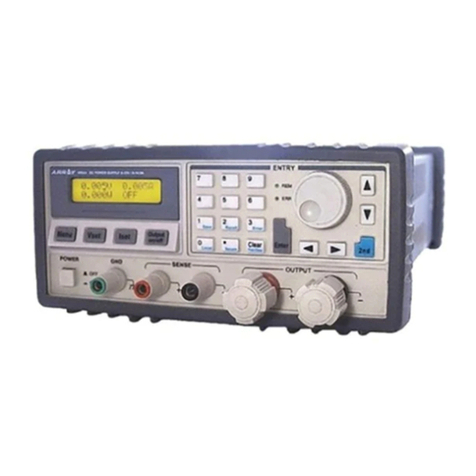
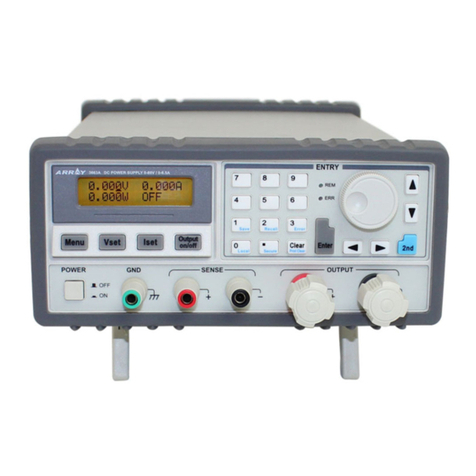
Array electronic 3720A User manual

1
Chapter1 General Introduction.............................................................................................................. 1
1.1 Function Features....................................................................................................................... 1
1.2 Front Panel.................................................................................................................................. 2
1.3 Rear Panel................................................................................................................................... 2
1.4 Keypad Function........................................................................................................................ 3
1.5 Annunciators............................................................................................................................... 4
1.6 Menu............................................................................................................................................ 4
1.6.1 Main Menu....................................................................................................................... 4
1.6.2 Mode Selection and Parameter Setting Menu............................................................. 5
1.6.3 Transient Operation Menu............................................................................................. 6
1.6.4 List Operation Menu ...................................................................................................... 6
1.7 Display Messages........................................................................................................................ 6
1.8 Remote Programming .................................................................................................................. 9
Chapter2 Functions and Features........................................................................................................ 10
2.1 Local and Remote Control...................................................................................................... 10
2.2 Main Functions:........................................................................................................................ 10
2.3 Basic Test Functions................................................................................................................. 10
2.3.1 Constant Current Mode............................................................................................... 11
2.3.1.1 Setting Ranges.................................................................................................... 11
2.3.1.2 Immediate Current Level.................................................................................. 12
2.3.1.3 Triggered Current Level ................................................................................... 12
2.3.1.4 Transient Current Level.................................................................................... 12
2.3.1.5 Software Current Limit..................................................................................... 12
2.3.2 Constant Voltage Mode (CV)....................................................................................... 12
2.3.2.1 Setting Ranges.................................................................................................... 13
2.3.2.2 Immediate Voltage Level................................................................................... 13
2.3.2.3 Triggered Voltage Level..................................................................................... 13
2.3.2.4 Transient Voltage Level..................................................................................... 13
2.3.3 Constant Resistance Mode (CR).................................................................................. 13
2.3.3.1 Setting Ranges.................................................................................................... 14
2.3.3.2 Immediate Resistance Level ............................................................................. 14
2.3.3.3 Triggered Resistance Level............................................................................... 14
2.3.3.4 Transient Resistance Level................................................................................ 15
2.3.4 Constant Power Mode (CP)......................................................................................... 15
2.3.4.1 Setting Ranges.................................................................................................... 16
2.3.4.2 Immediate Power Level..................................................................................... 16
2.3.4.3 Triggered Power Level....................................................................................... 16
2.4 Transient Operation................................................................................................................. 17
2.4.1 Continuous Transient Operation................................................................................. 17
2.4.2 Pulsed Transient Operation......................................................................................... 18
2.4.3 Toggled Transient Mode............................................................................................... 20
2.5 List Operation........................................................................................................................... 21
2.6 Battery Discharge Operation.................................................................................................. 22
2.7 Short Circuit Operation .......................................................................................................... 23

2
2.8 Triggered Operation................................................................................................................. 23
2.9 Input Control............................................................................................................................ 24
2.9.1 Turning On/Off the Load............................................................................................. 24
2.9.2 Von Point/Von Latch ..................................................................................................... 25
2.9.3 Current Limit in CV Mode.......................................................................................... 26
2.9.4 Current Rise Rate ......................................................................................................... 26
2.9.5 Current Fall Rate.......................................................................................................... 26
2.10 Measurement Function.......................................................................................................... 27
2.11 Saving and Recalling.............................................................................................................. 27
2.12 Reading Remote Programming Errors................................................................................ 28
2.13 Status Report........................................................................................................................... 29
2.14 Protection Function................................................................................................................ 29
2.14.1 Clearing Latched Protection...................................................................................... 29
2.14.2 Overvoltage.................................................................................................................. 30
2.14.3 Overcurrent ................................................................................................................. 30
2.14.4 Overpower.................................................................................................................... 30
2.14.5 Overtemperature......................................................................................................... 30
2.14.6 Reverse Voltage............................................................................................................ 30
2.15 Auxiliary Functions................................................................................................................ 30
2.15.1Trigger Function Selection.......................................................................................... 30
2.15.2 Knob Function............................................................................................................. 31
2.15.3 Key Sound.................................................................................................................... 31
Chapter3 Installation............................................................................................................................. 31
3.1 Initial Check............................................................................................................................ 31
3.2 Environment/Installation Location.................................................................................. 31
3.3 Power-On/ Self-Test ............................................................................................................. 31
3.4 Connections on the Rear Panel........................................................................................ 32
3.5 Connections on the Front Panel...................................................................................... 33
3.6 Wiring....................................................................................................................................... 34
Chapter 4 Local Operation.................................................................................................................... 35
4.1 Local Control............................................................................................................................ 35
4.2 Main Operation on the Front Panel....................................................................................... 35
4.3 Connecting to the Power Supply ............................................................................................ 35
4.4 Turning the Input On/Off........................................................................................................ 36
4.5 Basic Operation........................................................................................................................ 36
4.5.1 CC Mode ........................................................................................................................ 36
4.5.2 CV Mode ........................................................................................................................ 38
4.5.3 CR Mode......................................................................................................................... 39
4.5.4 CP Mode........................................................................................................................ 41
4.6 Short Circuit Operation .......................................................................................................... 42
4.7 Transient Operation................................................................................................................. 43
4.7.1 Continuous Transient Operation......................................................................... 44
4.7.2 Pulsed Transient Operation................................................................................. 46
4.7.3 Toggled Transient Operation............................................................................... 47
3
4.8 List Operation...................................................................................................................... 49
4.8.1 List Editing..................................................................................................................... 50
4.8.2 Modifying, Adding, Inserting, Deleting the List........................................................ 52
4.8.3 Starting/Stopping the List ............................................................................................ 54
4.9 Battery Discharge Operation.................................................................................................. 55
4.10 Saving and Recalling.............................................................................................................. 56
4.11 Clearing Protection Settings.................................................................................................. 57
4.12 Error Messages....................................................................................................................... 58
4.13 Triggered Operation............................................................................................................... 58
4.14 Main Menu.............................................................................................................................. 59
4.14.1 Loading Default Values............................................................................................... 59
4.14.2 Short Circuit Operation............................................................................................. 59
4.14.3 Von Point/Von Latch................................................................................................... 60
4.14.4 Current Limit in CV Mode........................................................................................ 60
4.14.5 Current Rise/Fall Rate in CC Mode......................................................................... 61
4.14.6 Trigger Function Selection......................................................................................... 62
4.14.7 Knob Function............................................................................................................. 62
4.14.8 Key Sound.................................................................................................................... 62
4.14.9 Communication Interface.......................................................................................... 63
Chapter5 Remote Programming Operation........................................................................................ 64
5.1 Communication Interface........................................................................................................ 64
5.1.1 RS232.............................................................................................................................. 64
5.1.2 USB ................................................................................................................................. 64
5.1.3 GPIB............................................................................................................................... 65
5.2 Flow Control Selection............................................................................................................. 65
5.3 Remote ControlAnnunciators................................................................................................ 65
5.4 Sending a Remote Command.................................................................................................. 65
5.5 Returning Data......................................................................................................................... 65
5.6 Remote Programming Commands......................................................................................... 65
5.6.1 Modes.............................................................................................................................. 65
5.6.2 Transient Levels............................................................................................................. 66
5.6.3 Programmable Current Protection............................................................................. 66
5.8 CV Mode Examples.................................................................................................................. 66
5.9 CR Mode Examples.................................................................................................................. 66
5.10 Continuous Transient Operation Example ......................................................................... 66
5.11 Pulsed Transient Operation Example.................................................................................. 67
Specifications........................................................................................................................................... 67

1
Chapter1 General Introduction
ARRAY 372x Series programmable electronic load,as a new generation of product developed by
ARRAY Electronic Co., Ltd., is designed with high performance. It provides you powerful test
function, user-friendly HMI, as well as RS232, USB, GPIB interfaces to support SCPI and Labview.
372x Series is widely used in scientific research and production fields such as aerospace, shipbuilding,
automotive electronics, solar cell, and fuel cell.
All “electronic load” and “load” appear in this manual refer to ARRAY 372x Series Electronic
Load if there is no special explanation.
1.1 Function Features
Main functions and features of ARRAY372x Series:
4 basic test functions: CC,CV, CR, and CP; 8 basic operating modes: CCL, CCH, CV, CRL,
CRM, CRH, CPV, CPC;
The 24 bits A/D and 17 bits D/A converters incorporated, provide this equipment with
greatly enhanced setting and measurement resolution. 100kHz D/A conversion rate fully
improves high-speed performance;
Minimum operating voltage is less than 0.6V at the load’s full rated current (3720/3721).
With optional low-voltage testing devices, the maximum current can be achieved even
though the input voltage is 0V. This is especially suitable for fuel cell, solar cell and other
new energy test applications;
Perfect protection assures high reliability in the most complicated test environments;
Innovative design of CPV and CPC modes effectively improves the practicability of CP
mode;
Circuit improvement greatly enhances the dynamic response of CR mode and widens the
application scope of that mode;
High-speed transient operation with a maximum test frequency of 50kHz:
Powerful sequential test function; with a minimum step time of 10us; and a maximum step
time of 10000s. Cyclic numbers can be adjusted freely and a sequence can be chained to
another sequence to achieve even more complex test procedures;
The input binding posts with their innovative design are especially suitable for large current
testing;
Provides short-circuit test, battery discharge test and other auxiliary functions;
A high-efficiency, intelligent cooling system can effectively reduce system temperature and
enhance power density;
Automatic ON/OFF function simplifies test operation;
Knobs and digital keypad makes the operation more convenient;
Save/recall function can save multiple groups of general settings;
Supports SCPI (Standard Commands for Programmable Instrumentation) and Labview, and
provides necessary PC software;

2
1.2 Front Panel
Fig. 1-1 Front Panel
LCD Function key Power switch External trigger input terminal Remote
sense terminal Input binding posts Knob Entry keys/secondary function keys
Annuciators Switch key for secondary function Left&Right key Up &
Down key/Display-switching key
1.3 Rear Panel
Fig1-2 Rear Panel
AC input socket Line voltage switch Fuse holder RS232 Interface GPIB or USB
(optional) Air outlet

3
1.4 Keypad Function
There are three groups of keypads on the front panel: the Function Keys, the Entry Keys, which
composite with secondary functions, and the Direction Keys. The secondary functions of the Entry
Keys are printed in blue. To use the secondary function, please press key first, then press the
relevant key.
List 1-1 Description for Keys
0/Local key
1/Save key
2/Recall key
3/Error code display key
4/List start key
5/List stop key
6/Battery discharge operation key
7/Insert key
8/Delete key
9/ List operation key
Decimal point/Trigger key
Clear or exit /Clear protection
Main Menu
Transient operation menu
Set key
Input on/off
Confirm key
Left key

4
Right key
Up key
Down key
Switch key for secondary function
Note: Up and Down key can be used as a switch key for displaying load status and actual power
during basic operating modes.
1.5 Annunciators
REM Indicates that the electronic load is in remote status.
ERR Indicates that a remote programming error has occurred.
1.6 Menu
1.6.1 Main Menu
Press key to enter into main menu. Please see the list below for main menu content:
Function and Parameter Description
Load Default
Yes *N o
Restore default
Yes No
Short
On *Off
Short circuit mode
On Off
Von Latch
On *Off
Von latch
On Off
Von Point
0.000v
Set Von voltage point
Von point
CV Curr Limit
40.00A
Current limit in CV mode
Current limit
Curr Rise Rate
4.000A/us
Current rise rate in CC mode
Current rise rate
Curr Fall Rate
4.000A/us
Current fall rate in CC mode
Current fall rate
Trig Function
*Tran List
Trigger function selection
Transient test Sequence (list) test
Knob
*On Off
Enable/disable knob function
On Off
Key Sound
*On Off
Enable/disable key sound
On Off
Interface
*RS232 USB GPIB
Remote interface selection
RS232 USB GPIB

5
RS232 Interface Baud Rate
2400 4800 *9600 19200 38400
Baud rate setting
2400 4800 9600 19200 38400
Parity Check
*None Even Odd
Parity check setting
None Even Odd
Data Bit
*8 7
Data bits length
8bits 7bits
Stop Bit
*1 2
Stop bit length
1bit 2bits
Flow Control
*On Off
Enable/disable Flow control
On Off
USB Interface USB selection
GPIB Interface GPIB Address
5
GPIB address
Address value
Note: Except knob, key sound and interface configurations, the other parameters in main menu
will not be saved when the load is turned off. If it is needed to save the parameters, please use
key + key or *sav command. When the load is turned on next time, the saved parameters in
location 0 will be recalled automatically.
1.6.2 Mode Selection and Parameter Setting Menu
Press key to enter into mode selection and parameter setting menu, which is shown as
below:
Function and Parameter Description
MODE:CCL
CURR:0.000A
Constant current low range
Immediate current level
MODE:CCH
CURR:0.000A
Constant current high range
Immediate current level
MODE:CV
VOLT:80.00V
Constant voltage mode
Immediate voltage level
MODE:CRL
RES:2.000Ω
Constant resistance low range
Immediate resistance level
MODE:CRM
RES:20.000Ω
Constant resistance medium range
Immediate resistance level
MODE:CRH
RES:20.000Ω
Constant resistance high range
Immediate resistance level
MODE:CPV
POWR:0.000W
Constant power-voltage source mode
Immediate power level
MODE:CPC
POWR:0.000W
Constant power-current source mode
Immediate power level

6
1.6.3 Transient Operation Menu
Press key in desired mode to enable its transient operation, and press key to enter
into transient setting menu, which is shown as below:
Function Description Example
LevelL Transient low level 1.000A
LevelH Transient high level 2.000A
TimeL Time for transient low level 600.00ms
TimeH Time for transient high level 600.00ms
TimeR Time for transient rising edge 0.01ms
TimeF Time for transient falling edge 0.01ms
MODE Continuous (Cont) Pulse (Puls) Toggle
(Togg)
Cont
Note: Transient operation may be used in CC, CV, and CR modes.
1.6.4 List Operation Menu
Press key + key to enter into the list operation menu, which is shown as below:
Function Description
No. Select sequence (list) number
(0-6)
Memo Sequence memo (10
characters)
Data: <New/Edit> Create a new or edit an existing
sequence
Count Cycle times(1-65535)
Chain: Off Sequence number to be
chained with (0-6,off)
Press and keys in list operation menu to select Data: <New/Edit>, and select New or
Edit with the knob or and keys. Then press key to enter into sequence data editing
status, which is shown as below:
Function Description
01. 10000.00000s
CCH 5.000A
Sequence (List) number
Time
Mode Set value
1.7 Display Messages

7
① CC Mode:
The first line shows measured voltage and current levels. The second line shows current set level, CC
mode (CCH indicates constant current high range; CCL indicates constant current low range) and
input status of the load: (ON, OFF).
② CV Mode:
The first line shows measured voltage and current levels. The second line shows voltage set
level, CV mode, and input status of the load: (ON, OFF).
③ CR Mode:
The first line shows measured voltage and current levels. The second line shows resistance level, CR
mode (CRL indicates constant resistance low range; CRM indicates constant resistance medium range;
and CRH indicates constant resistance high range) and input status of the load: (ON, OFF).

8
④ CP Mode:
The first line shows measured voltage and current levels. The second line shows power set
level, CP mode (CPC indicates constant power-current source mode; CPV indicates constant
power-voltage source mode), and input status of the load: (ON, OFF).
⑤ Transient Operation:
The first line shows measured voltage and current levels. The second line shows set level,
transient operation mode (tCCH indicates high current mode transient operaion; tCCL indicates
low current mode transient operaion; tCV indicates constant voltage mode transient operaion;
tCRL indicates low resistance mode transient operaion; tCRM indicate medium resistance mode
transient operaion and tCRH indicates high resistance mode transient operaion. “t” indicates
transient operation), and input status of the load: (ON, OFF).
⑥ List Operation:
The first line shows measured voltage and current levels. The second line shows set level,
sequence operation mode (LCCH indicates high current mode list operaion; LCCL indicates low
current mode list operaion; LCVindicates constant voltage mode list operation; LCRL indicates
low resistance mode list operaion; LCRM indicate medium resistance mode list operaion and
LCRH indicates high resistance mode list operaion. “L” indicates list test; and input status of the
load: (ON, OFF).
⑦ Battery Discharge Operation:
The first line shows measured voltage and current levels. The second line shows battery
capacity and discharge time.

9
⑧ Short Circuit Operation:
The first line shows measured voltage and current levels. The second line shows set level in
short circuit (Take 3721A as an example, short circuit test current in CCL is 4.4A; short circuit
test current in CCH is 44A; short circuit test voltage in CV is 0V; short circuit test resistance in
CRL is 0.018Ω; short circuit test resistance in CRM is 1.8Ω; short circuit test resistance in CRH
is 18Ω; short circuit test power in CPV is 420W; short circuit test power in CPC is 0W), short
circuit operation mode (sCCL,sCCH,sCV,sCRL,sCRM,sCRH,sCPC,sCPV;“s” indicates
short circuit test), and input status of the load (ON, OFF).
⑨ Display Actual Power:
Pressing and key can switch the display of load status and actual power. On the
display screen of actual power, the first line shows actual voltage and current; the second line
shows set level and actual power level.
⑩Protection Status
If the protection function is active, LCD will display corresponding protection status. For
example: the display of reverse voltage protection status is shown as below:
Protection status includes overcurrent (OC), overvoltage (OV), overpower (OP), over temperature
(OT), load protection (PT), and reverse voltage (RV).
1.8 Remote Programming
The commands are sent to electronic load via remote interface (RS232, GPIB, USB), and will be
executed after decoding by the processor. If there is any error occurs to the command, the processor
can detect the wrong command and error type, and it can maintain the status register as well.

10
Chapter2 Functions and Features
The functions and features of electronic load will be described in this chapter, which helps you to
know ARRAY 372x Series better.
2.1 Local and Remote Control
ARRAY 372x Series electronic load can be controlled via the keypad and knobs in the front panel,
or by remote controller via remote interface. If it is needed to control the load via the front panel, the
load has to stay in local control status. Local (front panel) control is in effect immediately after power is
applied. The REM annunciator is turned on,and remote control goes into effect as soon as the load
receives a SYSTem:REMote command via RS232, USB or GPIB.
Under remote control status, all operations on front panel keypad and knobs become invalid
(except key + key ). All operations on electronic load are controlled by remote controller.
The electronic load will return to local control and REM remote control annunciator is turned off after
receiving the return command( SYSTem:LOCal). Or you can return the electronic load to local control
by pressing key + key
Details of local operation are covered in Chapter 4 “Local Operation” and fundamentals of remote
programming are given in Chapter 5 “Remote Operation”. Complete SCPI programming details are given
in the ARRAY 372x Series Electronic Load SCPI Programming Guide.
2.2 Main Functions:
CC(constant current) Mode: CCL, CCH
CV(constant voltage) Mode: CV
CR(constant resistance) Mode: CRL, CRM, CRH
CP(constant power) Mode: CPV, CPC
Transient Operation: Tran
List Operation: LIST
Battery Discharge Operation: BATTERY
Short Circuit Operation (Short)
2.3 Basic Test Functions
There are four basic test funcitons: constant current (CC), constant voltage (CV), constant resistance

11
(CR), constant power (CP) and eight basic operating modes: CCL, CCH, CV, CRL, CRM, CRH, CPV and
CPC.
The operating mode and the associated parameters can be set via front panel or remote command.
The load will remain in current mode until the mode is changed. If the mode is changed when the
load’s input is in ON status, the load will be turned off for around 5ms automatically.
The set value for electronic load becomes effective immediately when the load is turned on. If the
input set value exceeds the allowed range, it will be automatically limited at maximum value or
minimum value.
2.3.1 Constant Current Mode
Constant current mode has two ranges, the high range (CCH) and the low range (CCL). The high
range provides wider test range. The low range provides better resolution at low current settings. In
CC mode, the load will sink a constant current in accordance with the programmed value
regardless of the change of input voltage (see Fig.2-1). Press key in basic mode to enter into
mode selection and parameter setting menu. Choose CCH or CCL mode with and keys.
Input the current level via the Entry keys or the knob with and keys. Use key for
confirmation. The CC mode and parameters can also be set via remote command (MODE CCL,
MODE CCH, CURRent <NRf+>).
Fig.2-1 CC Mode
2.3.1.1 Setting Ranges
The setting ranges for different models of load are listed as follows:
Model 3720A 3721A 3722A 3723A 3724A
Mode CCL 0~3A 0~40A 0~2A 0~3A 0~2A
CCH 0~30A 0~40A 0~20A 0~30A 0~20A
If the range is changed in CC mode while the load’s input stays in ON status, the load will be
turned off for around 5ms automatically. For example: when the load is switched from CCL to CCH,
the input will be turned off around 5ms. Besides, it is noted that the current set level may change with
the current level to fit the new range. Take 3721A as an example, the present setting is CCH 10.000A,
when the load is switched from CCH to CCL, the current set level will change to the maximum level
4.0000A for CCL.

12
2.3.1.2 Immediate Current Level
The immediate current level refers to the current set value in CC mode, which can be
programmed via mode selection and parameter setting menu, or via remote command (CRRRent
<NRf+>). The immediate current level can also be modified directly with left/right keys ( )
and the knob.
2.3.1.3 Triggered Current Level
The triggered current level refers to the preset current value, which can become immediate
current level automatically when a trigger is received. If the CC mode and the input are enabled, the
input will be updated immediately when a trigger occurs. If the CC mode is not active, this current
level will have no effect on the input until the CC mode becomes active.
The triggered current level only can be set via remote command (CURRent:TRIGgered <NRf+>).
Once a current level is triggered, subsequent triggers will become invalid until another
(CURRent:TRIGgered <NRf+>) command is received. The trigger operation will be described in later
chapter. The status register of the electronic load can keep track of pending triggers and other
operating conditions, which will be described in details in the “ARRAY 372x Series Electronic Load
SCPI Programming Guide”.
2.3.1.4 Transient Current Level
The load will switch between the transient high current level (LevelH) and transient low current
level (LevelL) when the transient operation is enabled. The transient current level can be set in
transient operation menu from the front panel, or via remote command (CURRent:HIGH <NRf+>,
CURRent:LOW <NRf+>).
2.3.1.5 Software Current Limit
The electronic load allows the user to set a current limit (the current range is the same as that in
CCH mode ) via remote command. The load will be turned off with beeping alarms if the current limit
is exceeded beyond a programmable time delay (0.001-60s). Please note that the software current limit
is in effect for any mode of operation. Remote commands are listed as follows:
CURRent:PROTection <NRf+>
CURRent:PROTection:DELay <NRf+>
2.3.2 Constant Voltage Mode (CV)
In CV mode, the load will attempt to sink enough current to control the source voltage to the
programmed constant value regardless of the change of input current. (see Fig.2-2). Press key in
basic mode to enter into mode selection and parameter setting menu. Choose CV mode with and
keys. Input the voltage value via the Entry keys or the knob with and keys. Use
key for confirmation. The CV mode and parameters can also be set via remote command
(MODE CV, VOLTage <NRf+>).

13
Fig.2-2 CV Mode
2.3.2.1 Setting Ranges
The voltage setting ranges for different models of load are listed as follows:
Model 3720A 3721A 3722A 3723A 3724A
Voltage 0~80V 0~80V 0~200V 0~200V 0~500V
2.3.2.2 Immediate Voltage Level
The immediate voltage level refers to the voltage set value in CV mode, which can be set via
mode selection and parameter setting menu, or via remote command (VOLTage <NRf+>). The
immediate current level can also be modified directly with left/right keys ( ) and the knob in
CV mode.
2.3.2.3 Triggered Voltage Level
The triggered voltage level refers to the preset voltage value, which can become immediate
voltage level automatically when a trigger is received. If the CV mode and the input are enabled, the
input will be updated immediately when a trigger occurs. If the CV mode is not active, this voltage
level will have no effect on the input until the CV mode is active.
The triggered voltage level only can be set via remote command (VOLTage:TRIGgered <NRf+>).
Once a voltage level is triggered, subsequent triggers will become invalid until another
(VOLTage:TRIGgered <NRf+>) command is received. The trigger operation will be described in later
chapter. The status register of the electronic load can keep track of pending triggers and other
operating conditions. which will be described in details in the “ARRAY 372x Series Electronic Load
SCPI Programming Guide”.
2.3.2.4 Transient Voltage Level
The load will switch between the transient high voltage level (LevelH) and transient low voltage
level (LevelL) when the transient operation is enabled. The transient voltage level can be set in
transient operation menu from the front panel, or via remote command (VOLTage:HIGH <NRf+>,
VOLTage:LOW<NRf+>).
2.3.3 Constant Resistance Mode (CR)
Constant resistance mode has three ranges: the low range (CRL), the medium range (CRM), and
the high range (CRH). In CR mode, the load is equivalent to a constant resistance and will sink a
current linearly proportional to the input voltage in accordance with the programmed resistance to make

14
I=U/R (see Fig.2-3). Press key in basic mode to enter into mode selection and parameter setting
menu. Choose CR mode with and keys. Input the resistance value via the Entry keys or
the knob with and keys. Use key for confirmation. The CR mode and parameters
can also be set via remote command (MODE CRL, MODE CRM, MODE CRH, RESistance <NRf+>).
Fig.2-3 CR Mode
2.3.3.1 Setting Ranges
The setting ranges for different models of load are listed as follows:
Model 3720A 3721A 3722A 3723A 3724A
Mode
CRL 0.02~2Ω0.02~2Ω0.0666~6.66Ω0.0666~6.66Ω0.125~12.5Ω
CRM 2~200Ω2~200Ω6.66~666Ω6.66~666Ω12.5~1250Ω
CRH 20~200Ω20~200Ω66.6~6660Ω66.6~6660Ω125~12500Ω
If the range is changed in CR mode while the load’s input stays in ON status, the load will be
turned off for around 5ms automatically. For example: when the load is switched from CRL to CRH,
the input will be turned off around 5ms. Besides, it is noted that the resistance set level may change
with the resistance range to fit the new range. Take 3721A for example, the present setting is CRM
10.000Ω, when the load is switched from CRM to CRL, the resistance set level will change to the
maximum level 2.0000Ωfor CRL.
2.3.3.2 Immediate Resistance Level
The immediate resistance level refers to the resistance set value in CR mode, which can be set via
mode selection and parameter setting menu, or via remote command (RESistance <NRf+>). The
immediate resistance level can also be modified directly with left/right keys ( ) and the knob
in CR mode.
2.3.3.3 Triggered Resistance Level
The triggered resistance level refers to the preset resistance value, which can become immediate
resistance level automatically when a trigger is received. If the CR mode and the input are enabled, the
input will be updated immediately when a trigger occurs. If the CR mode is not active, this resistance

15
level will have no effect on the input until the CR mode becomes active.
The triggered resistance level only can be set via remote command (RESistance:TRIGgered
<NRf+>). Once a resistance level is triggered, subsequent triggers will become invalid until another
(RESistance:TRIGgered <NRf+>) command is received. The trigger operation will be described in
later chapter. The status register of the electronic load can keep track of pending triggers and other
operating conditions, which will be described in details in the “ARRAY 372x Series Electronic Load
SCPI Programming Guide”.
2.3.3.4 Transient Resistance Level
The load will switch between the transient high resistance level (LevelH) and transient low
resistance level (LevelL) when the transient operation is enabled. The transient resistance level can be
set in transient operation menu from the front panel, or via remote command
(RESistance:HIGH<NRf+>, RESistance:LOW <NRf+>).
2.3.4 Constant Power Mode (CP)
There are two sorts of constant power modes, the Constant Power-Voltage Source mode (CPV)
and the Constant Power-Current Source mode (CPC). The CPV mode is applied to voltage source test,
and the CPC mode is applied to current source test. In CP mode, the load consumes the constant power
in accordance with the programmed value regardless of the changes of external current and voltage
(see Fig.2-4). Press key to enter into mode selection and parameter setting menu. Choose CPV
or CPC mode with and keys. Input the power value via Entry keys or the knob with
and keys. Use key for confirmation. The CP mode and parameters can also be set via
remote command (MODE CPV, MODE CPC, POWer <NRf+>).
Fig.2-4 CP Mode
Figure 2~5 are the current-voltage curves for several common power supplies. The constant
power curve is a hyperbola in the first quadrant. The constant power curve usually intersects with
current-voltage curve at two points (the CPV point and the CPC point) when the power of the external
power supply is larger than the set power. At the CPV point, the power supply shows the feature of
voltage source: the output power will be increased with increasing current; at the CPC point, the power
supply shows the feature of current source: the output power will be increased with increasing voltage.
Array 372x series electronic load can be set at any one of intersection points to operate by the user.

16
Fig. 2-5 Current-voltage Curve for Normal Power Supply
As adopting advanced slope detection method, Array 372x Series electronic load only need to test
a part of the current-voltage curve to know whether the two curves (constant power curve and
current-voltage curve) intersect. Therefore, when the set power is larger than the actual power, the
external power supply will not be short-circuited by the load for the insufficient power. When the load
detects that the power of the external power supply is insufficient, it will try to find constant power
point automatically till the set power is met.
2.3.4.1 Setting Ranges
The setting ranges for different models of load are listed as follows:
Model 3720A 3721A 3722A 3723A 3724A
Power 0~250W 0~400W 0~200W 0~350W 0~250W
2.3.4.2 Immediate Power Level
The immediate power level refers to the power set value in CP mode, which can be set via mode
selection and parameter setting menu, or via remote command (POWer <NRf+>). The immediate
resistance level can also be modified directly with left/right keys ( ) and the knob.
2.3.4.3 Triggered Power Level
The triggered power level refers to the preset power value, which can become immediate power
level automatically when a trigger is received. If the CP mode and the input are enabled, the input will
be updated immediately when a trigger occurs. If the CP mode is not active, this power level will have
no effect on the input until the CP mode becomes active.
The triggered power level only can be set via remote command (POWer:TRIGgered
<NRf+>).Once a power level is triggered, subsequent triggers will become invalid until another
(POWer:TRIGgered <NRf+>) command is received. The trigger operaion will be described in later
chapter. The status register of the electronic load can keep track of pending triggers and other
operating conditions, which will be described in details in the “ARRAY 372x Series Electronic Load
SCPI Programming Guide”.

17
2.4 Transient Operation
When the transient operation is enabled, the load periodically switch between two levels (LevelH
and LevelL), which can be applied to test the dynamic characteristics of the power supply. The
transient operation can be executed in the CC, CV and CR modes, and has three operating statuses:
Continuous, Pulsed, and Toggled. Please make sure the List Operation has been disabled before
enabling transient operation.
The parameters associated with transient operation are: low level (LevelL), high level (LevelH),
low level time (TimeL), high level time (TimeH), time for rising edge (TimeR), time for falling edge
(TimeF), and operating mode.
Transient high/low level and corresponding CC, CV and CR modes share the same setting ranges.
The range for high/low level time is 0 ~ 655.35ms; the range for rising/falling edge time is 10us ~
655.35ms; the time resolution is 10us, and the maximum test frequency is 50kHz.
Transient test can be turned on and off via key at the front panel or via remote command
(TRANsient ON/OFF). Before you turn on transient test, you should set the load to the operating mode
that needs transient test.
Note: In transient test, the Von point and current limit should be taken into consideration, which
may cause the shut down of the input, thus interrupt the transient test.
2.4.1 Continuous Transient Operation
In continuous operation, the load periodically switches between high/low levels, and this
operation is not affected by the trigger signal The relevant parameters such as low level (LevelL), high
level (LevelH), low level time (TimeL), high level time (TimeH), time for rising edge (TimeR), time
for falling edge (TimeF), and continuous transient operation can be set through transient operation
menu or via remote command (CURRent:LLEVel <NRf+>, CURRent:HLEVel <NRf+>,
VOLTage:LLEVel <NRf+>, VOLTage:HLEVel <NRf+>, RESistance:LLEVel <NRf+>,
RESistance:HLEVel <NRf+>, TRANsient:LTIMe <NRf+>, TRANsient:HTIMe <NRf+>,
TRANsient:RTIMe <NRf+>, TRANsient:FTIMe <NRf+>, TRANsient:MODE CONTinuous).
For example: assume that the CCH range is active, and the input is in OFF status, then the
transient parameters should be set as follows:
Press key to enter into transient operation;
Press key to open transient operation menu;
Set the following parameters in transient operation menu:
LevelL: 5.000A
LevelH : 10.000A
TimeL : 0.50ms
TimeH : 0.50ms
TimeR : 0.20ms
TimeF : 0.20ms
Mode : Cont
This manual suits for next models
2
Table of contents
Other Array electronic Power Supply manuals

Array electronic
Array electronic APV 800 Series User manual

Array electronic
Array electronic 3751A User manual

Array electronic
Array electronic 3645A User manual

Array electronic
Array electronic 366XA User manual

Array electronic
Array electronic 367 Series User manual

Array electronic
Array electronic 366X User manual

Array electronic
Array electronic 3645A-TYPE User manual

Array electronic
Array electronic 3646A User manual

Array electronic
Array electronic 3645A User manual