ARRI L Series User manual

Short Instruction
Kurzanleitung
Guide rapide
簡易説明書
08 / 2017
L-Series®
Arnold & Richter Cine Technik GmbH & Co. Betriebs KG, Pulvermühle, D-83071 Stephanskirchen, Germany | www.arri.com
L5.0015694 / L03072

1 Spigot / Aufhängezapfen / Spigot / 栓、コック
2 Stirrup / Haltebügel / Stirrup / あぶみ
3 Tilt lock / Bügelklemmung / Serrage tilt / 傾き錠、ロック
4 Top latch / Torsicherung / Verrou / トップラッチ
5 Safety catch / Rasthaken / Ancrage de sécurité /
安全、セーフティーキャッチ
6 Focus knob or P.O. gear / Fokusknopf oder P.O.-Antrieb /
Zoom ou P.O. / フォーカスノブ、P.Oギア
7 Handle / Griff / Poignée / ハンドル
8 Mains input / Netzeingang / Alimentation Secteur / メインイ
ンプット
9 Battery input / Batterie-Anschluss /
Alimentation DC / バッテリーパック用のコネクター
10 DMX input / DMX-Eingang / Entrée DMX / DMXインプット
11 USB interface / USB-Anschluss /
Interface USB / コンピューターつなぎ
12 DMX through / DMX-Ausgang / Recopie DMX / DMXスルー
13 P.O. gear pan / P.O. Antrieb Drehen /
P.O. pan / P.O. ギアパン
14 P.O. gear tilt / P.O. Antrieb Neigen /
P.O. tilt / P.Oギタティルト
15 Fixture menu / Gerätemenü /
Menu embarqué / フィクスチャーメニュー
Power / Status
Data
+ / up
- / down
Enter
Function
Display
Color temperature CCT / Hue
Intensity
Green-Magenta point / Saturation
Memory 1
Memory 2
8
9
10
12
11
2
1
3
4
5
6
7
6
13
14
1
2
15

DEUTSCH
Allgemeine Hinweise
Die Scheinwerfer der L-Series sind für den
professionellen Einsatz bestimmt. Sie dürfen nur von
befähigten Personen betrieben werden.
Bitte lesen Sie diese Anleitung sorgfältig vor der ersten
Inbetriebnahme. Der folgende Text enthält wichtige
Hinweise für die sichere Handhabung.
Beachten Sie in Ihrem eigenen Interesse die
Sicherheits- und Warnhinweise.
Beachten Sie alle allgemeinen und örtlichen
Sicherheitsvorschriften.
Bewahren Sie diese Anleitung für eventuelle
Nachbesitzer sorgfältig auf.
Entsorgen Sie das Verpackungsmaterial der Umwelt
zuliebe bei einer geeigneten Entsorgungsstelle.
Auch defekte Geräte müssen sachgerecht entsorgt
werden. Weitere Informationen hierzu erhalten Sie von
Ihrem ARRI-Händler und Ihrer Gemeinde- oder
Stadtverwaltung.
Verwenden Sie nur Originalersatzteile und Original-
Zubehör von ARRI.
Sicherheitshinweise
VORSICHT NETZSPANNUNG –LEBENSGEFAHR !
Öffnen Sie das Gerät nicht. Der sichere Betrieb des
Scheinwerfers ist nur bei vollständig geschlossenem
Gehäuse gewährleistet.
Verwenden Sie das Netzkabel nicht zum Halten,
Bewegen oder Aufhängen des Scheinwerfers.
Überprüfen Sie die Netzleitung des Scheinwerfers vor
jedem Gebrauch auf sichtbare Schäden.
Verwenden Sie den Scheinwerfer bei sichtbaren
Schäden der Netzleitung oder des Gehäuses nicht.
Beschädigte Gehäuseteile müssen durch ein ARRI
Service-Center ausgewechselt werden.
VORSICHT –HOHE LICHTSTÄRKE!
Blicken Sie nicht in die Lichtaustrittsöffnung des
Scheinwerfers.
Warnhinweise
Decken Sie die Lüftungsschlitze niemals ab. Der
Scheinwerfer muss frei umströmt werden können, um
eine effektive Kühlung zu gewährleisten.
Vermeiden Sie die Bestrahlung durch andere
Scheinwerfer und andere Wärmequellen.
Sicherung des Scheinwerfers und des Zubehörs
Bei hängendem Betrieb und beim Betrieb über
Personen müssen Sie den Scheinwerfer und das
verwendete Zubehör mittels eines zugelassenen
Sicherungsseils gegen Herabfallen sichern.
Das Sicherungsseil und seine Verbindungselemente
müssen mindestens für das 10-fache Gewicht des zu
tragenden Scheinwerfers und seines Zubehörs
ausgelegt sein.
Führen Sie das Sicherungsseil durch den Bügel und
um die tragende Struktur.
Halten Sie das Sicherungsseil so kurz wie möglich.
Das Zubehör muss korrekt in die Klauen eingesetzt
sein. die Torsicherung (4) muss geschlossen und der
Rasthaken (5) muss eingerastet sein.
Stative müssen standsicher aufgestellt und für die
Traglast ausgelegt sein. Beachten Sie hierbei das
Gewicht des Zubehörs und der Kabel.
Lesen Sie hierzu auch die Hinweise im
"Sicherheitsmerkblatt für ARRI-Scheinwerfer"
L5.40731.E.
Der Haltebügel darf nur senkrecht hängend oder
stehend montiert werden. Querbelastungen können zu
Deformation oder Bruch des Stativzapfens oder des
Bügels führen.
Produktbeschreibung
Die Produkte der L-Series sind innovative Scheinwerfer mit
einer elektronisch gesteuerten LED-Lichtquelle. Sie können
wie herkömmliche Glühlicht-Stufenlinsenscheinwerfer
eingesetzt werden, besitzen aber eine wesentlich höhere
Energieeffizienz. Das optische System ist von 15 bis 50°
Halbstreuwinkel und eine echte "Stufen"-Charakteristik mit
einem ausgezeichnet homogenen Lichtfeld und mit
sauberer Schattenbildung. Informationen zu den
Lichteigenschaften der Typen finden Sie auf der ARRI
Webseite www.arri.com. Alle Typen der L-Series können
über eine USB-Schnittstelle, über das
DMX / RDM Protokoll oder über das Gerätemenü gesteuert
werden.
Grundfunktionen
BEFESTIGUNG
Der Scheinwerfer darf nur an seinem Haltebügel (2)
stehend oder hängend befestigt werden. Schieben Sie den
28 mm Stativzapfen (1) in die Hülse eines passenden
Stativs oder einer passenden Haltevorrichtung und
klemmen Sie ihn fest. Sichern Sie den Zapfen gegen
Herausfallen.
DREHEN UND NEIGEN
Sie können den Scheinwerfer nach Lösen der Schraube
am Stativ oder der Haltevorrichtung drehen. Verändern Sie
die Neigung nach Lösen der Bügelklemmung (3). Ziehen
Sie alle Schrauben nach dem Einrichten des Scheinwerfers
fest an.
EINSTELLEN DES STREUWINKELS
Durch Drehen des Fokusknopfes (6) können Sie den
Streuwinkel stufenlos verändern. Dabei bewegt sich der
gesamte Linsentubus aus dem Gehäuse heraus bzw. in
das Gehäuse hinein. Dieser Mechanismus besitzt zwei
Schutzfunktionen:
Eine Sollbruchstelle verhindert Schäden am Gerät,
falls der Fokusknopf mit einem zu hohem Drehmoment
bewegt wird. Deshalb Fokusknopf nur mit der Hand
drehen und bei Stillstand des Tubus stoppen!
Ein selbsthemmendes Getriebe verhindert, dass sich
die Position des Tubus bei geneigtem Scheinwerfer
verändert.

DEUTSCH
VERWENDUNG VON ZUBEHÖR FÜR DIE
LICHTFORMUNG
Zubehör für die Lichtformung, wie z.B. eine Torblende oder
ein Filterhalter mit einem Diffusor, kann in die Halteklauen
auf der Vorderseite des Scheinwerfers eingesetzt werden:
Drücken Sie den Knopf an der Seite der Torsicherung
(4). Die Torsicherung klappt nach oben auf.
Schieben Sie das Zubehör von oben in die
Halteklauen, bis der Rasthaken (5) einrastet. Zur
Unterstützung kann der Rasthaken etwas mit dem
Finger gekippt werden.
Klappen Sie die Torsicherung (4) zu und achten Sie
darauf, dass die Nase in den Haltering des
Zubehörteils einrastet.
DMX-SCHNITTSTELLE
Der Scheinwerfer verfügt über zwei 5-polige, verriegelbare
XLR-Verbinder (9 und 10) für den DMX / RDM Datenein-
und -ausgang.
USB-SCHNITTSTELLE
Der Scheinwerfer besitzt eine USB-Schnittstelle mit einer
Mini-USB-Buchse (11) für das Aufspielen von Firmware,
die Einstellung von Betriebsparametern und für
Servicezwecke. Ein kostenlos erhältliches Service-Tool für
Windows, MACOS und Linux erlaubt die Steuerung bzw.
Programmierung des Scheinwerfers über diese
Schnittstelle.
Die neueste Firmware sowie den ARRI Lighting Service
Manager finden Sie im Download-Bereich der Internetseite
www.arri.com zum kostenlosen Download.
EINSCHALTEN UND BETRIEB
Mit dem Einschalten des Netzschalters (bzw. nach dem
Anlegen der Netzspannung bei Scheinwerfern ohne
Schalter) beginnt der Scheinwerfer nach kurzer
Verzögerung mit derjenigen Einstellung, die bei der letzten
Abschaltung aktiv war, zu leuchten.
Der Scheinwerfer kann nun über die DMX-Schnittstelle,
über die USB-Schnittstelle oder über das Gerätemenü (14)
gesteuert werden.
Betriebsarten
WEISSLICHT
Der Scheinwerfer erzeugt weißes Licht mit optimierter
Farbwiedergabe. Die Farbtemperatur und die Grün /
Magenta-Sättigung können stufenlos eingestellt werden.
FARBIGES LICHT
Der Scheinwerfer erzeugt weißes oder farbiges (nur „C“
Versionen) Licht. Der Farbton (Hue) und die Farbsättigung
(Saturation) können stufenlos eingestellt werden. Bei sehr
kleiner Farbsättigung wird weißes Licht mit nicht optimierter
Farbwiedergabe erzeugt.
Die beiden Betriebsarten können durch kurzes Drücken der
Taste FUNCT umgeschaltet werden.
Anzeigefeld und Gerätemenü
Der Scheinwerfer ist mit einem Gerätemenü mit folgenden
Funktionen ausgestattet:
Anzeige POWER/STATUS
Dauerlicht grün Betriebsspannung liegt an, keine
Störung
Blinklicht rot Übertemperatur-Warnung
Dauerlicht rot Störung oder Übertemperatur
Anzeige DATA
leuchtet blau, wenn ein gültiges DMX-Signal anliegt
Drehknopf CCT
zum Einstellen der korrelierten Farbtemperatur (CCT) im
Weißlicht-Modus
zum Einstellen des Farbtons im Farblicht-Modus
(nur „C“ Modelle)
Taste FUNCT
zum Umschalten der Betriebsart zwischen Weißlicht und
Farblicht (nur „C“ Modelle)
zum Sprung aus einem Untermenü (Escape)
Taste ENTER
zum Bestätigen einer Eingabe
zum Sprung in ein Untermenü
Taste +
zum Anzeigen des Menüs
zur Bewegung nach oben in einem Menü
zur Erhöhung eines Wertes
Taste -
zum Anzeigen des Menüs
zur Bewegung nach unten in einem Menü
zur Verringerung eines Wertes
Tasten 1 und 2
zum Speichern (langer Tastendruck) und Abrufen
(kurzer Tastendruck) von Benutzereinstellungen.
Anm.: es werden nur die Einstellungen der Drehknöpfe
CCT/HUE und GN/SAT gespeichert.
Bestimmungsgemäße Verwendung
Das Produkt dient zur Beleuchtung von Personen und
Gegenständen in trockener Umgebung.
Die Sicherheitshinweise sind unbedingt zu befolgen!
Eine andere als die beschriebene Verwendung führt zur
Beschädi-gung dieses Produktes, darüber hinaus ist dies
mit Gefahren, wie z.B. Kurzschluss, Brand, elektrischer
Schlag etc., verbunden. Das gesamte Produkt darf nicht
geändert bzw. umgebaut werden.
Dieses Produkt erfüllt die gesetzlichen, nationalen und
europäischen Anforderungen.
ARRI Service
Bei technischen Problemen besuchen Sie bitte unsere
Webseite
www.arri.com
Arnold & Richter Cine Technik GmbH & Co. KG
Service Lichttechnik
Pulvermühle
D-83071 Stephanskirchen
Deutschland
Technische Änderungen vorbehalten.

ENGLISH
General Notes
The L-Series luminaires are intended for professional
use and may only be operated by qualified persons.
Please read these instructions carefully before using
the product for the first time. The following text
contains important information for safe handling.
For your personal safety, please observe the safety
instructions and warnings.
Observe all common and local safety regulations.
Please keep these instructions for possible
subsequent owners.
Please dispose the packing material at your local
recycling center for environmental protection.
Defective products shall be disposed appropriately.
For further information please ask your ARRI dealer or
your local authorities.
Use only original ARRI spare parts and accessories.
Safety Instruction
DANGER OF LIFE –MAINS VOLTAGE!
Do not open the housing. For safe operation, the
housing must be closed completely at all times.
Do not misuse the mains cable to hold, move or
suspend the fixture.
Check the mains cable prior to every operation for
damage.
In case of visible damage to the mains cable or the
housing, the device may not be operated any longer.
Damaged components of the housing must be
replaced by an ARRI service center.
CAUTION –HIGH BEAM INTENSITY!
Do not look into the light aperture of the fixture.
Warnings
Do not cover the ventilation slots. Unobstructed airflow
is required for effective cooling.
Avoid direct illumination by other luminaires or other
heat sources.
Securing the Luminaire and its Accessories
When mounted in a hanging position or above
persons, use a suitable safety cable to prevent the
luminaire and the attached accessories against falling
when the primary mounting method fails.
The safety cable and its connecting elements must be
rated at a minimum load of 10 times the weight of the
luminaire and all attached accessories.
Lead the safety cable through the stirrup and the
structure the luminaire is mounted to.
The safety cable must be kept short.
The accessories must be inserted correctly in the
accessory holders. The top latch (4) must be closed
and the safety catch (5) must be engaged.
Tripods must be set up in a stable way and must be
rated to carry the required load. Please observe the
weight of the accessories and the cables. Please refer
also to our leaflet "Operating your ARRI Lampheads
Safely" L5.40731.E.
The stirrup must be mounted hanging or standing
vertically. Lateral load can cause deformation or
breaking of the spigot and the stirrup.
Product Description
The products of the L-Series are innovative luminaires with
an electronically controlled LED light source. They can be
used like conventional tungsten Fresnel luminaires but with
far higher efficiency. The optical system offers a continuous
focus range of 15-50° half peak angle and real 'Fresnel'
characteristics with an extremely uniform light field and
clean shadow rendition. Please visit the ARRI website for
www.arri.com detailed information about the optical
features of the different luminaires of the L-Series. All
luminaires of the L-Series can be controlled utilizing the
USB interface, the common used DMX / RDM protocol or
the integrated fixture menu.
Basic Functions
MOUNTING
The luminaire must be mounted on its stirrup (2) in a
standing position or a hanging position. Always insert the
28 mm spigot (1) into the bushing of a suitable stand or a
suitable clamping system and fix and secure the spigot
afterwards.
PAN AND TILT
Swivel the luminaire after loosening the screw of the stand
or the clamping system. The tilt angle can be adjusted by
releasing the tilt lock (3). After the adjustment of the pan
angle and the tilt angle, the screws respectively clamps
must be fastened again.
ADJUSTING THE BEAM ANGLE
The beam angle can be continuously adjusted by turning
the focus knob (6). In doing so, the lens tube will move into
and out of the housing. This mechanism has two protective
functions:
A predetermined breaking point protects the luminaire
from damage if the focus knob is being turned with
overly strong force. Therefore only turn the focus knob
by hand and stop when the lens tube has reached full
extension or retraction!
A self-inhibiting gear avoids the inadvertent movement
of the lens tube when the luminaire is in a tilted
position.
USE OF LIGHT SHAPING ACCESSORIES
Light shaping accessories like a barndoor or a filter frame
with a diffusing material can be inserted into the clamps at
the front of the luminaire:
Press the knob on the side of the top latch (4). The top
latch opens upwards.
Slide the accessory from above into the clamps until
the safety catch (5) engages. To support this, the
safety catch can be slightly tilted with a fingertip.
Close the top latch (4) and take care that the nose
engages in the retaining ring of the accessory.
DMX INTERFACE
The luminaire is equipped with two locking, 5-pin XLR
connectors (9 and 10) for the DMX / RDM data input.

ENGLISH
USB INTERFACE
The luminaire is equipped with an USB interface (Mini USB
connector 11). The interface can be used for uploading
new firmware, setting parameters or for service purpose. A
service tool for Windows, MACOS and Linux allows the
control and programming of the luminaire using this
interface.
The latest firmware and the ARRI Lighting Service
Manager software tool are located in the download area of
our website www.arri.com for free download.
POWER-ON AND OPERATION
By switching the power switch on (or by applying the mains
power on luminaires without a power switch), the luminaire
starts lighting after a short startup time with the same
setting which had been active at its last switch off.
The luminaire can now be controlled over the DMX
interface, over the USB interface or by the integrated fixture
menu (14).
Modes of Operation
WHITE LIGHT
The luminaire generates white light with an optimized color
rendition. The color temperature and the green / magenta
correction can be continuously adjusted.
COLORED LIGHT
The luminaire generates white or colored (only “C”
versions) light. The color tone (hue) and the color
saturation can be adjusted continuously. At very low color
saturation, the luminaire generates white light without an
optimized color rendition.
The operating modes can be changed by shortly pressing
the FUNCT button.
Indication Panel and Integrated Fixture Menu
The luminaire is equipped with an integrated fixture menu.
It supports the following functions:
POWER/STATUS Indicator
continuous green: powered, no malfunction
blinking red: over temperature warning
continuous red: malfunction or over temperature
DATA Indicator
lights blue when a valid DMX signal is present
CCT Controller
to adjust the correlated color temperature (CCT) in the
white light mode
to adjust the color hue in the colored light mode
(only “C” versions)
FUNCT Button
to change the operating mode between white and
colored light (only “C” versions)
to exit a sub-menu (escape)
ENTER Button
to confirm an input
to jump into a sub-menu
+ Button
to show the menu
to move upwards in a menu
to increase a value
- Button
to show the menu
to move downwards in a menu
to decrease a value
1 and 2 button
To record (press and hold) and recall (short press) of
user–defined presets.
Note: Only the settings of the CCT/HUE and GN/SAT
controllers will be stored.
Intended use
This product is intended to illuminate persons and objects
in a dry environment.
Always follow the safety information.
Any usage other than described above is not permitted and
can damage the product and lead to associated risks such
as short-circuit, fire, electric shock, etc. You are not allowed
to modify the product.
This product fulfils European and national requirements.
ARRI Service
In case of technical problems please visit us at
www.arri.com
Arnold & Richter Cine Technik GmbH & Co. KG
Service Lighting
Pulvermuehle
D-83071 Stephanskirchen
Germany
Design and specifications are subject to change without
notice.

FRANÇAIS
Notes générales
Les projecteurs L-Series sont conçus pour un usage
professionnel et ne peuvent être utilisés que par du
personnel qualifié.
Lisez attentivement ces instructions avant d'utiliser le
produit pour la première fois. Le texte ci-après contient
des informations importantes pour la sécurité.
Pour votre sécurité personnelle, respectez les mises
en garde et les instructions de sécurité.
Respectez toutes les régulations locales en matière de
sécurité.
Conservez ces instructions pour d'éventuels
propriétaires ultérieurs.
Recyclez l'emballage dans votre réseau de traitement
des déchets pour préserver l'environnement.
Les produits défectueux doivent être recyclés de façon
appropriée. Pour plus d'information, consultez votre
revendeur ARRI ou les autorités locales.
N'utilisez que des pièces détachées et des
accessoires d'origine ARRI.
Sécurité d'emploi
DANGER DE MORT–ELECTRISATION !
N'ouvrez pas le corps du produit. Pour une utilisation
en sécurité, le carter du produit doit toujours être
fermé.
N'utilisez pas le câble d'alimentation pour suspendre,
déplacer ou tenir le produit.
Vérifiez que le câble d'alimentation n'est pas
endommagé avant tout utilisation.
En cas de défaut visible sur le câble secteur ou le
carter, l'appareil doit être écarté sans attendre. Les
éléments de carter endommagés doivent être
remplacés par un centre technique agréé ARRI.
ATTENTION –FAISCEAU TRES INTENSE!
Ne regardez pas la lentille du projecteur allumé.
Mises en garde
Ne couvrez pas la ventilation. Un flux d'air non obstrué
est nécessaire pour un refroidissement efficace.
Evitez d'éclairer l'appareil avec d'autres projecteurs et
éloignez-le de sources de chaleur.
Sécurisation du projecteur et de ses accessoires
Lorsqu'il est suspendu, utilisez une élingue de sécurité
adaptée pour éviter toute chute du projecteur ou de
ses accessoires en cas de rupture de l'accroche
primaire.
L'élingue de sécurité et ses connecteurs doivent être
homologués pour 10 fois le poids du projecteur et de
tous ses accessoires.
Passez l'élingue dans la lyre et dans la structure
supportant le projecteur.
Gardez l'élingue aussi courte que possible.
Les accessoires doivent être insérés convenablement
sur le projecteur. Le verrouillage(4) doit être fermé et
la sécurité (5) engagée.
Les trépieds doivent être stables et homologués pour
la charge qu'ils soulèvent. Tenez compte des
accessoires et des câbles dans le calcul. Reportez-
vous au guide "Utilisation des produits ARRI en
sécurité " L5.40731.E.
La lyre doit être utilisée verticalement, en suspension
ou en perroquet. Une charge latérale peut causer des
déformation ou la rupture du spigot
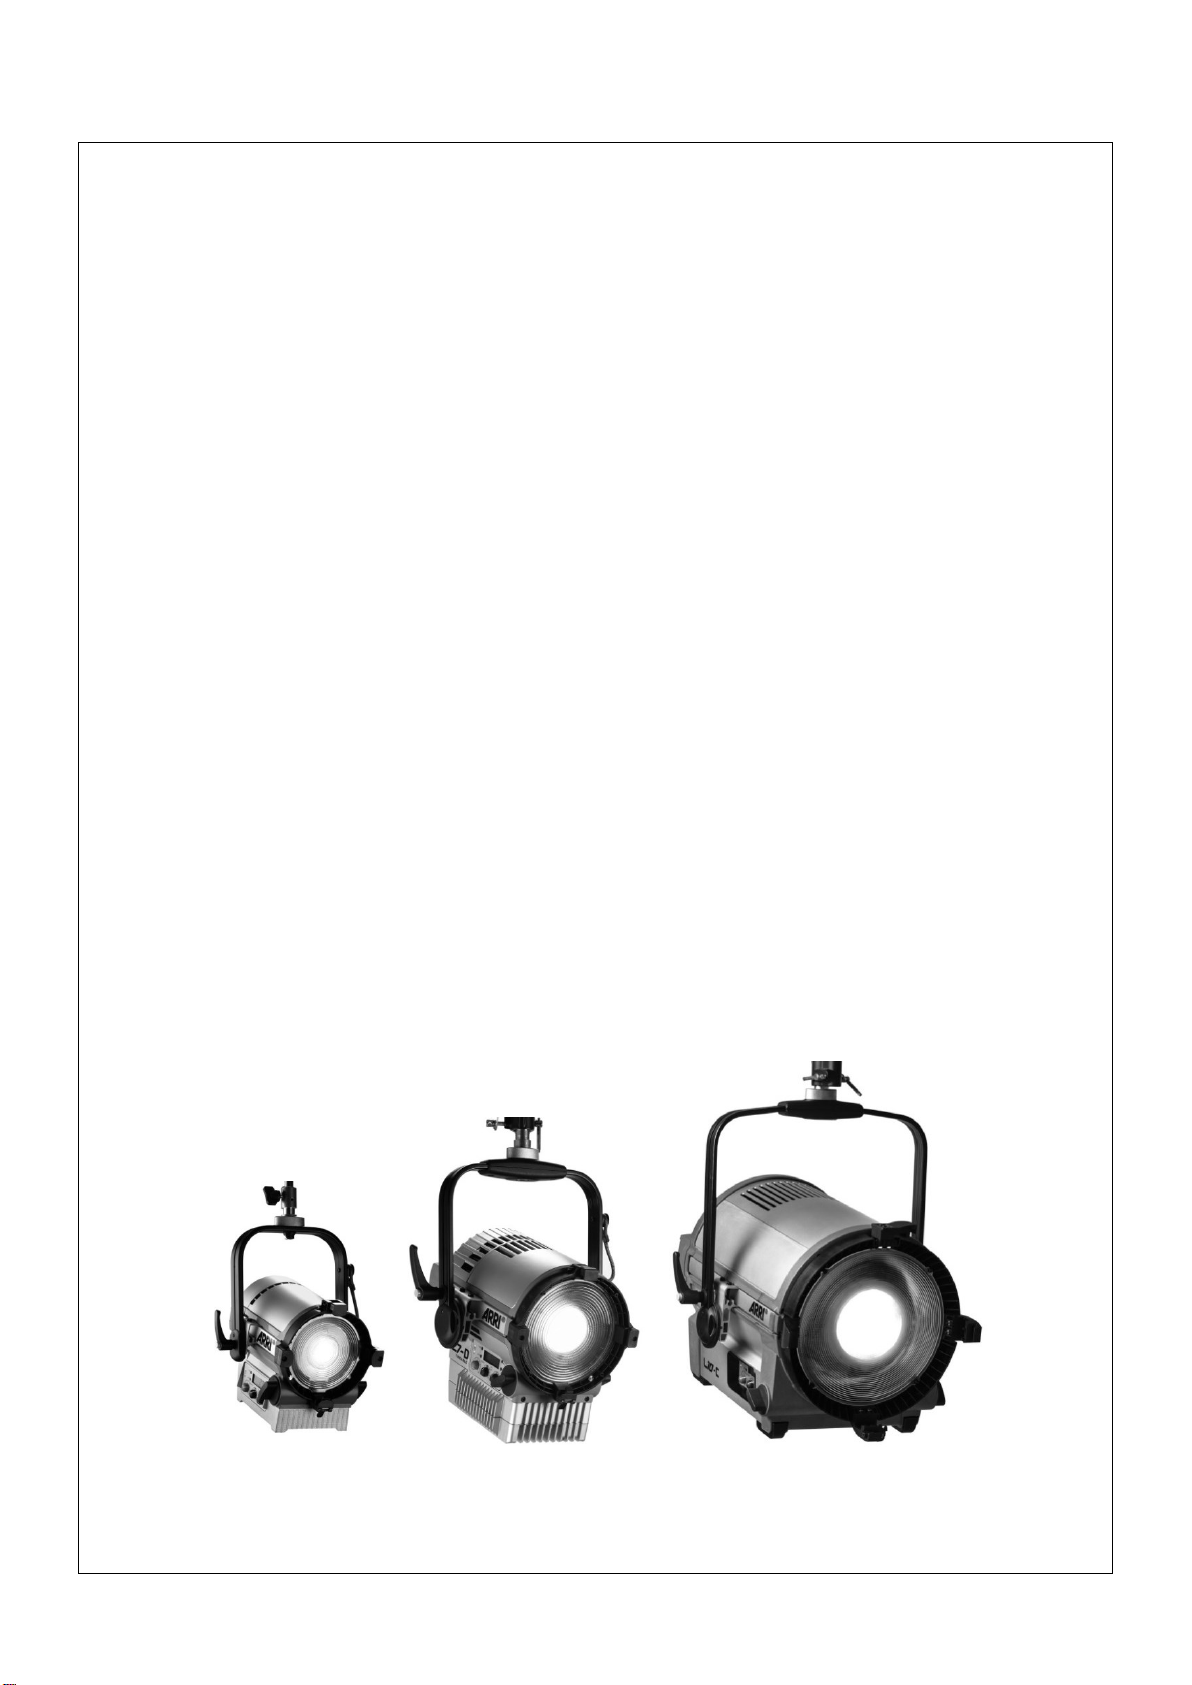
Description du produit
Les produits de la gamme L-Series sont des projecteurs
innovants à base de source LED contrôlée
électroniquement. Ils sont utilisables comme des Fresnels
traditionnels mais avec une meilleure efficacité. Leur
système optique offre une ouverture progressive de 15° à
50° et de vraies caractéristiques Fresnel avec un champ
très uniforme et un rendu des ombres propre. Visitez le site
ARRI www.arri.com pour plus d'information sur les
caractéristiques photométriques des différents produits de
la gamme L-Series. Tous les projecteurs de la gamme L-
Series peuvent être contrôlés avec une interface USB, en
DMX/RDM ou avec le menu embarqué.
Fonctions de base
MONTAGE
L'appareil doit être installé avec sa lyre (2) verticale (en
suspension ou en perroquet). Introduisez le spigot de
28mm (1) dans la bague d'un crochet ou d'un pied
compatible puis fixez et serrez le spigot convenablement.
PAN ET TILT
Orientez le projecteur après avoir desserré la vis de
serrage du pied ou du crochet. L'inclinaison de la source
peut être réglée sans effort une fois la poignée (3)
desserrée. Une fois le PAN et le TILT réglés, resserrez ces
fixations convenablement.
REGLAGE DE LA TAILLE DU FAISCEAU
L'ouverture du faisceau est réglable progressivement en
tournant la molette de zoom (6). En faisant cela, le groupe
de lentilles se déplace dans le carter de l'appareil. Ce
mécanisme dispose de 2 protections intégrées:
Une butée préréglée protège l'appareils de dommages
causés lors de la manipulation de la molette avec un
trop grand couple. Ne tournez la molette qu'à la main
et ne forcez pas lorsque le tube optique atteint ses fins
de course !
Un système de frein évite tout mouvement intempestif
de l'optique lorsque le projecteur est incliné.
INSTALLATION D'ACCESSOIRES ET FILTRES
Des accessoires (volets, porte-diffuseur ...) peuvent être
installés à l'avant de l'appareil:
Appuyez sur le côté du verrou supérieur (4) pour ouvrir
la gorge.
Glissez l'accessoire par le haut jusqu'à ce que la
sécurité (5) s'engage dedans. Il faudra peut-être aider
le verrouillage en la dégageant au doigt..
Fermez la sécurité (4) et assurez-vous que son
extrémité s'engage dans l'anneau de rétention de
l'accessoire.
INTERFACE DMX
L'appareil est équipé d'embases XLR 5 broches (9 et 10)
pour la transmission de signal DMX / RDM.

FRANÇAIS
INTERFACE USB
L'appareil est équipé d'une interface USB (connecteur mini
USB 11). Cette interface permet la mise à jour du logiciel,
l'injection de paramètres de configuration et la
maintenance. Un logiciel compagnon pour Windows, MAC
Os et Linux permet l'utilisation de cette interface. La
dernière version du logiciel interne et l'application ARRI
Lighting Service Manager software tool sont disponibles
gratuitement dans la zone de téléchargement du site
www.arri.com.
MISE SOUS TENSION ET UTILISATION
En engageant l'interrupteur principal (ou en mettant sous
tension la version sans interrupteur), le projecteur émet de
la lumière après une courte initialisation. Il reprend les
mêmes réglages qu'avant l'extinction.
Le projecteur est alors contrôlable en DMX ou part
l'interface USB ainsi que par le menu embarqué (14).
Modes opératoires
LUMIERE BLANCHE
Le projecteur émet un lumière blanche à indice de rendu
des couleurs optimisé. La température de couleur et le
point vert/magenta sont réglables progressivement.
LUMIERE COLOREE
La version "C" du projecteur génère une lumière blanche
ou colorée. La teinte et la saturation sont réglables
progressivement. A faible saturation, le projecteur émet
une lumière blanche sans optimisation du rendu des
couleurs.
Le mode opératoire est modifiable en appuyant brièvement
sur la touche FUNCT.
Afficheur et menus embarqués
Le projecteur est équipé d'une interface embarqué avec les
fonctions suivantes:
Indication d'état (POWER/STATUS)
vert permanent: sous tension, pas de défaut
rouge clignotant: proximité de la surchauffe
rouge permanent: défaut important ou surchauffe
Indicateur DATA
s'allume en bleu à la réception d'un signal DMX valide
Contrôleur CCT
réglage de la température de couleur corrélée (CCT) en
mode lumière blanche
réglage de la teinte en mode lumière colorée (version
"C" uniquement)
Touche FUNCT
passage du mode Blanc au mode Couleur sur les
version "C" uniquement
sortie d'un menu (fonction échappement)
Touche ENTER
validation d'une saisie ou d'un choix
entrée dans une rubrique
Touche +
affichage du menu
navigation dans les rubriques
augmente une valeur en cour de saisie
- Button
affichage du menu
navigation dans les rubriques
diminue une valeur en cour de saisie
Touches 1 et 2
enregistre (maintenir enfoncée) ou rappelle (appui bref)
un réglage personnalisé
Note: seuls les réglages CCT/Teinte et Point vert/
Saturation peuvent être mémorisés.
Conditions d'utilisation du produit
Ce produit est conçu pour l'éclairage d'objets et de
personnes dans un environnement sec.
Respectez les informations de sécurité.
Tout autre usage est interdit et peut endommager le produit
et conduire à des risques importants de sécurité comme
des courts-circuits, des électrisations, des départs
d'incendie ou des chutes d'obets.
Il est interdit de modifier le produit.
Ce produit répond aux normes européennes et nationales.
ARRI Service
En cas de problème technique, visitez notre site
www.arri.com
Arnold & Richter Cine Technik GmbH & Co. KG
Service Lighting
Pulvermuehle
D-83071 Stephanskirchen
Germany
ARRI se réserve le droit de modifier le produit et ses
spécifications sans préavis.

日本の
主な注意
Lシリーズ発光体は専門家、専門職の方、もしくは資
格を持っている方の使用に限る。
使用する前に必ず説明書を読む。正しくお使い頂くた
めの情報が記載されてある。
安全にお使い頂くため、入念に説明書を読む。
安全規制を守る事。
次の持ち主のために、説明書は必ず保管しておく。
梱包材は市町村のゴミ・資源の出し方を調べて処分す
る事。
不良品の場合、ARRIディーラー、もしくは地方自治体
に連絡する。
ARRI専用の予備部品や付属品のみを使用。
安全説明
注意ー電圧!
安全に使用して頂くため、必ず閉ざされたスペースで
製品を使う。
ヒューズが切れた場合、メインケーブルを抜いてから
ヒューズを交換する。
メインケーブルを引っ張ったりして、部品を動かさな
い事。
使用前にメインケーブルに不備がないか確認する。
もしメインケーブルに何か不具合がある場合、絶対に
装置を使わない事。ARRIサービスセンターに問い合わ
せて不備を修理してもらう。
注意ー高ビーム強度
絶対に光レンズを直接見ない。
警告
機械の適切な温度を保つ為に換気口を塞がない。
他の電気器具、暖房器具が直接装置にあたらないよう
注意。
照明器具の部品を固定する
吊るして固定する場合、器具の基本固定装置が万が一
切れた時のために備えて安全ケーブルを使う。
安全ケーブルの最低荷重kg数が吊るす照明器具の10
倍ある事を確認する。
安全ケーブルを照明器具が固定されている個所に通し
て使用する。
安全ケーブルは短い物を使用する。
付属品が正しく挿入されている事を確認する。トップ
ラッチ(11)が閉まっている事、そしてセーフティ
ーキャッチ(12)が固定されている事を必ず確認す
る。
三脚が正しく立てられている事、そして最低荷重が足
りている事を確認する。L5.40731.E.に表記されてい
る詳細を確認した上で、付属品やケーブルの重さも忘
れず計算に入れる。
あぶみは必ず縦に吊るす。横にすると故障や破損の原
因となる。
商品解説
Lシリーズの商品はLED光源を電子的にコントロールできる
最新のランプヘッドである。従来の Tungsten Fresnel装
置より効率よく使用できるよう改良されてある。新しく開
発された光学システムにより、フォーカス幅が15-50°も
あり、Fresnel商品の特徴である均一な光照射野ときれい
な影の演出が可能になっている。ARRIのホームページ、
www.arri.comでL7シリーズの更なる機能や特徴を確認でき
る。Lシリーズの照明器具はすべてDMX(RDMも対応)、
USB、もしくはコントロールパネルで操作できる。
基本機能
固定
器具は必ずあぶみ(9)に対して縦に、もしくは吊るして
はめる事。コック(8)は必ず正しくクランピングした
上、きちんと固定する。
回転と傾き
スタンドのスクリュー、もしくはクランピング/締め金を
緩めると装置は回転できる。傾きの角度は傾きロック
(10)を調整する事で変更できる。
回転角度と傾き角度を
調整した後、再度スクリューやロックをしっかり固定する。
光角度/ビームアングルの調整
光角度はフォーカスノブ(13)を操作する事でつねに調
整できる。レンズの動きで角度が調整される。このメカニ
ズムには二つの保護機能がある:
フォーカスノブを強く回し過ぎた場合、限界点で自動
的に止まるようになっている。
すなわち、フォーカスノブは必ず手作業で調節し、限
界点に達したら回す事をやめる事が重要。
自動抑制ギアーにより、装置が傾いている時のレンズ
チューブの誤った動きを防ぐ事が出来る。
照明の形を変える付属品
照明の形を変化できる付属品は、照明器具の正面について
いるクランプ/締め金に挿入する事で使用できる。以下の
手順を参考にする:
トップラッチ(11)の横についているノブを強く押
すとラッチが上に開く。
安全キャッチ(12)に固定されるまで、締め金の上
から付属品を入れる。セーフティーフックを指で少し
傾けると入りやすい。
トップラッチ(11)を閉じて、付属品が正しく固定
されている事を確認する。
DMX インターフェイス
器具に 5pin RDM-DMXインターフェイス(インとアウト)
が収容されている。
USB インターフェイス
照明器具についているUSBインターフェイスは、操作パラ
メーターのセッティングに必要な新しいツールやファーム
ウェアのアップロードがミニUSB接続子でできる。パソコ
ン(WIN/MAC)にサービスツールをARRIのホームページか
ら無料でダウンロード出来る。このツールでインターフェ
イスを通じて照明器具の操作とプログラミングが可能にな
る。
http://www.arri.com/lightingsoftware で最新のファー
ムウェアとALSM(ARRI ライティングシステムマネージャ
ー)を確認。
電源オンと操作
電源スイッチをつけるとゆっくり照明器具がスタートアッ
プを開始。最後に使用した時の設定がスタートアップ時に
起動する。
器具が作動してから、DMXインターフェイス、USBインター
フェイス、もしくはコントロールパネルで操作が可能にな
る。

日本の
操作方法
最適な色再現のため照明器具はホワイトライトを再生す
る。色の温度とグリーン/マゼンタ補正はつねに調整でき
る。
色付き照明/カラーライト
色付き照明、カラーライトを使用できる。色調、色合い、
そして色の彩度はつねに調整可能。彩度が低くなるとホワ
イトライトがつくが、色の演出はされない。
操作モードは FUNCTのボタンを押すと変更できる。
指示パネルとオンボードコントロール
この照明器具にはフィクスチャーパネルがついている。以
下の機能を調整出来る:
電源/ステータス表示
緑:電源オン、故障なし
赤:故障
赤点滅:オーバーヒート警告
データ表示
DMXシグナルがある場合青く光る
強度コントローラー
明るさを調整
CCT/HUE コントローラー
ホワイトライトモード時の色温度(CCT)を調整。
カラーライトモード時の色合いを調整。
GN/SATコントローラー
ホワイトライトモード時のグリーン/マゼンタ補正を
調整。
カラーライトモード時の色彩度を調整。
FUNCTボタン
ホワイトライトモードとカラーライトモードの二つの
モードを使い分けられる。
サブメニューから退出する(Escape)
ENTER ボタン
インプットを確証する。
サブメニューに飛ぶ。
+ボタン
メニューを表示
メニューの上へスクロール
数字、値を上げる
- ボタン
メニューを表示
メニューの下へスクロール
数字、値を下げる
1と2ボタン
プレセットを長押しで保存、もしくはワンクリックで
プレセットをリコールする。
注意:CCT/HUE と±GN/SATコントローラーの設定のみが保
存される。
使用目的
この照明器具は人物や物体を照らす目的として使用する
事。
必ず注意事項に従って使用する。
間違った使い方は漏電、火事や電気ショックなどの事故や
故障の原因になる可能性がある。
器具を勝手に改造する事も禁止。
この製品はヨーロッパ国内仕様基準に達している。
ARRI サービス
不具合や質問などがある場合、
www.ARRI.com で対応させて頂きます。
Arnold & Richter Cine Technik GmbH & Co. KG
Service Lichttechnik
Pulvermühle
D-83071 Stephanskirchen
Deutschland
デザインや設計は予告なく変更する場合があるのでご了
承下さい。

Specification
Technische Daten
Spécifications
専門データ
L5
L7
L10
Power consumption
Leistungsaufnahme
Consommation
電圧消費
Max. 115 W
Max. 220 W
Max. 510 W
Mains input
Netzeingang
Alimentation secteur
メインインプット電圧
90-250 VAC~ / 50-60 Hz
100-250 VAC~ / 50-60 Hz
Protection
Sicherung
Protection
保証
Refer to identification plate
Typenschild beachten
Voir étiquette de sérialisation
アイデンティフィケーションプレート参照
Electric safety class
Schutzklasse
Protection électrique
電気安全クラス
Protective earth
Schutzerde
Mise à la terre
プロテクティブアース
Protection class
Schutzart
Indice de protection
環境安全クラス
IP20
Operating temperature
Betriebstemperatur
Températures d'utilisation
使用中温度
ta= -20°C to +45 °C
Surface temperature
Oberflächentemperatur
Température de surface
表面温度
75° C (on heatsink / am Kühlkörper / sur le radiateur /最高)
Safety distance to surfaces
Sicherheitsabstand zur
beleuchteten Fläche
Distance de sécurité
他の装置との安全距離
0,25 m / 9.8 in.
(at all sides / allseitig /
toutes faces /
すべての側面から最低)
0,5 m / 20 in.
(at all sides / allseitig /
toutes faces /
すべての側面から最低)
0,25 m / 9.8 in.
(at all sides / allseitig /
toutes faces /
すべての側面から最低)
Tolerable inclination
Zulässige Neigung
Inclinaison maximale
傾斜限界角度
90°
(upwards and downwards / aufwärts und abwärts / vers le haut ou vers le bas /上下最高角度)
Weight
Gewicht
Poids
荷重
5 kg / 11.2 lbs (man.)
7 kg / 15.4 lbs. (P.O.)
8,2 kg / 18 lbs (man.)
10,9 kg / 24 lbs. (P.O.)
19,7 kg / 43.4 lbs (man.)
21,3 kg / 47 lbs. (P.O.)

Other manuals for L Series
2
This manual suits for next models
3
Table of contents
Languages:
Other ARRI Dj Equipment manuals

ARRI
ARRI Claypaky Arolla Aqua User manual

ARRI
ARRI True Blue T1 User manual

ARRI
ARRI ARRI 150 Manual

ARRI
ARRI SkyPanel S360-C Manual

ARRI
ARRI L10 Manual

ARRI
ARRI L Series User manual

ARRI
ARRI Claypaky Midi-B FX User manual

ARRI
ARRI ARRI 150 Manual

ARRI
ARRI ARRI D 5 Manual

ARRI
ARRI MINI-B AQUA CL3026 User manual