SmartZone 300
Rack Mount Kit
Quick Setup Guide
This Rack Mount Kit Quick Setup Guide provides step-by-
step instructions on how to install the Ruckus SmartZone
300 (SZ300) into a server rack using the Ruckus 902-
S330-0000 kit. The SZ300 is standard 2U server designed
for mounting in a standard EIA 19" server rack.
Before You Begin
Before deploying your Ruckus product, verify that all
items listed in Package Contents below are included in
the package. If any item is damaged or missing, notify
your authorized Ruckus sales representative. Also, make
sure that you have prepared the required hardware and
tools.
NOTE: Some standard EIA 19” server racks have square
or slotted mounting holes. The fasteners in this kit may
not work with these racks, requiring the customer to
supply rack-mount fasteners.
DANGER: Observe careful handling. The kit may contain
sharp edges.
NOTE: Using sliding rails could result in non-
compliance with Seismic Zone 4 requirements of
NEBS-3 certication.
This Guide in Other Languages
请从以下网站获得该指南的简体中文版 https://
support.ruckuswireless.com.
Vous trouverez la version française de ce guide à
l'adresse suivante https://support.ruckuswireless.com.
このガイドの日本語版は https://
support.ruckuswireless.com でご覧ください。
이 가이드의 한국어 버전은 웹 사이트 (https://
support.ruckuswireless.com) 에서 확인하시기 바랍니다.
Veja a versão em português (Brasil) deste guia em
https://support.ruckuswireless.com.
Puede ver la versión en español (América Latina) de esta
guía en https://support.ruckuswireless.com.
What You Will Need
•No. 1 Phillips screwdriver
•Ruler for measuring the rack depth
Package Contents
A complete rack mount installation kit includes two rail
assemblies and all of the items listed below:
•Two outer rails with front and rear mounting brackets
•Two inner rails with safety stops
•Eight M4 x 4mm long pan head screws
•Two M5 x 20m long pan head screws
•This Rack Mount Kit Quick Setup Guide
Step 1: Separate the Rail Assemblies into
Outer and Inner Rails
1. Extend the inner rail until it locks.
2. Slide the plastic tab towards the direction of the
extension lock and pull it in the direction of the arrow
(as shown in the following gure) to release the inner
rail.
3. Remove the inner rail from the outer rail assembly.
FIGURE 1 Separate the rail assemblies
Step 2: Assemble the Outer Rails to the
Inside of the Rack
1. Extend the outer rail assemblies with the front
stamped portion protrusions positioned into the slots
of the rack. Repeat this on the opposite end of the rail
until its protrusions are positioned in the back of the
rack.
2. Repeat Step 1 on the adjacent side of the rack. Ensure
that the correct slot levels on the rack are aligned
with the adjacent side rail assembly as shown in the
following gure.
FIGURE 2 Assemble the outer rails
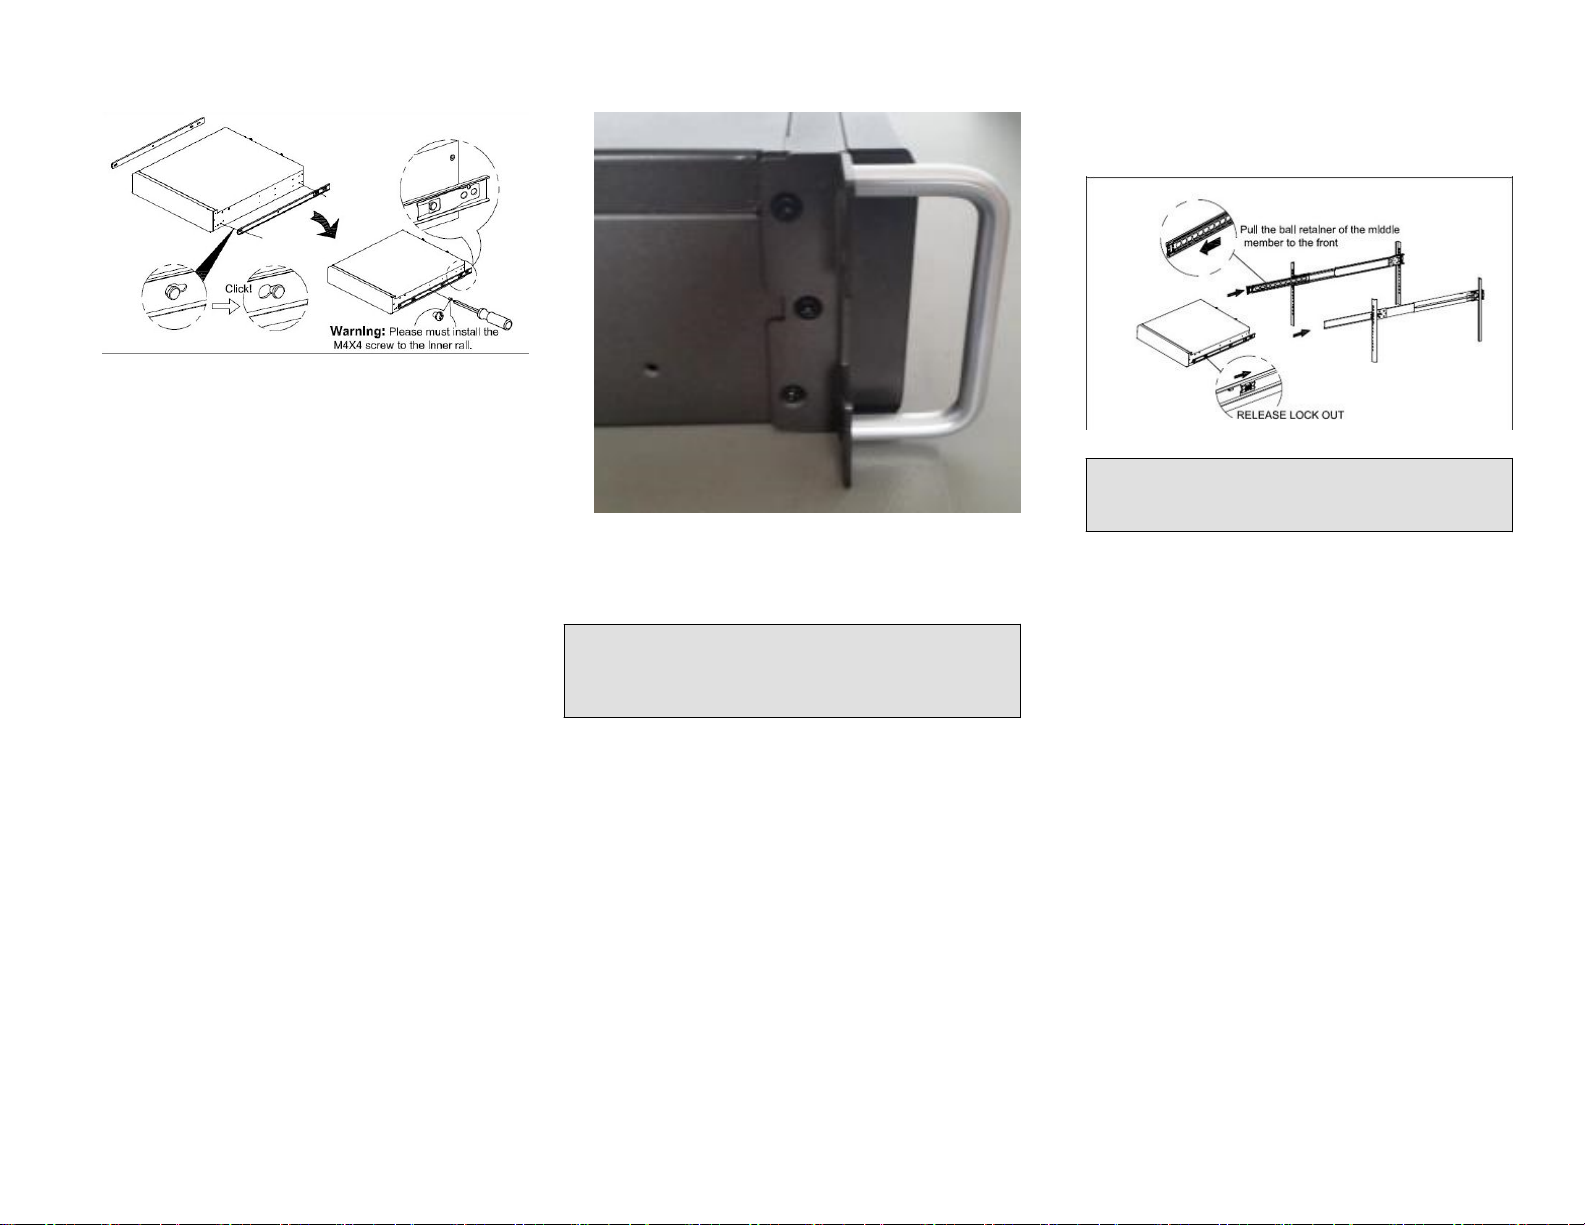
Step 3: Attach the Inner Rails to the
Server
1. Attach the inner rail to the side of the server chassis.
To do this, align the protrusion on the side of the
server to the keyhole cutout on the inner rail, and
slide it in until you hear a click.
2. Use one (1) M4 x 4 screw to fasten the inner rail to
the server chassis. Fasten until snug.
3. Repeat Steps 1 and 2 above for the other side of the
chassis.
Copyright © 2018 ARRIS Enterprises LLC. All rights reserved. Page 1 of 2
Published June 2018, Part Number 800-71878-001 Rev A