ASAHI HIPPO AS-V-320 User manual
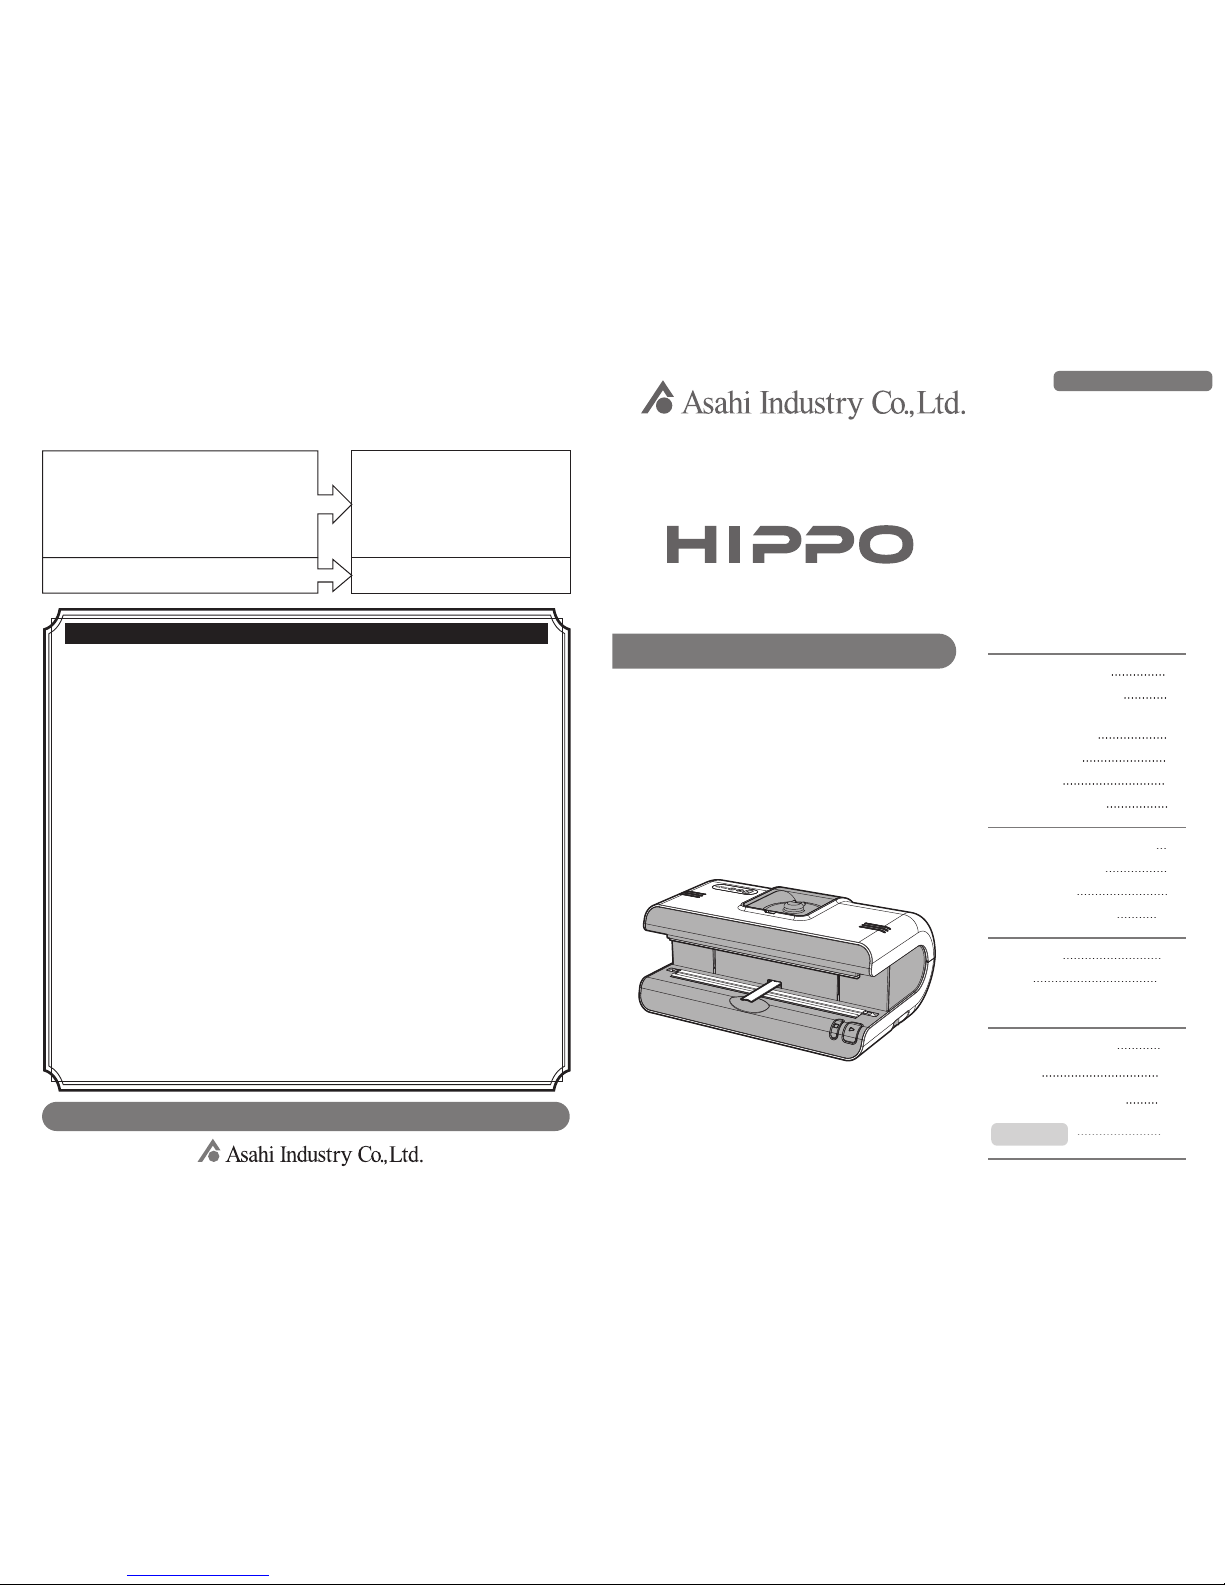
Vacuumsealer
AS-V-320Model:
UserManual
SaveTheseInstructions.
Thank you for purchasing this product.
Read this User’s Manual before using this product,
and make sure to use the product correctly. Misuse
may result in malfunction or unexpected accidents
or hazards.
TableofContents page
Safety Warning 2
Operating Instructions 6
Additional Safety
Instructions
4
Specifications 4
Accessories 4
Features 5
Cleaning 11
Troubleshooting 15
Vacuuming Tips 10
Seal Mode 9
Care 14
Check 16
Customer Service 16
Vacuum Mode 7
Available Bags 5
Warranty 16
Check Toprolongtheeffectivelifeoftheappliance,
pleaseperformadailyperformancecheck.
Productname:VacuumSealerHIPPOModelNo.:AS-V-320
■Doyoudetectthefollowingsigns?
-Dustisaccumulatedontheoutlet,the
connectororelectricoutlet. Removedust.
16
-Thepowercordorplugisextraordinarilyhot.
-Thepowercordorplughasdeepscratchesor
deformation.
-Thereisasmellofburning.
-Movingthepowercordmayinterrupttheelectric
current.
-Anelectricshockisexperiencedwhentouchingthe
unit.
-Otherabnormalitiesorfailuresarefound.
Topreventfailuresoraccidents,turnthe
powerswitchoffandunplugtheappliance
fromtheoutlet.Consultourcompanyorthe
storewhereyoumadethepurchasefor
inspectionandrepair.
1-11-22, YONBAN, ATSUTA-KU, NAGOYA, AICHI, JAPAN
TEL : 81-52-671-5193 FAX : 81-52-671-5196
Warranty
Warranty period
Model No.
Manufacturing No.
( Serial No.)
Name
Address:
TEL:
Store of purchase
Date of purchase
*Fill in the required information and keep in a safe place.
: months
: AS-V-320
:
:
:
:
:
:
Weguaranteequalityonlyforuseundernormalconditionsduringthewarrantyperiod(monthsfromdateofpurchase).Ifthe
productmalfunctionsduringthewarrantyperiod,wewillrepairitatnochargeusingourprescribedmethods.Bringtheproduct
alongwiththewarrantytothestorewhereyoupurchasedtheproduct.
Inthefollowingcases,wewillchargeafeeforrepairevenduringthewarrantyperiod.
(1)Ifnowarrantyisshown
(2)Iftherequiredinformationisnotfilledinorisrewritten
(3)Ifthemalfunctionwascausedbymisuse
(4)Ifthemalfunctionwascausedbyimpactduringshipmentormovementbythecustomer
(5)Malfunctionanddamagecausedbynature,pollution,abnormalvoltage,orotheroutsidefactor
Ifitisdeterminedthatthecustomerindependentlyalteredorrepairedtheproduct,itwillnotbeacceptedforrepairduringthe
warrantyperiod.
Repairsandreplacementsofsupplies(HeatingWires,PTFTstrips)thatareconsumedordeterioratewillincurachargeevenduring
thewarrantyperiod.
Thecompanywillnotbeliablefordirectorindirectdamagecausedbymalfunctionoruseoftheproduct.
Expensesforsendingorbringingaproductforrepairaretheresponsibilityofthecustomer.
Keepthewarrantyinasafeplace.Warrantieswillnotbereissued.
1.
2.
3.
4.
5.
6.
7.
UserManual&Warranty
SAMPLE

2
MalfunctionsandCauses
●Problemsolving.
Problem
Theunitdoesnot
operate.
Makesurethepowercordis
correctlypluggedintotheelectrical
outlet.
Checkthecircuitbreakers. Checkthecircuitbreakers.
Makesurethefuseisnotblown.
Replugthepowerplugintothe
electricoutlet.
Checkthefuseoftheappliance
inlet.
P16
P5,P7
P8
P14
Checkpoint Procedure
Theunitdoesnot
vacuum,orairis
notcompletely
removedfromthe
bag.
Makesurethebagisnottoolarge
forthevolumeofcontents.
Makesurethebagisplaced
correctly.
Checkthebottomfoamgasketfor
cracks.
Cutorchangethebagtothe
appropriatesize.
Placethebagproperly.
ReplacethePTFTstrip.
Pleasecontactthestorewhere
youmadethepurchase.
CheckthePTFTstripforwrinklesor
cracks.
Makesurethenozzleorthetube
fortheliquidcatchcanisteris
connectedproperly.
Makesurethenozzleortubeis
notclogged.
Makesurethelidoftheliquidcatch
canisterisclosed.
P11,P13
Resetthelidoftheliquidcatch
canister.
Cleantheinsideofthenozzle
ortube.
Reconnecteverytube.
P16
P5
P8
P14
P14
P14
Theunitcannot
sealthebag,or
thebagisnot
sealedsufficiently.
Makesurethebagisappropriate.
Makesurethebagisplacedcorrectly.
Makesurethefoamgasketisnot
deformed.
Useabagoftheproper
materialorsize.
Placethebagcorrectly.
ReplacethePTFTstrip.
Pleasecontactthestorewhere
youmadethepurchase.
CheckthePTFTstripforwrinklesor
cracks.
Makesuretheadjustmentofthe
sealingfunctionisproper.
Makesuretheadjustmentofthe
sealingfunctionisproper.
Makesuretheoverheating
protectivedeviceisnotactivated.
*Ifactivated,theredandgreenlightsflash
alternately.
Checktheheaterforbreaks.
P7
P7
Replacetheheatingwire.
Restarttheunit.
Setthesealtimeproperty.
P5
Thesealedpart
melts.
Makesurethebagisappropriate.
Malesuretherearenoholesinthe
PTFTstrip.
Useabagoftheproper
materialorsize.
Setthesealtimeproperty.
ReplacethePTFTstrip.
15
SafetyPrecautions ImportantSafeguards
▼Items shown here are categorized as Danger, Warning, or Caution.
Even items categorized as Caution may lead to serious results depending on the circumstances.
Important information about safety is written in all cases and must be observed without fail.
Danger This indicates that there is an imminent hazard and that death or serious injury
may result if this label is not heeded and the product is used improperly.
WarningThis indicates death or serious injury may result if this label is not heeded and
the product is used improperly.
Caution This indicates that injury or property damage may result if this label is not
heeded and the product is used improperly.
Avoidcontactwithwater,whichcanresultinashortorelectric
shock.
Donotusetheapplianceiftapeisnotplacedonthesealstrip.
Thismaycausefire,electricshock,orburnsandinjuries.
Closesupervisionisnecessarywhenanyapplianceisusednear
children.Childrenshouldnotoperate.
Onlyacertifiedrepairmanshouldperformanydismantling,
repairsormodifications.
Fireorabnormaloperationmayresultininjury.
Alwaysunplugtheappliancefromtheoutletforrepair.
Usetheoutletonlyforthisappliance(3.15Aormore).
Overloadedoutletsmaycauseoverheatingorfire.
Wipeawayanydirtontheplug.
Grimemaycausefire.
Besuretogroundthegroundingterminalproperly
topreventelectricshock.
Useadesignatedpartforthesealarea.
ApplythePTFTstripafterreplacement.
Inappropriatereplacementcancauseoverheating,fireorelectric
shock.
Cleanorreplacethesealingstripafterturningofftheswitchand
unpluggingtheunit.
Donotpluginorunplugelectricalequipmentwithwethands.

3
Caution
Donotholdnearflameoruseinanunstablelocation.
Thismayresultinfire,injuryordeformation.
Whenvacuumpacking,donotvacuumliquidwithoutattachingtheliquid
catchcanister.
ifliquidleaksfromthebottomoftheunit,itssurroundingsgetwet.
DonotputfingersonthePTFTstrip.
Closingthesealbarmaypinchorburnfingers.
Usetheunitonlywhenthebagisplacedinposition.
Thiscancauseoverheatingorfire.
Usetheapplianceonlyforitsintendeduse.
Improperusemaycauseelectricshock,shortorfire.
Donotallowtheunittovacuumflammableliquidorgas.
Firemayresult.
Qualityofvacuumpackingisnotguaranteed.
Conditionssuchaspackagedfoodshelflifeandvacuummethodmaycause
fooddegradationorrot.
Graspplugtoremovethecordfromthereceptacleoutlet.
Failuretodosomayresultincorddamage,electricshock,shortorfire.
Donotuseanunstableoutletoradamagedcordorplug.
Donotplaceheavyobjectsonthepowercord,applyexcessiveforce,deform
orbundleit.
Damagingthepowercordmaycauseelectricshockorfire.
Donottouchhotsurfaces,whichmaycauseburn.
Unplugtheappliancefromtheoutletwhennotinuse.
Aburn,electricshock,shortorcircuitfiremayresult.
Care
Beforeoperatingtheapplianceunplugthepowercordfromtheoutlet.
ReplacementofthePTFTStrip ReplacethePTFTstripwhenitisdamagedandcomesoff.
RemovetheoldPTFTstripandinstalla
newone.
Warning
-ForsurfaceswherethePTFTstripbecomes
soiledwithoilordust,cleanthesurfaceand
replacethestrip.
-Becarefulnottowrinklethestrip.
-Positionthestripsothatitcoversthe
electrodes.
ReplacementofHeatingWire
Replacetheheatingwirewhenthesealingweakensorthewireisbroken.
AfterremovingthePTFTstrip,unscrew
theheatingwirefromtheelectrodesand
installanewone.
Warning
-Setscrewsareplacedonbothsidesofthe
strip.
-ReplacePTFTstripundertheheatingwire.
-Placethestripundertheheatingwiretomake
surethattheheatingwiredoesnottouchthe
unit.
Tips
Theheatingwireisfixedbytheelectrodes.
Asshownintherightillustration,adjusting
theelectrodesinwardwithaflathead
screwdrivermakesreplacementeasier
wheninstalling.
Adjusttheterminalsinward
withaflatheadscrewdriver.
14
PTFTstrip
Heatingwire

Unplugtheappliancefromtheoutletwhennotinuse.Storetheunit
withthevacuumnozzlehousedandthesealbarraised.
Shouldyourproductnotperformproperly,restartit.
Whenyouarevacuumpackingmoistfood,emptytheliquidcatch
canisterbeforefillingitmorethanhalfwithwater.
Donotplaceobjectsontheappliance.
Donotdroporsubjecttheappliancetoastrongshock.
Handlethenozzlecarefully.
Holdthebottomoftheunitwhilecarrying.
Donotusestrongsolventssuchasbenzeneorthinnerwhencleaning.
User Manual Sample BagsPower Cord Nozzle Cleaning Tool
Two PTFE tapes
Two Heating Wires
AdditionalSafetyInstructions
Specifications
Accessories
Prodctname
Model
Power
Dimensions
Weight
Powerconsumption
Pumpefficiency
Seallength
Lengthofcords
HIPPO
AS-V-320
100~240V 50/60Hz
W394mm x D266mm x H175mm
4.35kg
200W
-80kPa
300mm
1.8m
4
2Removethenozzlefromthemainunit.
Removetherear-mountedrubbercapoftheremovednozzleto
cleantheinside.
Cleanthenozzlewiththeaccessorynozzlecleaningtoolandwashitoffwithwater.
Reinstallthe
nozzle.
Installtheliquidcatchcanisteran
cleaningiscomplete.
Whenremovingthenozzle,holditsbaseandcarefullyremovetherightandleft
fixedpartsinorderfromrighttoleft.
3
4Wipemoisturefromthenozzle,
replacetherubbercap,and
reinstallit.
Removethenozzlewithcautionbecauseroughtreatmentmaydamageparts.
Becarefulnottoletwaterordustintotheunit.
Removepartsmarkedwith
anarrowfromonesideand
thentheother.
Removedustwiththenozzle
cleaningtoolandwashitwithwater.
13
※Donotremove
thetube.
Rubbercap
Nozzlecleaningtool
Nozzle

11
2
2
CleaningtheFilter Removethefilterfromthelidandwashitwithwater.
1Preparingtoremovethenozzlefromtheunit.
Setoperatingmodetosealmodeandhousethenozzle.Opentherearcoverofthe
unitandremovetheliquidcatchcanistertorevealthenozzleunderneaththecover.
CleaningtheNozzle Removethenozzlefromtheunit.
Openthecoveroftheliquid
catchcanistertoremoveit
anditslid,andremoveits
protectionrubber.
Connectionbetweentubeandlid
Makesuretoturntheunitoffbeforecleaning.
Makesuretoturntheunitoffbeforecleaning.
12
Revealingthenozzle
underneaththecover.
Removethecanister
withitslid
※Donotremovethetube.
※Ifthereisseverecontamination
orscratchesonthefilter,itneeds
replacement.Pleasecontactthe
storewhereyoumadethepurchase.
Removethefilterfrom
thecanisterandwash
inwater.
Connectthe
tubetothenozzle.
Connectthefilter-side
nozzletotheunit.
Filter
AvailableBags
Usethevacuumbagwhenvacuumpackagingitems.
Thevacuumbagismadeofnylon/polyfilmoraluminum.Fordetails,checkthebag
performancesuchasair(oxygen)penetrationandcontactyourdistributor.
Back side of the container body
1 Appliance Inlet
2 Fuse
3 Power switch
4 Start button
5
Select/Pause Button
6 Teflon tape
7 Heating Wire
(This is located under 6.)
8 Gaskets
There are three gaskets
on upper and lower sides.
9 Nozzle
(Slides back and forth.)
10 The Seal Bar
(Moves up or down.)
11 Indicator Light
12 +Button
13 -Button
14 Manual Vacuum
Mode Light(Green)
15 Automatically Vacuum
Mode Light(red)
16 Liquid Catch Canister
Cover
17 Tube of Nozzle Side
(Connects to 19 A.)
18 Tube of Unit Side
(Connects to 19 A.)
19 Liquid Catch
Canister Lid
20 Filter
21 Protection Rubber
22 Liquid Catch Canister
NamesofParts
Suitablebagsvarybycontentsandpurposes.
Chooseabagforyourspecificneeds,suchasfoodtypesorcontentsforpacking,
heatsterilization,orfreezerstorageaftervacuumpacking.
caution
5
6
14
18
16
17
19
20
21
A B
22
1
2
3
4
5
7
8
9
10
11
12
13
15
-Whenstoringfood,choosetheusagepurposeoftheunitinconsider-
ationoffoodtypeorshelflife.Qualityofvacuumpackagedfoodisnot
guaranteed.
-Theunitcannotsterilizefood.
-Donotusehouseholdembossedbags.
-Alwayskeepthenozzleandliquidcatchcanisterclean.
-Avoidpackingunsanitaryitems.
-Avoidusingthesameunitforfood,dailynecessitiesandindustrialparts.
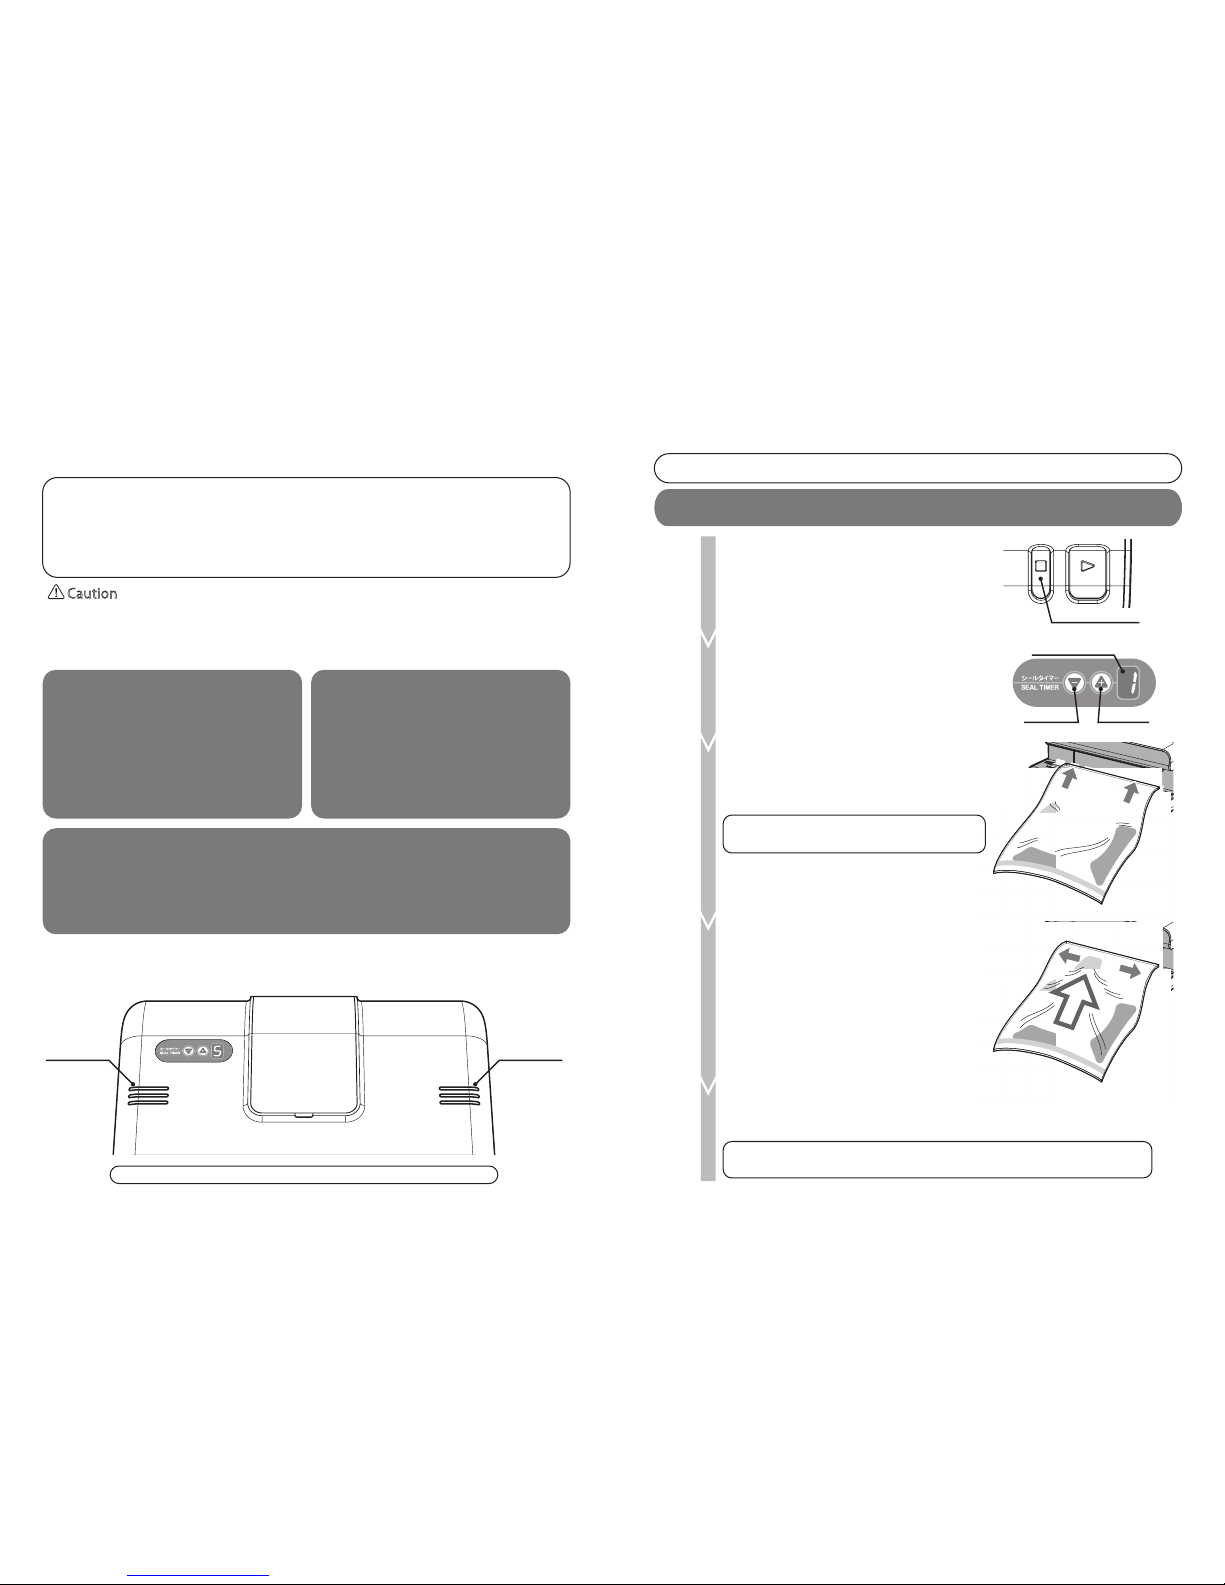
OperatingInstructions
OperatingMode Youcanselectfromthethreemodesbelow.
Topreventfoodfromrotoroxidation,
usethisapplianceforvacuumpacking.
AutomaticVacuumMode※
Theredlightonthetopleftofthecoverflashes.
Thismodesealsthebagonly.Usethismodewhenitemsdonotneedvacuumor
youwanttoperformthesealingprocessmanually.
Theredandgreenlightsonbothsidesofthecovertopturnon.
※Ifthenozzlevacuumsthebagoritscontents,vacuummodemayautomaticallyswitchto
sealmodeevenifthebagcontainsair.
(See“OperatingInstructions”,page8.)
Greenlight
Thelightonthecovertopindicatesoperatingmodeandprogress.
Redlight
6
Tomaintainproductsorsamplesunderpowerfulvacuumwithauser-friendly
operation,supermarkets,restaurants,livestockproducers,andmedicaland
researchinstitutionsusethisunit.
Itcanalsopreventoxidationofindustrialsamplesandmoisturetopreclude
deterioration.
Beginvacuumingafterplacingthebagin
position.Whentheunitdetectsthatthe
bagisvacuumed,sealmodewillturnon
automaticallytovacuumthepackage.
ManualVacuumMode
SealMode
Thegreenlightonthetoprightofthecoverflashes.
Checkingthedegreeofvacuum,this
modecanswitchtotheuserʼsselected
sealmode.Afterthebagisinserted,
vacuummodecontinues.Pressthestart
buttonagainandturnonsealmode.
Caution
Donotallowtheunittovacuumpowder,suchasflour,sugar,etc.
Donotallowtheunittovacuumviscousliquid,suchassauce,jam,curryetc.
Toomuchlukewarmwatermayoverflowthe
liquidcatchcanister.
Whenexcessliquidhasfilledtheliquidcatchcanister,liquidenteringthe
unitmayleakfromthebottom.
Cleaning
●Cleanthenozzleafterusetopreventclogging.
Cleaningwithlukewarmwater
Vacuuminglukewarmwatercleanstheinsideofthenozzleortube.
1
2
Turnmanualvacuummodeon.
Presstheselectbuttonandcheckthatthe
greenlightflashes.
Setthesealtimeat“1”(onesecond).
Pressthesealtimerbuttonandsetitat“1”.
Pourlukewarmwaterintothebagand
insertittotheunit.
Pour50°Corless,150mloflukewarmwaterand
placethevacuumnozzlebetweenthebag.
3
4
5
Acloggednozzlemayweakenorhaltvacuuming.
Pressthestartbuttontovacuum
lukewarmwater.
Cleantheinsideofthenozzleortube.
Whensettingthebag,stretchitsidewayswith
handstokeepthewarmwaterfromspilling.
Pressthestartbuttonagaintoraisethesealbar.
Checktheliquidcatchcanister.Ifwaterisuncleanwhenvacuumed,repeat
steps3and4untilwaterbecomesclean.
11
Selectbutton
Sealingtime(sec.)
+Button−Button

VacuumingTips
●HintsforBestVacuumingPerformance
PlacementofBags
Afterpressingthestartbutton,stretch
thebagsidewayswithhandstoavoid
wrinkles.
Pausetheunitimmediatelyafterthevacuumingbeginsandbringcontentsclosetothenozzle.
PreparationGuidelinesforMeatandFish
Placethebagata
positionlowerthan
sealarea.
PreparationGuidelinesforLiquids
Theunitcanvacuum
packagesoups.
10
Papertowel
Sealing
position
Whenthesealbarmovesdownand
graspsthebag,pressthepause
buttonimmediately.
Next,bringcontentsclosetothe
nozzlewiththeunitstopped.
Pressthepausebuttononceagainto
restartthevacuumprocess.
Thismakestheairvacuumingprocess
fasterandeasier.
Vacuumpackagingmeatorfishmaycomplicatetheair
vacuumingprocessbecausemoisturemaycausebagstostick.
Placeapapertowelinthebagtoabsorbexcessmoistureand
juicesduringthevacuumpackagingprocessinorderto
vacuumpackageitemsneatly.
*Theunitvacuumspackageneatlyafterfreezing.
Vacuumandsealliquidinmanualvacuummode.
Afterthesealbarmovesdownandgraspsthebag,placethebagatapositionlowerthanthe
sealarea.Thismakesairaccesstothenozzletipeasier.Vacuumasmuchairaspossibleby
vacuumingliquidandairatthesametime.Thisunitincludesaliquidcatchcanistertovacuum
liquids.Becarefulnottospillliquidduringoperation.
Donotallowtheunitto
vacuumviscousliquid
orpowder.
Caution
AutomaticVacuumMode/ManualVacuumMode
1
2
Checkthatthecanisterortubeisnotleakingair.
Makesuretoclosethelidoftheliquidcatchcanisterandconnectthetube.
Pluginthepowercordandturnonthepower.
Selectoperationmodeandcheckthenozzle.
Thepowerswitchisontherightsurfaceoftheunit.
Makesuretoindicatethenumberonthecover.
Setthesealingtime.
Setthesealtimertakingbagthicknessand
materialintoaccount.
(Sealtimernumber:1=1sec、2=2sec...)
3
Placeitem(s)inthebag.
BeforePlacingItemsinBags・・・
Note:Whenthecontentvolumesaresmall,cutthebagsorchangetoapropersize.
-Whenitemvolumesaresmallforthebagsizeorbagsareremarkablythin,
itmaymakethevacuumingprocessdifficult.
-Placeitem(s)inthebagtopreventwatercontactwiththesealarea.
-Somevegetablesemitgasesduringstorage.Thebagmayinflateaftervacuumsealing.
4
5
※Inautomaticvacuummodeormanual
vacuummode,makesurethenozzleisout.
Redlight(Left):AutomaticVacuumMode
Greenlight(Right):ManualVacuumMode
Red&greenlights:SealMode
Eachtimetheselectbuttonispressed,
thelightindicatorchangesonthecover,
andthemodewillchangeasfollows.
Forexample:nylon/polybag
Thickness(μm) 60μ
4
70μ
4
80μ
5
90μ
5
120μ
7
Sealingtime(sec.)
7
Sealingtime(sec.)
+Button−Button
Select/Pause Button
Checkingthesealcondition,settheappropriate
sealtimeasfollows

SealMode
1
2Checknozzleandoperatingmode.
See“BeforePlacingItemsinBags”,page7topreparethebag.
3
4
InsertthebagfartherthanthepositionofthePTFTstrip,untilthetipofthebag
contactstheendoftheunit.
5
Pressthestartbuttontobeginthesealingprocess.
Pressthestartbuttonatthebottomrightoftheunit,andthesealbarmoves
downtobeginthesealingprocess.Whentheprocessiscomplete,thesealbar
movesupautomatically.
6
Makesureredandgreenlightsatbothsidesofthecovertopareilluminatedand
nozzlesarehoused.Inothermodes,presstheselectbuttontochangethemode.
Toavoidwrinkling,stretchthebagsidewayswhileinserting.
9
Shouldyourproductnotperformproperly,restartit.
6
7
Placethebag.
Thebagispositionedsothatit
straddlesthevacuumnozzle.
Besuretoinsertthebagasfar
aspossible.
Pressthestartbutton.
Makesurethesealingprocessiscompleteandremovethebag.
Thesealbarmovesdownandholdsthebag.
Thesealbarmovesdownandbeginsvacuumingitemssimultaneously.
Whentheunitvacuumsfor60secondsordetectsthatvacuumingiscomplete,
thesealingprocesswillbeginautomatically.
Whenthesealingprocessiscomplete,thesealbarwillmoveupautomaticallyand
theunitwillstop.
Housethenozzle.
Housethenozzlebeforeshuttingoffthe
appliance.
Presstheselectbuttonandthenozzle
willmovedown.
8
Turnoffthepower.
10
9
Becarefulthatthebardoesnotpinchyourfingers.
AutomaticVacuumMode
Pressthestartbuttonagainandturnonsealmode.
ManualVacuumMode
Duringvacuuming,bringingthecontentsclosetothenozzleexpeditestheloss
ofairfromthebag.*See“VacuumingTips”,page10.
8
Pluginthepowercordandturnonthepower.
Thepowerswitchisontherightsurfaceoftheunit.
Makesuretoindicatethenumberonthecover.
Redlight(Left):AutomaticVacuumMode
Greenlight(Right):ManualVacuumMode
Red&greenlights:SealMode
Setthesealingtime.
Setthesealtimertakingbagthicknessand
materialintoaccount.
(Sealtimernumber:1=1sec、2=2sec...)
Sealingtime(sec.)
+Button−Button
Checkingthesealcondition,settheappropriate
sealtime.
Placeitem(s)inthebag.
Placethebag.
Table of contents
Other ASAHI Food Saver manuals


