ASCOM LACERTA MOTORFOCUS User manual

LACERTA MOTORFOCUS 1 2016
LACERTA MOTORFOCUS
User Manual v1.0.4
Thank you very much for choosing our product!
The LACERTA MOTORFOCUS is an ASCOM compatible focusmotor controller with
position feedback, temperature and backlash compensation and exposure monitoring
possibility. It can also be used as a standalone focus controller with advanced
features.

LACERTA MOTORFOCUS 2 2016
The content of the package:
-LACERTA MOTORFOCUS hand controller
-capsuled Motor unit
-Temperature probe
-USB cable, 1,9m (for PC connection)
-RJ45 cable 2m (for motor unit connection)
-DC power cable 3m with cigarette lighter plug.
Please visit Lacerta Motorfocus' website to check for drivers and additional
information, firmware updates (free), or links to user discussions. Download the
virtual user CD from the Support Tab:
http://www.teleskop-austria.at/index.php?produkt=MotorFocusLA
Connection details: Connections on the hand controller
12V DC socket(5,5/2,1mm center positive) _ Off-On switch _ USB-B mini _ RJ45
Connections on the motor unit
upper side: 2,5mm stereo socket (from MGEN's camera port)
3,5mm stereo socket (to DSLR)
right side: RJ45 (from handbox)
3,5mm stereo socket (temperature probe)
Connection to the focuser:
The Lacerta Motorfocus is compatible to a growing number of focusers. You do not
need any additional adaption for follwing focusers: Skywatcher Esprit 80-150, ED120,
Lacerta Microfocus unit, Octo60. Please visit the website mentioned above to see a
video how to connect properly.

LACERTA MOTORFOCUS 3 2016
Technical data:
Size:
79x117x24mm (120gr)
Main power:
12V DC (9-15V)
Plug size: 5.5/2.1mm,
center positive polarity (with polarity
protection).
Fuse:
built-in regenerating fuse
Stepper motor:
200 step/revolution, 2 phase bipolar,
800mA / coil max. current.
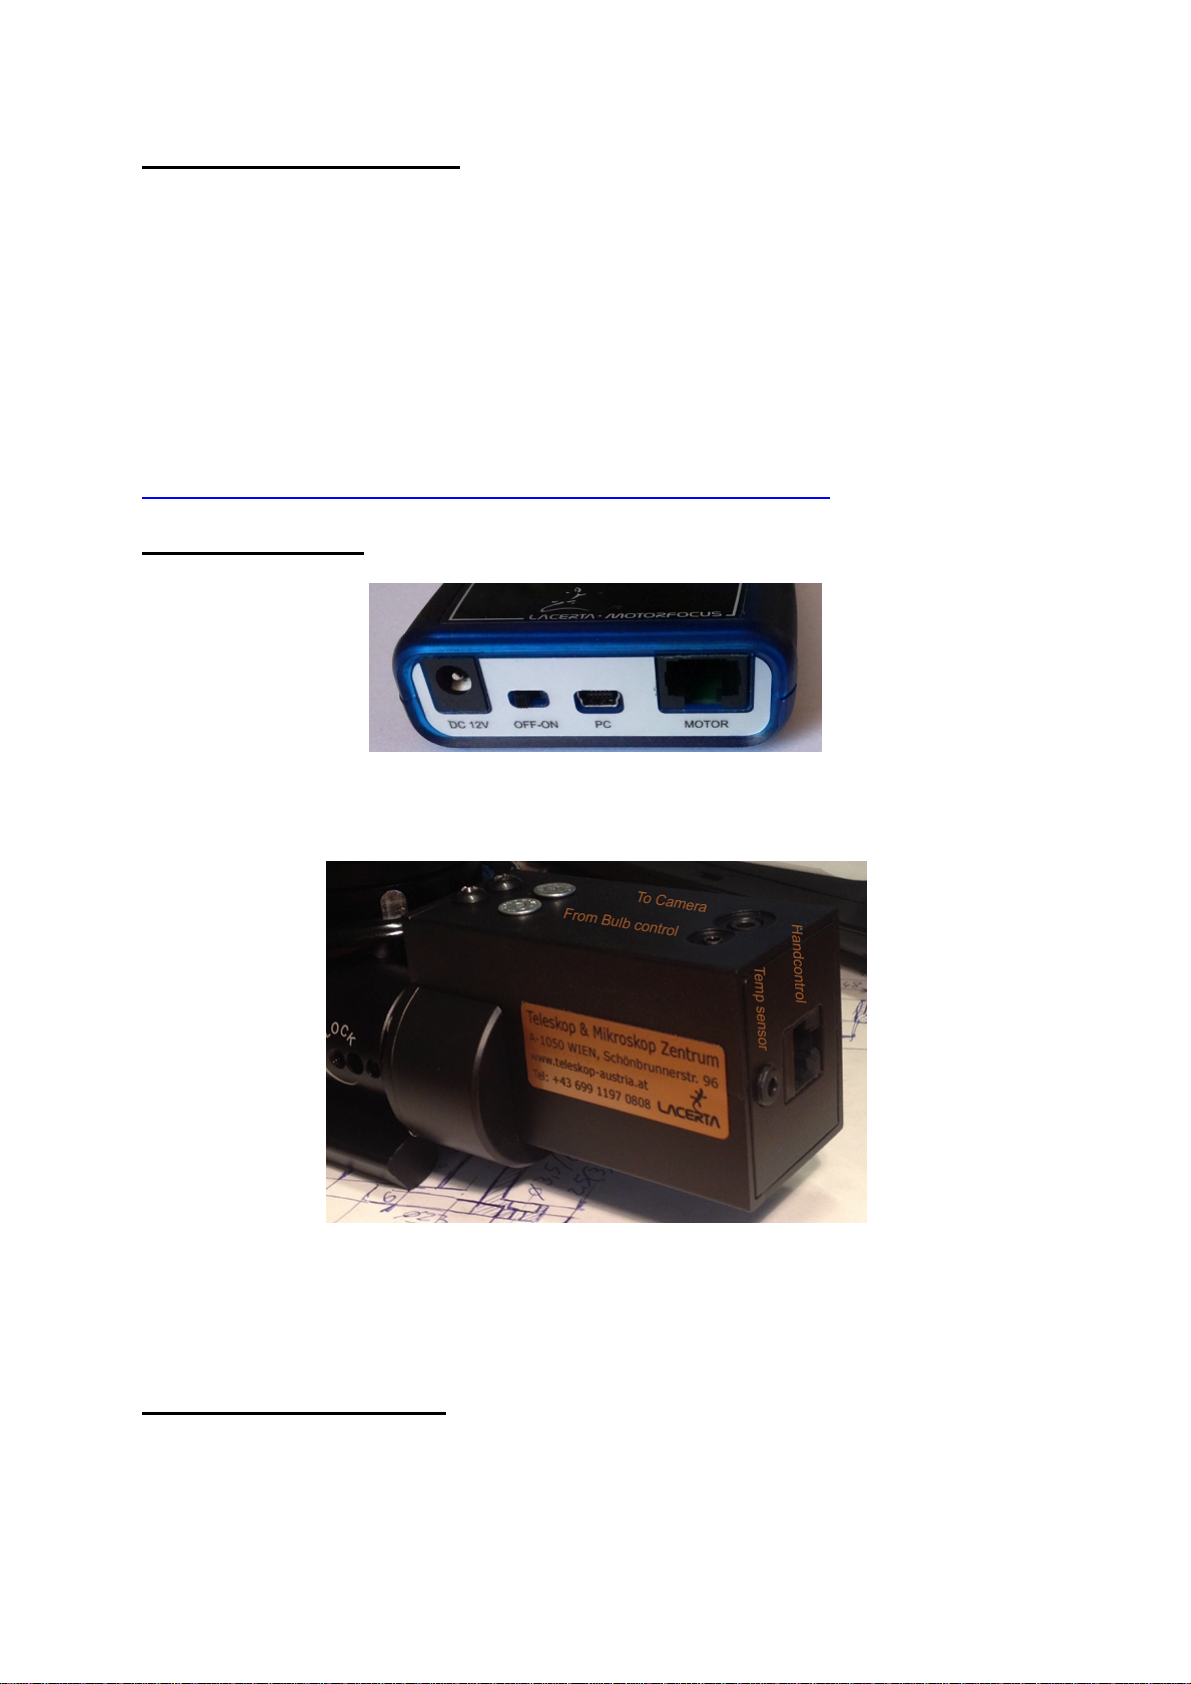
Motor connection:
RJ45-8p8c, pinout:
1 = Temperature signal
2 = Motor coil A-Plus
3 = Exposure signal
4 = Motor coil A-Minus
5 = +5V
6 = Motor coil B-Plus
7 = GND
8 = Motor coil B-Minus
Only use with 1:1 UTP sable. NEVER
use reverse UTP (cross-link) cable!
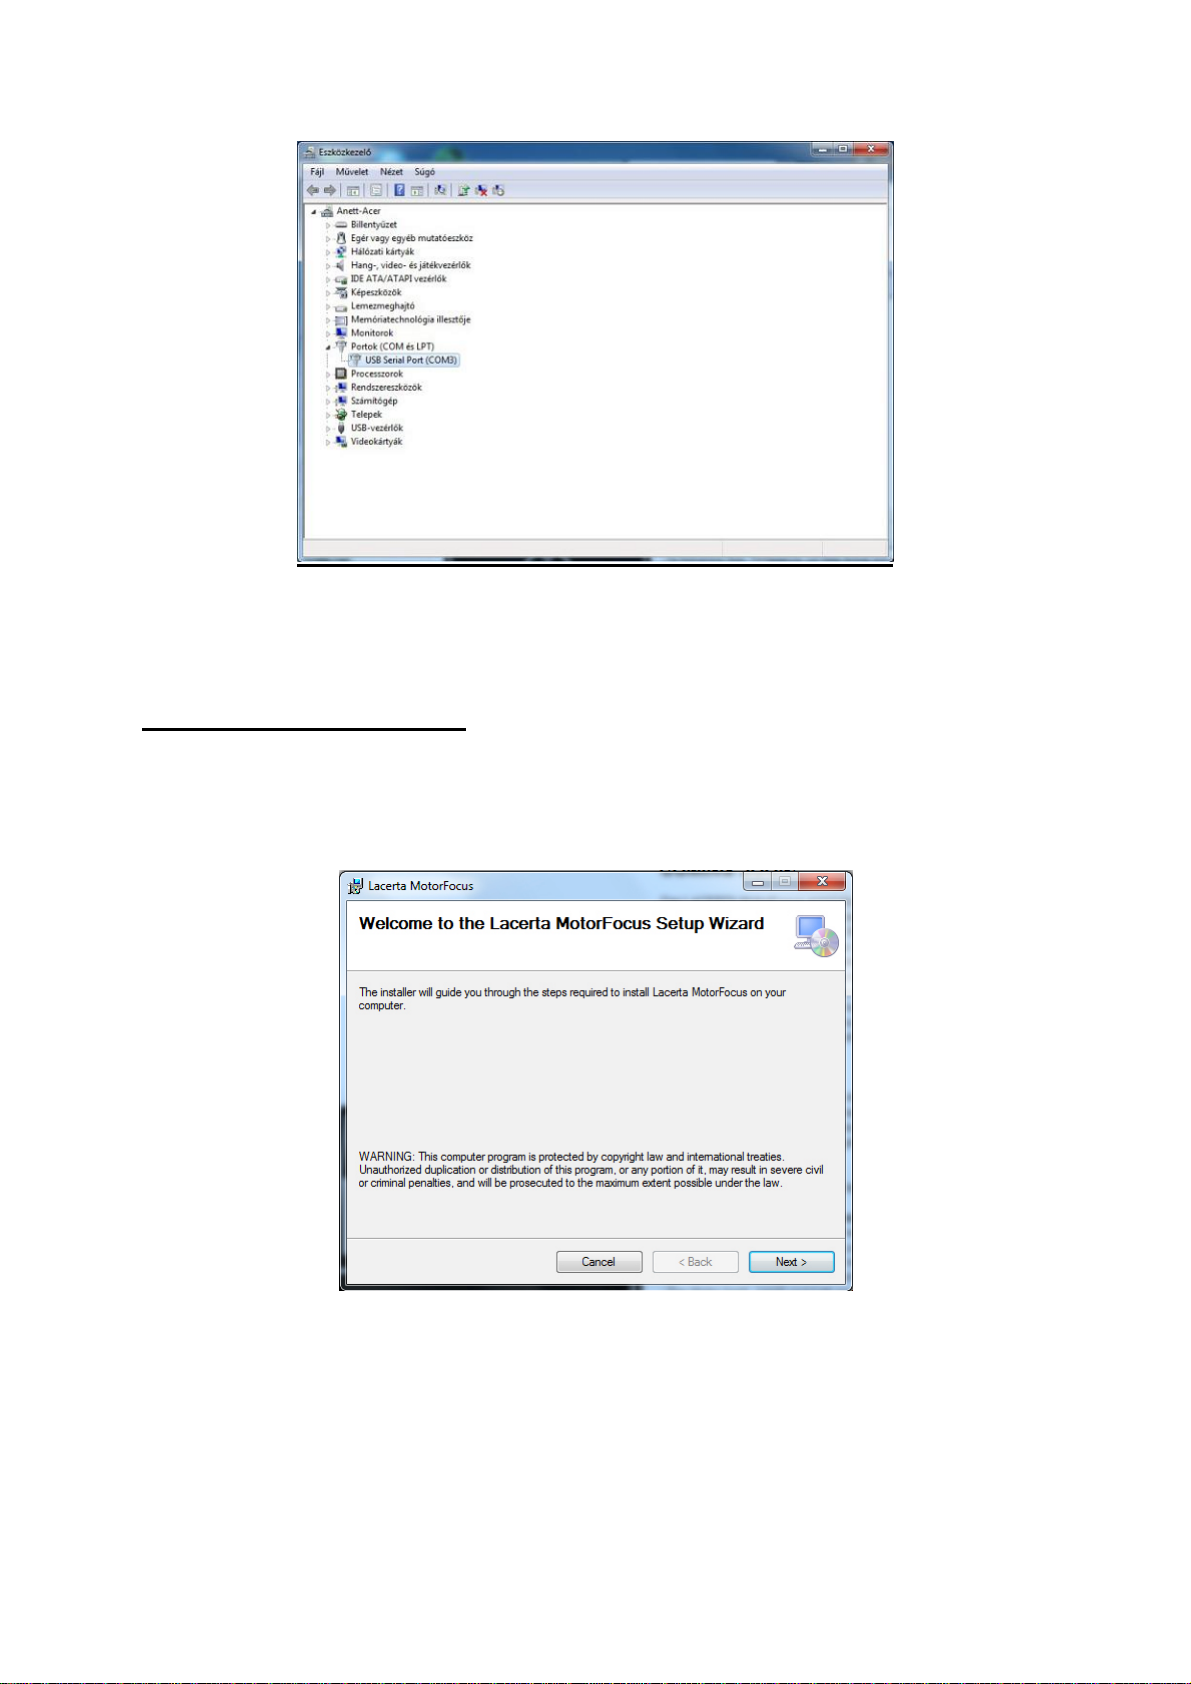
PC connection:
USB-B mini
Display:
2 row 16 characters LCD, black
background,
amber-yellow characters.
Temperature Probe
180cm long with hole to be screwed
somewhere, 3,5mm stereo jack
Attention! Be aware that Manual turning of the focuser is possible, but only if UTP
cable to handbox is DISCONNECTED, otherwise the possibly induced voltage may
cause damage of MOTORFOCUS!
Functions and concepts
The hand controller is equipped with a digital display that shows a wealth of status
informations, like position of your focuser, temperature, direction of movements,
backlash compensation, filter slot and so on. You may enter the menu by pressing
Esc and Ent at the same time, and change all important parameters. There are three
filter offset positions definable, relative to the main filter position, which step number
also can be stored. The Temperature probe can be mounted near the most sensitive
part of your telescope (preferably isolated against outside air), to pick up Temp.
information from there and automatically compensate for focus drifts. A backlash
compensation can be designed to be active from a certain step distance, and your
focus position will be reached from one movement direction only. If you use Lacerta
MGEN superguider, you may connect its camera control and focus corrections will
take place only between exposures. The resulting precision (if your focuser allows
for) is usually in 1 micron range (0,001mm). That provides ample possibility to
measure V-curves using compatible programs, or watch the Bahtinov pattern at the
live screen of your camera, and achieve best possible focus all the time.

LACERTA MOTORFOCUS 4 2016
Installation
For comprehensive use of device it’s necessary to install the USB driver and PC
applications first. You can see below the installation steps on a Windows 7 64 bit
system
Installing the USB driver:
Download the virtual user CD from our website given above, and extract the zip file to
a folder. Connect LACERTA MOTORFOCUS to PC and power supply using
accessory cables. Turn on the device. The Operating System recognizes the device
and it’s looking for a suitable driver. If it does not find the dricer automatically, the
screenshots below help you to successful install the driver after opening the Device
Manager. USB driver is found at the virtual user CD at the USB_driver folder.

LACERTA MOTORFOCUS 5 2016

LACERTA MOTORFOCUS 6 2016

LACERTA MOTORFOCUS 7 2016

LACERTA MOTORFOCUS 8 2016
Installing the ASCOM driver:
The required setup.exe is in the virtual user CD at x86 (32bit OS) or x64 (64bit OS)
subfolder of ASCOM_driver folder. ASCOM 6.1 platform is needed! If it’s not
installed, you can download it from http://ascom-standards.org/index.htm

LACERTA MOTORFOCUS 9 2016

LACERTA MOTORFOCUS 10 2016
Settings of the ASCOM driver:
Choose LACERTA MOTORFOCUS on the ASCOM Focuser Chooser drop-down
panel in your compatible software (MaximDL, APT...).
If the port was chosen previously, the device can be connected by pressing the OK
button. A acoustic signal and flashing of device display indicate that the connection is
created. „A” character shows in the MOTORFOCUS display that the ASCOM
connection is available. For device parameters press the properties button.
The serial port of LACERTA MOTORFOCUS can be selected in the COM port drop-
down menu. When the connection is created, parameters are loading from Eeprom.
After parameter modification click the Save button to write changes into Controller.

LACERTA MOTORFOCUS 11 2016
Installation of Firmware Updater:
Copy whole Firmware Updater folder from CD to any folder on your PC. Select
firmware file button opens this same folder, that’s why it’s recommended to copy
HEX files of the software update file here.
At first, connect device to your PC, after that push and hold down In and Out buttons
at the same time and then turn on the device. Release the buttons after you can hear
the acoustic signal and you can read Buttons released on the display. After some
seconds you can hear the signal again and the display reads: Programming mode.
Now start the Updater program LacertaMotorFocusFirmwareUpdater.exe in the
install folder. It may occur that your antivirus software prevents the operation of
Updater program. In this case you need to turn off antivirus.
Select the port which is in use by the device (consult Device Manager if you don't
know). Load the new firmware file with Select firmware button.
The name of the selected HEX file is shown at the bottom side of window.

LACERTA MOTORFOCUS 12 2016
To start uploading, press the Upload firmware button. An uploading message at the
bottom of the window shows the process status. When the uploading is in progress,
the display of the Hand Controller is dark and the LED light of the serial
communication is flashing. Red flashing is the sign of back reading.
When the process is complete, the device is restarting and the display shows the
new version number. Please use the factory reset function to fully install the new FW!

LACERTA MOTORFOCUS 13 2016
Usage of LACERTA MOTORFOCUS
Informations on the screen:
The device name appears after turning on
1,5s later the version number with acoustic signal
again 1,5s later the normal main screen is displayed
It shows some important Informations:
’1’ - 1 step/button pressing active or ’*’ if the user stepping number is active.
’A’ - ASCOM connection is active or ’_’ if inactive.
’B’ – Backlash compensation is active or ’_’ if inactive.
’T’ – Temperature compensation is active or ’_’ if inactive.
’E’ – Exposure is in progress or ’_’ if not.
’3’ – Offset number for active filter.
’T:’ – Current temperature. (Without temperature sensor: ’NC!’)
’Pos:’ – Current position.
’D:’ – Direction of last movement (In / Out)

LACERTA MOTORFOCUS 14 2016
the Menu structure – Overview
There are two menus available: The Main Menu contains all settings for backlash,
step size, initial position, light and sound, motor currents, temperature compensation.
The GotoSelect Menu contains the main positions and filter offset settings, so you
can reach your important positions easily.
GOTO quick menu (press GOTO button 1sec)
1 GoStartPos
(GotoPos)
After Ent ("Set" is displayed) change value with
In/Out. Press "Ent" button to confirm, and once
more and the motor moves to the desired
position.
2 GoFilt0Pos Only works if you're one of the "Offset" positions.
3 Go Offset1
4 Go Offset2
5 Go Offset3
6 Save Pos
Save the current position to the"GoStartPos"
function. AfterEnt ( "Set" displayed) change value
with In/Out. press "Ent"button first to confirm,
and once more, and the motor moves to the
desired position. ***
7 SetOffset1 input value to offset the Go menu choices.
Difference to Filt0Pos!
8 SetOffset2 input value to offset the Go menu choices.
Difference to Filt0Pos!
9 SetOffset3 input value to offset the Go menu choices.
Difference to Filt0Pos!
*** If you want the position tobe
shown at startup, set the
StartSavedPos to "Yes". Main
Menu/Handcontrol/StartSavedPos
and set to "Yes".
Main Menu (press Esc and Ent 1sec)
Focuser HandControl Motor
Backlash Step/Click hold current
BacklChg Backlight move current
BacklMultp Contrast Direction
Pos.Max Volume
TempComp StartSavedPos
TempTrackDir
FactoryReset!

LACERTA MOTORFOCUS 15 2016
Shortcuts
Esc (Press 1sec)
Change the shaved and single Stepsnumber (display * or 1)
Ent (Press 1sec) Switch TempTrack function (displayT or _ )
Direction buttons ( In / Out)
The position counter starts from 0 normally, but this value is modifyable in the Menu.
Normally, one time pressing the in/out buttons means the motor takes 1 step. If you
would like to switch to the user defined StepsPerClick mode, just press the Esc
button for 1 second. Then, on the display the first character at the upper row will
change to ’*’ with acoustic signal, and pressing in/out now takes the StepsPerClick
value which can be set in the menu (the default value is 50). If you would like to
return to 1 push / 1 step mode, just push again the Esc button for 1 second. The ’*’
character will become ’1’.) If you push down the direction button permanently, the
motor will accelerate continuously until it reaches terminal velocity. After releasing the
button the motor slows down continously until it stopps.
The position cannot take values below 0, and also not more than the PositionMax
value, which is setable in the Menu (default value is 15000). If the motor reaches the
position limits, an error message will be shown on the display with sounding a signal.
Use the In and Out buttons for scrolling up and down the menus, and for changing
values. In some menus the value input is dynamic: With continuously pressing the
button, and the value steps are more than 10, the counting will be in tens. If the
value steps are more than 100, the counting will be in hundreds. If the value steps
are more than 1000, the counting will be in thousands. If the counting reaches the
limit, the opposite limit will be the next value. (Example: In case of GoStartPos menu
the next value after 65535 is the 0 and inversely.)
Function buttons (Ent, Esc, Goto) and menus
Ent button
Generally use for entering to menus and confirming.
Switch on/off Temperature compensation (TempTrack) by pressing down for 1
sec. If TempTrack is active, „T” character will be shown in the upper row on
the display.
Enter the Main menu by pressing Ent together with Esc button.
Esc button
Generally used to exit from menus, or cancelling changes.
Switch between 1 step/button pressing and StepsPerClick stepping mode by
pressing down Esc for 1 sec. „1” or „*” is shown at the upper row on the
display.
Enter the Main menu by pressing Esc together with Ent button.
Goto button
To reach the Goto quick menu, press this button for 1 sec.

LACERTA MOTORFOCUS 16 2016
Goto menu
This menu contains often used functions and position settings.
Press the Up (or Down) button to scroll though the menu items in a circle, and
finish by Esc:
GoStartPos:
Movement to the stored position. After pressing Ent button ("Set" is shown on
the display) this value is modifiable by the In/Out buttons. GoStartPos text
becomes GotoPos. after modification. You can move the focuser to the
selected position by pressing again Ent button. If you would like to exit from
this menu, press Esc button. When the focuser is under movement, the
position value on the screen becomes „Move”. The focuser moves dynamic.
Long voice signal indicates when the focuser reaches required position, then
the controller leaves the Goto Select menu automatically. The focuser stops
immediately when you push Esc button for 0,5 seconds! (Emergency stop)
GoFilt0Pos:
Movement to Clear filter (base filter) position. This menu always shows
the initial (or modified) base position. The modified position is calculated
by filter the wheel position and TempTrack corrections if it’s activated.
This is the default filter position and this is the base from which the
Offset values are calculated. This way filters of slightly varying
thickness can be programmed. e.g. there are 2 filter using Pos0, 3
filters using Pos1 and 1 filter using Pos.2. There are this base position
and 3 user defined offset positions possible – 4 alltogether.
Go Offset1, Go Offset2, Go Offset3:
Moves the focuser by this pre-set value, when changing the filter wheel
manually. If this is the active Offset, the device exits from menu without
movement.
Save Pos.:
This position is the stored value for the GoStartPos menu. If
StartSavedPos function is activated, it will be shown as the wake up
position after turning on the device. It’s also possible to modify the
stored value by In/Out buttons. Press Esc button to exit without
modification.
SetOffset1, SetOffset2, SetOffset3
To compensate focus deviations with different filters, you can set an
offset of +/- 50 steps in this menu. If you push Esc or Ent,the device
doesn’t exit from whole GotoSelect menu to reach other Offset
settings faster.

LACERTA MOTORFOCUS 17 2016
Main menu
Push Esc and Ent at the same time to reach the Main menu, Use In/out to select an
entry and press Ent to enter it. Here you can find the following settings:
Focuser menu:
Backlash:
The value of basic backlash compensation (the value can be between 0 and
255). Backlash compensation takes place only when the rotational direction of
the motor is changing (in/out).The movement of motor increases by this value,
without counting the backlash steps, when the direction of motor rotation is
changing. The idea is to correlate the counter with the focuser position, not the
motor position.
The process when the direction of motor revolution is changing:
Backlash (position uncounted) + Steps (position counted)
If this function is activated (the value is not 0) the ’B’ character will appear at
the upper row of the display.
Of course it is necessary to determine the backlash of your system first. You
can measure the correct value of backlash using the following simple method
indoors, or use a star instead:
Mount a Dial indicator to your focuser, then move focuser to any position (e.g.
Pos: 1000). Reset dial indicator and Backlash value. Activate single stepping
mode, than move focuser further in the same direction (e.g Pos: 1050). After
that move back the focuser, until the dial indicator reaches 0 again. Read the
position on the display (e.g Pos: 975). Because the motor needs 25 more
steps to reach the absolute position, write 25 to Backlash value and repeat the
process to recheck.
Tip!
This process is also suitable to define the resolution of our system (mm/step).
Do this calibration method at focus position, because the backlash is not equal
in every focuser position due to deviations of gear teeth profiles and motor
stepping angles (approx. +/- 5% at full step).
BacklChg:
The Backlash change is the step limit of switching between two backlash
copensation modes (the value is from 0 to 50). The „Basic” backlash
compensation is accurate in case of small motor movements at specified
position (functionally around the right focus position), but it’s not working with
enough accuracy in case of large movements. That’s why the method in case
of large movements is approaching the desired position from one direction
only (in or out) to eliminate any backlash. To move 15 steps out it would move
e.g. 100 steps out and 85 in, to reach the position. This is very precise. Below

LACERTA MOTORFOCUS 18 2016
the limit the „basic” backlash compensation is in use, above the limit the
„approaching from one direction only” is in use.
Attention: Please use „basic” backlash compensation exclusively when
the Temperature compensation is active without Exposure monitoring,
because the photo may defocused due to focusmotor movement while an
exposure is going on!
BacklMultp:
(Backlash Multiplier, the value is from 1 to 10) is a factor determining the
"overdose" of backlash correction for the „approaching from one direction only”
method. (Backlash value is multiplied with BacklMultp). The movement to the
Out direction is as usual without compensation. But if the movement is to the
In direction, the step number of the motor is increased by the given value, and
then the motor moves back in the Out direction by this same value to reach
the desired position from the Out direction only. Because backlash appears in
both directions, these two backlashs in different directions cancel out each
other precisely and the focuser position can be reproduced exactly.
No compensation to Out direction.
To In direction the formula of the compensation is the following:
In = Step + (Backlash*BacklMultp)
Out = (Backlash*BacklMultp)
In this case the final movement direction is only Out.
If the last movement direction was In using „Basic backlash compensation”,
and the motor steps at movement to In direction exceed the BacklChg value,
then the compensation formula is the following:
Out = Backlash (position uncounted)
In = Step + (Backlash*BacklMultp)
Out = (Backlash*BacklMultp)
Pos.Max.:
Limits the maximal focuser position. This value is adjustable dynamically
between 300 and 65535. (The default value is 15000, the maximum travel of
Octo60 focuser.)
TempComp:
Step numbers per 10 degrees temperature difference, this value may be
between +/-5000.
Comment:
The temperature data refreshes about every 30 sec., or at the end of
exposure. The initial temperature and Focuser position will be saved, these
will be the base of Temperature compensation. If the Focuser position is
modified manually or by ASCOM, this new position will be the base of
Temperature compensation.
Tip – how to calculate the TempComp value
Adjust focus at two different temperatures. E.g the accurate focus position is
at position 540 when the temperature is 18,2°C. Later, the accurate focus

LACERTA MOTORFOCUS 19 2016
position is at 558 position at 15,5°C. Calculate the compensation value with
the following formula: ((18 steps / 2,7°C)*10°C= 66 steps / 10°C
TempTrackDir:
Direction of temperature compensation, to prevent the activation of backlash
compensation in a certain direction if the temperature changing is only small
and probably random: - In
- Out
- All
e.g. when temperatures are generally dropping during the night, a refractor will
only need In compensations, and any Out compensation can be ignored.
Select In.
Activate temperature compensation with pressing Ent button for 1 sec (or with
ASCOM). In this case ’T’ character will be at the upper row of display.
Comment: This function is switchable by ASCOM compatible software!
(MaximDL, FocusMax) If the motor reaches the limit, the TempTrack function
will switch off automatically! This function is inactive after swiching on the
device, but it has function button (Ent) to reach faster this function. Do not
forget to set enough time between exposures for temperature compensation!
A speciality of LACERTA MOTORFOCUS is, that it has the possibility of
exposure monitoring when using Lacerta MGEN autoguider. Plug in the
camera cable from MGEN into the plug at the motor side, and plug in another
camera cable to go to your camera. The motor then recognizes the shutter
signal, and that prevents temperature compensation movements while an
exposure is going on. Only at the end of the exposure, when the shutter signal
is off, the controller starts temperature compensation if it’s necessary.
Handcontrol menu:
StepsPerClick:
Steps per pressing the In/Out buttons once. This value is adjustable between 2
and 255.
Backlight:
Display brightness adjustment, from 1 to 10.
BeepVolume:
3 options for adjusting sound volume:
Mute
Silent
Loud
Contrast:
Display contrast adjustment, from 1 to 10.
StartSavedPos: yes or no

LACERTA MOTORFOCUS 20 2016
Turn on/off position usage in GotoSelect/Save Pos menu as initial position
after turning on the device.
FactoryReset:
Restore setting to factory default. Restart is needed!
Motor menu:
Cur.Hold.:
Setting of motor holding current:
160mA, 400mA, 600mA, 800mA
Motor holding current gets active one minute after last movement.
Cur.Mov.:
Peak of motor moving current:
160mA, 400mA, 600mA, 800mA
Direction:
Direction of motor revolution in Out direction. (CW or CCW)
Clockwise or counter clockwise. To correlate the revolution of the motor wit the
focuser movement.
ASCOM mode:
LACERTA MOTORFOCUS is controllable by ASCOM compatible software on PC
(tested with Astroart 4, Astro Photography Tool 2.82, DSLR Focus V3, FindFocus
1.2.0.0, FocusMax 3.8.0.20, Maxim DL 5.15, SharpCap 1.5.0.344). After connection
the ’A’ character will be at the upper row of display. ASCOM reads current position of
LACERTA MOTORFOCUS, the measured temperature and the value of FocusMax.
All buttons on the handbox are functionable. Operations of different softwares are
different. E.g. the AA4, APT, FocusMax and MaximDL refresh position data every
second, so the position adjustment on LACERTA MOTORFOCUS, the position
change appears immediately in program. Other tested programs refresh values only
after giving a command for movement to a new position, so you can’t see changes of
values on the PC screen after position adjustment on the device directly.
Some of ASCOM compatible softwares support Backlash compensation and
Temperature compensation.
If you would like to use Backlash compensation from PC software, set this value to
0 in LACERTA MOTORFOCUS menu! DSLR Focus, FocusMax and MaximDL use
approaching from one side method to eliminate backlash. Approaching direction is
adjustable (In or Out).
The temperature compensation function of suitable ASCOM compatible software use
the feature of LACERTA MOTORFOCUS, which is activatable or not. Device settings
will be overwritten by ASCOM. Some ASCOM compatible software have a custom
algorithm for temperature compensation. If you would like to use this custom method,
set 0 value in TempComp menu and deactivate TempTrack on device.
Table of contents
Other ASCOM Controllers manuals