Ascot 302-05601 User manual

OPERATING MANUAL
ASCOT SUPPLY
2-TON LOW-PROFILE
FLOOR JACK
302-05601
AS5601
MAKE SURE TO READ AND FULLY UNDERSTAND THE INSTRUCTION MANUAL BEFORE USING THIS PRODUCT

TABLE OF CONTENTS
General Description & Safety............................................................................ 1
Warnings................................................................................................................ 2
Assembly................................................................................................................ 3
Hydraulic System Purging ................................................................................ 4
Operating Instructions....................................................................................... 5
Maintenance ......................................................................................................... 6
Troubleshooting................................................................................................... 7
Exploded View & Parts List................................................................................ 8
Warranty Information......................................................................................... 9

GENERAL DESCRIPTION & SAFETY
Product Description
Hydraulic service jack is designed to lift, but not support, one end of a vehicle. Immediately after lifting,
loads must be supported by a pair of appropriately rated jack stands.
Specifications
Capacity 2-Ton
Minimum Height 2 3/4”
Maximum Height 24”
Hydraulic Lift Range 21 1/4”
Length 31 3/4”
Weight 102.3 lbs.
Safety Information
Important: Read these instructions carefully.
NOTE THE SAFE OPERATIONAL REQUIREMENTS, WARNINGS AND CAUTIONS. USE THIS JACK CORRECTLY AND
WITH CARE FOR THE PURPOSE FOR WHICH IT IS INTENDED. Failure to do so may cause damage or personal
injury and will invalidate the warranty. Retain THESE INSTRUCTIONS for future use.
To avoid personal injury or property damage during operation, read and follow all CAUTIONS, WARNINGS and
INSTRUCTIONS, included with or attached to each product.
WE CANNOT BE RESPONSIBLE FOR DAMAGE OR INJURY RESULTING FROM UNSAFE USE OF PRODUCT, LACK OF
MAINTENANCE OR INCORRECT PRODUCT AND SYSTEM APPLICATION.
Contact us when in doubt as to safety precautions or applications.
1

WARNINGS
1) Locate the jack in a suitable working area.
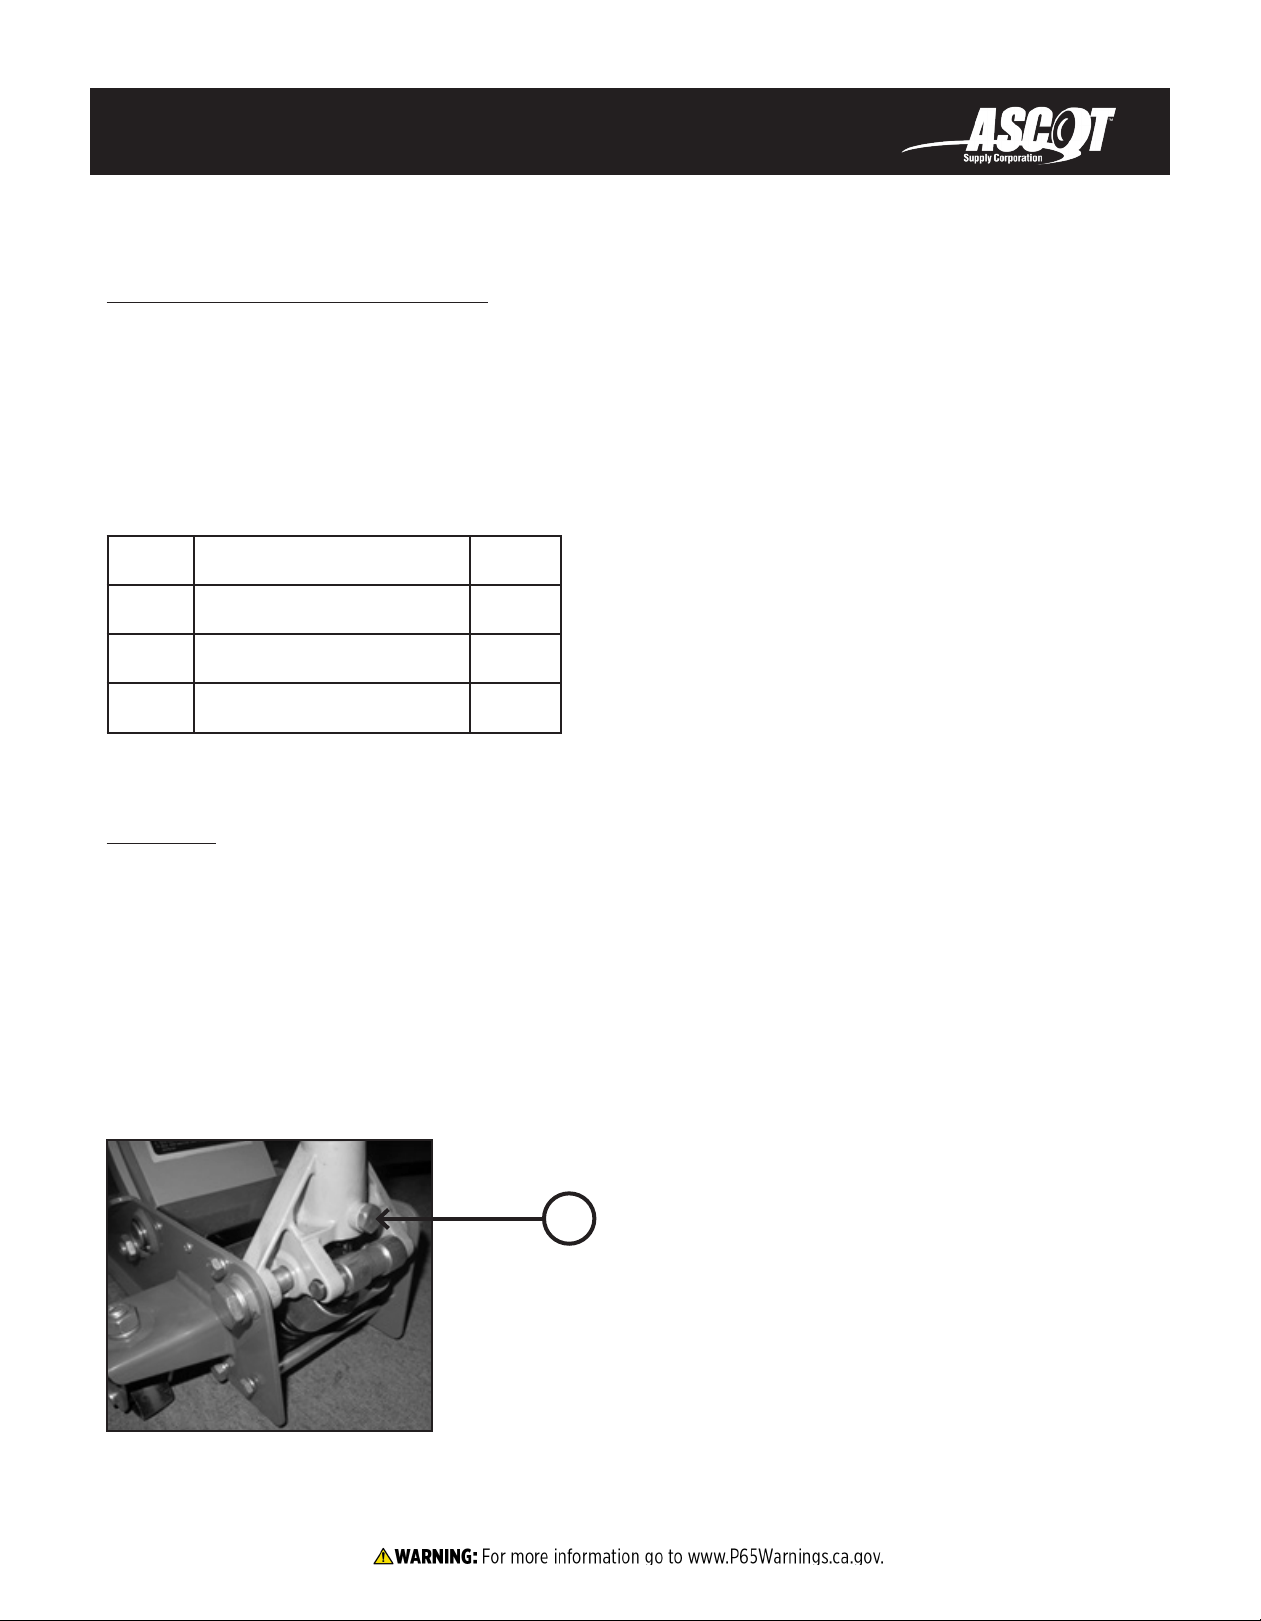
2) Inspect the jack before each use. Do not use jack if damaged, altered, modified, in poor condition, leaking
hydraulic fluid or unstable due to loose or missing hardware or parts. Make corrections before using.
3) Use jack on level and solid ground, preferably concrete. Avoid tar macadam as jack may sink in. Chock
wheels of vehicle.
4) Ensure the vehicle’s parking brake is engaged, engine is switched off and transmission is in gear (or
“PARK” if automatic).
5) Ensure minimum distance of 2 feet between vehicle and static objects such as doors, walls, etc. to allow
for vehicle tilting.
6) Ensure all non-essential persons keep a safe distance while the jack is in use.
7) Ensure there are no passengers in the vehicle.
8) Place jack under only those lifting points recommended by vehicle manufacturer (see vehicle’s owner’s
manual).
9) Check that the lifting point is stable and centered on the jack saddle.
10) Ensure the jack wheels are free to move and that there are no obstructions.
Danger: Use the jack for lifting only!
11) Ensure there are no persons or obstructions beneath the vehicle before lowering.
12) Use a pair of suitable axle stands under the vehicle before proceeding with any task.
13) Use a qualified person to lubricate and maintain the jack.
14) Wear ANSI-approved safety goggles and heavy duty work gloves during use.
15) Ensure that only hydraulic jack oil is used in the jack.
DO NOT operate the jack if damaged.
DO NOT allow untrained persons to operate the jack.
DO NOT exceed the rated capacity of the jack.
DO NOT allow the vehicle to move during lifting or lowering, or use the jack to move the vehicle.
DO NOT jack vehicle if there is a risk of spillage of fuel, battery acid or other dangerous substances.
DO NOT work under the vehicle until appropriately rated axle stands have been correctly positioned.
DO NOT fill hydraulic system with brake fluid, alcohol or transmission oil. Use hydraulic jack oil only.
DO NOT adjust the safety overload valve.
DO NOT use for aircraft purposes.
16) When not in use store jack, fully lowered, in a safe, dry, childproof location.
17) The warnings, precautions and instructions discussed in this manual cannot cover all possible conditions
and situations that may occur.
2

ASSEMBLY
Important Receiving Instructions
Visually inspect all components for shipping damage. If any shipping damage is found, notify carrier at once.
Shipping damage is NOT covered by warranty. The carrier is responsible for all repair and/or replacement cost
resulting from damage in shipment.
Check the parts in the carton. Visually inspect all components for any missing parts or damage. Refer to the
below packing list.
No. Description Qty.
1 Handle 1
2 Jack Body 1
3 Instruction Manual 1
Assembly
1. The jack comprises the following parts: Jack body & Handle.
2. The handle socket is pressed down and supported by nylon supporting block in the package during
transportation. Before assembling, please take out the nylon supporting block.
3. Undo the screw (B) in the handle socket, until it no longer protrudes into the handle socket.
4. Insert the pump handle into the handle socket hole completely.
5. Ensure that the handle is correctly inserted into the socket, then tighten the handle socket screw (B). Please
make sure that the handle can be turned smoothly.
B
3

HYDRAULIC SYSTEM PURGING
To purge hydraulic system:
1. Open the release valve by turning it two full turns counter-clockwise.
2. Quickly pump the handle a minimum of four full strokes.
3. Close the release valve by turning it clockwise.
4. Pumping the handle with full strokes to check if it can reach the maximum height by ten pumps.
If it can’t reach the maximum height by ten pumps, please refer to the following
special purging process:
5. Open the release valve by turning counter-clockwise and lower the lifting arm to the minimum height.
6. Put the jack on a flat working table, lift the front part of the jack to make sure the front part is at least 20”
higher than the end part of the jack. See the following picture.
7. Quickly pump the handle a minimum of four full strokes.
8. Put the jack on a flat surface and close the release valve by turning it clockwise.
9. Pumping the handle with full strokes to check if it can reach the maximum height by ten pumps, if not
please repeat the special purging process again.
4

OPERATING INSTRUCTIONS
Lifting a Vehicle
1. Ensure that the jack and the vehicle are on a hard, level surface.
2. Always ensure that the vehicle’s parking brake is engaged and that the vehicle’s wheels are chocked.
3. Consult the vehicle’s owner’s manual to determine the location of jacking points. Position the jack under a
suitable lifting point.
4. Turn the handle clockwise, to close release valve. DO NOT over-tighten.
5. Lift the vehicle to the desired height by pumping the handle up and down.
6. Place axle stands beneath the locations recommended by the vehicle manufacturer.
7. Turn the release valve slowly counter-clockwise to lower the vehicle on to the axle stands.
Lowering a Vehicle
1. Turn the release valve clockwise to close it.
2. Pump the handle to lift the vehicle off the axle stands.
3. Remove the axle stands from beneath the vehicle.
4. Turn the release valve slowly counter-clockwise to lower the vehicle to the ground.
NOTE: When the jack not in use, ALWAYS leave the saddle and ram fully retracted.
CAUTION: Keep hands and feet away from the hinge mechanism of the jack.
IMPORTANT: Only fully qualified personnel should attempt maintenance or repair.
5

MAINTENANCE
Monthly Maintenance
Lubrication is critical to jacks, since they support heavy loads. Any restriction due to dirt or rust can cause
either slow jack movement or extremely rapid jerks, causing damage to the internal components. To keep
the jack well lubricated, carry out the following steps.
1. Lubricate the linkages, the saddle and pump mechanism with light oil
2. Grease the wheel bearing and axles.
3. Keep all jack surfaces and warning labels clean.
Three-Month Maintenance
At three-month intervals, check the pump for any signs of rust or corrosion. Clean the pump as required and
wipe with an oil cloth.
Linkage (1) Linkage (2)
Roller pin (Right) Roller pin (Left) Lifting arm
6

TROUBLESHOOTING
PROBLEM CAUSE REMEDY
Jack will not lift to full height 1. Oil level low
2. Release valve not closing
1. Check / add oil
2. Close the release valve
Jack will not hold the load 1. Release valve not closing
2. Hydraulic oil contaminated
3. Pump leaking
1. Close the release valve
2 & 3. Contact authorized
service agent
Lift arm will not lower 1. Pump cylinder binding
2. Parts worn
3. Internal component damage
4. Return spring broken or unhooked
5. Lift arm linkage either bent or binding
6. Still have air in the hydraulic system
Contact authorized service agent
After hydraulic purging, the
jack still can reach the
maximum by 10 pumps
Open the release valve by turning
counter-clockwise and lower the
lifting arm to the minimum height.
Poor lift performance 1. Fluid level low
2. Hydraulic unit malfunction
1. Ensure proper fluid level
2. Discontinue use, contact
authorized service agent
7

EXPLODED VIEW & PARTS LIST
NO. DESCRIPTION QUANTITY
1HANDLE ASSY 1
2 HANDLE SLEEVE 1
3 RETAINING RING 1
4 PEDAL 1
5 PIN 1
6PUMP CORE WHEEL 1
7 BOLT 1
8LOCK WASHER 1
9 LIMITING ROD 2
10 SPRING 1
11 HANDLE BASE 1
12 SCREW 1
13 LOCK WASHER 1
14 BOLT 1
15 TOOLS PLATE 1
16 NUT 2
17 LOCK WASHER 4
18 WASHER 2
19 CASTOR 2
20 LOCK WASHER 4
21 BOLT 4
22 BOLT 4
23 LOCK WASHER 4
24 RETAINING RING 2
NO. DESCRIPTION QUANTITY
25 NUT 2
26 ADJUST SCREW 2
27 FRAME ASSY 1
28 RIGHT ADJUSTABLE PLATE 1
29 LEFT ADJUSTABLE PLATE 1
30 FIXED WHEEL 2
31 WASHER 2
32 RETAINING RING 2
33 OIL CUP 1
34 LIFTING STRUCTURE 1
35 LIFTING SHAFT 1
36 RUBBER PAD 1
37 SCREW 1
38 SADDLE 1
39 RETAINING RING 2
40 PUMP ASSY 1
41 SPRING 2
42 PIN 1
43 RETAINING RING 2
44 ROD ASSY 1
45 SCREW 4
8

WARRANTY INFORMATION
9
ONE YEAR LIMITED WARRANTY
For a period of one (1) year from your purchase date, distributor will repair or replace (at its option),
without charge, your product if it was purchased new and the product has failed due to a defect in
material or workmanship which you experienced during normal use of the product. This limited warranty
is your exclusive remedy.
To access the benefits of this warranty, contact your distributor for confirmation that this warranty
applies. Thereafter, you may be advised to return the product under warranty, freight prepaid, to the
distributor service department.
If this product is altered, abused, misused, modified or undergoes service by an unauthorized technician,
your warranty will be void. We are not responsible for damage to ornamental designs you place on
this product and such ornamentation should not cover any warnings or instructions or it may void the
warranty. This warranty does not cover scratches, superficial dents and other abrasions to the paint finish
that occur under normal use.
Subject to the law in your state:
(1) Your sole and exclusive remedy is repair or replacement of the defective product as described above.
(2) Distributor is not liable for any incidental damages, including but not limited to, lost profits and
unforeseeable consequences.
(3) The repair and replacement of this product under the express limited warranty described above
is your exclusive remedy and is provided in lieu of all other warranties, express or implied. All other
warranties, including implied warranties and warranties of merchantability or fitness for a particular
purpose are disclaimed and, if disclaimer is prohibited, these warranties are limited to one year from
your date of purchase of this product. Some states’ laws do not allow limited durations on certain implied
warranties and some states’ laws do not allow limitations on incidental or consequential damages. You
should consult the law in your state to determine how your rights may vary.
This manual suits for next models
1
Table of contents
Other Ascot Jack manuals
Popular Jack manuals by other brands

Kennedy
Kennedy T556 instruction manual

Sealey
Sealey 2500LE instructions

Halfords
Halfords TH90204 instruction manual

ATD Tools
ATD Tools ATD-7431A owner's manual

Days
Days EQUALIZER SYSTEMS AM Series Installation and operation guide

QUALITY LIFTS
QUALITY LIFTS QRJ03H Installation, operation & maintenance manual