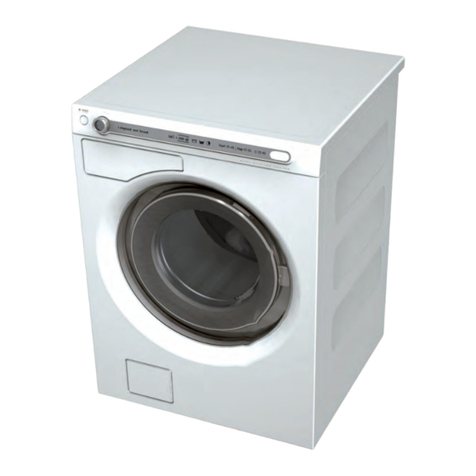
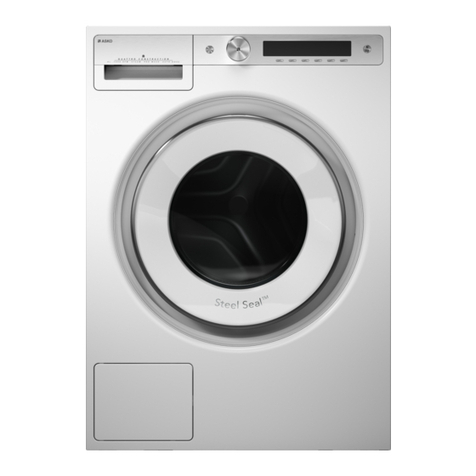
Asko WM70 User manual

Service manual:Washing machine
Type:WM70

Service manual WM70
2

Type:WM70
Service manual
Contents
Updates...................................................................................................................................................................... 4
Introduction ............................................................................................................................................................. 5
Troubleshooting strategy.................................................................................................................................. 6
WM70.1 Overview Panel............................................................................................................................ 7
Service menu ................................................................................................................................ 8
Fault indications..........................................................................................................................10
Wiring diagram WM70.1 CIM ...........................................................................................12
Wiring diagram WM70.1 UM ............................................................................................14
WM70.2 Overview Panel..........................................................................................................................16
Service menu...............................................................................................................................17
Fault indications..........................................................................................................................18
Wiring diagram WM70.2 .....................................................................................................20
WM70.3 Overview Panel..........................................................................................................................22
Service menu...............................................................................................................................23
Shop program .............................................................................................................................28
Fault indications..........................................................................................................................29
Wiring diagram WM70.3 ......................................................................................................32
Components and measurement values WM70................................................................................34
Thermistor measurement values WM70..............................................................................................35
Technical data WM70.......................................................................................................................................35
Tools...........................................................................................................................................................................36
Rehanging the door...........................................................................................................................................37
Replacing panels, control unit and detergent compartment.....................................................40
Replacing front panel, door, cover plate and the hinges...............................................................43
Emergency opener for door lock..............................................................................................................44
Wash agitator removal....................................................................................................................................45

Service manual WM70
4
Updates
Rev Date Description Sign
01 2010-10-06 First version developed BPA
02 2010-10-12 Service menu WM70.1, WM70.2, WM70.3 updated ISC
03 2012-04-20 Replacing front panel, door, cover plate and the hinges updated EH

Service manual WM70
5
Introduction
You are holding the service manual for WM70 type washing machines.
It should be easy to service a washing machine. It is important that you, as a service technician, are
given the conditions to be able to carry out work in an efficient and satisfactory way. Our hope is
that this service manual is a useful tool for your daily work.
The type designation is located by the inside of the glass door (see image below).
Asko Appliances AB
SE-534 82 Vara
Sweden
WM 60.C
Type designation
Product number Serial number
Year Week
WM70
OPERATING INSTRUCTIONS
Always have the operating instructions for the machine available during service

Service manual WM70
6
Troubleshooting strategy
Troubleshooting is an important part of the service callout, and as such we have drawn up a
troubleshooting strategy that describes, in broad terms and step by step, what you need to do to find
and diagnose faults arising in our machines.
• Ask the customer to describe the problem.
• Check whether the customer’s description matches the reported fault.
• Check that the machine is correctly installed:
- Electrical connection - Drainage
- Water connection - Machine correctly levelled
Fault
found?
Incorrect installation or external factors that affect performance and functionality (for
example, water pressure, electrical supply, drainage).
The machine operates normally. No deviations can be found. The customer probably
needs to be informed about proper use of the machine. If necessary, also inform the
customer about the guarantee conditions and the fact that the customer will be charged
for the callout.
Yes
Open the service menu:
1. Check the settings
2. Run a test cycle
3. Note any fault codes
If the above actions do not uncover the fault:
• Conduct general troubleshooting. Use the documentation available at ServiceSaver
(service manuals, service memos, wiring diagrams and other documents).
Yes
No
No
Fault
diagnosed?
Repair and check
function/safety.
Carry out the actions
suggested by technical
support.
Satisfied customer!
OK?
No
Yes
No
Yes
Fault
found?
Contact technical support
for assistance.

Service manual WM70
7
Overview: Panel WM70.1
Programs: 10
Options: 4 or 6
Settings: 1
20°
30°
40°
50°
60°
95°
800
1400
1000
400
20°
30°
40°
50°
60°
95°
800
1600
1200
400

Service manual WM70
8
Service menu WM70.1
S1
S1
S2 S3 S4
S6
S7
S9 S10 S11
S3 S4 S7
S9 S10 S11
How to get to the service menu
Is the machine turned on: turn off the power first at the main switch.
+Press and hold the button for super wash (S4) while you press the main switch.
Press button (S4) three times within 5 seconds. You are about to component
testing.
Turn/press SCREENING Comments/Instructions
No component
Intake valve 1 starting
Intake valve 2 starting
Intake valve 1 and 2 starting
Heater starts and warms up to a maximum of 60 ° C
Drain pump starts
Spin and drain pump starts
Door opening

Service manual WM70
9
Service menu WM70.1 cont.
Press the Start/Stop button to exit the service menu
”Auto door on/off”
Ad O ”Auto door on”
Ad F ”Auto door off”
Press button (S11) to store your selection
”Extra rinses Off/On”
r F ”Extra rinses off” - 3 rinses
r 0 ”Extra rinses On” 5 rinses
Press button (S11) to store your selection
+
Stop
Stop
+

Service manual WM70
10
Fault indications WM70.1
Error messages on the display Cause Action
F10 – Overflow Too much water in the
machine.
Service action:
- Check the machine's level system, inlet valve
and drainage pump.
- Check for any leaks.
The drainage pump is
running but the machine
is empty.
Service action:
- The overflow cut-out at the bottom of the
machine has been activated (some models
only).
- Check for leaks.
F11 - Water outlet fault The drainage pump
has been running for 3
minutes. Water remains
in the machine.
The wash cycle has been
interrupted and the
programme reset.
Information to customer:
- Check that no objects are stuck in the
drainage hose outlet.
- Check that the drainage pump is not
blocked by foreign objects.
- Check that there are no kinks in the
drainage hose.
Service action:
- If the pump only runs for a short while
(approximately 20 seconds), this indicates
a fault in the level system. Check the level
sensor and hoses.
- Check wiring and voltage to the pump. If
necessary, replace the pump and/or control
unit. After implementing corrective action,
run the Drain programme or press the
Key (door opening) button to empty the
machine.
F12 – Water inlet fault If the correct water level
is not achieved within 5
minutes the wash cycle
will be interrupted.
Information to customer:
- Check that the tap on the water pipe is open.
Service action:
- Check that the filter in the machine's water
intake is not blocked.
- Check the inlet valve. If necessary, replace
the valve.
- Check voltage to the inlet valve. If there is
no voltage, this could be due to a fault in
the level system, wiring or control unit.
- Unbalance detection After 10 failed attempets
to spin the load the
machine has stoped to
spin beacuse of to high
umbalance.
Information to customer:
- Small loads with heavy items can cause this
problem when these articles are difficult to
redistribute.

Service manual WM70
11
PERSONAL NOTES

Service manual WM70
12
Wiring diagram WM70.1 CIM
This document must not be copied without
our written pemission, and the contents
thereof must not be imparted to a third party
nor be used for any unauthorized purpose.
Contravention will be prosecuted.
Asko Appliances AB
CIRCUIT DIAGRAM WM70.1 CIM
80 886 20 - 01
RESISTANCES AT ROOM TEMPERATURE (CA. 20°C/68°F)
VALUES WITHIN +/-10% ARE REGARDED AS NORMAL COMPONENT
F: RADIO INTERFERENCE SUPPRESSION FILTER 680K Ohm
EL: HEATING ELEMENT 25 Ohm
AP: DRAIN PUMP 50 Hz 144 Ohm
AP: DRAIN PUMP 60 Hz 76 Ohm
LL: DOOR LOCK, 1-2 122 Ohm
NTC: THERMISTOR 6.1 - 3.8 K Ohm
IV 1: INLET VALVE 1 3.7 K Ohm
IV 2: INLET VALVE 2 3.7 K Ohm
MO: MOTOR, 1-3 4,3±7% Ohm
1-2 4,3±7% Ohm
2-3 4,3±7% Ohm
MCU: MOTOR CONTROL UNIT
N: PRESSURE SWITCH
TS: PRESSURE SENSOR
TG: TACHO GENERATOR
BA: CONTAINER
INKB: INCOMING GROUND
WIRES IN ALL MACHINES
INTERNAL CONNECTION
*A FUSE CONNECTION USA & CANADA
EL
IV2
IV1
<N
N14
N12
N16
N11
NTC
EL
F
INKB
BA
AP
LL
L
N
3
1
2
*A
*A
2010-10-19
TOTAL RESET
TURN OFF POWER (S1)
WAIT FOR AT LEAST 5 SEC
HOLD DOOR OPENING (S11)
TURN ON POWER (S1)
CABLE POSITIONS
1: MOTOR COMMUNICATION
2: THERMISTOR
3: INLET VALVES
4: DOOR LOCK, DRAIN PUMP, PREASSURE SWITCH
8: POWER
9: HEATING ELEMENT, PREASSURE SWITCH
10: MOTOR POWER
MCU
MO
TG
S1 S11S10
S4S2 S3
S6
S7
S9
SERVICE MENU
TURN OFF POWER (S1)
WAIT FOR AT LEAST 5 SEC
HOLD START/STOP (S10)
TURN ON POWER (S1)
PRESS START/STOP (S10) 5 TIMES TO ENTER SERVICE MENU
PRESS DOOR OPENING (S11) TO CHANGE MENU STEP
ROTATE DIAL TO CHANGE IN STEP
PRESSING START/STOP (S10) STORES AND EXITS SERVICE MENU

Service manual WM70
13
This document must not be copied without
our written pemission, and the contents
thereof must not be imparted to a third party
nor be used for any unauthorized purpose.
Contravention will be prosecuted.
Asko Appliances AB
CIRCUIT DIAGRAM WM70.1 CIM
80 886 20 - 01
RESISTANCES AT ROOM TEMPERATURE (CA. 20°C/68°F)
VALUES WITHIN +/-10% ARE REGARDED AS NORMAL COMPONENT
F: RADIO INTERFERENCE SUPPRESSION FILTER 680K Ohm
EL: HEATING ELEMENT 25 Ohm
AP: DRAIN PUMP 50 Hz 144 Ohm
AP: DRAIN PUMP 60 Hz 76 Ohm
LL: DOOR LOCK, 1-2 122 Ohm
NTC: THERMISTOR 6.1 - 3.8 K Ohm
IV 1: INLET VALVE 1 3.7 K Ohm
IV 2: INLET VALVE 2 3.7 K Ohm
MO: MOTOR, 1-3 4,3±7% Ohm
1-2 4,3±7% Ohm
2-3 4,3±7% Ohm
MCU: MOTOR CONTROL UNIT
N: PRESSURE SWITCH
TS: PRESSURE SENSOR
TG: TACHO GENERATOR
BA: CONTAINER
INKB: INCOMING GROUND
WIRES IN ALL MACHINES
INTERNAL CONNECTION
*A FUSE CONNECTION USA & CANADA
EL
IV2
IV1
<N
N14
N12
N16
N11
NTC
EL
F
INKB
BA
AP
LL
L
N
3
1
2
*A
*A
2010-10-19
TOTAL RESET
TURN OFF POWER (S1)
WAIT FOR AT LEAST 5 SEC
HOLD DOOR OPENING (S11)
TURN ON POWER (S1)
CABLE POSITIONS
1: MOTOR COMMUNICATION
2: THERMISTOR
3: INLET VALVES
4: DOOR LOCK, DRAIN PUMP, PREASSURE SWITCH
8: POWER
9: HEATING ELEMENT, PREASSURE SWITCH
10: MOTOR POWER
MCU
MO
TG
S1 S11S10
S4S2 S3
S6
S7
S9
SERVICE MENU
TURN OFF POWER (S1)
WAIT FOR AT LEAST 5 SEC
HOLD START/STOP (S10)
TURN ON POWER (S1)
PRESS START/STOP (S10) 5 TIMES TO ENTER SERVICE MENU
PRESS DOOR OPENING (S11) TO CHANGE MENU STEP
ROTATE DIAL TO CHANGE IN STEP
PRESSING START/STOP (S10) STORES AND EXITS SERVICE MENU
Wiring diagram WM70.1 CIM

Service manual WM70
14
Wiring diagram WM70.1 UM
This document must not be copied without
our written pemission, and the contents
thereof must not be imparted to a third party
nor be used for any unauthorized purpose.
Contravention will be prosecuted.
Asko Appliances AB
CIRCUIT DIAGRAM WM70.1
80 886 21-02
RESISTANCES AT ROOM TEMPERATURE (CA. 20°C/68°F)
VALUES WITHIN +/-10% ARE REGARDED AS NORMAL COMPONENT
F: RADIO INTERFERENCE SUPPRESSION FILTER 680K Ohm
EL: HEATING ELEMENT 25 Ohm
AP: DRAIN PUMP 50 Hz 144 Ohm
AP: DRAIN PUMP 60 Hz 76 Ohm
LL: DOOR LOCK, 1-2 122 Ohm
NTC: THERMISTOR 6.1 - 3.8 K Ohm
IV 1: INLET VALVE 1 3.7 K Ohm
IV 2: INLET VALVE 2 3.7 K Ohm
MO: MOTOR, 1-3 3,7±7% Ohm
1-2 3,6±7% Ohm
2-3 3,6±7% Ohm
MCU: MOTOR CONTROL UNIT
N: PRESSURE SWITCH
TS: PRESSURE SENSOR
TG: TACHO GENERATOR
BA: CONTAINER
INKB: INCOMING GROUND
WIRES IN ALL MACHINES
INTERNAL CONNECTION
*A FUSE CONNECTION USA & CANADA
EL
IV2
IV1
<N
N14
N12
N16
N11
NTC
EL F
INKB
BA
AP
LL
MO
3
2
1
L
N
3
1
2
TG
*A
*A
TOTAL RESET
TURN OFF POWER (S1)
WAIT FOR AT LEAST 5 SEC
HOLD DOOR OPENING (S11)
TURN ON POWER (S1)
CABLE POSITIONS
2: THERMISTOR
3: INLET VALVES
4: DOOR LOCK, DRAIN PUMP, PREASSURE SWITCH
8: POWER
9: HEATING ELEMENT, PREASSURE SWITCH
10: MOTOR COMMUNICATION, MOTOR POWER
S4
S10 S11
S1
S3 S7
S9
2010-10-27
SERVICE MENU
TURN OFF POWER (S1)
WAIT FOR AT LEAST 5 SEC
HOLD START/STOP (S10)
TURN ON POWER (S1)
PRESS START/STOP (S10) 5 TIMES TO ENTER SERVICE MENU
PRESS DOOR OPENING (S11) TO CHANGE MENU STEP
ROTATE DIAL TO CHANGE IN STEP
PRESSING START/STOP (S10) STORES AND EXITS SERVICE MENU
RO

Service manual WM70
15
This document must not be copied without
our written pemission, and the contents
thereof must not be imparted to a third party
nor be used for any unauthorized purpose.
Contravention will be prosecuted.
Asko Appliances AB
CIRCUIT DIAGRAM WM70.1
80 886 21-02
RESISTANCES AT ROOM TEMPERATURE (CA. 20°C/68°F)
VALUES WITHIN +/-10% ARE REGARDED AS NORMAL COMPONENT
F: RADIO INTERFERENCE SUPPRESSION FILTER 680K Ohm
EL: HEATING ELEMENT 25 Ohm
AP: DRAIN PUMP 50 Hz 144 Ohm
AP: DRAIN PUMP 60 Hz 76 Ohm
LL: DOOR LOCK, 1-2 122 Ohm
NTC: THERMISTOR 6.1 - 3.8 K Ohm
IV 1: INLET VALVE 1 3.7 K Ohm
IV 2: INLET VALVE 2 3.7 K Ohm
MO: MOTOR, 1-3 3,7±7% Ohm
1-2 3,6±7% Ohm
2-3 3,6±7% Ohm
MCU: MOTOR CONTROL UNIT
N: PRESSURE SWITCH
TS: PRESSURE SENSOR
TG: TACHO GENERATOR
BA: CONTAINER
INKB: INCOMING GROUND
WIRES IN ALL MACHINES
INTERNAL CONNECTION
*A FUSE CONNECTION USA & CANADA
EL
IV2
IV1
<N
N14
N12
N16
N11
NTC
EL F
INKB
BA
AP
LL
MO
3
2
1
L
N
3
1
2
TG
*A
*A
TOTAL RESET
TURN OFF POWER (S1)
WAIT FOR AT LEAST 5 SEC
HOLD DOOR OPENING (S11)
TURN ON POWER (S1)
CABLE POSITIONS
2: THERMISTOR
3: INLET VALVES
4: DOOR LOCK, DRAIN PUMP, PREASSURE SWITCH
8: POWER
9: HEATING ELEMENT, PREASSURE SWITCH
10: MOTOR COMMUNICATION, MOTOR POWER
S4
S10 S11
S1
S3 S7
S9
2010-10-27
SERVICE MENU
TURN OFF POWER (S1)
WAIT FOR AT LEAST 5 SEC
HOLD START/STOP (S10)
TURN ON POWER (S1)
PRESS START/STOP (S10) 5 TIMES TO ENTER SERVICE MENU
PRESS DOOR OPENING (S11) TO CHANGE MENU STEP
ROTATE DIAL TO CHANGE IN STEP
PRESSING START/STOP (S10) STORES AND EXITS SERVICE MENU
RO
Wiring diagram WM70.1 UM

Service manual WM70
16
Overview: Panel WM70.2
Programs: 12
Options: 1 or 5
Settings: 3

Service manual WM70
17
Service menu WM70.2
S1
J1
S10
S8S2 S3
S13
S11
S14
S12S9
S4 S5 S6 S7
LCD
L3 L4
L1 L5
L2
L6
Switch off, and then on main power.
S6
•Wait for at least 5 seconds
•Press down button S6
•Turn on the power
•Pressing S6 when power on followed by 3 pushes on S6 within 5 sec enters the
service menu.
NOTE! Make all selections. Pressing S13 stores all selections made in service menu and leaves
service mode.
Turn
J1
Tracking data reed out
SP: (software programming date: year week
CM: (control unit manufacturing date: year week
SV1: (Software version)
SV2: (Software version)
NC: Number of cycles
Press S14 next step is accessed.
Failure reed out
Rotating J1 will display 2nd and 3rd last deviating fault, ex “Thermistor fault (2); 30” ,
“Over flow (3); 20”
Failure record is cleared by total reset
Pressing S14 next step is accessed.
Diagnostics
Separate test of auxiliary components.
Rotating J1 each component will be turned on (with a 1 sec delay) and inputs
detected in sequence:
“Testing” (no component),
“Testing valve 1” (inlet valve 1 on),
“Testing valve 2” (inlet valve 2 on),
“Testing valve SM” (inlet valve 1 and 2 on),
“Testing heater” (heater on until max 60°C),
“Testing motor” (normal action),
“Testing drain” (drain pump on),
“Testing spin” (spin sequence, drain pump on),
“Testing door”.
Pressing S14 components will be off and next step is accessed.
Spin speed
Turn J1 counter clockwise 1500 rpm, 1600 rpm, 1700 rpm, 1800 rpm, default or
clockwise 1800 rpm, 1700 rpm ...
Pressing S14 next step is accessed or S13 to store or leave service mode.
Reset
By pressing S13, the machine returns to the default settings.

Service manual WM70
18
Fault indications WM70.2
Error messages Cause Action
Over flow fault Too much water in the
machine.
Service action:
Check the machine’s level system, inlet valve
and drain pump. Make sure that there is no
leaks.
The drain pump is on,
without any water in the
machine.
Service action:
The overflow protection at the bottom of
the machine is activated (not all models).
Make sure that there is no leaks (water on
the machines base)
Water outlet fault 1. The drain pump has
been activated more
than 3 minutes. There is
still water in the machine.
2. The wash cycle is
interrupted and the
program is cleared.
Customer information:
1. Check that no objects are stuck in the
drainage hose outlet.
2. Check that the drain pump is not blocked
by foreign objects.
3. Check that there are no kinks in the
drainage hose.
Service action:
1. If the pump only runs for a short while
(approximately 20 seconds), this indicates
a fault in the level system. Check the level
sensor and hoses.
2. Check wiring and voltage to the pump. If
necessary, replace the pump and/or control
3. After implementing corrective action, run
the Drain program or press the Key button
(door open) to empty the machine.
Water inlet fault If the correct water level
is not reached within 5
minutes, the wash cycle
is interrupted.
Customer information:
1. Check that the tap on the water pipe is
open.
Service action:
1. Check that the lter in the machine’s water
intake is not blocked.
2. Check the inlet valve. If necessary, replace
the valve.
3. Check voltage to the inlet valve. If there is
no voltage, this could be due to a fault in the
level system, wiring or control unit.
Security fault The door is open. Close the door

Service manual WM70
19
After carrying out corrective actions as above, reset the fault indications by pressing the DOOR
OPERING BUTTON at the same time as the main power switch.
Error messages Cause Action
Thermistor fault
1. The circuit for the
thermistor is open.
2. The thermistor is
faulty.
3. The measurment value
for the thermistor is
<300 Ω(>120 °C).
Service action:
Check the thermistors function. If needed,
replace it.
Temperature fault The temperature is
raised < 5 °C/41°F within
10 minutes. The wash
cycle continues to next
step
Service action:
Check the heater, cables, thermistor and level
system.
Engine fault No signal from Tacho or
MCU.
Service action:
Check the output from the MCU and the
wiring between the motor and the MCU
Pressour sensor fault Iindicated if the level
drops to 0 within 30
seconds of the first
rinsing.
Service action:
Check the leakage
Unbalance detection After 10 failed attempets
to spin the load the
machine has stoped to
spin beacuse of to high
umbalance.
Information to customer:
- Small loads with heavy items can cause this
problem when these articles are difficult to
redistribute.
Fault indications WM70.2 cont.

Service manual WM70
20
Wiring diagram WM70.2
This document must not be copied without
our written pemission, and the contents
thereof must not be imparted to a third party
nor be used for any unauthorized purpose.
Contravention will be prosecuted.
Asko Appliances AB
CIRCUIT DIAGRAM WM70.2
80 886 18 - 00
WIRES IN ALL MACHINES
INTERNAL CONNECTION
RESISTANCES AT ROOM TEMPERATURE (CA. 20°C/68°F)
VALUES WITHIN +/-10% ARE REGARDED AS NORMAL COMPONENT
F: RADIO INTERFERENCE SUPPRESSION FILTER 680K Ohm
EL: HEATING ELEMENT 25 Ohm
AP: DRAIN PUMP 50 Hz 144 Ohm
AP: DRAIN PUMP 60 Hz 76 Ohm
LL: DOOR LOCK, 1-2 122 Ohm
NTC: THERMISTOR 6.1 - 3.8 K Ohm
IV 1: INLET VALVE 1 3.7 K Ohm
IV 2: INLET VALVE 2 3.7 K Ohm
IV 3: INLET VALVE 3 3.5 K
Ohm
MO: MOTOR, 1-3 4,3±7% Ohm
1-2 4,3±7% Ohm
2-3 4,3±7% Ohm
MCU: MOTOR CONTROL UNIT
N: PRESSURE SWITCH
TS: PRESSURE SENSOR
TG: TACHO GENERATOR
BA: CONTAINER
INKB: INCOMING GROUND
EL
IV2
IV1
<N
N14
N12
N16
N11
NTC
EL
F
INKB BA
TS
AP
LL
MO
MCU
3
2
1
CABLE POSITIONS
1: MOTOR COMMUNICATION
2: THERMISTOR
3: INLET VALVES
4: DOOR LOCK, DRAIN PUMP, PREASSURE SWITCH
8: POWER
9: HEATING ELEMENT, PREASSURE SWITCH
10: MOTOR POWER
L
N
3
1
2
TG
S1
S6S7 S13 S14
TOTAL RESET
TURN OFF POWER (S1)
WAIT FOR AT LEAST 5 SEC
HOLD DOOR OPENING (S14)
TURN ON POWER (S1)
SERVICE MENU
TURN OFF POWER (S1)
WAIT FOR AT LEAST 5 SEC
HOLD S6 OR S7
TURN ON POWER (S1)
PRESS S6 OR S7 3 TIMES TO ENTER SERVICE MENU
PRESS DOOR OPENING (S14) TO CHANGE MENU STEP
ROTATE DIAL TO CHANGE IN STEP
PRESSING START/STOP (S13) STORES AND EXITS SERVICE MENU
STEP 1: PRODUCT DATA
STEP 2: FAILURE DATA
STEP 3: COMPONENT TEST
*A FUSE CONNECTION USA & CANADA
*A
*A
IV3
Other manuals for WM70
2
Table of contents
Other Asko Washer manuals
Popular Washer manuals by other brands

Alliance Laundry Systems
Alliance Laundry Systems DCG020ND manual

Dexter Laundry
Dexter Laundry T-450SWD Operators manual installation & operation instructions

Haier
Haier HW-C1060TVE user manual

Beko
Beko D1 7081 E Operation manual

Electrolux
Electrolux EW 502 F user manual

Haier
Haier HW-C1270TVE-U user manual

Bosch
Bosch WUU28T63ES User manual and installation instructions

Kleenmaid
Kleenmaid LTK96A*N4350 Installation

Haier
Haier HWF 5300 AW user manual

Maytag
Maytag MGWE550WJ Use and care guide

Bosch
Bosch Washing Machine Instruction manual and installation instructions

Bosch
Bosch WAU28460ID Instruction manual and installation instructions