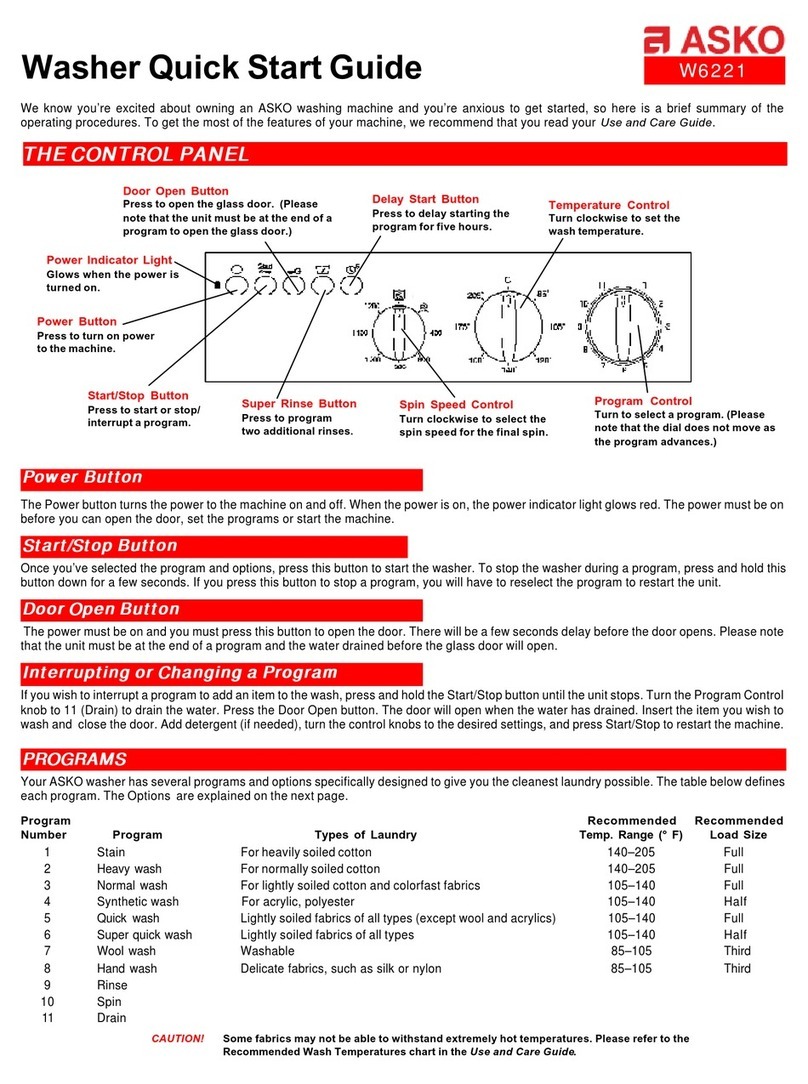
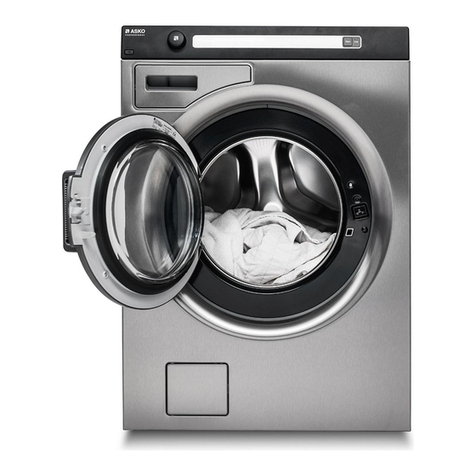
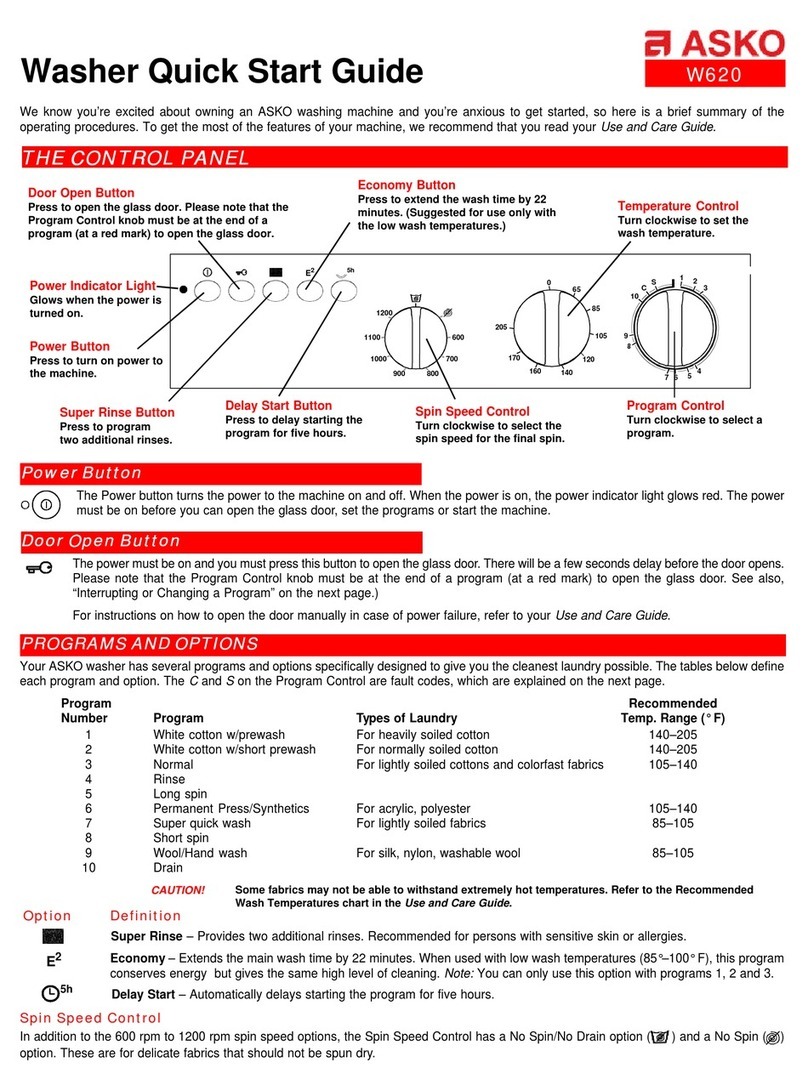
Asko WT63 Series User manual

USE AND CARE GUIDE
Guide d’utilisation et d’entretien
Bruksanvisning
Guía de uso y cuidados
Brugs- og vedligeholdelsesvejledning
Bruks- og vedlikeholdsveiledning
Guia de Utilização e Manutenção
Guida per l’uso e la manutenzione
Käyttö- ja hoito-opas
Bedienungsanleitung
Gebruikers- en Onderhoudshandleiding
Инструкция по эксплуатации


ENGLISH 5-14
РУССКИЙ 15-24
GB
RU


5
SM2138
INDEX
We suggest that you always keep the following data at hand:
MODEL: ...........................................................................................................................................................................................................................
PRODUCTION CODE: .........................................................................................................................................................................................
DATE OF PURCHASE: .......................................................................................................................................................................................
THE MANUFACTURER WILL NOT BE HELD RESPONSIBLE FOR ANY ACCIDENTS THAT MAY RESULT FROM NON-
COMPLIANCE WITH THE REQUIREMENTS OF SAFETY STANDARDS OR THIS INSTRUCTION MANUAL.
ENGLISH
Dear customer,
Thank you for choosing our product.
Please read these instructions carefully before connecting and using the machine.
An awareness of how the machine operates will help guarantee its correct and safe use.
The instructions also contain some useful information on the machine’s functions that will help you
get the most out of its use.
If you decide to sell or give the washing machine to someone else, remember to give the instruc-
tion book to the new owner.
GB
NOTES AND USEFUL ADVICE FOR THE USER 6-7
DESCRIPTION OF THE MACHINE 7
INSTALLING THE MACHINE 8-10
• Unpacking and unblocking the machine 8-9
• Installation 9
• Connecting to the power supply 9-10
• Connecting to the water system 10
USING THE MACHINE 11-12
• How to remove stains 11
• International clothing care symbols 11
• Using the washing machine 12
• Use of detergents and additives 12
MAINTENANCE 13-14
• Cleaning the washing machine 13
• How to remove the detergent tray 13
• Inspection hole 13
• Cleaning the filter 13
• Troubleshooting 14

6
SM2138
NOTES AND USEFUL ADVICE FOR THE USER
▼The washing machine has been designed
for domestic use only, and as such any other
use is regarded as improper and therefore
potentially dangerous.
▼Any modifications or attempts to alter the
equipment in any way may be dangerous for
the user and cause damage to the washing
machine.
▼Due to the weight of the machine, special
safety standards must be observed during
handling.
▼The machine must not be used by unsuper-
vised children.
▼Any modifications to the water or electrical
system must be carried out by authorised
specialists.
▼When positioning the appliance, make sure
that the power supply cable is not bent or
squashed and that it is accessible.
▼Before operating the machine, remove all
packing materials and the locking device
used for protection during transport (protec-
tion screws). Failure to do this may result in
serious damage to the machine and to your
home.
▼If the machine is installed on a carpeted
floor, make sure that air is free to circulate
between the machine and the floor.
▼The washing machine must never be over-
loaded.
▼When the machine is in operation, avoid
any contact with the water coming out of
the drain hose and this may be hot.
▼Only wash clothes that are machine washa-
ble.In case of doubt, check the manufacturer
’s instructions found on the label attached
to the clothes (see “Clothing care symbols
“ page 7)
▼Before loading clothes into the washing ma-
chine, check that all the pockets are empty.
Hard or pointed objects such as coins, pins,
nails, screws or even stones can cause
serious damage.
▼Clothes that have been dirtied with sub-
stances containing petroleum cannot be
washed in the machine. If stains have been
removed using vaporising products, before
loading the clothes in the washing machine,
wait until the substances have completely
evaporated from the material.
▼Do not use detergents formulated for
hand washing, in that the excessive lather
produced could damage the internal com-
ponents.
▼After washing rugs, blankets or any other
long fibre fabrics, remember to check the
filter and, if necessary, clean it.
Unplug the washing machine
from the power supply before
servicing and cleaning.
The washing machine can be
opened only after the led or
display indicate the end of the
cycle. On some models, this is
indicated by the start button
flashing.
To disconnect the machine
from the power supply, pull the
plug and not the cable.
After the end of each washing
cycle it is advisable to unplug
the machine and shut-off the
water supply.
Do not expose the appliance to
atmospheric agents. Do not plug-in or unplug the
machine with wet hands. Extension leads or multiple
adapters must not be used
to connect the washing ma
chine to the mains supply.
The power supply socket must
be earthed and must comply
with the safety requirements.
GB
7
SM2138
NOTES AND USEFUL ADVICE FOR THE USER
DESCRIPTION OF THE MACHINE
GB
A - Top cover
B - Drum
C - Detergent compartment
D - Control panel
E - Filter door
F - Feet
The washing machine is a household appliance that can wash any type of fabric using the
method selected by the user.
▼The exterior of the machine is fabricated in steel sheet, which has been worked using a special
process and then enamelled in order to maintain its external appearance and protect it against
corrosion.
▼The motor and all the other moving parts are built to ensure noiseless machine operation.
▼The large stainless steel drum is well placed to guarantee a good wash quality and prolong the
life of the washing.
▼The easy to use control panel makes the selection of any wash programme quick and simple.
The perfect machine balance is the result of many years of research aimed at finding the correct
balance between the various moving parts.
1
AB
C
D
E
F
The symbol on the product, or on
the documents accompanying the product,
indicates that this appliance may not be
treated as household waste. Instead it shall
be handed over to the applicable collection
point for the recycling of electrical and
electronic equipment.
Disposal must be carried out in accordance
with local environmental regulations for
waste disposal.
For more detailed information about treat-
ment, recovery and recycling of this product,
please contact your local city office, your
household waste disposal service or the
shop where you purchased the product.
▼It is advisable to leave the door open at the
end of the wash cycle.
▼Under no circumstances should any repairs
to the machine be attempted by unqualified
persons as this could result in serious da-
mage and will invalidate the guarantee.
▼Repairs to the washing machine must only
be carried out by persons authorised to do
so by the service centres.Only original spare
parts may be used for repairs.
▼This appliance is marked according to
the European directive 2002/96/EC on
Waste Electrical and Electronic Equipment
(WEEE).
By ensuring this product is disposed of
correctly, you will help prevent potential
negative consequences for the environment
and human health, which could otherwise be
caused by inappropriate waste handling of
this product.

8
SM2138
INSTALLING THE MACHINE
When selecting the location in which to install the machine, follow the advice given below
area:
▼The room must be provided with a water supply, drainage system and mains power
supply (remember that the cables and hoses on the back of the washing machine
must not be squashed).
▼The washing machine must be placed on a hard flat surface.
▼It is advisable to avoid installing the washing machine in a room where the tem-
perature may fall below 3 °C.
▼Position the washing machine near to its place of installation and remove the external
packaging (fig.2).
▼Lift the washing machine and remove the polystyrene base and the plastic
spacer (fig. 3).
UNPACKING AND UNBLOCKING THE MACHINE
GB
▼Loosen the 2 screws (fig. 4) or the 4 screws (fig. 5) (according
to the model) that secure the moving pieces and remove them
together with the plastic bushes (fig. 2). Close the holes with the
plastic plugs supplied.
▼Pick up the screws and bushes and keep them for future transpor-
tation
3
4
2
5
6
▼Incline the washing machine and extract the two internal polystyrene corner pie-
ces (if present) by pulling the two cardboard strips, first E and then F (fig.6).
F
E
V
V

9
SM2138
10
INSTALLING THE MACHINE
CONNECTING TO THE POWER SUPPLY
INSTALLATION
Carefully move the machine until it is close to the connection points.
WHEN FITTED, use the machine’s manoeuvring wheel to help with the positioning.
To use the wheel, move the lever located on the bottom right over to the left.
Once the machine has been moved, return the lever to its original position (Fig.9).
In order for the machine to operate correctly it must first be levelled. This can be
done by adjusting the screw-in feet (Fig.10) on the base of the appliance (2 feet for
machines with rear wheels, 4 feet for machines without wheels).
Once the machine has been levelled, lock the feet in position by tightening the nut
on the base of the machine using a spanner.
GB
UNPACKING AND UNBLOCKING THE MACHINE
9
8
7
▼Remove the polystyrene spacer (fig. 7).
▼Remove the polystyrene spacer (fig. 8).
▼Check that the voltage indicated on the technical data plate on the back of the
washing machine is the same as that of the mains power supply. (fig. 11).
▼The fuses, electric cables and wall socket must be rated to withstand the maxi-
mum power load indicated on the data plate.
▼On completion of the installation, the appliance must be connected to the mains
supply through a two-pole switch.
▼The power supply socket into which the washing machine will be plugged must
be earthed. Otherwise, the manufacturer will not be held responsible for any
accidents (fig. 12).
▼If the socket to which the machine will be connected is faulty or does not comply
with the requirements, it must be replaced by a qualified electrician.
11

10
SM2138
INSTALLING THE MACHINE
CONNECTING TO THE WATER SYSTEM
▼If the waste water is to be discharged into a sink or washbasin, insert the
hose in the special racket supplied and hook it over the edge of the sink or
washbasin. Then tie the hose and bracket to a tap or similar. (fig.16).To avoid
overflowing, the sink drain must be clear of obstructions and must be able to
empty quickly.
▼Place the washing machine against the wall, taking care not to squash the
hoses.
GB
▼The water drain hose must be placed at least 60 cm and not more than 90 cm
from the floor (fig.15).
▼If the drain hose is connected to a fixed drainage system, the free end must
be inserted in a pipe of minimum internal diameter 40 mm.
▼The drain hose water connection to the drainage system must not be hermeti-
cally sealed, as this would cause air to accumulate and the water to siphon
out.
▼Check that the other end of the tube is well fixed to the washing machine
(fig.14).
▼While the machine is operating the water fill valve must be fully open.
CONNECTING TO THE POWER SUPPLY
13
14
12
15
16
▼The mains water pressure must be between 0.005 and 1.00 Mpa (0.5-10 atm.).
▼Before connecting the water fill hose, open the valve and allow a quantity of
water to flow. This will censure that the supply pipes are free from impurities,
such as sand or rust (this operation is very important when the washing machine
is being connected to a new supply system or if the system has not been used
for a long period of time).
▼Connect the water fill hose to a ∫” threaded cold water outlet
▼Place the filter washer supplied between the hose and the valve and hand
tighten the connection as much as possible (fig.13).
N.B.: Use the new pipe supplied with the machine and do not re-use the
old one.
▼The washing machine must not be connected to the electricity supply using
extension leads or multi-plug adapters.
▼During maintenance the washing machine must be unplugged from the power
supply socket.
▼Do not plug-in or unplug the machine with wet hands.
▼If the power cable is damaged in any way, contact the specialised technical
service centre.
▼Position the appliance so that the power supply cable can be accessed with
ease, enabling it to be disconnected when required.

11
SM2138
USING THE WASHING MACHINE
INTERNATIONAL CLOTHING CARE SYMBOLS
Before placing the clothes in the washing machine and selecting the wash programme, examine the
symbols on the manufacturer’s label. The table reported below will provide a useful guide to reading
the symbols.
HOW TO REMOVE STAINS
GB
Some stains cannot be removed by just washing in a washing machine. Before trying to remove any
type of stain by hand, first try the removal procedure on a small area of hidden fabric starting from the
edge of the stain and working inwards, this will prevent a dark ring from forming around the site of the
stain. A few methods for removing stains are reported below.
▼WAX:scrape the wax using a blunt point in
order not to damage the fabric. Then, with
the fabric placed between two pieces of ab-
sorbent paper, run a hot iron over the stain.
▼BALL-POINT PENS AND FELT-TIP PENS:clean using
a soft cloth soaked in ethyl alcohol. Take care
not to spread the mark.
▼DAMP AND MOULD:if the fabric supports the
use of bleach, perform a wash cycle adding
bleach to the appropriate compartment in
the dispenser [see table of programmes ].
Otherwise, soak the soiled part in hydrogen
peroxide (10 volumes) and leave for 10 to 15
minutes.
▼LIGHT SCORCH MARKS CAUSED BY IRONING:follow
the instructions for mould and damp.
▼RUST:use products specially designed for
rust stains, following the manufacturer’s
instructions written on the packet.
▼CHEWING GUM:rub ice over the mark, scrape
away as much as possible and then rub with a
cotton cloth soaked in acetone (alternatively,
use nail varnish remover).
▼PAINT:do not allow the paint to dry. Rub
the area with the solvent recommended by
the paint manufacturer (e.g. water, turps,
trichloroethylene), apply soap and then
rinse.
▼LIPSTICK:stains on cotton or wool can be elimi-
nated using a cloth soaked in ether. Stains
on silk require the use of trichloroethylene.
▼NAIL VARNISH:place a sheet of absorbent
paper on the stained material, then dampen
the back of the fabric with acetone, fre-
quently changing the paper placed over the
stain. Continue like this until the stain has
disappeared.
▼TAR OR DIRT:spread some fresh butter over
the stain, allow to stand and then wash with
oil of turpentine.
▼GRASS: delicately soap the stain, use diluted
bleach. Good results can be obtained on
woollen fabrics using 90% alcohol.
▼BLOOD: put into soak in cold water with
added salt, then wash with washing soap.

12
SM2138
USING THE WASHING MACHINE
Attention: We would recommend running a short wash cycle before us-
ing the machine in order to check its operation and clean the
drum.
Each time before using the washing machine follow the procedures listed below:
1. Check all the water connections; check that the water supply valve is open and
that the drain hose is positioned correctly (see chapter on installation).
2. Check that the programmer knob (P)is positioned on STOP.
3. Insert the plug in the power supply socket with dry hands.
4. Divide the washing into the various fabrics (check the labels on the clothes).
5Before putting clothes into the drum, check that: pockets are empty; torn parts are
mended; zips, belts, fasteners and hooks are closed; stains are pre-treated.
6. To open the top lid of the washing machine, press lightly and lift (fig.17).
7. Open the drum doors by holding them both with a hand and pressing the button
with the other (fig.18).
8. Put the clothes in the basket.
In order to keep the machine load balanced when spinning, it is advisable to
wash items of different sizes but of the similar fabric in the same cycle.
Items that have been loaded incorrectly may disrupt the balance of the machine
during spinning.
Warning: Do not overload the washing machine. It is not advisable to use the
machine to wash fabrics that absorb excessive amounts of water, for example:
carpets.
9. Close the drum doors and ensure that they are locked properly.
10. Fill the detergent compartments following the instructions in chapter “Use of
detergents” (fig.19).
11. Close the top lid; select the required programme and the correct temperature
after consulting the programme table.
In hard water areas, water softeners should be added to the detergent to prevent
scale building up on the heater element.The water softener should be placed in
compartment “II ” together with the detergent.
USE OF DETERGENTS AND ADDITIVES
GB
The washing machine is fitted with a dispenser for detergents and four compart-
ments for additives (fig.20)
compartment for pre-wash detergent
compartment for main wash detergent
compartment for rinsing liquids, softeners, perfumes and other finishes
compartment for bleach
18
19
17
20
21
N.B. When filling the detergent compartment, make sure no detergent goes
into the softener compartment as this would cause rinsing with suds
and the washing could come out with white stains still on it. Vice-versa
if softener entered the detergent compartment, it would make said de-
tergent less efficient.
Important: Only use soap powders or liquid detergents specifically designed
for use in automatic washing machines. These products produce
less suds. Use the correct amount of detergent following the ma-
nufacturer’s instructions on the packet. Using too much detergent
will produce a large amount of foam and reduce the quality of the
wash. Using too little detergent will result in a poor wash. Liquid
detergent can only be used with programs without pre-wash.

13
SM2138
CLEANING THE WASHING MACHINE
MAINTENANCE
GB
24
25
22 The washing machine has been designed to reduce maintenance to a minimum.
It must, however, be cleaned regularly.
▼Before starting to clean the washing machine, remember to make sure that it
is unplugged from the power supply socket and that the water supply valve is
closed.
▼Power supply cable: If the power supply cable is damaged, it must be replaced
by the assistance service.
▼Warning: Do not use chemical products to clean the appliance. Instead, use a
lightly soaped damp cloth.
▼Clean the outside of the machine using a soft damp cloth. Do not use abrasive
products. (fig.22).
▼At the end of the wash cycle, leave the lid of the washing machine open to allow
the rubber elements to dry.
▼Detergent residues must be removed regularly using a damp sponge.
▼Periodically wash the detergent dispensers. To do that, remove the detergent
tray and rinse it under running water (fig. 23). Then put it back into place
INSPECTION HOLE
To remove any objects that have accidentally fallen between the drum and the body
of the machine, remove the plastic cover of the counterweight on the opposite side
to the drum opening (fig.25),then open the doors and remove the object from the
bottom.
HOW TO REMOVE THE DETERGENT TRAY
▼Press with one hand on the button over the drawer and with the other hand pull
the tray outwards (fig. 24).
23
CLEANING THE FILTER
ATTENTION!! Before starting the operations described below, make sure
that the washing machine is empty. Do not remove the filter while the
machine is running, or when full of water.
Place a cloth or flat plate under the filter to collect any water that may still be inside
it. Open the filter door, unscrew the filter and remove it, turning in an anticlockwise
direction (fig.26).
The use of a tool might be necessary to open the door (fig. 26).
The filter must be cleaned periodically.
Rinse the filter under running water to eliminate all waste. Replace the filter, screwing
in a clockwise direction and making sure it is hermetically sealed.
26

14
SM2138
If the appliance is not working properly, check through the following troubleshooting list before calling for
technical assistance.In some models malfunctions are shown with a code at the end of the cycle.
Code: E:00 Carry out all checks listed in paragraphed marked with *
E:01 Carry out all checks listed in paragraphed marked with **
E:02 Technical malfunction “Call Customer Service”
E:03 Technical malfunction “Call Customer Service”
The washing machine does not work (warning
lights are off) (Display off)
• check that:
1) The mains power supply is working
2) The plug is inserted correctly in the socket
3) The On/Off button has been pressed, or if
there isn’t any, that the programming knob is
positioned on a program.
The washing machine does not work (warning
lights are off) (Display on)*
• check that:
1) The program has been selected
2)
The Top is closed properly
3) The ”Start” button has been pressed (electronic
models only)
4) check the indications provided under ”The
washing machine does not fill with water”
The washing machine does not fill with water*:
• check that:
1) There is water in the water supply system
2) The water supply hose is connected to the
washing machine
3) The water supply tap is open
4) The filter is not blocked. If it is, clean the filter
after unplugging the appliance from the power
supply
The washing machine continuously fills and
drains the water**:
• check that:
1) The drain hose has been installed at the proper
height (60-90 cm)
2) The end of the drain hose is not under water
The washing machine does not drain or spin**:
• check that:
1) The drain hose is properly connected
2) The drain hose is not bent
3) The drainage filter is not blocked
4) The no-spin function has not been selected
5) The “stop with water” function has not been
selected.
The washing machine vibrates and is noisy
• check that:
1) All the blocking elements used for transportation
have been removed.
2) the washing machine is level
3) Bulky items such as sheets, tablecloths etc. are
not all in one part of the drum
The top does not open
• check that:
1) the wash cycle is finished.
2) the “stop with water” function has not been
selected (automatic on some models).
The washing has not been properly spun
• check that:
1) The washing is evenly distributed in the drum
2) The correct spin speed has been selected
The washing machine stops during the wash
• check that:
1) The mains power supply is working
There is still a lot of detergent in the compartment
• check that:
1) The water supply tap is open
2) The filter between the tap and the supply hose
is clean
The washing is not clean at the end of the wash cycle
• check that:
1) The drum is not overloaded
2) The correct amount of detergent has been used
3) The correct programme has been selected
The washing has shrunk or faded
• check that:
1) The correct washing programme has been
selected
2) The correct washing temperature has been se-
lected
The washing machine does not dry (washer-dryer
models only)
• Make sure that:
1) The water supply tap is open
2) The drainage filter is clean
3) The washing machine is turned on (spy light or
display on)
4) The drying program has been selected
5) The drying time has been set
TROUBLESHOOTING
MAINTENANCE
GB
If, after trying the above remedies, the machine still does not work, refer
the fault to the nearest authorised service centre.
When calling the service centre, inform them of the machine model, the
serial number and the type of fault.
This information will allow the technical service staff to select the ap-
propriate spare parts, thus making the repair service quicker and more
efficient (fig. 27).
pump W
model
220V
N°204276237
kg wash
kg dry
A
total w
heating wash W
heating dryer W
wash motor W
spin motor W
dryer motor W
Hz
5 / 100 N/cm
2
27

15
SM2138
СОДЕРЖАHИЕ
РУССКИЙ
Уважаемый покупатель,
благодарим Вас за выбор нашего изделия.
Прежде чем подключить прибор и приступить к его использованию,просим Вас внимательно
прочитать инструкцию по эксплуатации.
Знание принципов работы стиральной машины обеспечит её правильную и надежную
эксплуатацию. Инструкции по эксплуатации содержат много полезных рекомендаций
относительно работы и технических особенностей стиральной машины, которые помогут
Вам использовать ее оптимальным образом.
В случае продажи или передачи стиральной машины другому лицу не забудьте отдать
новому пользователю и инструкцию по эксплуатации.
RU
ИЗГОТОВИТЕЛЬ ОТКЛОНЯЕТ ВСЯКУЮ ОТВЕТСТВЕННОСТЬ ЗА НЕСЧАСТНЫЕ СЛУЧАИ,
ВЫЗВАННЫЕ НЕСОБЛЮДЕНИЕМ ПРАВИЛ БЕЗОПАСНОСТИ И РУКОВОДСТВА ПО
ЭКСПЛУАТАЦИИ.
РЕКОМЕНДАЦИИ И СОВЕТЫ ДЛЯ ПОЛЬЗОВАТЕЛЯ 16-18
ОПИСАНИЕ МАШИНЫ 18
УСТАНОВКА МАШИНЫ 19-21
• Снятие упаковки и транспортировочных деталей 19-20
• Рaзмeщение стиральной машины 20
• Подготовка к работе 20
• Подключение к электрической сети 20-21
• Подключение к водопроводной сети 21
ЭКСПЛУАТАЦИЯ СТИРАЛЬНОЙ МАШИНЫ 22-24
• Выведение пятен 22
• Международные символы по уходу за одеждой 22
• Эксплуатация стиральной машины 23
• Применение стирального порошка и других средств 23-24
УХОД 24-25
• Очистка стиральной машины 24
• Как вынуть отделение моющих средств 24
• Смотровое отверстие 24
• Очистка фильтра 24
• Решение возникающих проблем 25

16
SM2138
РЕКОМЕНДАЦИИ И СОВЕТЫ ДЛЯ ПОЛЬЗОВАТЕЛЯ
При покупке просим Вас изучить основную инструкцию по эксплуатации и проверить правильность
заполнения гарантийной книжки и товарного чека. При этом заводской номер и наименование
модели приобретенного Вами изделия должны быть идентичны записям в гарантийной книжке.
Не допускайте внесения в книжку каких-либо изменений и исправлений. В случае неправильного
или неполного заполнения гарантийной книжки немедленно обратитесь к продавцу.
Срок гарантии - 24 месяца со дня продажи. Во избежание возможных недоразумений, сохраняйте
в течение всего срока службы документы, прилагаемые к товару при его продаже, а именно:
товарный чек, инструкция по эксплуатации, гарантийная книжка. Проследите, чтобы гарантийная
книжка и товарный чек были правильно заполнены и имели печати торговой организации. При
отсутствии даты покупки гарантийный срок исчисляется с момента изготовления изделия.
Гарантийное обслуживание не производится в случаях, возникающих после передачи товара
потребителю:
▼несоблюдения правил эксплуатации
▼механических повреждений, повреждений
вследствие воздействия химических
веществ, термических повреждений или
неправильного применения расходных
материалов (стирального порошка и других
моющих средств)
▼использования изделия в целях, для
которых оно не предназначено
▼использования в производственных целях
(ресторан, кафе, офис, детский сад,
больница и т.д.)
▼повреждений или нарушений нормальной
работы, вызванных животными или
насекомыми
▼
блокировки подвижных элементов изделия
при попадании во внутренние рабочие объемы
посторонних предметов, мелких деталей
одежды, жидкостей или остатков пищи
▼неисправностей, вызванных действием
непреодолимой силы (пожара, стихийных
бедствий и т.п.)
▼внесения исправлений в текст гарантийного
талона или чека
▼ремонта, разборки и других, не
предусмотренных инструкцией
вмешательств не уполномоченными на
это лицами
▼повреждений, возникших вследствие
небрежного хранения и/или
транспортировки по вине покупателя,
транспортной фирмы, торговой или
сервисной организации. В этом случае
владельцу следует обратиться с претензией
в организацию, оказавшую эти услуги
▼отклонения от стандартов и норм питающих
или других сетей подключения
▼неправильной установки или подключения
изделия
▼необходимостизамены осветительных ламп,
фильтров, стеклянных и перемещаемых
вручную пластиковых деталей
Рекомендуется всегда иметь под рукой
следующие данные:
МОДЕЛЬ: ................................................................................................................................................................................................................
ЗАВОДСКОЙ НОМЕР: ................................................................................................................................................................................
ДАТА ПРИОБРЕТЕНИЯ: ............................................................................................................................................................................
На изделие имеется сертификат Ростеста РОСС SE.АЯ46.B50002.
Срок службы стиральной машины ASKO составляет 10 лет от даты производства при условии
ее нормальной эксплуатации в бытовых условиях в соответствии с требованиями инструкции
по эксплуатации и гарантийного талона.
ИЗГОТОВИТЕЛЬ ОТКЛОНЯЕТ ВСЯКУЮ ОТВЕТСТВЕННОСТЬ ЗА НЕСЧАСТНЫЕ СЛУ-
ЧАИ, ВЫЗВАННЫЕ НЕСОБЛЮДЕНИЕМ ПРАВИЛ БЕЗОПАСНОСТИ И РУКОВОДСТВА
ПО ЭКСПЛУАТАЦИИ.
RU

17
SM2138
РЕКОМЕНДАЦИИ И СОВЕТЫ ДЛЯ ПОЛЬЗОВАТЕЛЯ
▼Настоящий прибор должен использоваться
для стирки вещей в домашних условиях;
любое другое его применение считается
неправильным и поэтому опасным.
▼Любая модификация или попытка
повредить прибор могут оказаться
для пользователя опасными и вызвать
повреждение машины.
▼Учитывая значительный вес стиральной
машины, следует соблюдать особые нормы
безопасности во время ее перемещения.
▼Запрещается пользование машиной детям
без присмотра взрослых.
▼Любое изменение, вносимое в систему
водо- и электроснабжения, должно
выполняться специалистами, имеющими
соответствующее разрешение.
▼При размещении стиральной машины
следует проверить, чтобы питающий
провод не сгибался, не пережимался и был
доступен для проведения работ.
▼Прежде чем включить стиральную машину,
следует полностью снять с нее упаковку и
используемые для транспортировки детали
(транспортировочные болты). В противном
случае может быть причинен серьезный
ущерб как машине, так и помещению.
▼Если прибор устанавливается на пол,
покрытый ковролином, следует проверить,
чтобы между стиральной машиной и полом
свободно циркулировал воздух.
▼Не следует перегружать стиральную
машину бельем.
▼Во время работы прибора не подставляйте
руку под воду, вытекающую из сливного
шланга, так как она может быть горячей.
▼Следует стирать только ткани,
предназначенные для стирки в стиральной
машине. При наличии любых сомнений
изучить указания производителя на
этикетках одежды (смотри “Символы по
уходу за одеждой” стр. 8)
▼Прежде чем положить одежду в машину,
следует проверить, чтобы все карманы
были пусты. Твердые и острые предметы,
как, например, монеты, булавки, гвозди,
винты или камни могут привести к
серьезному повреждению машины.
▼Нельзя стирать в стиральной машине
одежду, испачканную содержащими бензин
веществами. Если такого рода загрязнения
удаляются испаряющимися веществами,
прежде чем класть вещи в машину,
следует подождать полного испарения этих
веществ с поверхности тканей.
▼Не пользуйтесь моющими средствами для
ручной стирки, поскольку образующаяся
обильная пена может повредить внутренние
части машины.
Стиральную машину можно от-
крыть только после того, как
индикатор или дисплей указали
на завершение цикла. В некото-
рых моделях на это указывает
мигающая кнопка старт.
При проведении проверок и
очистки машины не забудьте
отсоединить прибор от электри-
ческой розетки.
Если Вы хотите отсоединить машину
от электрической розетки,беритесь
не за электрический провод, а
за вилку.
После завершения каждой
стирки рекомендуется вынуть
вилку из розетки и закрыть кран
подачи воды.
Не подвергайте прибор
воздействию атмосферных
явлений.
Не вставляйте и не вынимай-
те вилку из розетки мокрыми
руками.
Стиральная машина должна быть под-
ключена к соответствующей правилам
безопасности электрической розетке с
заземлением.
Запрeщaemcя подклю-
чать cmupaльнyю мaшuнy к
злeкmpuчecкoй розemкe чepeз
удлинители и тройники.
RU

18
SM2138
РЕКОМЕНДАЦИИ И СОВЕТЫ ДЛЯ ПОЛЬЗОВАТЕЛЯ
ОПИСАНИЕ МАШИНЫ
▼После стирки половиков, покрывал и
прочих ворсистых тканей не забудьте
проверить фильтр и при необходимости
очистите его.
▼По завершениицикластирки рекомендуется
оставить дверцу машины открытой.
▼Не пытайтесь самостоятельно устранить
неисправности прибора, так как ремонт,
выполненный лицами, не имеющими
специальной подготовки, может вызвать
серьезные повреждения и привести к
потере права на гарантийный ремонт.
▼Ремонт прибора должен проводиться
специалистами авторизованных
сервисных центров. Для ремонта должны
использоваться только оригинальные
запасные части.
▼
Данное изделие промаркировано в соответствии
с Европейской директивой 2002/96/EC по
утилизации электрического и электронного
оборудования (WEEE).
Обеспечив правильную утилизацию данного
изделия,Вы поможете предотвратить
потенциальные негативные последствия для
окружающей среды и здоровья челове а, оторые
могли бы иметь место в противном случае.
Символ на самом изделии или
сопроводительной документации
указывает, что при утилизации данного
изделия с ним нельзя обращаться как с
обычными бытовыми отходами Вместо
этого,егоследует сдавать всоответствующий
пункт приемки электрического и
электронного оборудования для
последующей утилизации. Сдача на слом
должна производиться в соответствии
с местными правилами по утилизации
отходов. За более подробной информацией о
правилах обращения с та ими изделиями,их
утилизации и переработки обращайтесь
в местные органы власти,в службу по
утилизации отходов или в магазин,в
котором Вы приобрели данное изделие.
A- Верхняя крышка
B- Барабан
C-
Контейнер для стирального порошка
D- Панель управления
E - Крышка фильтра
F - Ножки
Стиральная машина является электробытовым прибором, в котором можно стирать любые
ткани в выбранном пользователем режиме.
▼Наружная часть машины изготовлена из специальным образом обработанного и затем
окрашенного металлического листа, что обеспечивает неизменность ее эстетических свойств
и одновременно защищает от коррозии.
▼Мотор и все подвижные части машины гарантируют максимальную бесшумность во время
работы машины.
▼Барабан большого размера из нержавеющей стали сконструирован так, чтобы обеспечить
высокое качество стирки и длительный срок службы белья.
▼Панель управления предоставляет все возможности для простого выполнения выбранных
программ стирки. Отличная балансировка стиральной машины является результатом
многолетних исследований, цель которых заключалась в поиске равновесия подвижных
частей прибора.
1
AB
C
D
E
F
RU

19
SM2138
УСТАНОВКА МАШИНЫ
СНЯТИЕ УПАКОВКИ И ТРАНСПОРТИРОВОЧНЫХ БОЛТОВ С МАШИНЫ
▼Приподнять стиральную машину, убрать прокладку из полистирола и
пластмассовую распорку (рис. 3).
▼Винты и втулки следует сохранить на предмет возможной в будущем
перевозки машины.
▼Приподнять стиральную машину, убрать прокладку из полистирола и
пластмассовую распорку (рис. 3).
▼Наклонить машину и вынуть два внутренних уголка из полистирола
(если имеются), потянув за две картонные ленты“E - F”. Сначала вынуть
картонку “E” и затем картонку “F” (Рис. 6).
F
E
V
V
При выборе места установки стиральной машины принять во внимание
следующие рекомендации:
▼В помещении должна быть предусмотрена система водоснабжения и
электрическая сеть (следует учитывать, что провода и трубы, находящиеся
с задней стороны машины, не должны ни в коем случае пережиматься).
▼Стиральная машина должна быть размещена на ровной и твердой
поверхности.
▼Не рекомендуется устанавливать машину в помещении, в котором
температура может опускаться ниже 3°C.
▼Поставить стиральную машину в предусмотренном месте и снять наружную
упаковку (рис. 2).
RU
3
4
2
5
6

20
SM2138
УСТАНОВКА МАШИНЫ
ПОДКЛЮЧЕНИЕ К ЭЛЕКТРИЧЕСКОЙ СЕТИ
ПОДГОТОВКА К PАБOТE:
Осторожно приблизить машину к точкам подключения.
ЕСЛИ ПРЕДУСМОТРЕНО, воспользоваться колесиком для перемещения
машины. Для приведения колесика в рабочее положение отвести рычаг,
находящийся внизу справа, в противоположенную сторону. По завершении
перемещения машины привести рычаг в исходное положение (Рис. 9).
Внимание! Транспортировочное колёсико не предназначено для частого
использования.
Чтобы машина работала хорошо, необходимо выставить ее по уровню. Для
этого отрегулировать должным образом ножки в основании прибора (Рис. 10)
(2 ножки на машинах с задними колесиками, 4 - в машинах без колесиков).
Выставив машину по уровню, закрепить регулировочные ножки, прикрутив
гайки к основанию машины гаечным ключом.
СНЯТИЕ УПАКОВКИ И ТРАНСПОРТИРОВОЧНЫХ БОЛТОВ С МАШИНЫ
▼Убрать прокладку из полистирола (рис. 7).
▼Убрать пластмассовую распорку (рис. 8).
RU
10
9
8
7
▼Проверить, чтобы напряжение, указанное на маркировочной табличке,
расположенной на задней стороне стиральной машины, соответствовало
напряжению электрической сети. (рис. 11).
▼
Параметры предохранителей, электрических проводов и настенной розетки должны
выдерживать максимальную силовую нагрузку, указанную на маркировочной
табличке.
▼После установки машины доступ к сетевому питанию должен обеспечиваться
многополюсным выключателем.
▼Электрическая розетка, к которой подключается стиральная машина, должна
быть оснащена системой заземления. В противном случае изготовитель не
несет ответственности за несчастные случаи (Рис. 12).
▼Если розетка, в которую должна быть вставлена вилка, не работает или
11
Table of contents
Languages:
Other Asko Washer manuals
Popular Washer manuals by other brands

Electrolux
Electrolux EW 805 F Installation and instruction manual

Speed Queen
Speed Queen LTSAO Specifications

AEG
AEG OKO-Lavamat 6450 Sensortronic operating instructions

Kenmore
Kenmore ENERGY HE3T Owner's manual and installation instructions

Whirlpool
Whirlpool WFW9550WL Energy guide

LG
LG F14G6TDM2NH owner's manual