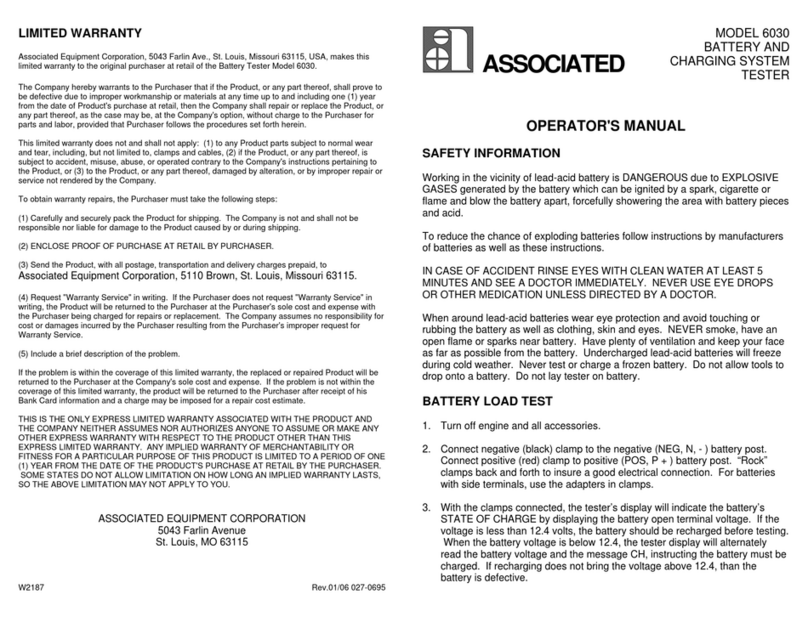
Associated 6039 User manual

ASSOCIATED
Model 6039
Battery Tester
Operator's Manual
IMPORTANT SAFETY INSTRUCTIONS
1. SAVE THESE INSTRUCTIONS
This manual contains important safety and operating instructions for the battery tester model 6039. You may need
to refer to these instructions at a later date.
2. CAUTION – The electrolyte in automotive starting batteries is sulfuric acid. This acid is capable of causing
severe damage to skin, eyes, and clothing. If you come in contact with battery acid:
1. Remove contaminated clothing and flood skin for at least 10 minutes with clear, cool water.
2. Eyes: force open and flood with cool running water at least 10 minutes; then see a doctor. Never
use eye drops or other medication before seeing a doctor.
While batteries are being charged or tested, an explosive gas mixture forms inside each cell. Some of this gas
escapes through the vent holes in the filler caps and may remain around the battery in an explosive condition. Sparks
or flames igniting this gas mixture will burn back through the vent hole and explode inside the battery cell. Such an
explosion is dangerous not only because of its own force but also because of the acid electrolyte which would spray
over anything in the vicinity.
To Prevent Explosions:
1. Use well ventilated area for charging and testing batteries.
2. Add distilled water in each cell until battery acid reaches level specified by battery manufacturer. This helps
purge excessive gas from cells. Do not overfill. For a battery without cell caps, carefully follow manufacturer's
instructions.
3. Allow no smoking, sparks or open flames near batteries being charged or tested, or those recently charged or
tested.
3. WARNING - RISK OF EXPLOSIVE GASES.
a. WORKING IN VICINITY OF LEAD-ACID BATTERY IS DANGEROUS. BATTERIES GENERATE
EXPLOSIVE GASES DURING NORMAL BATTERY OPERATION. FOR THIS REASON, IT IS OF UTMOST
IMPORTANCE THAT EACH TIME BEFORE USING YOUR TESTER, YOU READ THIS MANUAL AND
FOLLOW THE INSTRUCTIONS EXACTLY.
b. To reduce risk of battery explosion, follow these instructions and those published by battery manufacturer and
manufacturer of any equipment you intend to use in vicinity of battery. Review cautionary marking on these
products and on the engine.
c. Do not break live electrical circuits at the terminals of batteries because a spark may occur at that point
causing an explosion. Always turn battery chargers or testers OFF before connecting or disconnecting the
clamps from the battery terminals.
4. PERSONAL PRECAUTIONS
a. Wear complete eye protection and clothing protection. Avoid touching eyes while working near battery.
b. If battery acid contacts skin or clothing, wash immediately with soap and water. If acid enters eye,
immediately flood eye with cold running water for at least 10 minutes and get medical attention immediately.
Never use drops or other medication before seeing a doctor.
c. NEVER smoke or allow a spark or flame in vicinity of battery or engine.
d. Be extra cautious to reduce risk of dropping a metal tool onto battery. It might spark or short circuit battery or
other electrical part that may cause explosion.
e. Remove personal metal items such as rings, bracelets, necklaces, and watches when working with a lead-acid
battery. A lead-acid battery can produce a short circuit current high enough to weld a ring or the like to metal,
causing severe burn.
f. Spilled acid: Neutralize with a solution of baking soda (1 pound per gallon of cold water) or household
ammonia (1 pint per gallon of cold water).

5. PREPARING TO TEST
a. If necessary to remove battery from vehicle to test, always remove grounded terminal from battery first. Make
sure all accessories in the vehicle are turned off, so as not to cause an arc.
b. Clean battery terminals. Be careful to keep corrosion from coming in contact with eyes.
c. Determine cold cranking amp (CCA) rating of battery by referring to car owner's manual or label on battery.
6. TESTER LOCATION
a. Locate tester as far away from battery as DC cables permit.
b. Never allow battery acid to drip on tester when reading specific gravity or filling battery.
c. Do not set a battery on top of tester.
d. Position cables to reduce risk of damage by hood, door, or moving engine parts.
e. Stay clear of fan blades, belts, pulleys and other parts that can cause injury to persons.
7. CONNECTION PRECAUTIONS
a. Check that the load knob is fully counter clockwise before connecting clamps.
b. When attaching clamps to battery posts, twist or rock back and forth several times to make a good connection.
This tends to keep clamps from slipping off terminals and helps to reduce risk of sparking.
OPERATING INSTRUCTIONS
Duty Cycle: It is difficult to specify a duty cycle on a carbon pile load tester. It will vary greatly with ambient
temperature, length of test and load current on battery.
For maximum life, we recommend that the carbon pile never be heated until it is red hot. This can be easily seen by
looking in the unit when running a test. A red glow will indicate that the discs are so hot that the binders which hold
the carbon granules together are burning and deteriorating. This will lead to a deterioration of the discs, which will be
exhibited by the surfaces of the disc turning soft and powdery.
1. Visually inspect battery for obvious damage. Do not test battery if posts are loose, case is cracked, or fluid level in
cells is below the top of the plates. With "maintenance free" batteries, see manufacturer's instructions for
checking water level.
Do not test a frozen battery.
2. See connection precautions before connecting or disconnecting clamps prior to test.
3. Connect RED clamp to POSITIVE (POS, +, P) battery post and BLACK clamp to NEGATIVE (NEG, -, N) battery
post. Rock clamps to be sure of good electrical connection.
4. DETERMINE STATE OF CHARGE OF BATTERY.
a. Adjust LOAD CONTROL clockwise (CW) to ½ CCA rating for 3 seconds and release. Do not exceed 300
Amps on a 24-Volt battery.
b. Determine State of Charge by reading voltmeter and comparing to chart.
6 Volt 12 Volt 24 Volt % Charge
6.3 or greater 12.6 or greater. 25.2 or greater 100%
6.2 - 6.3 12.4 - 12.6 24.8 - 25.2 75 - 100%
6.1 - 6.2 12.2 - 12.4 24.4 - 24.8 50 - 75%
6.0 - 6.1 12.0 - 12.2 24.0 - 24.4 25 - 50%
5.8 - 6.0 11.7 - 12.0 23.4 - 24.0 0 - 25%
5.8 or less 11.7 or less 23.4 or less 0%
If the state of charge is less than 75%, charge battery and retest.

8. LOAD TEST:
NOTE: DURING HEATING CAUSED BY A LOAD TEST, THE CARBON PILE MAY EMIT STEAM
AND ODORS THAT HAVE BEEN ABSORBED BY THE CARBON DISCS. THIS IS
NORMAL.
a. Adjust LOAD CONTROL knob CW to ½ the amps of the CCA rating of the battery (do not exceed 300 Amps
on a 24-Volt battery) under test for 15 seconds. During the 15-second load test, it may be necessary to adjust
the load to give the correct current. This is made necessary by the changing voltage of the battery & the
change in resistance of the tester.
b. At 15 seconds, with the ammeter still reading ½ the amps of the CCA rating, read the voltmeter. Release the
LOAD CONTROL knob and be sure that the ammeter returns to zero amps.
c. Results: MINIMUM ACCEPTABLE VOLTAGE
6 Volt
12 Volt
24 Volt Battery Temperature
Degrees F.
4.8 9.6 19.2 70
4.7 9.4 18.8 50
4.6 9.2 18.4 35
4.5 9 18.0 25
4.4 8.8 17.6 15
4.3 8.6 17.2 5
4.25 8.5 17.0 0
NOTE: if smoke is emitted from any cell, the battery is defective regardless of meter indication.
d. If battery is okay, wait 15 seconds and read voltage. Recharge if below 75% state of charge.
e. To test two, six volt batteries, or two 12-Volt batteries in series, the jumper between the batteries must be
removed and each battery tested individually.
HOW TO DETERMINE CCA OF BATTERY:
If the CCA of a battery is unknown, it may be determined by a quick test.
a. Determine the temperature of the battery.
b. Check the chart in the load test section for minimum acceptable voltage for a battery of the determined
temperature.
c. Apply a load to the battery for 15 seconds while holding the voltage at the minimum acceptable level
determined in step b.
d. At the end of 15 seconds, read the current applied to the battery. Multiply by two to get the CCA rating of the
battery.
●Do not exceed 300 Amps on a 24-Volt battery.
APPLICATION DATA:
9. ALTERNATOR TEST:
Be sure battery in car tests good. Start engine with tester connected to battery. Allow engine to fast idle
approximately one minute to recharge battery. Voltage reading should be between 13.5 and 15.0 volts in most
cases. Cold battery and regulator temperatures may make the reading higher.
10. STARTER CURRENT TEST:
Connect tester to battery. Be sure battery is fully charged. Ground the ignition by removing the coil cable from the
distributor cap. Ground the cable to the block with a jumper wire to prevent arcing of the high-voltage spark that
could cause a fire, shock you, or damage the ignition system. (On GM cars with HEI ignition, simply disconnect
the small lead connected to the BAT terminal on the distributor). Turn ignition switch on and allow starter to turn.
Do not crank engine more than 5 seconds. Read the voltage on VOLTS scale while cranking. With automobile
circuits OFF and with tester connected to battery terminals, adjust LOAD CONTROL knob to give voltmeter
reading the same as measured while cranking engine. Read amps on ammeter. The measured amps is starting
current of car.

11. MAINTENANCE:
A 9 volt battery provides power for each of the LCD digital meters. To increase battery life, turn the meters off
when the tester is not in use.
To replace the instrument batteries, turn the power switch to the OFF position. Remove the two screws on the
battery cover in the back of the cabinet. Replace both batteries with fresh alkaline batteries and replace the cover.
WIRING DIAGRAM
-
+
IN
++
CARBON PILE
SHUNT
AMMETER VOLTMETER
NEG. CLAMP (-)
BLACK
POS. CLAMP (+)
RED
YELLOW
GRAY WHITE
BROWN
WHITE
WHITE ORANGE
BLUE
WHITE
RED
RED
BLACK
MODEL 6039 PARTS LIST
Load Knob.......................................................... 610809
Ammeter ............................................................ 610810
Voltmeter............................................................ 610811
Carbon Pile Assy. ..............................................610812
Handle................................................................ 610813
DC Cables.......................................................... 610311
Carbon Stack ..................................................... 610816
Switch ................................................................ 610291
Ceramic Tube..................................................... 610817
Battery Holder Assy. .......................................... 611450
ASSOCIATED EQUIPMENT CORPORATION
5043 Farlin Avenue
St. Louis, MO 63115
Tel. (314)385-5178 Fax. (314)385-3254
www.associatedequip.com
W2040 REV. 20160812 027-0581
Table of contents
Other Associated Test Equipment manuals
Popular Test Equipment manuals by other brands

Keysight Technologies
Keysight Technologies U3022AM06 User's and service guide

Pentair
Pentair TRACETEK operating instructions

Bante Instruments
Bante Instruments ECscan10 instruction manual

CATU
CATU PE C'diAG Touch Instructions for use

T&R
T&R PT18-10 mk2 Operating and maintenance manual

Kikusui
Kikusui tos6200 Operation manual