ASTRO DEVICES Nexus DSC Pro User manual

Nexus DSC
Pro
USER MANUAL
7 8
4
1
0
2
5
9
6
3ESCOK
OFF ON
DSC
Nexus Pro

User Manual for Nexus DSC Pro
Version 1.0
Firmware version 1.x.x
Last revised on February 4th, 2021
Printed in Australia
Copyright
Copyright © 2021, Astro Devices. All rights reserved.
No part of this manual may be reproduced or transmitted in any form for any purpose other than
the purchaser’s personal use, without the express written permission of Astro Devices.
Astro Devices reserves the right to make changes and improvements to its product without
providing a notice.
Precautions and Safety
Electricity
Nexus DSC Pro contains a rechargeable Lithium-ion battery. Lithium-ion
batteries can explode or cause a fire if they are used incorrectly or if they
are defective. Therefore, you are recommended to read the following
instructions very carefully:
NEVER leave Nexus DSC Pro where it is subjected to extremes in temperatures.
This includes low levels as well as high.
DO NOT leave Nexus DSC Pro where it is in direct sunlight or in an enclosed
space, such as a car, that can become extremely hot very rapidly.
Do not drop or subject the Nexus DSC Pro to impact.
Use only approved power adapter to charge your Nexus DSC Pro.
Do not handle power plug and adapter with wet hands. Electrical shock may
result. Immediately power off the product and unplug the DC adapter and/or
batteries if smoke or odours emit from the product. Immediately power off the
product and unplug the DC adapter if water or other liquids are present.
Product
Keep it away from harsh environments including humid, dusty, and smoky
areas.
Do not use excessive force on the connectors.
Do not attempt to disassemble the device without prior consultation with Astro
Devices.
Do not place heavy objects on the product. Damage to your products may result
from improper use.
Technical Support
Astro Devices
198 The Esplanade,
SYLVANIA, NSW 2224
AUSTRALIA
ABN 75 270 616 917
E-Mail: support@astrodevices.com
Website: http://www.astrodevices.com

Nexus DSC Pro User Manual
Thank You!
Thank you for purchasing Nexus DSC Pro digital setting circles telescope computer. We hope
you enjoy it!
You have purchased one of the most advanced Digital Setting Circles computers. It will allow you
to located celestial objects quickly and easily. Nexus DSC Pro has a huge database of objects –
planets, galaxies, star clusters, globular clusters, nebulae and others. It also provides extensive
descriptions for those objects – magnitudes, sizes, common names, alternative designators,
surface brightness, separations for double stars, spectral class, galaxy morphology. It is all
available at a press of a button!
This user manual will get you started and help you make the most of your Nexus DSC Pro.

Nexus DSC Pro User Manual
~ This page intentionally left blank ~

Nexus DSC Pro User Manual
1
TABLE of CONTENTS!
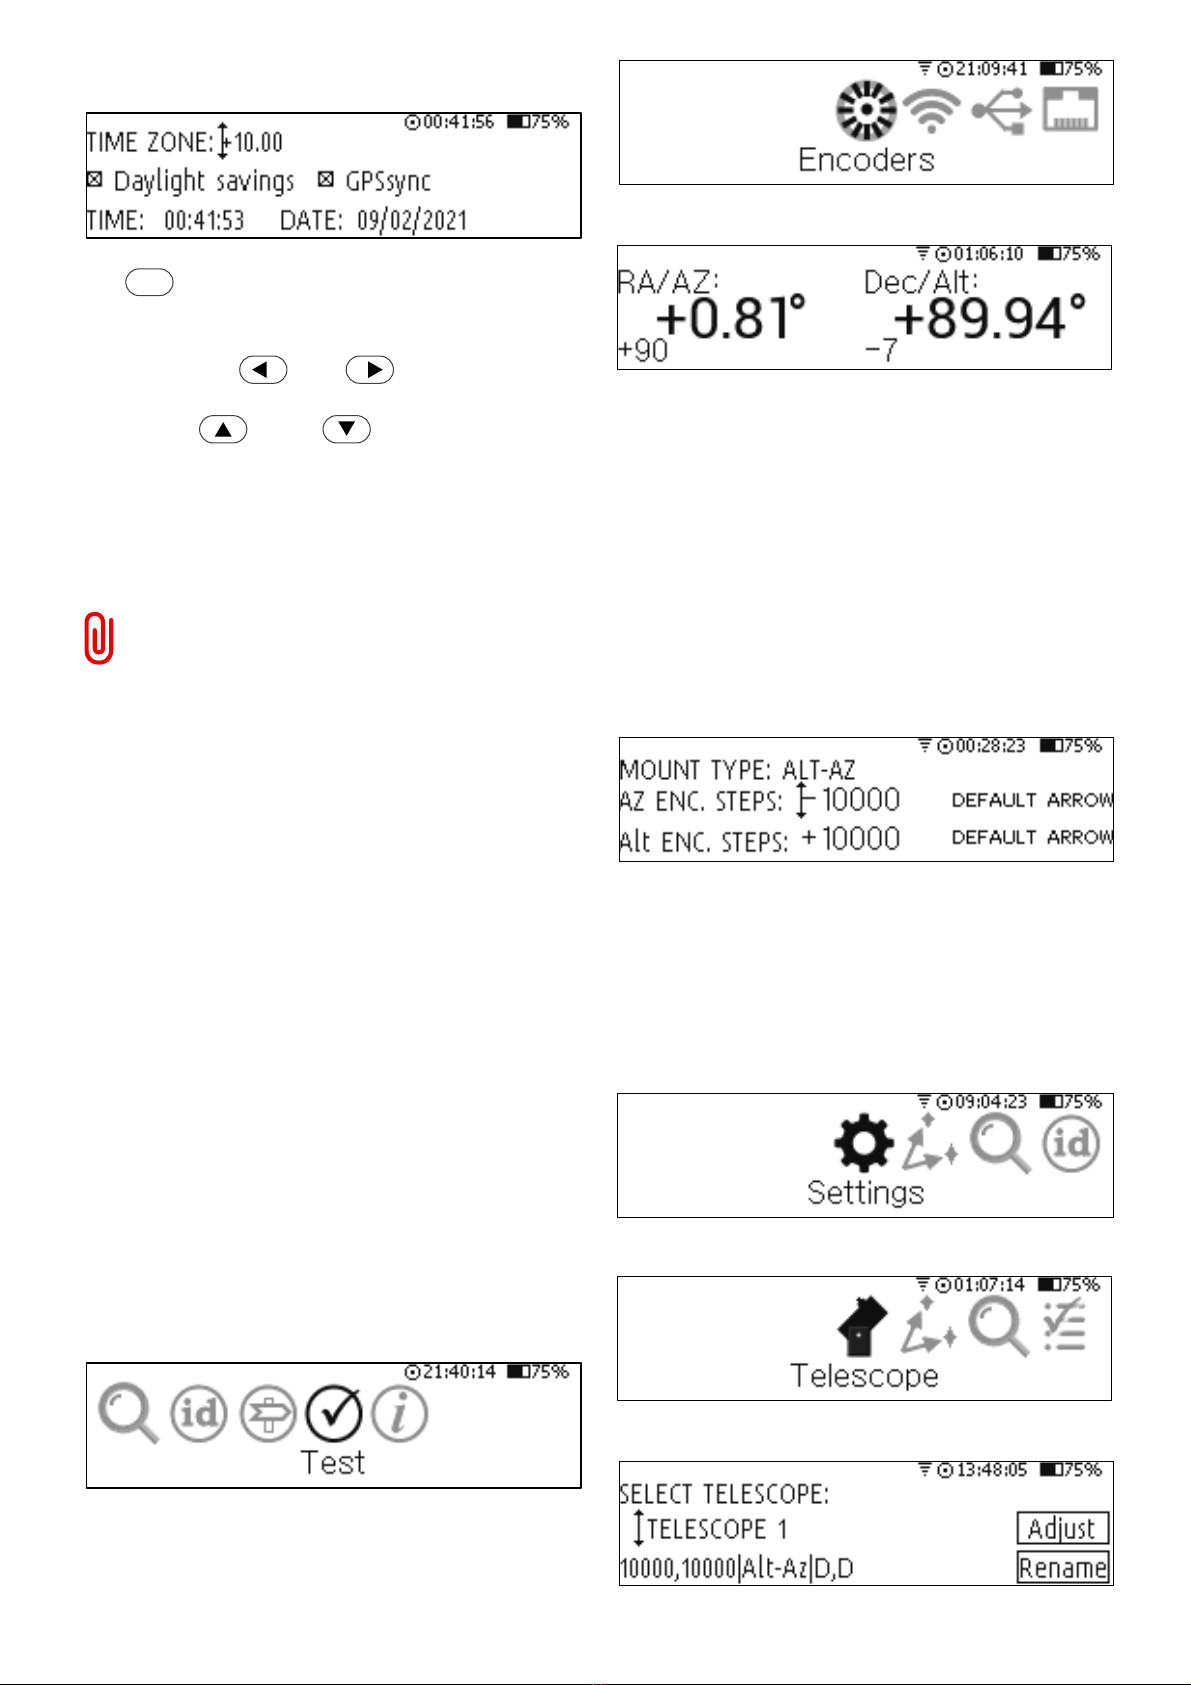
TABLE&of&CONTENTS!...............................................!1
Introduction!.............................................................!2
Product!Features!....................................................!2
Technical specifications................................................. 2
Digital setting circles specifications ............................... 2
Package Content ........................................................... 2
Unpacking ..................................................................... 2
Controls ........................................................................ 3
Charge the battery ........................................................ 3
User interface ............................................................... 4
Main menu ............................................................... 4
Status Bar ................................................................. 4
Keypad ..................................................................... 4
Initial Setup................................................................... 4
Setting the time and date.......................................... 4
Connecting to your telescope .................................... 5
Telescope Settings .................................................... 5
Two star alignment ................................................... 6
Alignment object screen ............................................ 7
Pointing accuracy ..................................................... 7
Locating an object .................................................... 8
Improving pointing accuracy ..................................... 8
Nexus!DSC!Pro’s!menus!.........................................!9
Settings ......................................................................... 9
Telescope .................................................................. 9
Align ....................................................................... 10
Find ........................................................................ 10
Other Parameters ................................................... 11
AstroLock ................................................................ 12
Communications ..................................................... 12
Time and Date ........................................................ 13
WiFi ........................................................................ 13
Sound ..................................................................... 13
Display/Keypad ....................................................... 14
Align ........................................................................... 14
Altitude Reference .................................................. 14
First Object Alignment ............................................ 15
Second Object Alignment ........................................ 15
Alignment Status .................................................... 15
Mpoint Start ........................................................... 15
Mpoint Parameters ................................................. 17
Mpoint Edit Points .................................................. 18
Mpoint Analyse ....................................................... 18
Equatorial Timer ..................................................... 18
Find ............................................................................ 19
From Catalogues ..................................................... 19
From Observation List ............................................. 23
Object at RA/Dec .................................................... 24
From Planetarium ................................................... 24
Identify ....................................................................... 25
Tour ............................................................................ 26
Test............................................................................. 27
Encoders ................................................................. 27
WiFi ........................................................................ 28
USB......................................................................... 28
Serial ...................................................................... 28
Info ............................................................................. 28
About Nexus DSC Pro .............................................. 28
Time ....................................................................... 28
Environment ........................................................... 29
Battery ................................................................... 29
GPS ......................................................................... 29
Settings for Motorised Telescopes .............................. 30
AZ-EQ5 & AZ-EQ6 ................................................... 30
ScopeDog ............................................................... 31
ServoCAT ................................................................ 31
SiTech ..................................................................... 31
SkyTracker .............................................................. 31
Advanced!Topics..................................................!31
Daylight Testing .......................................................... 31
Firmware!and!Catalogues!Update!..................!32
Apendix!..................................................................!33
Ports Pinouts .............................................................. 33
Serial Port ................................................................... 33
Encoders Port ............................................................. 33
List of Compatible Planetarium Software .................... 34
FREQUENTLY ASKED QUESTIONS (FAQ) ....................... 34
Troubleshooting!..................................................!34
Warranty!...............................................................!36
Technical!Support!...............................................!36

Nexus DSC Pro User Manual
2
Introduction
Nexus DSC Pro is a digital setting circles
computer with optional WiFi interface for your
telescope. It works with most popular telescopes
– on equatorial or Alt-Azimuth mounts.
Nexus DSC Pro is a very sophisticated device
for locating celestial object in the sky. Only two
rotary encoders are required to be fitted to your
telescope in order to be able to locate celestial
object with Nexus DSC Pro.
Product Features
Below is a short outline of main features of your
Nexus DSC Pro.
Technical specifications
• CPU – 32 bit, Cortex M7 running at 400MHz
• Memory – 32MB internal FLASH
• External memory – up to 512GB on micro SD card
• 3.12” Red OLED screen (256x64 pixels) with 256
levels of brightness
• Full numeric keypad with adjustable back light
• Real time clock with thermal compensation
• Built-in GPS receiver with support for GPS and
GLONASS
• Built-in 5200mAh rechargeable Lithium battery
• Operating temperature range from -20 oC to +50 oC
(-5 oF to +120 oF)
• Humidity 10%-90% non-condensing
• Optional WiFi interface
• FCC / CE/ IC certified 2.4GHz IEEE 802.11b/g
transceiver
o Supports Access Point and infrastructure WiFi
networks
o Secure Wi-Fi authentication schemes
o Class I WiFi device (up to 150 meters)
o Uses 2412 ~ 2484MHz Unlicensed ISM band
(channels 1-14)
o Output power 0.08W
• One RS232 port
• One USB port
• Upgradeable firmware and catalogues (firmware is
upgraded using a USB memory stick)
• Can be charged/powered by an external power
source of 5-16V DC; can be charged from a
cigarette lighter socket in a car
• Reverse polarity protection
• RoHS compliant
• Size: 140 x 120 x 30mm (5.5” x 4.7” x 1.2”)
• Weight: 260g (9oz)
Digital setting circles specifications
• Intuitive graphical user interface
• Supports Alt-Az mounts, Equatorial Mounts,
Equatorial Platforms
• Supports a two star alignment
• Filter objects by magnitude, constellation and object
type
• Displayed angular resolution is 0.001 of a degree
• Internal FLASH memory contains a database of
more than 90000 objects:
o Named stars
o Bright stars, Flamsteed, Bayer, Asterisms
o Planets, Sun, Moon
o Common named objects
o Full catalogues of popular catalogues.
• Around 2.5 million objects are located on optional
microSD card
• Displays object’s information: magnitude, size,
surface brightness, spectral class, double star
separations, galaxies morphology, alternative
names, rise time, set time, transit time etc.
• Identify function; can also display up to 256 nearby
objects
• Tour modes: within a radius and within a
constellation
• Supports a multi point telescope pointing analysis
system for telescope pointing corrections
• Supports rotary encoders with up to 999999 steps
per revolution
• Shows internal battery status – remaining capacity,
current power consumption and percentage of
charge remaining
• Can be interfaced to a tablet/smartphone/computer
using a standard RS232 interface or optional WiFi
interface
• Internal real-time clock can be synchronised with
GPS time automatically
• Time display of local time, UTC and local sidereal
time
• Supports LX200 emulation
• Supports ServoCAT, SiTech, SkyTracker and
ScopeDog motor controllers
Package Content
The package contains:
• Nexus DSC Pro
• User manual
• DC 2.1mm to cigarette lighter power
cable
• USB to DC 2.1mm cable (for charging
only)
• Optional serial cable
• Optional power adapter Introduction
Unpacking
Nexus DSC Pro has a protective film covering
the front panel. Please peel it off to be able to
see the display clearly.

Nexus DSC Pro User Manual
3
Controls
All controls are situated on front panel of Nexus
DSC Pro:
– power switch
– keypad
– display
– external power connector (DC 2.1mm)
– charging status LED
– USB connector
– Serial (RS232) port
– Encoders port
– Micro SD socket
is used to charge the battery; can be
connected to a power adapter or to a cigarette
lighter socket (using the supplied cable)
indicates the charging status of the battery
Blinking
type
Description
Solid ON
The internal battery charging is in progress
OFF
The internal battery has been fully charged
Flashing
Flashing LED is indicating an error (power
source is not supplying sufficient voltage
and or current)
The USB port acts as a USB host. It cannot
be used to connect Nexus DSC Pro to a
computer directly.
The USB port on Nexus DSC Pro is used for:
• To interface Nexus DSC Pro to ServoCAT
• To interface Nexus DSC Pro to SiTech motor
controller
The USB port is not intended for charging Nexus
DSC Pro. Never connect any power source to the
USB port. This will void the warranty
Serial port is a standard RS232 port, 6P6C
RJ connector. It is used for the following
purposes:
• To connect Nexus DSC Pro to a computer
• To connect Nexus DSC Pro to motor
controller
Encoder port is used to connect encoders
using an 8P8C RJ connector
microSD socket is push-in push-out type
Charge the battery
The battery may not be fully charged at first. It is
advised to fully charge the battery.
Please use either the provided power adapter or
one of the recommended power adapters to
charge the battery.
Power source must have the following
minimum ratings:
- 5-6 V DC – 2A is recommended
- 9-12 V DC – 1.5A is recommended
Some inexpensive power adapters do
not have an over-current protection and
when connected to Nexus DSC Pro will
fail and damage the unit and that will
void the warranty
It is also possible to use the supplied USB to DC
2.1mm cable to charge the battery from a power
adapter with a USB socket. The power adapter
should be capable of supplying at least 1.5A at
5V otherwise it will take much longer to fully
charge the battery in Nexus DSC Pro.
Connect the power adapter to Nexus DSC Pro
and plug the adapter into a power point.
It is recommended to keep Nexus DSC Pro
turned off during charging to reduce charging
time.
WARNING:
Do not connect Nexus DSC Pro to an
external power source that is not within
the specified voltage range. Nexus DSC
Pro has internal over-current protection
but it is safer to use it with the power
source specified.
7 8
4
1
0
2
5
9
6
3ESCOK
OFF ON
DSC
Nexus Pro
1 2 3
1
2
3
ENCODERSSERIAL
USB
microSD
5-16V DC
CHG
1 2 3 4 5 6
1
2
3
4
5
6
1
2
3
4
5
6

Nexus DSC Pro User Manual
4
The internal Lithium battery can only be charged at a
temperature range of 0 oC to +30 oC (32 oF to 86 oF)
In order to keep the battery lasting a long time it is
best to keep it charged at around 60% especially if
leaving Nexus DSC Pro unused for long periods of
time.
We advise to check the battery charge level every
three months and charge it to around 60% level.
Never leave the battery charged to 100% for long
periods of time (greater than two weeks)
User interface
Main menu
The main screen consists of a status bar,
horizontal menu with icons and a text description
of the currently selected menu item:
– Status bar
– Main menu
– Menu description
Status Bar
The status bar shows basic information about
battery state, current time, GPS receiver status
and WiFi. The status bar has the following
elements:
WiFi status is only shown if the WiFi is enabled
GPS fix status - the dot in the centre is flashing until
the GPS receiver acquires the current location
Current time in 24 hour format
Battery charge level in %
Keypad
Nexus DSC Pro has a full numeric (0-9) keypad
with directional keys ( , , , ),
and to allow an easy method of
control.
The keys have the following functions:
• to keys are used to specify a
numeric information to Nexus DSC Pro
• and keys on the keypad move
between previous and next menu item, they
are also used to move between control fields
(edit value, list, check box, on-screen
buttons) in a dialogue screen. The key
also acts as a backspace when editing a
value in edit fields.
• and keys are used to select an
item from a list, to adjust value in numeric
fields with predefined steps (like ‘Time Zone’)
or to change a character in an edit field; they
can also be used to go to the previous/next
menu level.
• The key activates the selected menu
item (on-screen button press, accepts a
selection from a list, finish editing a text or
numeric value).
• The key goes back to the previous
menu level/screen.
Special note about the and the
keys: in all settings pressing the key
accepts the changes that you see on the
screen while pressing the key cancels
the changes and switches back to the
previous screen discarding the new values.
Initial Setup
This section describes how to setup Nexus DSC
Pro to start locating celestial objects. The
following sections will describe all features of
Nexus DSC Pro in detail.
In order to be able to use Nexus DSC Pro for
locating celestial object it is necessary to set a
few parameters first:
• Time and date
• Mount Type
• Encoders’ resolution
Setting the time and date
Please select ‘Settings’ from the main menu:
Then select ‘Time and Date’:
1
2
3
1
2
3
1 2 3 4
1
2
3
4
OK
ESC
0
9
OK
ESC
OK
ESC
OK
ESC

Nexus DSC Pro User Manual
5
It will show the current time and date that can be
changed:
If all parameters are set correctly then pressing
the key can be used to avoid changing any
parameter.
If the time zone, time and date need to be
changed then and keys can be used
to select the parameter that needs to be
adjusted. and keys are used to
change the value.
Setting the time and date is only required if time
synchronisation with GPS is disabled. However,
the time zone and date need to be set for Nexus
DSC Pro to show the local time correctly.
It usually takes 30 to 60 seconds for the
GPS receiver to get a fix on the location
(under open sky conditions). Nexus DSC
Pro will update the internal real-time clock
with the time received by the GPS receiver
at this time. The GPS receiver will
automatically be switched into a power
saving mode after it acquired the location to
conserve the battery power.
Connecting to your telescope
Nexus DSC Pro requires only encoders
connected to operate. Please plug the encoder
cable into Encoders port on Nexus DSC Pro.
For operating Nexus DSC Pro with a motorised
telescope either the serial port or the USB port
or both ports need to be connected to motor
controller. A special cable may be required for
the connection(s). Please refer to Settings for
motorised telescope for additional information
on how to setup Nexus DSC Pro to work
correctly with the motor controller installed on
your telescope.
To make sure that encoders are functioning
correctly Nexus DSC Pro has a test mode to test
the encoders. Selecting Test from the main
menu activates it:
Then select Encoders:
will show the current angles and encoder steps:
In order for Nexus DSC Pro to function correctly
it is required to adjust the encoder steps to make
sure that:
• the RA/AZ current position in degrees is
increasing when rotating the telescope
clockwise around RA/AZ axis
• the Dec/Alt current position in degrees is
increasing when moving the telescope up in
declination/altitude
If either of those values is decreasing then set
the encoder steps’ sign for that axis to a negative
sign in the Telescope Settings:
Telescope Settings
Nexus DSC Pro needs the mount type and
encoder steps to be set correctly before it can be
used to locate celestial object precisely.
The mount type and encoder steps are set in the
Telescope Settings that can be accessed by
selecting ‘Setting’ from the main menu:
then by selecting ‘Telescope’:
Then you need to select the telescope:
ESC

Nexus DSC Pro User Manual
6
Nexus DSC Pro allows to have up to five
different telescope configurations. and
keys are used to switch between telescope
configurations. You can also rename
TELESCOPE 1 to your telescope’s name. You
just need to activate the Rename button by
using and then press the key. A text
cursor now appears under the name:
You will now be able to edit the name and
change it to your telescope name:
Now you need to set other parameters for your
telescope:
where the mount type can be selected by using
and keys. The encoder steps are set
to 10000 steps by default and should be set to
the number of steps corresponding to the
number of steps of the encoder installed on your
telescope. Encoder steps can be set by using
the numeric keys on the keypad. Please change
the sign in front of encoder steps for either one
or both encoders if required as described
previously:
Two star alignment
Nexus DSC Pro needs to be aligned on two star
before it can locate celestial objects.
Your telescope does not need to be levelled
for Nexus DSC Pro to locate celestial
objects accurately unless a one star
alignment method is used.
The two star alignment is performed in three
steps.
Please go to the Align menu:
Then select Altitude Reference:
Adjust the altitude reference angle if required:
Now move the telescope into position depending
on the mount type (for 90 degrees reference):
Telescopes on Alt-Azimuth mount should be
positioned vertically:
The same rule applies to telescopes installed on
equatorial platforms. Please note that the
telescope should be at 90 degrees to the ground
board, not the ground.
For equatorial mounts 0 degrees altitude
reference is more convenient.
Telescopes on an Equatorial Fork for a 0
degrees altitude reference then be positioned as
below:
The telescope does not have to be
positioned exactly at the angle specified,
but it should be within ±10°.
OK

Nexus DSC Pro User Manual
7
The following information applies only to
German Equatorial mounts.
It is worth noting that the 90º altitude reference
for the German Equatorial mode means that the
telescope is pointing at the celestial pole while
positioned in the top position (i.e. the
counterweight is at the bottom). Please see the
Test section of this manual to find how the
encoder steps should be setup for a German
Equatorial mount.
• For the 0º Altitude reference the telescope
should be positioned horizontally pointing
west if aligning first on a star in the western
part of the sky and pointing east if aligning
first on a star in the eastern part of the sky.
Nexus DSC Pro will automatically switch the
screen to the selection of first alignment object:
While Nexus DSC Pro can be aligned on any
object in its database it is best to use objects
form either Named Stars catalogue or Bright
Stars catalogue.
Pressing will switch to the CATALOGUE
tab and a different catalogue can be selected
then pressing the key will return to the
object selection.
It is time to select the first alignment object – by
pressing and to change to another
star:
Gacrux was selected as it is well above 30
degrees. Now the telescope should be pointed
at Gacrux using an eyepiece with a
reticle/crosshair or a very high magnification
eyepiece. Press the button once the
telescope is pointing at the star.
Nexus DSC Pro will now switch to the selection
of a second alignment object:
Please follow the procedure described above to
change the selection of the second alignment
object if necessary.
Press the button once the star is in the
centre of the eyepiece.
Now Nexus DSC Pro will show the alignment
error:
Now you can press either the key or the
key to go to the previous menu.
You can go back to align on first or second
object at any time in case the alignment
error is too big.
Alignment object screen
Alignment object screen has four tabs:
CATALOGUE, OBJECT, INFO and HELP. You
can use and keys to switch between
the tabs. The OBJECT tab is selected by default:
The INFO tab shows additional information
about the object:
where:
– Object’s information
– Currently selected object’s azimuth
– Currently selected object’s RA
– Telescope’s AZ/RA
– Telescope’s Altitude/Declination
– Currently selected object’s altitude
– Currently selected object’s declination
Pointing accuracy
Pointing accuracy depends on a number of
factors:
OK
OK
OK
ESC
1
5
2 3
6 74
1
2
3
4
5
6
7

Nexus DSC Pro User Manual
8
• Quality of the telescope mount
• Choice of alignment stars
• Accuracy in pointing on alignment objects
To achieve the best pointing accuracy with an
Altitude-Azimuth mount it is recommended that:
• The alignment stars chosen should always be
at 30 to 80 degrees in altitude and separated
by at least 70 degrees in azimuth.
• Alignment stars should ideally have at least a
few degrees separation in altitude
• Polaris can be used as one of the alignment
stars
To achieve the best pointing accuracy on an
Equatorial mount it is recommended that:
• Polaris should never be used as one of the
alignment stars
• Alignment stars with a declination greater
than 80 degrees should be avoided
• The alignment stars chosen should always be
at 30 to 80 degrees in altitude and separated
by at least 70 degrees in RA.
Locating an object
Once the two star alignment is performed Nexus
DSC Pro can locate celestial object in the sky.
The following steps describe a basic method of
location of celestial objects.
Go to the top menu and select Find:
Select From Catalogues:
Select a catalogue by using the and
keys and then press the :
The display will show the last selected object:
Suppose we would like to find NGC55. Just
press the key and the display will prompt
to continue typing the object number:
Now press the key again and then press
:
Nexus DSC Pro will now show where to move
the telescope to aim at NGC55:
It shows that the telescope needs to be moved
down by 27.2 degrees and counter clockwise by
47.7 degrees. As you start moving the telescope
the numbers will start updating. Continue to
move until both numbers are close to 0s:
If you look through the eyepiece then you will
see NGC55 there now.
To display additional information about the
object just press or key:
Pressing , or will take you
back to the previous screen.
If a description for the object fits on one
screen then no scroll bar is displayed on
the right.
Improving pointing accuracy
Every telescope has some kind of imperfections.
Nexus DSC Pro supports two methods of
improving pointing accuracy that compensate
OK
5
5
OK
ESC

Nexus DSC Pro User Manual
9
for those imperfections: sync objects and
Mpoint. Mpoint is described later in this manual.
Sync objects are used to improve the pointing
accuracy when a telescope is pointing in the
proximity of a synced object. Nexus DSC Pro
limits the number of sync objects to 128. The
size of the area is limited to 10º radius. If there
are more than one sync objects in the area then
corrections from the closest sync objects are
used.
Once the two star alignment is performed Nexus
DSC Pro will enable an additional mode to allow
adding sync objects. Use to activate it
while an object from one of the catalogues is
selected:
To sync to the object (M79 in this example) and
make sure it is precisely in the centre of the field
of view and of any of offsets are not exactly 0
then press the key to add it to the sync
objects list. Once you press the key you will
see that offsets became 0s:
Nexus DSC Pro’s menus
Settings
Nexus DSC Pro has a number of parameters
that can be adjusted. All of the adjustable
parameters are stored in non-volatile memory
and will be used every time you turn Nexus DSC
Pro on.
Please note that all settings can be reset
back to their default values by turning Nexus
DSC Pro on while holding the key. You
will be asked to confirm the reset to the
factory settings.
Telescope
Nexus DSC Pro needs the mount type and
encoder steps to be set correctly before it can be
used to locate celestial object precisely.
The mount type and encoder steps are set in the
Telescope Settings that can be accessed by
selecting Setting from the main menu:
then by selecting Telescope:
Nexus DSC Pro supports up to five different
telescope configurations. Each telescope
configuration has its own mount type, encoder
steps, altitude reference angle value. Having
different telescope configurations allows you to
use Nexus DSC Pro with different telescopes
without spending time on setting all parameters.
Then you need to select the telescope:
and keys are used to switch between
telescope configurations.
To select a telescope configuration without
changing any parameters just press the
key.
You can also rename TELESCOPE 1 to your
telescope name. You just need to activate the
Rename button by using and then press
the key. A text cursor now appears under
the name:
You will now be able to edit the name and
change it to your telescope name:
Now you need to set other parameters for your
telescope (by pressing the key when the
Adjust button is active):
OK
ESC
ESC
OK
OK
!

Nexus DSC Pro User Manual
10
where the mount type can be selected by using
and keys. The encoder steps are set
to 10000 steps by default and should be set to
the number of steps corresponding to the
number of steps installed on your telescope.
Encoder steps can be set by using the numeric
keys on the keypad. Change the sign to negative
if required as described previously:
Nexus DSC Pro has a provision for changing the
default direction of the arrows indicating where
to move the telescope. It can be changed by
selecting REVERSE ARROW:
Align
The Align settings menu is used to control the
behaviour during alignment.
It enables to set various parameters that are
used only during the alignment:
• Force altitude limits will force Nexus DSC Pro
to display only objects that are within altitude
limits (specified in Settings->Other
Parameters) if checked.
• Alignment Method selects the alignment
method used for the telescope alignment. Two
methods are supported: Two star alignment and
One star alignment:
Two star alignment should be used for most
cases as it provides the best pointing
accuracy.
One star alignment should only be used on
a perfectly polar aligned German Equatorial
mount or on perfectly levelled Alt-Azimuth
mounts. The pointing accuracy will depend
on the accuracy of polar alignment/levelling
the telescope.
Enable magnitude limit is forcing displaying
(during alignment only) only objects brighter
than the magnitude specified in the next field if
checked.
Find
The Find settings menu is to control the
behaviour of Nexus DSC Pro in all Find modes.
• Force altitude limits will force Nexus DSC Pro
to display only objects that are within altitude
limits (specified in Settings->Other
Parameters) if checked.
• Enabled catalogues specifies which
catalogues will be displayed in Find->From
Catalogues mode.
Use key to activate the Enabled
Catalogues button and then press the key
to select/deselect catalogues that are shown in
the Find mode.
OK

Nexus DSC Pro User Manual
11
Now the screen will list all catalogues installed:
Pressing and keys selects/deselects
a catalogue, and keys to switch
between catalogues, and keys
switches between pages. Pressing the key
will switch to the next page if All ON and All OFF
buttons are inactive.
All ON and All OFF selects/deselects all
catalogues (in case only a few catalogues need
to be selected one can deselect all catalogues
and then go and select only catalogues that are
needed:
Use and keys to switch between
catalogues for selecting/deselecting and also to
get to All ON and All OFF buttons.
Press the key to finish the selection.
• Precision setting determines the number of
digits displayed after the decimal point in all Find
modes. It can be set to display one, two or three
digits after the decimal point.
• Display coordinates controls the type of
coordinate system used to display coordinates
of objects on the object screen in Find mode. It
can be switched between Equatorial (J2000)
and Horizontal system.
Coordinates are displayed in equatorial system:
Coordinates are displayed in horizontal system:
Other Parameters
The Other Parameters menu is to set other
settings that do not fall under a specific category
for your Nexus DSC Pro.
• Altitude limits can be specified that are used
for:
• Limiting a range of objects’ search in
Align/Find/Tour modes
4
6
OK
ESC

Nexus DSC Pro User Manual
12
• Limiting slewing the telescope when
Nexus DSC Pro is used with a motor
controller (ServoCAT, SiTech,
SkyTracker)
• Reverse Scrolling changes the behaviour of
and key presses.
AstroLock
AstroLock™ menu allows to set parameters
determining the behaviour of tracking objects
when Nexus DSC Pro is used with motor
controllers (like ServoCAT, SiTech,
SkyTracker).
AstroLock™ helps tracking objects when the
motor controller used does not have the gear
ratios configured precisely. Nexus DSC Pro
detects when the telescope starts tracking and
locks onto that coordinate and adjusts the drive
rates to keep telescope tracking locked onto that
coordinate when AstroLock is enabled. Another
option is to compensate for a backlash when
slewing the telescope to an object which will
have the tracking direction changed.
• Enable AstroLock – enables or disables
AstroLock
• Activation delay – sets the delay after the slew
is complete and before AstroLock is engaged;
this delay is to allow using the motor controller’s
hand pad to adjust the telescope’s position – this
is especially important in case of using
ServoCAT or SkyTracker; the delay is not
required in case of using SiTech motor controller
as any key presses on the handpad disengages
the lock.
• Engage limit – specifies the threshold for
Nexus DSC Pro to detect that the telescope
started tracking (in degrees per one quarter of a
second)
• Disengage limit – specifies a threshold when
the lock is disengaged; to allow using the motor
controller’s handpad to move the telescope
when the lock is active.
• Alt backlash and AZ backlash – specify the
backlash values for the altitude and the azimuth
motors.
Communications
Communications menu allows to set parameters
for serial port and USB port. Please select
Communications from the Settings menu:
USB
USB port settings are set by selecting the USB
menu:
Nexus DSC Pro supports interfacing to
ServoCAT through the USB port for performing
GOTO commands from a planetarium
application. For third generation of ServoCAT
you will need a USB cable supplied with
ServoCAT, for the first and the second
generation of ServoCAT a USB to serial adapter
is required – the adapter must be based either
on FT232 chipset, on CP210x chipset or on
PL2303 chipset. Please contact Astro Devices
for a list of compatible USB to serial adapters.
For operating Nexus DSC Pro with ServoCAT it
is necessary to set a few parameters:
• Communication protocol set to ServoCAT
• Baud rate set to 9600
• Stop bits set to 1
• Data bits set to 8
• Parity set to None
Serial
Serial port parameters are set by selecting the
Serial menu:

Nexus DSC Pro User Manual
13
Now the serial port parameters can be adjusted
as required:
• Communication protocol
• Baud rate
• Stop bits
• Data bits
• Parity
Time and Date
Nexus DSC Pro has a built-in battery backed
real time clock.
To set the time you need to select Time & Date:
then the time settings can be adjusted:
The easiest method of setting the time and
date parameters is to set TIME ZONE,
Daylight Savings, enable GPSsync and
then step outside to allow the GPS receiver
to get a fix on the location and the time and
date will be set automatically.
WiFi
Nexus DSC Pro’s optional WiFi interface can be
disabled, set to Access Point mode (when
Nexus DSC Pro acts as a WiFi access point thus
allowing other devices to joins its network) or it
can be set to Infrastructure mode (for connecting
to an existing WiFi network). To change various
WiFi parameters can be done by choosing
Settings->WiFi:
The WiFi is disabled by default.
The easiest way of using Nexus DSC Pro with a
smartphone/tablet/laptop is to switch the WiFi to
Access Point mode:
If default parameters are to be used then after
changing WiFi Mode to Access Point just press
the key three times to save the new setting.
Otherwise two additional pages allow changing
all available parameters:
The Use EPOCH is set to JNow by default as
most planetarium applications use the current
epoch for the coordinates. Some planetarium
applications can only accept J2000.
Please note that this password needs to be
at least 8 characters long. If Password is
set to Password (case sensitive) then
Nexus DSC Pro will create an open WiFi
network.
Sound
Nexus DSC Pro allows you to adjust the volume
and enable/disable sounds.
• Play Sounds enables/disables sounds when
aligning, sending commands from a planetarium
application, command completion confirmation.
• Volume can be used to adjust the volume of
sounds played; it can be from 0 (mute) to 100
(maximum).
OK
!

Nexus DSC Pro User Manual
14
Display/Keypad
Nexus DSC Pro allows you to adjust the
brightness of display and of the keys’ backlight.
The display brightness has a range from 0 to 255
(255 is the maximum) while the back light has a
range from 0 to 100 (0 will turn the back light off
while 100 is the maximum level).
To adjust the levels of brightness is done
through Display/Keypad:
which bring up the controls:
Use and keys to switch between
Display and Keypad and and keys to
adjust the levels.
Set After is used to set the time period after
which the selected display brightness will be set.
For example, if the display brightness level was
left at a low level and Nexus DSC Pro was
turned ON during daytime then it would be very
difficult to see the text on the screen. The
delayed setting of the display brightness will
allow you to set the brightness to the desired
level while operating the device.
Sleep controls when Nexus DSC Pro will turn the
display OFF if no key has been pressed for the
selected time period. Nexus DSC Pro is fully
operational when the display is turned OFF.
Pressing any key will turn the display back ON.
Precision controls the number of digits displayed
after the decimal point for showing the offset to
the selected object. It is saved for each
telescope.
Once you have adjusted the brightness levels to
the ones you desire press the key to save
them.
Align
Align menu contains all functions handling the
telescope alignment:
• Altitude reference alignment
• First object alignment
• Second object alignment
• Alignment status
• Mpoint start
• Mpoint parameters
• Mpoint analyse
• Equatorial platform timer
All alignment functions are accessed by
selecting Align from the top level menu:
There are currently two methods of aligning the
telescope:
- Two star alignment
- One star alignment
The method used is specified in Settings-
>Align. Two star alignment should be used in
most cases. One star alignment should only be
used on:
- Perfectly levelled altitude-azimuth mount
- Perfectly polar aligned German
equatorial mount
The steps to align the telescope depend on the
selected method:
• Two star alignment:
1) Altitude Reference
2) First Object Alignment
3) Second Object Alignment
4) Alignment status
• One star alignment:
1) First Object Alignment
2) Alignment status
Altitude Reference
The first step of the telescope alignment is to
set the initial altitude reference.
It is done by selecting Altitude Reference from
the Align menu:
Now you can select the initial altitude reference
angle:
There are three choices with the angle:
• 90°
• 0°
• Custom
OK

Nexus DSC Pro User Manual
15
The custom angle can be set with a precision of
1/100 of a degree. Once Custom is selected you
can change the integer part (from -180° to
+180°) using and keys:
And then you can set the fractional part using
and keys:
First Object Alignment
You can choose first alignment object by
selecting First object alignment from the Align
menu:
Use and keys to switch to the
CATALOGUE tab to change the catalogue if
required. Use and keys to change the
selection.
Aim the telescope at the selected object using
an eyepiece with a reticle or a high magnification
eyepiece and once the object is in the centre
press key:
Nexus DSC Pro will automatically switch to the
Second object alignment.
Second Object Alignment
You can choose first alignment object by
selecting Second object alignment from the
Align menu if Nexus DSC Pro did not activate it
automatically – for example, if you decided that
the telescope was not aimed at the second
alignment object precisely.
Please repeat the procedure describe above for
the second alignment:
Nexus DSC Pro will store your selection of
alignment catalogues and objects in non-
volatile memory which means that you don’t
need to change the selection next time you
observe.
Alignment Status
The alignment status shows whether the two
star alignment was successful (it will show the
error if unsuccessful).
The accuracy of the alignment is shown only in
case of using three star alignment method.
Three values displayed show differences
between angular separations based on
catalogued positions of three stars and angular
separations based on the encoder positions.
Mpoint Start
Every telescope has some kind of imperfections:
• Fabrication errors
OK

Nexus DSC Pro User Manual
16
• Mechanical and optical axes not being
perpendicular
• Flexure of telescope mechanical structure
Nexus DSC Pro can compensate for most of
systematic errors.
Mpoint calculates a mathematical model of your
telescope and performs pointing corrections in
real time.
Using Mpoint telescope pointing correction
involves:
1. Performing the initial two star alignment
2. Starting an Mpoint run of calibration
objects (from 4 to 128 objects)
3. Analysing the results
4. Enabling the model to be used for pointing
corrections
The first step has been described earlier. The
second steps starts with selecting Mpoint Start
from the Align menu:
Then you can select a catalogue of objects to be
used as calibration objects:
It is always better to use either Named Stars
catalogue or Bright Stars catalogue for
calibration objects as it is much easier to put
stars in centre of eyepiece. It is best to use an
eyepiece with a reticle for the calibration run to
achieve the precise pointing of the telescope at
calibration objects. It is also advisable to use
stars that are currently at 30° to 80° in altitude
(the current altitude is displayed in square
brackets at the bottom of the screen).
Once you selected a catalogue you can start the
calibration run:
The screen shows you where to move the
telescope to Ankaa in this example. Move move
the telescope and put the star in the centre of
your eyepiece as precise as possible:
Now press the key. You will see that the
counter at the bottom of the screen (after the
closing square bracket) has been incremented
and becomes 3:
Now continue the calibration run until you
collect enough calibration stars:
Calibration stars are automatically added
to sync objects list and Nexus DSC Pro will
apply the correction to pointing immediately
and the offsets will become equal zero;
It is always good to have the calibration stars
spread across the whole sky for achieving the
best results.
Adding calibration stars in Find/Identify/Tour
modes
It is also possible to add calibration stars in
Find/Identify/Tour modes. The two star
alignment needs to be performed before adding
calibration stars for MPoint analysis.
For example, in Find mode when Acrux is shown
and the telescope has it in the centre of the field
of view:
Pressing the key will display the following
screen:
The current object will be added for the analysis:
OK
Other manuals for Nexus DSC Pro
1
Table of contents
Other ASTRO DEVICES Accessories manuals
Popular Accessories manuals by other brands

Endress+Hauser
Endress+Hauser Oxymax H COS21D operating instructions

Loup Electronics
Loup Electronics Weighlog 100 User guide and installation manual

Salonserve
Salonserve Swan Steamer Installation and user guide

Honeywell Home
Honeywell Home DC311 Series manual

Patton electronics
Patton electronics 590A user manual

SOMFY
SOMFY TaHoma 2401368 installation guide

Half Price Blinds
Half Price Blinds Folding Arm Awning Fitting instructions

DeWalt
DeWalt DW083 instruction manual

Saje
Saje aroma Breeze manual

Panasonic
Panasonic MA24D52 Specification sheet

Seifert
Seifert 841210S62 manual

Atlantic Ultraviolet
Atlantic Ultraviolet Sanidyne Installation operation & maintenance