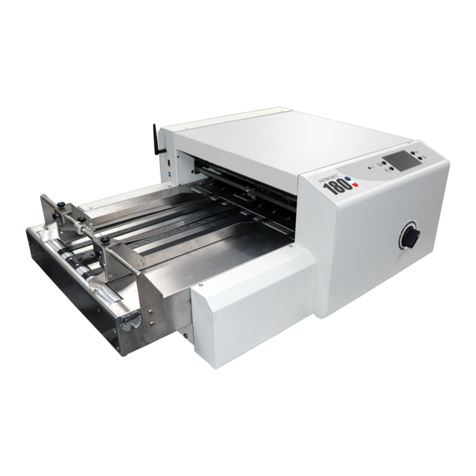
AstroJet 5000 User manual

AstroJetTM 5000
SHUTTLE HEAD
PRINTER
OPERATOR MANUAL
ASTRO MACHINE CORP.
630 Lively Blvd.
Elk Grove Village, IL 60007
Phone: (847) 364-6363
Fax: (847) 364-9898
www.astromachine.com

SAFETY PRECAUTIONS
THIS EQUIPMENT PRESENTS NO PROBLEM WHEN USED PROPERLY.
HOWEVER, CERTAIN SAFETY RULES SHOULD BE OBSERVED WHEN
OPERATING THE ASTROJET 5000 PRINTER.
BEFORE USING THE PRINTER, YOU SHOULD READ THIS MANUAL
CAREFULLY AND FOLLOW THE RECOMMENDED PROCEDURES, SAFETY
WARNINGS, AND INSTRUCTIONS:
Keep hands, hair, and clothing clear of rollers and other moving parts.
Avoid touching moving parts or materials while the machine is in use. Before clearing a jam, be
sure machine mechanisms come to a stop.
Always turn off the machine before making adjustments, cleaning the machine, or performing any
maintenance covered in this manual.
The power cord and power supply supplied with the machine should be plugged it into a properly
grounded, easily accessible wall outlet located near the machine. Failure to properly ground the
machine can result in severe personal injury and/or fire.
The power cord and wall plug is the primary means of disconnecting the machine from the power
supply.
DO NOT use an adapter plug on the line cord or wall outlet.
DO NOT remove the ground pin from the line cord.
DO NOT route the power cord over sharp edges or trap it between furniture.
Avoid using wall outlets that are controlled by wall switches, or shared with other equipment.
Make sure there is no strain on the power cord caused by jamming between equipment, walls or
furniture.
DO NOT remove covers. Covers enclose hazardous parts that should only be accessed by a
qualified service representative. Report any cover damage to your service representative.
This machine requires periodic maintenance. Contact your authorized service representative for
required service schedules.
To prevent overheating, do not cover the vent openings.
Use this equipment only for its intended purpose.
In addition, follow any specific occupational safety and health standards for your workplace or area.
This manual is intended solely for the use and information of Astro Machine Corp., its designated
agents, customers, and their employees. The information in this guide was obtained from several
different sources that are deemed reliable by all industry standards. To the best of our
knowledge, that information is accurate in all respects. However, neither Astro Machine Corp. nor
any of its agents or employees shall be responsible for any inaccuracies contained herein.
AstroJetTM is a registered trademark of Astro Machine Corp.
Hewlett-Packard is a registered trademark of Hewlett-Packard Corporation.
Windows 98, 2000, NT and XP are registered trademarks of Microsoft Corporation.
IBM is a registered trademark of International Business Machines.
All other trademarks are the property of their respective holders.
All rights reserved. No part of this book may be reproduced or transmitted in any form or by any means, electronic or mechanical,
including photocopying, recording, or any information storage and retrieval system, without permission in writing from the publisher
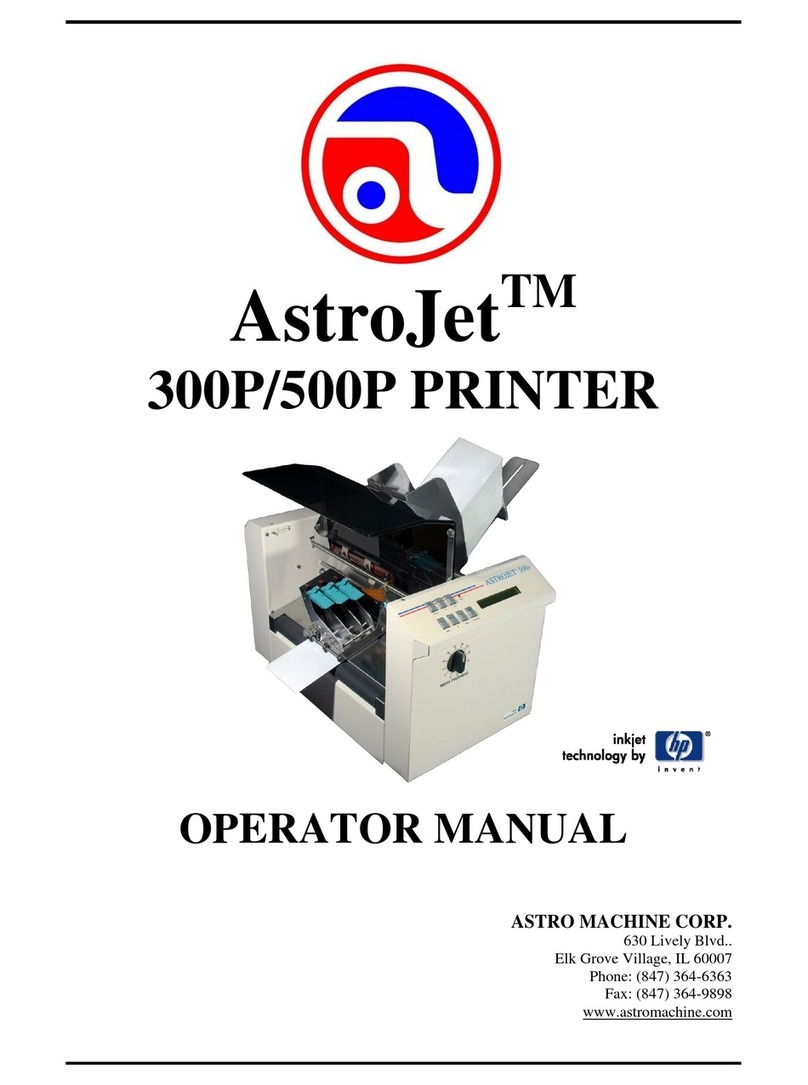
TABLE OF CONTENTS
i
Table of Contents
Section 1 –Getting Acquainted
1
Front View
Rear View
1
2
Section 2 –Installing the Printer
3
Choosing a Location
Unpacking and Setup
Connecting the AstroJet 5000
Connecting the Computer
Installing the Inkjet Cartridges
Setting up the Feed
Feeding Envelopes
Installing the Printer Driver
3
3
5
5
6
7
8
9
Section 3 –Operating the AstroJet 5000
13
Setting Up a Job in MS Word
Printer Driver Properties
Paper/Quality Tab
Finishing Tab
Effects Tab
Basics Tab
Color Tab
Service Tab
Tap 13
13
15
15
17
17
17
18
19
22
Section 4 –Maintenance
23
The Inkjet Cartridge
Jams in the Printer
Replacing the Sheet Separators
Cleaning
23
24
25
25
Section 5 –Troubleshooting
27
HP Inkjet Print Cartridges
The Printer
27
28
Appendices
29
Appendix A –Specifications
Appendix B –Supplies and Optional Hardware
29
30
Index
31

TABLE OF CONTENTS
ii
NOTES
______________________________________________________
______________________________________________________
______________________________________________________
______________________________________________________
______________________________________________________
______________________________________________________
______________________________________________________
______________________________________________________
______________________________________________________
______________________________________________________
______________________________________________________
______________________________________________________
______________________________________________________
______________________________________________________

SECTION 1
GETTING ACQUAINTED
1
Section 1 –Getting Acquainted
Front View
1.
Paper Switch –When light blinks indicates that the next piece did not feed into
position. Press it to continue printing.
2.
Cancel Switch –Press to cancel the job being printed. When the light is flashing
the Printer is out of ink or a cartridge is missing.
3.
Adjustable Media Guide –Holds the paper against the Fixed Register Guide.
4.
Fixed Media Guide –All printing is registered against this Guide.
5.
Soft Power Button –Press and hold to reset the Printer’s software. Light comes
on when the job is sent to the Printer.

SECTION 1
GETTING ACQUAINTED
2
Rear View
1.
Parallel Port Connection –Attach the Centronics Parallel cable here.
2.
USB Port Connection –USB cable attaches to the printer here.
3.
Main Power Switch –Powers up the printer when turned ON.
4.
Power Connection –Connect the Printer’s Power Pack here. Use only the
Power Supply shipped with the Printer.
5.
Clear Machine Button –Operates the motor to help clear media from the
machine.
6.
Rear Guide Support –Supports the media.
7.
Adjustable Media Guide –Holds the media against the Fixed Register Guide.
8.
Rear Guide –Holds the media against the Front Plate.
9.
Fixed Media Guide –All printing is registered against this Guide.

SECTION 2
INSTALLING THE PRINTER
3
Section 2 –Installing the Printer
Before using the AstroJet 5000 Printer the following must be done:
Choose a location for the Printer
Unpack and assemble the Printer.
Plug in the Printer and connect it to the computer
Install the Inkjet Cartridges
Set up the feed on the Printer
Install the Printer Driver
Choose a Location
The AstroJet 5000 should be placed on a sturdy worktable or cabinet at least 9 inches from any walls.
Protect the AstroJet 5000 from excessive heat, dust, and moisture –avoid placing it in direct sunlight.
Unpacking and Setup
Remove the Printer and its parts from the carton. Remove all packing tape. The screws that attach the
various parts of the Guides to the Printer are under the tape in their respective positions.
Begin by installing the Fixed Side Guide. It is held in place by two screws [1]:

SECTION 2
INSTALLING THE PRINTER
4
Next install the Adjustable Side Guide using the two
screws [2] provided.
Attach the Rear Paper Support using the two knobs [3]
provided.
NOTE: The large slots fit over the socket head screws.
Install the Back Guide using the thumbscrew and washer
[4] provided. The washer goes between the screw and the
Rear Paper Support.

SECTION 2
INSTALLING THE PRINTER
5
Connecting the AstroJet 5000
Plugging in the Printer
Make sure that the Main Power Switch of the Printer is in the OFF position.
1. Connect the power cord from the Power Pack to the connector [4] at the rear of the Printer.
2. Plug the power cord into the Power Pack and then plug the other end into a 115-220 Volt AC,
50/60 Hz. grounded outlet.
CAUTION
USE THE POWER SUPPLY PACKED WITH THE PRINTER.
DO NOT USE AN ADAPTER PLUG OR EXTENSION CORD TO
CONNECT THE PRINTER TO THE WALL RECEPTACLE.
DO NOT USE OUTLETS CONTROLLED BY WALL SWITCHES.
DO NOT USE AN OUTLET THAT SHARES THE SAME CIRCUIT
WITH LARGE ELECTRICAL MACHINES OR APPLIANCES.
Connecting to the Computer
The Printer has both a USB and a Parallel Port [1]
connection. The two ports are located one above the
other as shown. If you use the Parallel Printer Cable
from your computer plug it in and latch the two
locking clips. If using a USB Port [2] plug that cable
into the connector mounted below the Parallel
Connecter.
The Main Power Switch [3] should be turned on after
you attach the power cord to the Power Receptacle [4].

SECTION 2
INSTALLING THE PRINTER
6
Install the Inkjet Cartridges
The AstroJet 5000 uses two Ink Cartridges, the HP57 Color Cartridge and the HP56 or HP58 Black
Cartridge. Use the HP56 Black Cartridge for every day printing and the HP58 Black Cartridge for photos
and high quality printing.
To install and replace the Cartridge:
1. Plug in the Printer and turn the Main
Power Switch ON. Open the Top Cover
and press the Soft Power Button [1], the
button will light. The Printhead Carriage
will move side to side and the Printhead
Wiper mechanism will move to its
downward position. Wait until the
mechanism stops moving. Then open the
two Printhead Latching Covers [2] by
lifting them from the front.
2. Insert the Cartridges in their appropriate
positions as shown. The Color Cartridge
goes on the left.
3. Press down on the Cartridge Latches
until you hear a click, and then close the
machine cover.
4. Refer to Section 3 –Operating the
AstroJet 5000 for information on how to
align the Printheads when you install
new Cartridges.

SECTION 2
INSTALLING THE PRINTER
7
Setting up the Feed
The AstroJet Printer is equipped with four Sheet Separators, two Side Guides (one fixed and the other
adjustable), and a Back Media Guide. The Sheet Separators are adjusted individually as follows:
1. Move the Adjustable Side Guide so that the locking screws on the Sheet Separator Assembly are
accessible.
2. Loosen the locking screw and raise the Separator, then tighten the locking screw to hold the
Separator in the up position.
3. Place the media under the Separators. The
media is always placed against the Fixed
Paper Guide. Loosen the Separator locking
screw. Place the Separator on the media and
tighten the locking screw.
4. Adjust the Movable Side g\Guide so that it
is about 1/32-inch from the sides of the
media. Tighten the locking screws on the
Side Guide. Place some media in the
machine.
5. The Rear Support Guide adjusts by
loosening the two Locking Knobs and
raising it up or down. The starting position
for the Guide is with the slots centered on
the Knobs. If you experience feeding
problems, you can raise or lower the Rear
Support Guide to help improve the angle of
the media to the Feed Roller / Sheet
Separators.

SECTION 2
INSTALLING THE PRINTER
8
6. Adjust the Rear Guide by loosening the
locking screw and place it so that the
media is raised approximately 1/2-inch
above the Feed Table.
7. The same procedure is used for other media sizes and types.
NOTE: The amount of media that can be stacked on the Printer is determined by the weight of
the material. The Feeder may not feed larger and heavier media when the stack is full. If this is
the case, reduce the amount of media in the stack until the Feeder functions properly.
Feeding Envelopes
1. Insert one envelope under the Sheet
Separators and adjust the two outer ones to
the envelope. Do not use the Center
Separator. Then place a small stack of
envelopes in the Printer and adjust the
Adjustable Side Guide to within 1/32" of
the envelopes. Then adjust the large Rear
Envelope Support to that it is centered on
the stack of envelopes and the first
envelope is at the bend in the Rear Guide
as shown.
NOTE: The position of the Rear Guide is a
starting point. Some envelopes may require that
the Guide be slightly further back. Also, the Rear
Support should be in the middle position to start.
2. Load envelopes to the top of the Side
Guides and then place the weight on top of
the pile. There are two weights, one for # 9
and one for # 10 envelopes. These weights
keep pressure on the pile and help feeding.
They are designed to permit feeding of the
last envelope in the stack without the
weight feeding into the Printer.

SECTION 2
INSTALLING THE PRINTER
9
Installing the Printer Driver
The installation procedure for the AJ5000 driver is different for USB and Parallel Ports. Follow the
instructions below for installing the Printer with a USB Port. Instructions for installing the Printer on a
Parallel Port follow the instructions below.
Install the disk supplied with the Printer in your CD drive. If the Window’s Explorer window opens,
close it.
USB Port Installation
1. Connect the Printer to the computer via the
USB Port and turn the Printer ON. In a few
minutes the “Welcome to the Found New
Hardware wizard” will open on the computer
screen. Check the box “No, not this time” as
shown. Then click NEXT>.
2. The next window that opens will show the
name of the Printer, AMC50 or AMCAMC50.
Click on the “Install the software
automatically (Recommended)” box and then
click NEXT>.
3. After a few moments the window shown
below will appear, and then the “Hardware
Installation” window will appear. Click on
“Continue Anyway” and the driver software
will load from the disk.

SECTION 2
INSTALLING THE PRINTER
10
4. Once the driver is loaded the
“Completing the found New Hardware
Wizard” window will appear. Click
FINISH.
5. The installation is complete when the “Found New Hardware” box appears in the lower right-hand
corner of your screen.
Parallel Port Installation
1. Connect the Printer to the computer via the
Parallel Port (LPT1) and turn the Printer ON. If
the disk loads and the “Welcome to the Found
New Hardware wizard” opens; CLOSE it.
2. Click on START and then Printers and Faxes.
When the “Printers and Faxes” window opens
click on Add a printer.
3. The “Welcome to the Add Printer Wizard”
window will open. Click NEXT>.

SECTION 2
INSTALLING THE PRINTER
11
4. Click on the Local printer attach to the
computer and Automatically detect and install
my Plug and Play printer buttons in the “Local
or Network Printer” window. Then click NEXT>.
5. The “Welcome to the Found New Hardware
Wizard” window will then open. Click on No,
not at this time and then click NEXT>.
6. In the “Found New Hardware Wizard” window
that appears next, click on Install the software
automatically (Recommended) button and
then click NEXT>.
7. The Installer will look for the disk. This may take a
few minutes. Then the “Please wait while the wizard
installs the software…” will open as will the “Copying
Files” window.

SECTION 2
INSTALLING THE PRINTER
12
8. After a few moments you will see the “Hardware
Installation” window. Click on the Continue
Anyway button to continue the installation of the
software.
9. When the “Completing the Found New Hardware
Wizard” window opens click FINISH.
10. The “New Printer Detection” window opens. It is
a good idea to print a test page at this point to
confirm that the Printer Driver and the Printer are
communicating. Load a sheet of 8-1/2” x 11”
paper in the Printer and click NEXT>.
11. Once the test page is printed the “Completing the
Add Printer Wizard” window will display
information about the Printer. Click FINISH to
close the window.
12. Restart the computer to complete the installation.

SECTION 3
OPERATING THE ASTROJET 5000
13
Section 3 –Operating the AstroJet 5000
Once the Printer Driver is installed on your computer, you are ready to start printing. Turn the Printer on
from the Main Power Switch. Set up your job and send it to the Printer. The Printer will start and print.
This rest of this section is divided into two parts. The first part describes how to set up a job to print from
Microsoft Word. The second part describes the driver properties and the various options available when
you run a job.
The Printer Driver that you installed on your computer in Section 2 should be set as the default driver. It
will then be accessible through your applications such as Microsoft Word. Other types of applications and
database management software will work in a similar manner when using this Driver.
This Section further assumes that you have set up the Feed and the Printer is connected to your computer.
Setting-Up a Job in MS Word
The first thing that you have to take into account when
setting up a job to print in MS Word or any other
application is the print area of the Printer and the
paper sizes it can handle. The maximum print area for
the AstroJet 5000 Printer is 8.5 inches wide by 17
inches long. The maximum paper size that the Printer
can feed is 11 inches wide by 17 inches long. The
diagram on the right illustrates this difference.
When setting up for the maximum print area for an 11
inch by 17 inch document, always set the paper size as
9.5 inches wide by 17 inches long in the custom paper
setting. Set the top and bottom margin to 0.24 inches
and the left-hand margin to 0 inches. The right-hand
margin should be set to 1 inch. You will now be able
to layout the job and print the maximum printing area.
For other page sizes such as 8.5 inches by 11 inches
(standard letter) or 8.5 inches by 14 inches (legal size)
set the paper size to their exact sizes and choose the
margins you want.
NOTE: the top and bottom margin default is 0.24 inches, but you can make them larger.
A #10 envelope can be chosen from the Page
Setup in MS Word. The envelope should be run
the 9.5 inch wide way. This is the fastest way to
run the envelope, especially if you are addressing
them with a mail merge. Setting up for this is as
simple as selecting the #10 envelope from the
Page Setup Menu and setting the top and bottom
margin at 0.24 inches and the right-hand margin
at 1 inch as shown.

SECTION 3
OPERATING THE ASTROJET 5000
14
Printing the Entire 9.5 inches on a #10 Envelope
If it is necessary to be able to print the entire 9.5 inch length of the #10 envelope it can be done, however
the printing speed will be greatly reduced because you will be running the envelope in the long direction.
1. Set up your layout page by going
to the Page Setup option in MS
Word. Select the margins as
shown below. Set the margins that
you want to use for the layout.
The minimum left and right
margins that can be set are 0.13
inches. Select Landscape for
paper orientation and then select
the Paper tab.
2. When you select the Paper Tab,
select Paper Size “Custom 1” and
then set the paper Width to 9.5
inches and the paper Height to
4.13 inches. Then click on the OK
button.
NOTE: You must use a custom size
to get the correct orientation of the
envelope. Do not use the standard
#10 envelope selection.
3. The last step is to go to print from
the File menu and select
Properties from the Print window.
In the AMC50 Properties window
select “Custom 1” and set the
Width at 4.13 inches and the
Length at 9.5 inches under the
Page size. Click OK in the
“Custom paper size” window and
then click OK in the “AMC50
Properties” window to return to
the “Print” window.
4. Select the number of copies you
want to print, and then click OK.
For more information about changes that can be made in the Driver please see the section on the
Printer Driver below.

SECTION 3
OPERATING THE ASTROJET 5000
15
Printer Driver Properties
The Printer Driver for the AstroJet 5000 works the same as any other Printer Driver for Windows. It does,
however, have some enhancements to help you maximize the ability of the Printer to print variable
addresses quickly and efficiently.
Once the job is set up click on File, and then on
Print. The window at right will open.
Paper/Quality Tab
If you then click on the Properties button, the
“Properties” window opens. Click on "Size is" box to
select the size of the material to be printed. You can
enter up to five custom sizes if the paper size you are
printing on is not listed.
The next step is to click on the "Paper Length" box to
select either Automatic Detection or "Select from
above". Automatic Detection will cause the Printer to
feed one sheet of paper and measure its length. The
Printer will then use this information for each
succeeding sheet. The first sheet is not printed. "Select
from above" allows you to pick the paper size from
the "Size is" box and the first sheet will be printed.

SECTION 3
OPERATING THE ASTROJET 5000
16
The "Type is" box allows you to select the type of
paper you are going to print. Some settings such
as Photo Paper, Glossy will adjust the printing
mode in the software to account for the quality of
the paper.
Print Quality refers to the amount of ink and the
resolution of the image the Printer will print. Fast
Draft uses the least amount of ink, has the lowest
resolution and prints the fastest. It is equivalent to
300 dpi (dots per inch). Fast Normal and Normal
are approximately 600 dpi and print slower, but at
a higher quality. The Best setting is
approximately 1200 dpi and is used where high
quality images are required. Finally, there is the
Maximum DPI setting. This setting is used when
printing photos and has a correction routine
available under the "Real Life Digital
Photography" button to help improve the quality
of photos you print.
On this and subsequent pages in the Properties
window you will notice at the top the Print Task
Quick Sets menu. This menu contains some
standard setups for printing different types of
jobs. You may also add job setups to this menu by
typing in a description or name for a job and
clicking on the Save button. This is particularly
useful if you have some standard jobs you run all
the time. Highlighting the job and clicking the
Delete button will cancel any of the jobs in the
menu.
Table of contents
Other AstroJet Printer manuals

AstroJet
AstroJet 2650P User manual

AstroJet
AstroJet AJ-140 User manual

AstroJet
AstroJet 140 User manual

AstroJet
AstroJet M1DX Manual

AstroJet
AstroJet 3600P? 3800P User manual

AstroJet
AstroJet 300P User manual

AstroJet
AstroJet M1 User manual

AstroJet
AstroJet IB-9000-6P User manual

AstroJet
AstroJet AJ-180 User manual

AstroJet
AstroJet 1000P User manual