manuals.online logo
Brands
  1. Home
  2. •
  3. Brands
  4. •
  5. AstroStart
  6. •
  7. Transmitter
  8. •
  9. AstroStart Elite 2615D-TX User manual

AstroStart Elite 2615D-TX User manual

510-10569 5/15/2017 PM
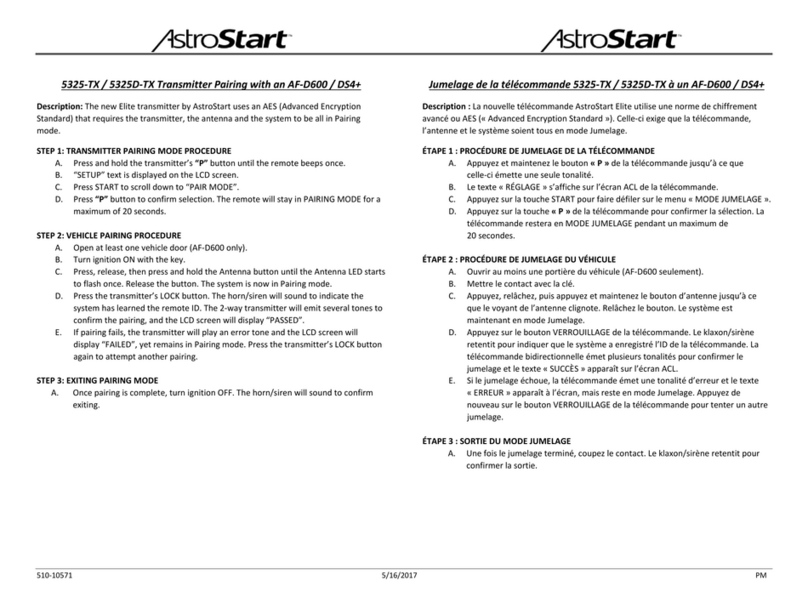
2615-TX / 2615D-TX Transmitter Pairing with an AF-D600 / DS4+
Description: The new Elite transmitter by AstroStart uses an AES (Advanced Encryption
Standard) that requires the transmitter, the antenna and the system to be all in Pairing
mode.
STEP 1: TRANSMITTER PAIRING MODE PROCEDURE
A. Press and hold the transmitter’s “P” button until the remote emits a long beep.
Release the “P” button.
B.
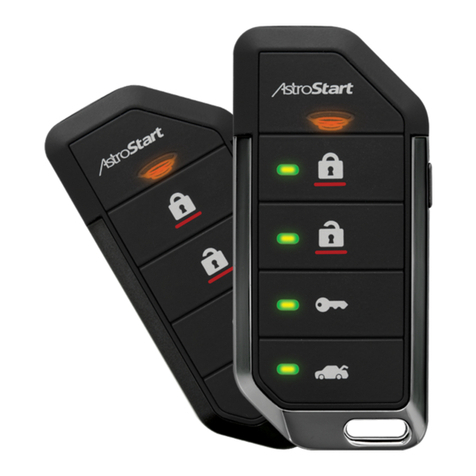
2615-TX
2615D-TX
Proceed to step C.
Press and hold the UNLOCK button. The
remote emits another long beep, the transmit
LED stays ON then blinks OFF.
C. The remote is now in Pairing mode for a maximum of 20 seconds.
STEP 2: VEHICLE PAIRING PROCEDURE
A. Open at least one vehicle door (AF-D600 only).
B. Turn ignition ON with the key.
C. Press, release, then press and hold the Antenna button until the antenna LED
flashes once. Release the button. The system is now in Pairing mode.
D. Press the transmitter’s LOCK button. The horn/siren will sound to indicate the
system has learned the remote ID.
E. If pairing fails, press the transmitter’s LOCK button again to attempt another
pairing.
STEP 3: EXITING PAIRING MODE
A. Once pairing is complete, turn ignition OFF. The horn/siren will sound to confirm
exiting.
B. Press on the transmitter’s “P” button. The transmitter will play a two-toned beep
to confirm exiting.
Jumelage de la télécommande 2615-TX / 2615D-TX à un AF-D600 / DS4+
Description : La nouvelle télécommande AstroStart Elite utilise une norme de
chiffrement avancé ou AES (« Advanced Encryption Standard »). Celle-ci exige que
la télécommande, l’antenne et le système soient tous en mode Jumelage.
ÉTAPE 1 : PROCÉDURE DE JUMELAGE DE LA TÉLÉCOMMANDE
A. Appuyez et maintenez le bouton « P » de la télécommande jusqu’à ce
que celle-ci émette une longue tonalité. Relâchez le bouton « P ».
B.
2615-TX
2615D-TX
Passez à l’étape C.
Appuyez et maintenez le bouton
DÉVERROUILLAGE. La télécommande émet
une autre longue tonalité, le voyant de
transmission demeure ALLUMÉ et CLIGNOTE.
C. La télécommande est maintenant en mode Jumelage pendant un
maximum de 20 secondes.
ÉTAPE 2 : PROCÉDURE DE JUMELAGE DU VÉHICULE
A. Ouvrir au moins une portière du véhicule (AF-D600 seulement).
B. Mettre le contact avec la clé.
C. Appuyez, relâchez, puis appuyez et maintenez le bouton d’antenne
jusqu’à ce que le voyant de l’antenne clignote. Relâchez le bouton. Le
système est maintenant en mode Jumelage.
D. Appuyez sur le bouton VERROUILLAGE de la télécommande. Le
klaxon/sirène retentit pour indiquer que le système a appris l’ID de la
télécommande.
E. Si le jumelage échoue, appuyez à nouveau sur le bouton VERROUILLAGE
de la télécommande pour tenter un autre jumelage.
ÉTAPE 3 : SORTIE DU MODE JUMELAGE
A. Une fois le jumelage terminé, coupez le contact. Le klaxon/sirène retentit
pour confirmer la sortie.
B. Appuyez sur le bouton « P » de la télécommande. Celle-ci émet un bip à
deux tonalités pour confirmer la sortie.
510-10569 5/15/2017 PM
2615-TX / 2615D-TX Transmitter Pairing with a XL202
Description: The new Elite transmitter by AstroStart uses an AES (Advanced Encryption
Standard) that requires the transmitter, the antenna and the system to be all in Pairing
mode.
STEP 1: TRANSMITTER PAIRING MODE PROCEDURE
A. Press and hold the transmitter’s “P” button until the remote emits a long beep.
Release the “P” button.
B.
2615-TX
2615D-TX
Proceed to step C.
Press and hold the UNLOCK button. The
remote emits another long beep, the transmit
LED stays ON then blinks OFF.
C. The remote is now in Pairing mode for a maximum of 20 seconds.
STEP 2: XL202 PAIRING PROCEDURE
A. With UNLOCK ALL Option:
Press, release, then press and hold the Programming button of the XL202 module.
The LED starts to flash slowly.
With UNLOCK DRIVER DOOR PRIORITY Option:
Press and hold the Programming button of the XL202 module. The LED starts to
flash slowly.
B. Press the transmitter’s LOCK button. The XL202 LED turns ON solid for one second,
then turns OFF to indicate the XL202 module has learned the remote ID.
C. If pairing fails, press the transmitter’s LOCK button again to attempt another
pairing.
STEP 3: EXITING PAIRING MODE
A. When programming is finished, release the Programming button on the XL202.
B. Press on the transmitter’s “P” button. The transmitter will play a two-toned beep
to confirm exiting.
Jumelage de la télécommande 2615-TX / 2615D-TX à un XL202
Description : La nouvelle télécommande AstroStart Elite utilise une norme de
chiffrement avancé ou AES (« Advanced Encryption Standard »). Celle-ci exige que
la télécommande, l’antenne et le système soient tous en mode Jumelage.
ÉTAPE 1 : PROCÉDURE DE JUMELAGE DE LA TÉLÉCOMMANDE
A. Appuyez et maintenez le bouton « P » de la télécommande jusqu’à ce
que celle-ci émette une longue tonalité. Relâchez le bouton « P ».
B.
2615-TX
2615D-TX
Passez à l’étape C.
Appuyez et maintenez le bouton
DÉVERROUILLAGE. La télécommande émet
une autre longue tonalité, le voyant de
transmission demeure ALLUMÉ et CLIGNOTE.
C. La télécommande est maintenant en mode Jumelage pendant un
maximum de 20 secondes.
ÉTAPE 2 : PROCÉDURE DE JUMELAGE DU XL202
A. Avec l’option DÉVERROUILLER TOUTES LES PORTIÈRES :
Appuyez, relâchez puis appuyez et maintenez le bouton de
programmation du module XL202. La DEL commence à clignoter
lentement.
Avec l’option DÉVERROUILLER LA PORTIÈRE DU CONDUCTEUR EN
PRIORITÉ :
Appuyez et maintenez le bouton de programmation du module XL202. La
DEL commence à clignoter lentement.
B. Appuyez sur la touche VERROUILLAGE de la télécommande. La DEL du
XL202 S’ALLUME pendant une seconde puis S’ÉTEINT pour indiquer que
le module XL202 a appris l’ID de la télécommande.
C. Si le jumelage échoue, appuyez à nouveau sur le bouton VERROUILLAGE
de la télécommande pour tenter un autre jumelage.
ÉTAPE 3 : SORTIE DU MODE JUMELAGE
A. Une fois la programmation terminée, relâchez le bouton de
programmation du XL202.
B. Appuyez sur le bouton « P » de la télécommande. Celle-ci émet un bip à
deux tonalités pour confirmer la sortie.

This manual suits for next models

1

Other AstroStart Transmitter manuals

AstroStart Elite 2625-TX User manual

AstroStart

AstroStart Elite 2625-TX User manual

AstroStart Elite 5325D-TX User manual

AstroStart

AstroStart Elite 5325D-TX User manual

Popular Transmitter manuals by other brands

Scanreco G5 RF instruction manual

Scanreco

Scanreco G5 RF instruction manual

Load Cell Systems TLM8 Installation and user manual

Load Cell Systems

Load Cell Systems TLM8 Installation and user manual

Hama RTR-10 operating instructions

Hama

Hama RTR-10 operating instructions

Servonaut ServoNaut Radio Zwo4 HS16 user manual

Servonaut

Servonaut ServoNaut Radio Zwo4 HS16 user manual

Audiovox ADDP1 Install & transmitter programming guide

Audiovox

Audiovox ADDP1 Install & transmitter programming guide

Hama RTR-100 Operating	 instruction

Hama

Hama RTR-100 Operating instruction

Retekess TR506 manual

Retekess

Retekess TR506 manual

SICK TRANSIC Extractive TRANSIC151LP operating instructions

SICK

SICK TRANSIC Extractive TRANSIC151LP operating instructions

Visonic WT-211 installation instructions

Visonic

Visonic WT-211 installation instructions

Walkera WK-2403 user manual

Walkera

Walkera WK-2403 user manual

Emerson Micro Motion 5700 Configuration and Use Manual

Emerson

Emerson Micro Motion 5700 Configuration and Use Manual

FUTABA FMT-02 instruction manual

FUTABA

FUTABA FMT-02 instruction manual

steute RF I/O SW868-NET Mounting and wiring instructions

steute

steute RF I/O SW868-NET Mounting and wiring instructions

LEGRAND C2G C2G30014 manual

LEGRAND

LEGRAND C2G C2G30014 manual

Ebtron GTC116 installation guide

Ebtron

Ebtron GTC116 installation guide

Teradek Bolt LT 1000 RX quick start guide

Teradek

Teradek Bolt LT 1000 RX quick start guide

Quick RRC P02 user manual

Quick

Quick RRC P02 user manual

WIKA IPT-2 Series operating instructions

WIKA

WIKA IPT-2 Series operating instructions

manuals.online logo
manuals.online logoBrands
  • About & Mission
  • Contact us
  • Privacy Policy
  • Terms and Conditions

Copyright 2025 Manuals.Online. All Rights Reserved.