Atag CX4511C User manual

Instructions for use
Oven
CX4511C
CX4592C

EN 2
EN Instructions for use EN 3 - EN 26
Pictograms used
Important information
Tip

EN 3
CONTENTS
Your oven
Introduction 4
Control panel 5
Description 6
Guide rails/Telescopic guide rails 6
Accessories 7
Use
First use 8
Oven settings 9
Oven modes 11
Defrosting 14
Microwave 15
Microwave function / Combi function 17
Using the timer 18
Selecting additional functions 20
Cleaning
Cleaning your oven 22
The Aqua clean function 22
Removing and cleaning the wire guides 23
Replacing the oven light bulb 23
Troubleshooting
General 24
Your oven and the environment
Disposing of the appliance and the packaging 26

EN 4
Introduction
Congratulations on your choice of this ATAG microwave oven.
This product was designed with simple operation and optimum comfort
in mind. With the extensive setting options, you can always select the
right method of preparation.
This manual describes the best way to work with this oven. In addition
to information on operation, you will also find background information
that may come in handy when using the appliance.
Read the separate safety instructions before
using the device!
Read this manual before using the appliance and keep it in a safe
place for future use.
The installation instructions are included separate.
YOUR OVEN

EN 5
YOUR OVEN
Control panel
1. Off
2. Fast preheat
3. Top + bottom heat
4. Grill
5. Grill + fan
6. Hot air + bottom heat
7. Hot air
8. ECO baking and roasting
9. Aqua clean
10. Defrosting
11. Microwave + hot air
12. Microwave
13. Display (cooking information and timer clock)
14. Child lock
15. Oven lighting on/off
16. Temperature / power
17. Timer
18. Start / stop
19. Multi-function selector
Note:
The keys respond best if you touch them with a large area of your
fingertip. Every time you press a button during use, a short warning
signal will sound.
CX45XXC
ATAG IconLed Combi Microwave
19-01-2015
Dashboard Glasspanel
F00003160A Pantone process black
F00003161B Pantone 430C
rev. B 19-1-2015 F00003161B changed V|X key
A 15-12-2014 updated complete screening with
latest dimensions
7 6 5 48910 1914 15 16 17
13
12 3
1211
18

EN 6
YOUR OVEN
Description
1. Control panel
2. Oven levels
3. Oven door
4. Door handle
Guide rails/Telescopic guide rails
• The oven has four or five guide rails (Level 1 to 4/5), depending on
the model. Level 1 is mainly used in combination with bottom heat.
The two upper levels are mainly used for the grill function.
• Place the oven rack, baking tray or steam dish in the gap between
the guide rail sliders.
• A number of shelf levels can have fully-retractable telescopic guide
rails, depending on the model.
▷Pull the telescopic guide rails out of the oven cavity completely
and place the oven rack / baking tray / steam dish on them.
Then slide the oven rack / baking tray / steam dish on the
telescopic guide rails, back into the oven cavity.
▷Only close the oven door when the telescopic guide rails have
been returned completely back into the oven cavity.
1
3
Level 1
Level 2
Level 3
Level 4
2
4

EN 7
Accessories
Your appliance is accompanied by a range of accessories, depending
on the model. Only use original accessories; they are specially suited
to your appliance. Be sure that all the accessories that are being used
are able to withstand the temperature settings of the chosen oven
function.
Note: not all accessories are suitable/available for every appliance
(it may also differ by country). When purchasing, always provide the
exact identification number of your appliance. Please see the sales
brochures or check online for more details about optional accessories.
Note: never place an accessory on the bottom of the oven!
Accessories that can be supplied with your appliance (depending on the model)
Enamelled baking tray; to be used for pastries and cakes.
• Do not use the enamelled baking tray for microwave functions!
• Suitable for pyrolysis cleaning.
Oven rack; mainly used for grilling. A steam dish or pan with food
can also be placed on the oven rack.
• The oven rack is equipped with a safety peg. Lift the rack slightly
at the front to slide it out of the oven.
• Do not use the oven rack for microwave functions!
Deep enamelled baking tray; to be used for roasting meat and
baking moist pastry.
• Do not place the deep baking tray on the lowest level during
a cooking process, except when using it as a drip tray during
grilling, roasting or roasting with a spit roast (when available).
• Do not use the deep enamelled baking tray for microwave
functions!
• Suitable for pyrolysis cleaning.
Glass baking tray; for microwave and oven use.
• NOT suitable for pyrolysis cleaning.
YOUR OVEN

EN 8
USE
First use
Setting the current time of day
When the appliance is first plugged in, the ‘display’ lights up. After
three seconds, the Clock symbol and “12:00” blink on the display.
1. Turn the ‘Multi-function selector’ to set the time of day.
2. Confirm the settings by pressing ‘start / stop’.
If nothing is pressed, the settings are stored automatically after
three seconds.
You can always set the current time by pressing the “timer
button” twice. Then turn the ‘Multi-function selector’ to set the
current time. Confirm the settings by pressing “start/stop”.
If nothing is pressed, the settings are stored automatically after
three seconds.
Using the oven
The oven has 10 oven functions and 1 cleaning function. Consult the
table to select the right oven function to prepare a dish.
1. Place the dish in the oven.
▷Attention; for most dishes the oven has to be preheated first.
Please do not insert your food in the oven yet, but wait until the
preheating is complete.
2. Turn the ‘Mode selector’ to the desired oven setting.
The selected pictogram will appear on the display.
3. Touch the ‘Temperature / power key’.
4. Set the oven to the desired temperature using the ‘Multi-function
selector’ (between 30-250 °C).
5. Select, if required, a cooking time by pressing the ‘timer key’
6. Press the ’Start / stop’ key.
The oven will start the oven function set and heat the oven to the
selected temperature. The temperature symbol in the display will
flash. When the oven has reached the selected temperature, the
temperature symbol in the display will remain illuminated.
Multi-function
selector
Mode selector
Temperature /
power key
Start / stop key

EN 9
Remarks
• The temperature can be adjusted during preparation.
• Cooking times are rough estimates and may vary subject to some
conditions.
• Some recipes should be preheated using the selected oven mode.
• If you are using parchment paper, make sure it is highly temperature
resistant.
• When cooking larger chunks of meat or pastry, a lot of steam will
be generated inside the oven, which in turn may condense on the
oven door. This is a normal phenomenon which will not affect the
operation of the appliance. After the cooking process, wipe the
door and the door glass dry.
• To prevent condensation (dew) do not leave heated food cool off in
a closed oven.
• Please ensure that glass baking dishes are suitable for 250 °C
cooking temperatures.
Oven settings
Consult the table to select the right oven function. Also consult the
instructions for preparation on the dish packaging.
Function Description Suggested
temp. °C
Suggested
power (W)
Oven mode
Fast preheat
Use this function if you wish to heat the oven to the desired
temperature as quickly as possible. This function is not
appropriate for cooking food! When the oven is heated
up to the desired temperature, the heating process is
completed.
160
Top Heat + Bottom Heat Setting
Heat comes from top and bottom heating elements.
This setting is suitable for baking and roasting.
200
Grill Setting
Food is heated by the top heating element.
240
Top heat + Fan setting
The heat generated by the top heating elements is
distributed by the fan. This mode can be used for grilling
meat and fish.
170
USE

EN 10
Hot Air + Bottom Heat Setting
Hot air and the bottom heating element combine so food
can be crisped and browned.
200
Hot Air Setting
Food is heated by hot air from the back of the oven. This
setting provides uniform heating and is ideal for baking.
180
ECO baking and roasting
Optimize energy use during baking or roasting. This mode can
be used for roasting meat and baking pastry.
This setting makes use of the residual heat (heating is not
on the whole time) to achieve low energy consumption (in
accordance with energy class EN 60350-1). In this mode
the actual temperature in the oven is not displayed.
180
Automatic functions
Aqua clean
By the help of hot steam the surface of the oven cavity will
be soaked and you can easily clean your oven. The aqua
clean programme takes only 4 minutes time. Then wait
± 30 minutes.
70
Defrosting
Microwaves are an excellent way of defrosting frozen food.
Microwaves gently defrost frozen food in a short period of
time. The oven features automatic defrosting programs that
employ microwaves (A1 to A5).
Microwave function / Combi function
Microwave + Hot Air
This function is suitable for all kind of meat and poultry as
well as casseroles and gratin dishes, sponge cakes and
light fruit cakes, pies and crumbles, roast beef and chicken.
160 600
Microwave
Microwave energy is used to cook and defrost foods. It
provides fast efficient cooking without changing the colour
or form of food. Power level and cooking time are manually
set to suit various dishes.
750
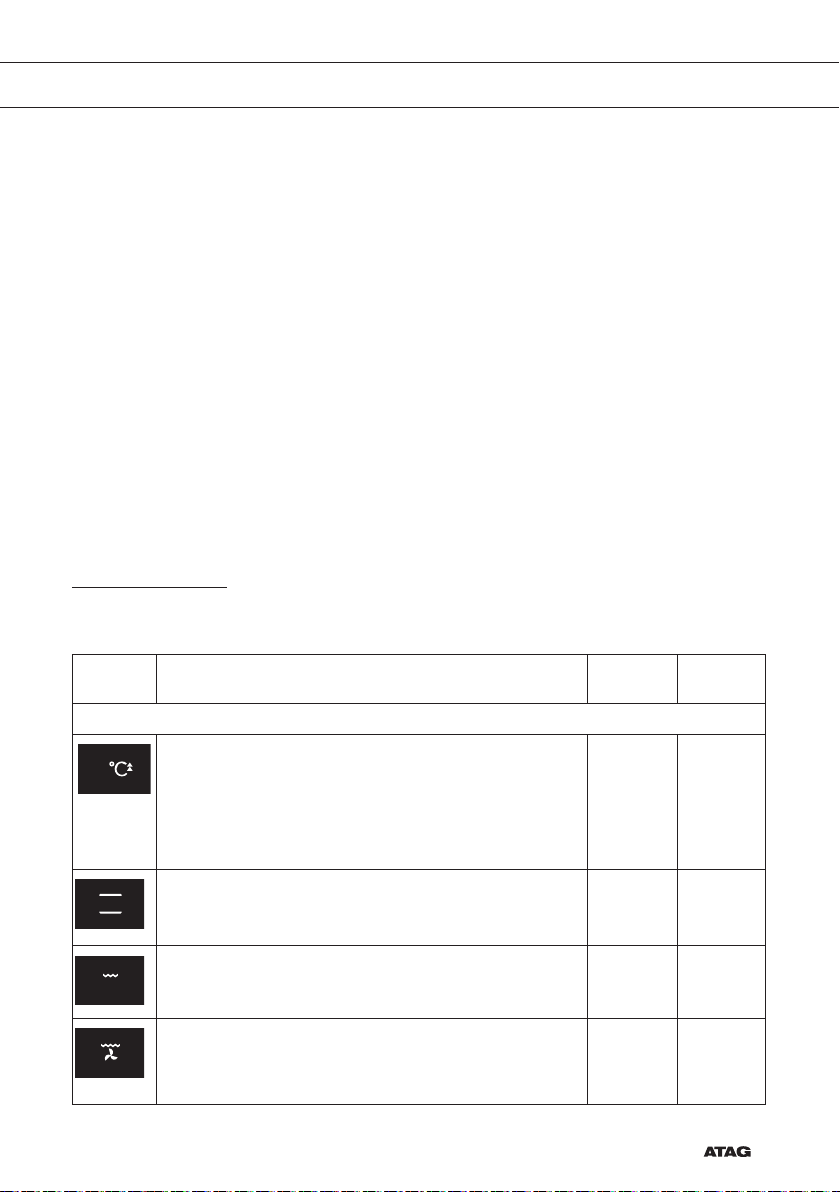
Each oven mode features basic or default settings which can be
adjusted.
Adjust the settings by pressing the relevant key (before pressing the
‘Start / stop key’). Some settings are not available with some programs;
an acoustic signal will remind you of such cases.
USE

EN 11
Changing the cooking temperature and microwave power
Only set the power (W) in a microwave function (microwave or combi-
microwave function).
1. Turn the ‘Mode selector’ and choose the cooking mode.
The selected icon will appear on the display.
2. Touch the ‘Temperature / power key’.
▷For the Combi function: touch once to set the temperature,
touch twice to set the power.
3. Turn the ‘Multi-function selector’ and choose the desired
temperature or power.
Oven modes
Fast preheating
Use this function to heat the oven to the desired temperature as quickly
as possible.
This mode is not appropriate for cooking!
1. Turn the ‘Mode selector’ to ‘fast preheating’.
The preset temperature will be displayed. This temperature setting
can be adjusted.
2. Press the ’Start / stop’ key.
After the oven is switched on with the ‘Start / stop key’, it will start
to heat up. When the set temperature is reached, preheating is
completed and an acoustic signal will sound.
Top heat + bottom heat setting
Heat comes from top and bottom heating elements. This setting is
suitable for traditional baking and roasting.
• Place the baking tray or oven rack in the middle of the oven.
• Preheating is recommended.
USE
Fast preheat
Top and bottom
heat
2

EN 12
Grill
Food is heated by the top heating elements.
• Place the oven rack in the upper part of the oven and the baking
tray in the middle of the oven.
• Supervise the cooking process at all times. The meat may burn
quickly due to high temperature.
• Preheat for 5 minutes.
• Maximum allowed temperature: 240 °C
Top heat + Fan setting
The heat generated by the top heating element is distributed by the fan.
This mode can be used for grilling meat, fish, poultry and vegetables.
It is not necessary to turn over food and it will get the crispy texture.
• Place the oven rack in the upper part of the oven and the baking
tray in the middle of the oven.
• Supervise the cooking process at all times. The meat may burn
quickly due to high temperature.
• Preheat for 5 minutes.
2
4
Top heat and fan
USE
Grill
2
4

EN 13
USE
Hot air + bottom heat Setting
Hot air and the bottom heating element combine to heat food. This is a
useful setting for crisping and browning.
• Place the baking tray or oven rack in the middle of the oven.
• Preheating is recommended.
Hot air
Food is heated by hot air from the fan and heating element, which are
located in the rear back side of the oven. This setting provides uniform
heating and is ideal for baking.
• Place the baking tray or oven rack in the middle of the oven.
• Preheating is recommended.
ECO baking and roasting
Optimize energy use during baking or roasting. This mode can be used for
roasting meat and baking pastry.
This setting makes use of the residual heat (heating is not on the whole time)
to achieve low energy consumption (in accordance with energy class EN
60350-1). In this mode the actual temperature in the oven is not displayed.
Hot air and
bottom heat
2
Hot air
2

EN 14
• Place the baking tray or oven rack in the middle of the oven.
Defrosting
Microwaves are an excellent way of defrosting frozen food.
Microwaves gently defrost frozen food in a short period of time.
1. Turn the ‘Mode selector’ to defrosting.
The icon and the program A1 will appear on the display unit (choose
between five programs – see table below).
2. Turn the ‘Multi-function selector’ to select the desired program and
weight in kilograms.
3. Press the ‘Start / stop key’.
The following table presents the various Auto Defrost programmes,
quantities, standing times and appropriate recommendations.
These programmes use microwave energy only. Remove all
packaging material before defrosting. Place meat, poultry and
fish on the glass tray.
Program Recipe Weight*
(kg)
Power
(W)
Cooking time
(minutes)
A1 Meat 1 90 30
A2 Poultry 1 90 17
A3 Fish 1 90 12
A4 Bread 0.5 180 12
A5 Frozen vegatables 1 90 16
* Weight can be adjusted (within a range) by pressing the
Temperature / power key. The cooking time will be adjusted
automatically depending on the weight setting.
Important
The Defrost Mode uses microwave energy to heat food.
Therefore guidelines for cookware and other microwave safety
precautions must be strictly observed when using this mode.
USE
ECO baking and
roasting
2
Defrosting

EN 15
USE
Microwave
Microwaves are high - frequency electromagnetic waves; the energy
released enables food to be cooked or reheated without changing
either the form or the colour.
Microwave is used in:
• Microwave mode
• Combi-function
Cooking Principle
1. The microwaves generated by the microwave are distributed
uniformly by using a stirrer distribution system. The food is thus
cooked evenly.
2. The microwaves are absorbed by the food up to a depth of about
1 inch (2.5 cm). Cooking then continues as the heat is dissipated
within the food.
3. Cooking times vary according to the container used and the
properties of the food:
▷Quantity and density
▷Water content
▷Initial temperature (refrigerated or not)
Important
As the centre of the food is cooked by heat dissipation, cooking
continues even when you have taken the food out of the oven.
Standing times specified in recipes and in this booklet must therefore
be respected to ensure:
• Even cooking of the food right to the centre.
• The same temperature throughout the food.
Microwave cookware guide
Cookware used for ‘Microwave Mode’ must allow microwaves to pass
through and penetrate food. Metals such as stainless steel, aluminum
and copper reflect microwaves. Therefore, do not use cookware made
of metallic materials. Cookware marked ‘microwave - safe’ is always
safe for use. For additional information on appropriate cookware refer
to the following guide and always use the glass tray on shelf Level 1
when using microwave mode.

EN 16
USE
Cookware Microwave-
Safe Comments
Aluminium Foil 37 Can be used in small quantities to protect areas
against overcooking. Arcing can occur if the foil is too
close to the oven wall or if too much foil is used.
China and Earthenware 3Porcelain, pottery, earthenware and bone china are
usually suitable, unless decorated with a metal trim.
Disposable Polyester
Cardboard Dishes
3Some frozen foods are packaged in these dishes.
Fast - Food Packaging
• Polystyrene
cups containers
• Paper bags or
newspaper
• Recycled paper
or metal trims
3
7
7
Can be used to warm food. Overheating may cause
the polystyrene to melt.
May catch fire.
May cause arcing.
Glassware
• Oven-to-table
ware
• Fine glassware
• Glass jars
3 Can be used, unless decorated with a metal trim.
Can be used to warm foods or liquids. Delicate
glass may break or crack if heated suddenly.
Must remove the lid. Suitable for warming only.
Metal 7May cause arcing or fire.
Paper
• Plates, cups,
Kitchen paper
• Recycled paper
3
7
For short cooking times and warming. Also to
absorb excess moisture.
May cause arcing.
Plastic 3Particularly if heat-resistant thermoplastic. Some
other plastics may warp or discolour at high
temperatures. Do not use Melamine plastic.
Can be used to retain moisture. Should not touch
the food. Take care when removing the film as hot
steam will escape. Only if boilable or oven-proof.
Should not be airtight. Prick with a fork, if necessary
Note
“Arcing” is the microwave term for sparks in the oven.
3: Recommended
37 : Use Caution
7: Unsafe

EN 17
Microwave function / combi function
Microwave
Microwave energy is used to cook and defrost foods. It provides fast
efficient cooking without changing the colour or form of food. Power
level and cooking time are manually set to suit various dishes.
• Power levels: 90, 180, 360, 600, 750 and 1000 W.
• Insert the glass tray into the first guide.
Do not use metal cookware or utensils see ‘Microwave cookware
guide’. Do not preheat the oven.
Power level Use
1000 W • Quickly reheating beverages, water and dishes
containing a large volume of liquid.
750 W • Cooking fresh or frozen vegetables.
600 W • Melting chocolate.
• Cooking fish and crustaceans. Reheating on two
levels.
• Cooking dried beans at low heat.
• Reheating or cooking delicate egg-based dishes
360 W • Low-heat cooking of dairy products, jams.
180 W • Manual defrosting, softening butter or ice cream.
90 W • Defrosting cream-filled pastry.
USE
1
Microwave

EN 18
USE
Microwave + hot air
This mode combines hot air and microwave and is therefore reducing
the cooking time while giving the food a brown and crispy surface.
This fuction is suitable for all kind of meat and poultry as well as
casseroles and gratin dishes, sponge cakes and light fruit cakes, pies
and crumbles, roast beef and chicken.
• Power levels: 90, 180, 360 and 600 W.
• Insert the glass tray into the first guide.
Using the timer
Setting the clock
1. Press the ‘Timer key’ twice.
2. Set the time of day by turning the ‘Multi function selector’.
Setting the ‘cooking time’
In this mode, you can define the duration of the oven operation
(cooking time).
Setting the ‘end time’
This mode allows you to set the time at which you wish the oven to
stop operating.
• Make sure the clock is accurately set to current time.
Using the timer function
1. Select a oven function with the ‘Mode selector’ and set the
temperature.
2. Touch the ‘Timer key’ several times to select a timer function.
The icon for the selected timer function will light up and the
adjustable cooking start/end time will flash on the display.
Other icons are dimly lit.
3. Press the ‘Start / stop key’ to start the cooking process.
The elapsed cooking time will be displayed.
Microwave with
hot air
1

EN 19
USE
Example:
• Current time: 12:00
• Cooking time: 2 hours
• End of cooking: 6 pm
1. First, set the cooking time (cooking duration), i.e. 2 hours.
The sum of the current time and cooking time is automatically
displayed (2 pm).
2. Touch the ‘Timer key’ again to select the ‘end time’ symbol and set
the time when you wish the cooking to end (6 pm).
3. Press the ‘Start / stop key’ to start the cooking process.
The timer will wait for the time to start the cooking process and the
symbol will be lit up. The oven automatically switches on (at 4 pm)
and stops operating at the selected time (at 6 pm).
• After the set time expires, the oven will automatically stop operating
(end of cooking). An acoustic signal will be heard which you may
turn off by touching the ‘Start / stop key’ or ‘Timer key’. After one
minute, the acoustic signal will be switched off automatically.
• All timer functions can be cancelled by setting the time to “0”.
• After a few minutes of idling, the appliance will switch to standby
mode. Time of day will appear and the selected timer function icon
will light up.
Setting the minute minder
The minute minder can be used independently of the oven operation
(the ‘Mode selector’ is in position ‘0’).
1. Touch the ‘Timer key’ to select the minute minder.
2. Set the time by turning the ‘Multi function selector’.
▷The longest possible setting is 10 hours.
3. Press the ‘Start / stop key’ to start the minute minder.
▷During the last minute, the minute minder is displayed in
seconds.

EN 20
USE
Selecting additional functions
Some functions are not available with some systems; an acoustic signal
will remind you of such cases.
Child lock
The oven’s Child Safety Lock allows you to lock the control panel to
protect the oven against unintended use.
• You can activate the child lock by holding down the “child lock key”
for a few seconds.
A lock symbol appears in the display, indicating that all functions
are locked.
• To deactivate the child lock, press the key for a few seconds again.
The lock symbol disappears in the display, indicating that all
functions are unlocked.
Note:
If the child lock is activated with no timer function engaged (only clock
is displayed), then the oven will not operate. If the child lock is activated
after a timer function has been set, then the oven will operate normally;
however, it will not be possible to change the settings.
When the child lock is activated, systems (oven modes) or additional
functions cannot be changed. The only possible change is to end the
cooking process by turn the ‘Mode selector’ to “0”.
Child lock remains active after the oven is switched off. To select a new
system, the child lock must first be deactivated.
This manual suits for next models
1
Table of contents
Other Atag Oven manuals
Popular Oven manuals by other brands

STOVES
STOVES 720GRa User & installation instructions

Zanussi
Zanussi ZBD 904 Instructions for the installation and use

Viking
Viking Professional VGSO166 Service manual

Kenmore
Kenmore 665.63792 Use & care guide

Kleenmaid
Kleenmaid OMF6010 Instructions for use and warranty details

LG
LG LWD3010ST owner's manual