Atag OX26611B User manual

Instructions for use
Oven
OX16611B
OX26611B

EN 2
EN Instructions for use EN 3 - EN 26
Pictograms used
Important information
Tip

EN 3
CONTENTS
Your oven
Introduction 4
Control panel 5
Description 6
Guide rails/Telescopic guide rails 6
Accessories 6
Door 7
Cooling fan 7
Use
Initial use 8
Oven settings 9
Oven functions 11
Timer 15
Selecting additional functions 17
Cleaning
Cleaning the oven 20
Removing and cleaning the guide rails 20
Removal and installation of the oven door 21
Removing the oven window 22
Aqua clean function 22
Replacing the oven lamp 23
Solving problems
General 24
Your oven and the environment
Disposal of the appliance and packaging 26

EN 4
Introduction
Congratulations on the purchase of this oven. This product is designed
to offer optimum user-friendliness. The oven has a wide range of settings
enabling you to select the correct cooking method every time.
This manual shows how you can best use this oven.
In addition to information about operating the oven, you will also find
background information that may be useful when using the appliance.
Please read the separate safety instructions
carefully before using the appliance!
Read this manual before using the appliance and keep it in a safe
place for future use.
Installation instructions are supplied separately.
YOUR OVEN

EN 5
YOUR OVEN
Control panel
1. Off
2. Quick preheat
3. Top heat + bottom heat
4. Small grill
5. Large grill
6. Grill with fan
7. Hot air + bottom heat
8. Hot air
9. Bottom heat with fan
10. ECO cooking
11. Defrosting
12. Aqua Clean
13. Display (cooking information and timer)
14. Child lock
15. Oven lamp
16. Temperature
17. Timer
18. Start/Stop
19. Selection dial
Note:
For the best touch response, touch the keys with the main part of your
fingertip. Every time you press a key during use, a short signal will
sound.
PYRO
OVEN
COMBI MW
Solo microwave
7 6 5 48910 1914 15 16 17
131 2 31211
18

EN 6
YOUR OVEN
Description
1. Control panel
2. Rack levels
3. Oven door
4. Handle
Guide rails/Telescopic guide rails
• The oven has four or five guide rails (Level 1 to 4/5), depending on
the model. Level 1 is mainly used in combination with bottom heat.
The two upper levels are mainly used for the grill function.
• Place the oven rack, baking tray or steam dish in the gap between
the guide rail sliders.
• A number of shelf levels can have fully-retractable telescopic guide
rails, depending on the model.
▷Pull the telescopic guide rails out of the oven cavity completely
and place the oven rack / baking tray / steam dish on them.
Then slide the oven rack / baking tray / steam dish on the
telescopic guide rails, back into the oven cavity.
▷Only close the oven door when the telescopic guide rails have
been returned completely back into the oven cavity.
Accessories
Your appliance is accompanied by a range of accessories, depending
on the model. Only use original accessories; they are specially suited
toyour appliance. Be sure that all the accessories that are being used
1
3
Level 1
Level 2
Level 3
Level 4
Level 5
2
4

EN 7
are able to withstand the temperature settings of the chosen oven
function.
Note: not all accessories are suitable/available for every appliance
(itmay also differ by country). When purchasing, always provide the
exact identification number of your appliance. Please see the sales
brochures or check online for more details about optional accessories.
Note: never place an accessory on the bottom of the oven!
Accessories that can be supplied with your appliance (depending on the model)
Enamelled baking tray; to be used for pastries and cakes.
• Do not use the enamelled baking tray for microwave functions!
• Suitable for pyrolysis cleaning.
Oven rack; mainly used for grilling. A steam dish or pan with food
can also be placed on the oven rack.
• The oven rack is equipped with a safety peg. Lift the rack slightly
at the front to slide it out of the oven.
• Do not use the oven rack for microwave functions!
Deep enamelled baking tray; to be used for roasting meat and
baking moist pastry.
• Do not place the deep baking tray on the lowest level during
a cooking process, except when using it as a drip tray during
grilling, roasting or roasting with a spit roast (when available).
• Do not use the deep enamelled baking tray for microwave
functions!
• Suitable for pyrolysis cleaning.
Glass baking tray; for microwave and oven use.
• NOT suitable for pyrolysis cleaning.
Door
• The door switches interrupt the operation of the oven when the door
is opened during use. The oven continues operating when the door
is closed.
Cooling fan
• The appliance is equipped with a cooling fan that cools the casing
and control panel.
YOUR OVEN

EN 8
USE
Initial use
Set the current time
When you connect the appliance to the mains electricity for the first
time, the display lights up. After three seconds the clock symbol and
‘12:00’ will flash on the display.
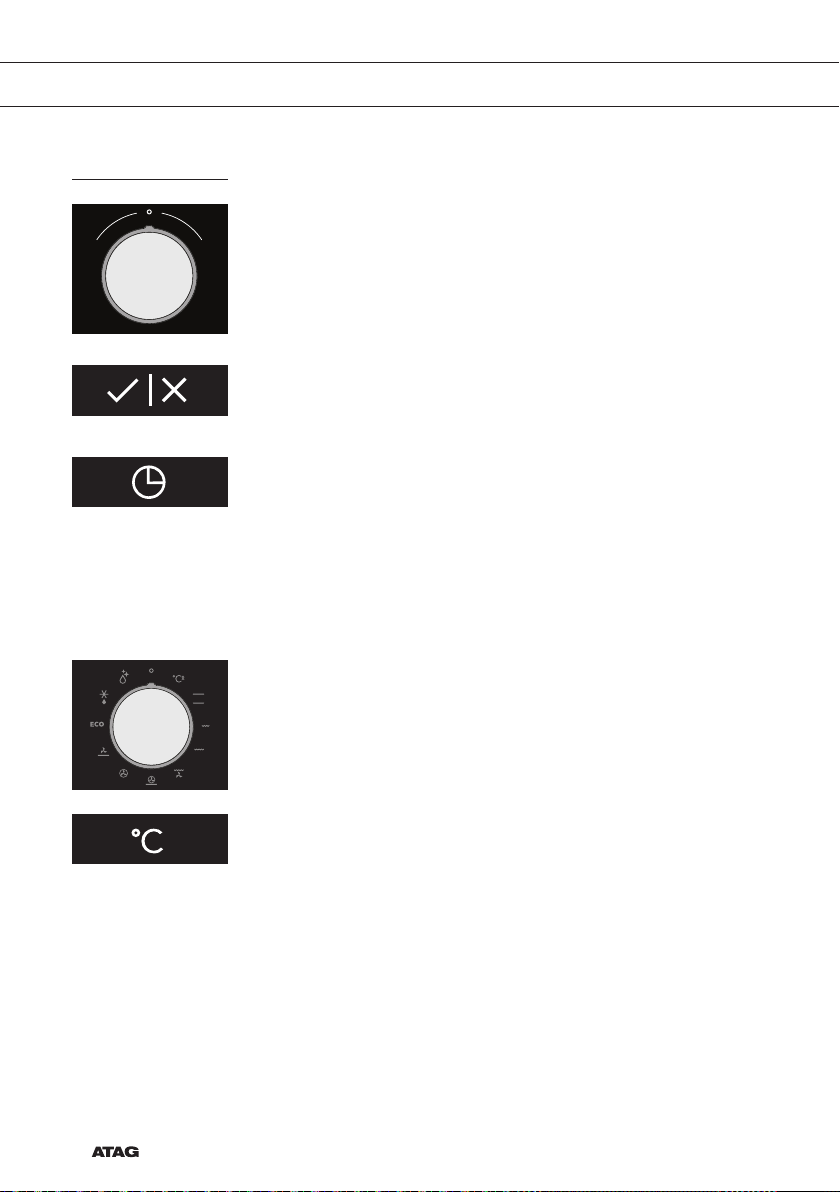
1. Turn the ‘selection dial’ to set the current time.
You can set the values in the display faster by turning the selection
dial further to the left or right.
2. Confirm the settings by pressing ‘start/stop’.
If you do not press anything, the settings will be saved automatically
after three seconds.
You can always set the current time by pressing the ‘timer key’
twice. Then turn the ‘selection dial’ to set the current time. Confirm
the settings by pressing ‘start/stop’.
If nothing is pressed, the settings are stored automatically after
three seconds.
Using your oven
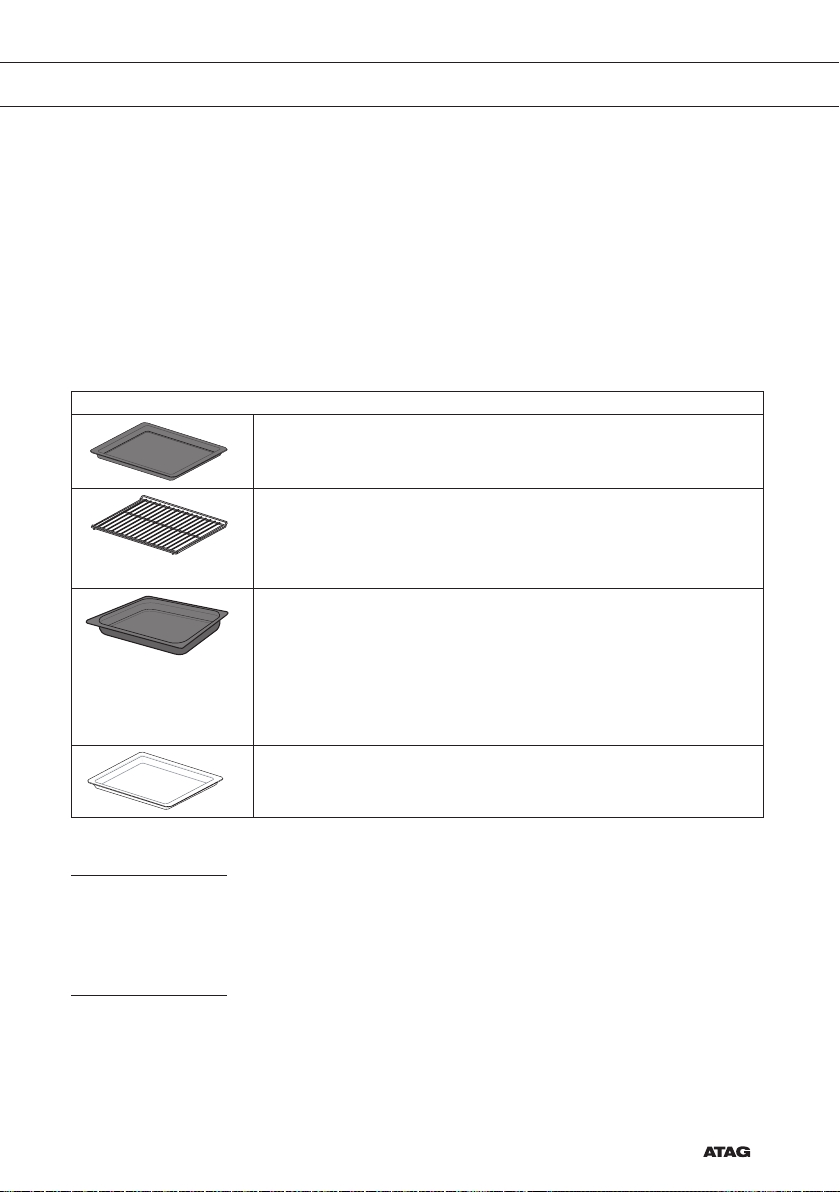
The oven has 10 oven functions and 1 cleaning function. Consult the
table to select the correct oven function for the dish.
1. Place the dish in the oven.
For most dishes you should first preheat the oven.
2. Turn the ‘oven function dial’ to the desired setting.
The selected pictogram will appear on the display.
3. Press the ‘temperature key’.
4. Set the oven to the desired temperature using the ‘selection dial’.
5. If desired, set a cooking time by pressing the ‘timer key’ and use
the ‘selection dial’ to set the desired time.
6. Press the ‘start/stop’ key.
The set oven function will be started and the oven will be heated to
the selected temperature. The temperature symbol in the display
will flash. When the oven has reached the selected temperature, the
temperature symbol in the display will stay lit.
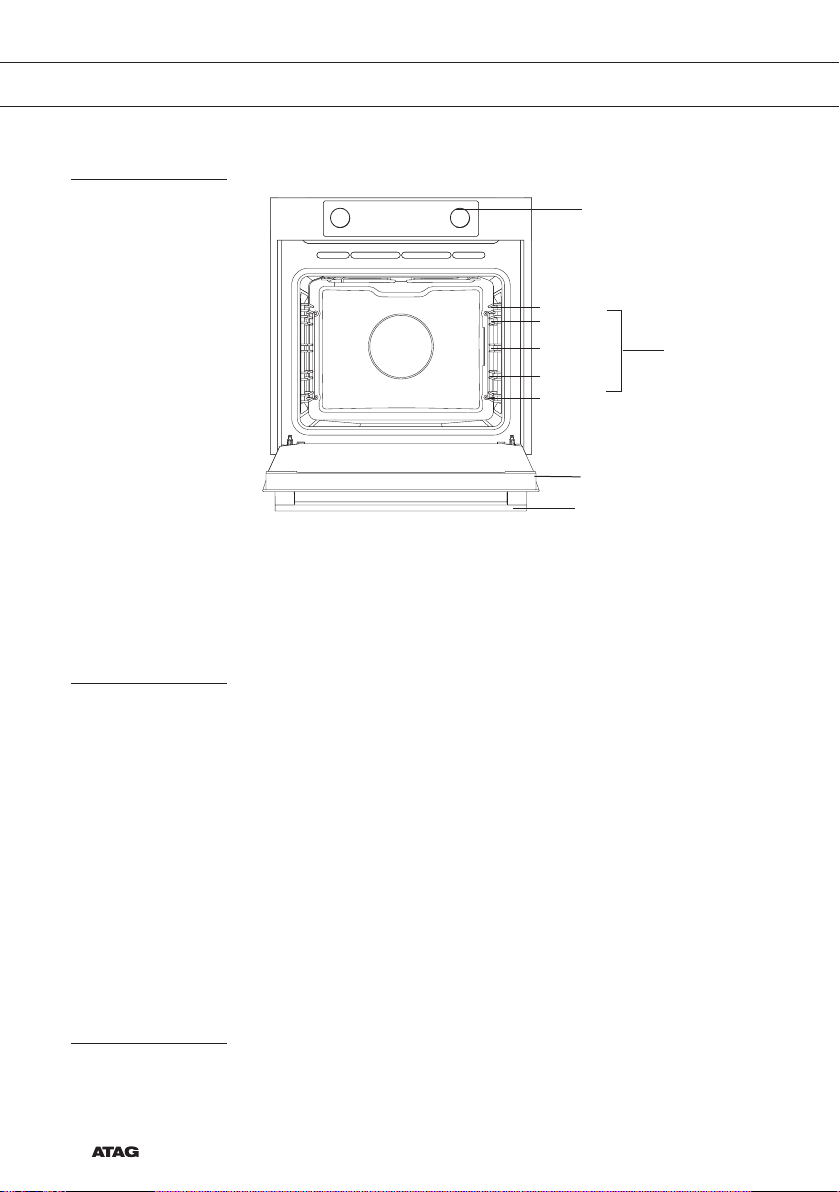
Selection dial
Start/stop key
Timer key
Oven function dial
Temperature key

EN 9
Notes
• The temperature can be changed during cooking.
• Cooking times are rough estimates and can vary depending on a
number of conditions.
• For certain dishes, the oven should be preheated.
• If you use baking paper, this should be able to withstand high
temperatures.
• A lot of steam is released when cooking larger pieces of meat or
dishes using dough, such as pies. This can cause condensation on
the oven door. This is a normal occurrence and does not influence
the functioning of the appliance. When the cooking process has
ended, dry the door and the glass.
• Prevent condensation from forming and do not allow hot food to
cool in a closed oven.
• Any glass dishes you use must be able to withstand temperatures
of 275 °C.
Oven settings
Use the table to select the right oven function. Also consult the cooking
instructions on the food packaging.
Function Description Recommended
temp. °C
Quick preheat
Use this function to heat the oven quickly to the desired
temperature. This function is not suitable for cooking
food!The preheat process is complete once the oven has
been preheated to the desired temperature.
160
Top heat + bottom heat
Heat is generated by the heating elements at the top and
bottom of the appliance. This setting is suitable for baking
and roasting.
200
Small grill
Food is heated by the top grill heating element.
240
Large grill
Food is heated by the top grill heating element. The top
heating element is activated simultaneously to increase the
eect of the elements.
240
USE

EN 10
Grill + fan
The fan distributes the heat generated from the top heating
element. You can use this function for grilling meat and fish.
170
Hot air + bottom heat
The combination of hot air and bottom heat provides a crispy
and browned result.
200
Hot air
Food is heated by hot air supplied from the back of the oven.
This setting uses even heating and is ideal for baking.
180
Bottom heat + fan
The bottom element heats the dish and the heat is
distributed by the fan.
180
ECO cooking
In this mode, power consumption during the cooking
process is optimized. This mode is used for roasting meat
and baking pastry.
By making use of the residual heat this setting gives a low
energy consumption (energy class in accordance with
EN 60350-1). On this setting the oven does not display the
actual temperature in the oven.
180
Defrosting
The air circulates with no heaters activated. Only the fan will
be activated. This is used to slowly thaw frozen food.
Aqua Clean
The hot steam dampens the interior of the oven, so you can
clean the oven easily. The Aqua Clean programme takes just
30 minutes.
70
Each oven function has a number of basic or standard settings that you
can adjust.
You adjust the settings by pressing the relevant key (before pressing the
‘start/stop’ key). Certain settings are not available for all programmes; if
this is the case you will be alerted by a sound signal.
USE

EN 11
Adjusting the cooking temperature
• Turn the ‘oven function dial’ to the desired oven function.
The selected pictogram will appear on the display and the prior set
temperature will flash.
• Press the ‘temperature key’. Set the oven to the desired
temperature using the ‘selection dial’.
Oven functions
Quick preheat
Use this function to heat the oven quickly to the desired temperature.
This function is not suitable for cooking food!
• Turn the ‘oven function dial’ to the ‘quick preheat’ position.
The prior set temperature will be displayed. You can alter this
temperature.
Note:
Preheat will begin after you have started the oven using the ‘start/stop’
key.
Preheat is complete when the set temperature is reached and a signal
sounds.
Top heat + bottom heat
Heat is generated by the heating elements at the top and bottom of the
appliance. This setting is suitable for traditional baking and roasting.
2
• Place the baking tray or oven rack in the middle of the oven.
• Preheating is recommended
Quick preheat
Top and bottom heat
USE

EN 12
Small Grill
Food is heated by the grill element.
2
4
• Place the oven rack in the upper part of the oven and the baking
tray in the middle of the oven.
• Keep an eye on the cooking process. At high temperatures, meat
can burn quickly
• Preheat the oven for 5 minutes
Large grill
The heat comes from the top element and the grill element. This setting
is particularly useful for dishes and baked food that require a real
bottom crust or browning. Use this just before the end of the baking or
roasting time.
2
4
• Place the oven rack in the upper part of the oven and the baking
tray in the middle of the oven.
Smal grill
Large grill
USE

EN 13
USE
Grill + fan
The fan distributes the heat generated from the top heating element.
You can use this function for grilling meat, fish, poultry and vegetables.
It gives food a crispy texture without it needing to be turned over.
2
4
• Place the oven rack in the upper part of the oven and the baking
tray in the middle of the oven.
• Keep an eye on the cooking process. At high temperatures, meat
can burn quickly
• Preheat the oven for 5 minutes
Hot air + bottom heat
Food is heated using a combination of hot air and bottom heat.
This setting is used for a crispy and browned result.
2
• Place the baking tray or oven rack in the middle of the oven.
• Preheating is recommended.
Grill and fanr
Hot air and bottom
heat

EN 14
Hot air
Food is heated by hot air from a fan and the heating element at the
back of the oven. This setting uses even heating and is ideal for baking.
2
• Place the baking tray or oven rack in the middle of the oven.
• Preheating is recommended
Bottom heat + fan
The bottom element heats the dish and the heat is distributed by the
fan. This setting is used for baking yeasted pastry and preserving fruit
and vegetables.
2
• Place a not too high baking tray in the lower part of the oven, so
that hot air can also circulate over the upper surface of the food.
• Preheating is recommended
Hot air
Bottom heat and fan
USE

EN 15
ECO cooking
In this mode, power consumption during the cooking process is
optimized. This mode is used for roasting meat and baking pastry.
By making use of the residual heat this setting gives a low energy
consumption (energy class in accordance with EN 60350-1). On this
setting the oven does not display the actual temperature in the oven.
• Place the baking tray or oven rack in the middle of the oven.
Defrosting
In the defrost function the fan circulates the air. No heat elements are
switched on. Use this function for slow defrosting of frozen dishes
(cakes, biscuits, cookies, bread, bread rolls and frozen fruit).
• If desired, set a different defrost time by pressing the ‘timer key’
and setting the time using the ‘selection dial’.
• Turn the food over after half the defrosting time has elapsed; stir the
food or break up large pieces if these are frozen together.
Timer
ECO heating
Defrosting
USE

EN 16
USE
Setting the timer
• Press the ‘timer key’ twice.
• To set the time, turn the ‘selection dial’ to the current time.
Timer function
• Select an oven function using the ‘oven function dial’ and set the
temperature.
• Press the ‘timer key’ several times to select a timer function.
The pictogram for the selected timer function lights up on the
display and the adjustable start/end time will flash.
The other pictograms are dimmed.
• Press the ‘start/stop key’ to start the cooking process.
The elapsed cooking time will be displayed.
‘Setting the ‘cooking time’
• In this setting you can set how long the oven needs to operate
(cooking time).
‘Setting the ‘end time’
• In this setting you can set the time the oven should switch off.
A cooking time first needs to be set. Ensure that the clock is set
precisely to the current time.
Example:
• Current time: 12:00
• Cooking time: 2 hours
• End of cooking: 18:00 hours
• First set the cooking time, for example 2 hours. The sum of the
current time and the cooking time is displayed automatically
(14:00 hours). Press the ‘timer key’ again to select the ‘end time’
pictogram and set the time when the cooking should be ended
(18:00 hours).
• Press the ‘start/stop key’ to start the cooking process.
The timer will delay the cooking process until the appropriate
time. The pictogram will now light up. The oven will switch on
automatically (16:00 hours) and switch off at the selected time
(18:00 hours).

EN 17
‘Timer alarm’ function
• The ‘timer alarm’ function can be used independently of the oven.
The highest possible setting is 23:59 hours.
The last minute of the run time is displayed in seconds.
The oven will switch off automatically once the set time has elapsed
(end of cooking). A signal will sound that you can switch off by pressing
the ‘start/stop’ or ‘timer’ key. The sound signal will stop automatically
after one minute.
You can cancel all timer functions by setting the time to ‘0’.
If the appliance has been inactive for a few minutes, it will switch to
standby. The current time appears and the selected timer function will
light up.
Selecting additional functions
Certain settings are not available for all programmes; if this is the case
you will be alerted by a sound signal.
Child lock
With the oven’s childproof lock you can lock the control panel to
prevent unintended use of the oven.
• You can activate the child lock by pressing the ‘child lock key’ for a
few seconds.
A pictogram in the form of a lock appears in the display.
This indicates that all functions are locked.
• To deactivate the child lock, press the key again for a few seconds.
The lock pictogram disappears from the display, indicating that all
functions are unlocked.
Child lock key
USE

EN 18
Note:
Once the child lock is activated and no timer function has been set
(only the clock is displayed), the oven will not work. If the child lock
is activated after a timer function has been set, the oven will work;
however, the settings cannot be changed.
When the child lock is activated, oven functions or additional functions
cannot be changed. The cooking process can only be ended by turning
the ‘oven function dial’ to ‘0’.
The child lock remains activated even after the oven has been switched
off. The child lock needs to be deactivated before you can select a new
programme.
Oven lamp
• The oven lamp will light automatically if the oven door is opened or
if the oven is switched on.
• After the end of the cooking process, the lamp stays lit for another
minute.
• You can switch off the oven lamp by pressing the ‘lamp key’.
Sound signal
The volume of the sound signal can be set if no timer function has been
activated (only the time is displayed).
• The ‘Oven function dial’ must be in the ‘0’ position.
• Press and hold the ‘temperature key’.
Bars appear on the display that are (partly) fully lit.
• Turn the ‘selection dial’ to select one of three volume levels (one,
two or three bars lit) or no sound (no bar lit).
• The setting will be saved automatically after 3 seconds and the time
will be displayed.
Reduce display contrast
• The ‘oven function dial’ must be in the ‘0’ position.
• Press and hold the ‘lamp key’ for 5 seconds.
Bars appear on the display that are (partly) fully lit.
• Turn the ‘selection dial’ to adjust the dimming level of the display
(one, two or three bars).
The setting will be saved automatically after three seconds.
Lamp key
Temperature key
Lamp key
USE

EN 19
USE
Standby
If you do not wish to use the display lighting, this can be disabled.
• Press the ‘child lock key + timer key’ to disable the display.
‘Off’ and the ‘timer’ pictogram will appear on the display.
• Press the ‘child lock key + timer key’ again to reactivate the display.
‘On’ and the ‘timer’ pictogram will appear on the display.
Following a power failure the additional function settings will only
be saved for a few minutes. All settings, except the sound signal
and child lock, will then revert to factory settings.
Child lock key
+ Timer key

EN 20
Cleaning the oven
Clean the oven regularly to prevent fat and leftover food from
accumulating, especially on interior and exterior surfaces, the door
and seal.
• Clean exterior surfaces with a soft cloth and soapy warm water.
Wipe afterwards with a clean, damp cloth and dry the surfaces.
• Remove splashes and stains on the interior surfaces with a soapy
cloth. Wipe afterwards with a clean, damp cloth and dry the surfaces.
• Clean the interior of the oven
Important
• Take care that NO water enters the vents.
• NEVER use abrasive cleaning materials or chemical solvents.
• ALWAYS ensure that the door seal stays clean.
This prevents accumulation of dirt and allows you to close the door
properly.
Removing and cleaning the guide rails
Only use conventional cleaners to clean the guides.
• Remove the screws using a screwdriver.
• Remove the guides from the holes in the back wall.
CLEANING
This manual suits for next models
2
Table of contents
Other Atag Oven manuals

Atag
Atag CX4511D User manual

Atag
Atag SQ4211T User manual

Atag
Atag ZX4611D User manual

Atag
Atag OX6211C User manual

Atag
Atag OX9570G User manual

Atag
Atag OX60 E Series User manual

Atag
Atag SX4592D/A22 User manual

Atag
Atag OX6592D User manual

Atag
Atag MA4692C User manual

Atag
Atag Combi Steam SQ4111B User manual