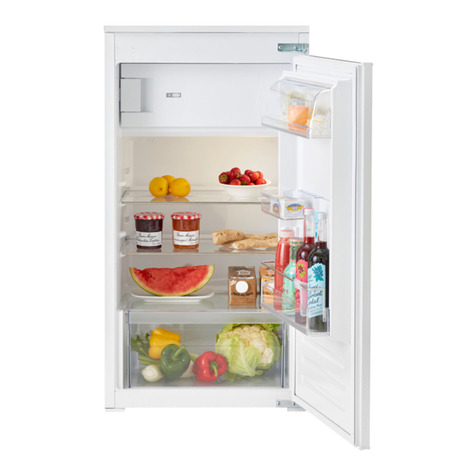
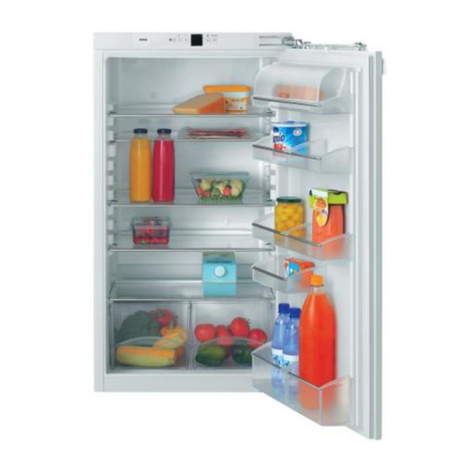
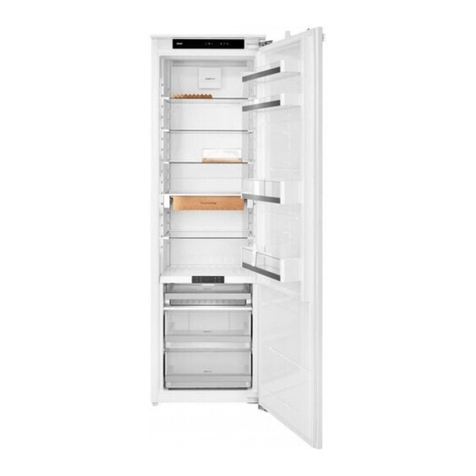
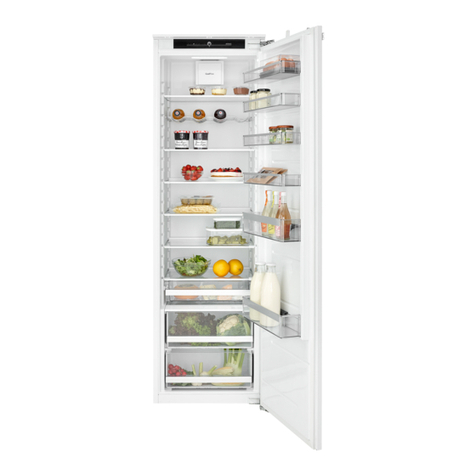
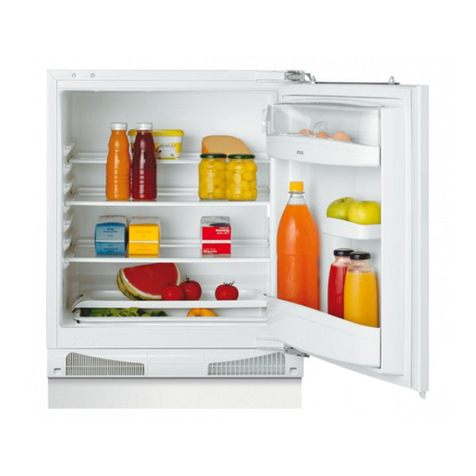
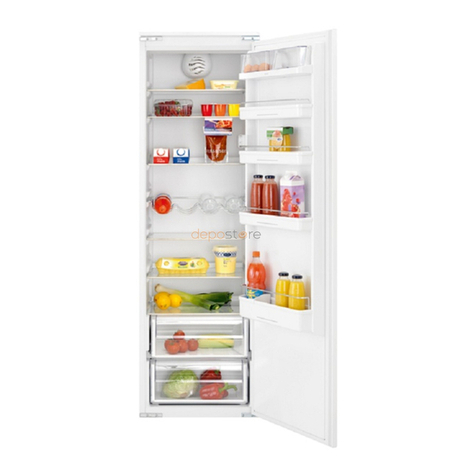
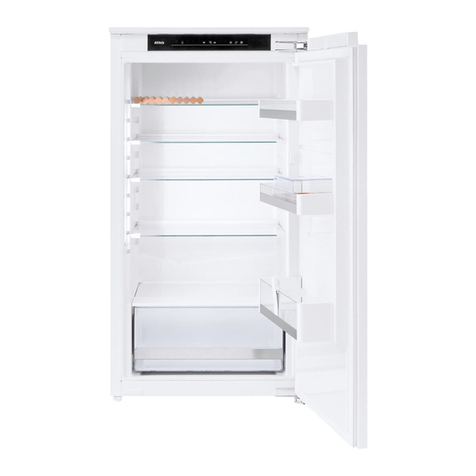
Atag KD63140B/A01 User manual

Handleiding

HANDLEIDING
1
INDEX
Gebruiks-enOnderhoudsgids ............................................... 2
Koelkastverlichting ......................................................... 2
Het ledlampje vervangen (afhankelijk van het model) . . . . . . . . . . . . . . . . . . . . . . . . . . . . . . . . . . . . . . . 2
Schappen ....................................................................... 2
Deur ........................................................................... 2
Gebruikvanhetapparaat ..................................................... 3
Eerstegebruik .................................................................... 3
Koelvakenbewarenvoedsel ......................................................... 3
Verseetenswarenendrankenbewaren .................................................. 3
* Voedselopslag in het diepvriescompartiment (afhankelijk van het model) . . . . . . . . . . . . . . . . . . . . . . . . 4
Houdbaarheidsperiode voedingsmiddelen bij verschillende temperaturen . . . . . . . . . . . . . . . . . . . . . . . . 4
* Ontdooien van het diepvriescompartiment (afhankelijk van het model) . . . . . . . . . . . . . . . . . . . . . . . . . 5
Functionelegeluiden ............................................................... 5
Aanbevelingen wanneer het apparaat niet wordt gebruikt . . . . . . . . . . . . . . . . . . . . . . . . . . . . . . . . . . . . 5
Reinigenenonderhoud ...................................................... 6

Gebruiks- en Onderhoudsgids NL
2
Koelkastverlichting
Het verlichtingssysteem in het koelkastcompartiment maakt gebruik van ledverlichting voor een betere verlichting dan de
traditionele lampjes en een zeer laag energieverbruik. Neem contact op met het Technische Servicecentrum als u een
vervanging nodig heeft.
Belangrijk: De binnenverlichting van het koelkastcompartiment gaat branden wanneer de deur van de koelkast geopend
wordt.
Het ledlampje vervangen (afhankelijk van het model)
Trek eerst de stekker uit het stopcontact voordat u het lampje vervangt. Volg daarna de instructies op basis van het
type lampje voor uw product. Vervang het lampje door een nieuw lampje met dezelfde specificaties, verkrijgbaar bij het
Technische Servicecentrum en erkende verkooppunten.
Lamptype 1)
Schroef het lampje linksom los om het te verwijderen, zoals aangegeven in de
afbeelding. Wacht 5 minuten voordat u het apparaat weer aansluit.
led-lampje (max. 25W)
Lamptype 2)
Als het product is uitgerust met Led-lampjes, zoals aangegeven in de onderstaande afbeeldingen, neemt dan contact op
met het Technische Servicecentrum indien vervanging nodig is. Led-lampjes gaan langer mee dan traditionele lampjes,
verbeteren het zicht in het apparaat en zijn milieuvriendelijk.
Schappen
Alle laden, deurvakken en schappen kunnen worden verwijderd.
Deur
Omkeren van de deur
Opmerking: De richting waarin de deur opengaat, kan worden veranderd. Indien deze actie wordt uitgevoerd door Consumentenservice
valt dit niet onder de garantie. Volg de instructies in Installatiegids.

Gebruiks- en Onderhoudsgids
3
Gebruik van het apparaat
Eerste gebruik
Wacht minstens twee uren na de installatie vooraleer het apparaat aan te sluiten op het stopcontact. Nadat de stekker in het
stopcontact is gestoken, begint het apparaat automatisch te werken. De ideale opslagtemperaturen voor etenswaar zijn vooraf
in de fabriek afgesteld.
Na het inschakelen van het apparaat dient u 4-6 uur te wachten tot de juiste opslagtemperatuur voor een normaal gevuld
apparaat is bereikt. Breng het antibacteriële filter tegen onaangename geuren op de ventilator aan, zoals aangeduid in de
filterverpakking (indien aanwezig). Als het geluidssignaal afgaat, betekent dit dat het temperatuuralarm in werking is getreden:
druk op de knop om de geluidsalarmen uit te schakelen.
Koelvak en bewaren voedsel
In het koelkastcompartiment kunnen verse etenswaar en dranken bewaard worden. Het ontdooien van het
koelkastcompartiment vindt geheel automatisch plaats. De aanwezigheid van waterdruppels op de achterste binnenwand van
het koelkastcompartiment is een teken van de automatische ontdooifase. Het dooiwater loopt weg in een afvoeropening en
vervolgens in een bak, waar het verdampt.
Opmerking: de omgevingstemperatuur, hoe vaak de deur wordt geopend en de plaats van het apparaat kan een invloed hebben op de
interne temperatuur van de twee vakken. Stel de temperatuur in aan de hand van deze factoren. Bij veel vocht in het koelkastcompartiment
kan er condensvorming ontstaan, vooral op de glasplaten. In dit geval wordt geadviseerd dat u vloeistoffen in open pannen afsluit (bijv. een
pan bouillon), etenswaar met een hoog watergehalte (bijv. groenten) in folie wikkelt en de ventilator inschakelt (indien hiermee uitgerust).
Alle laden, deurvakken en schappen kunnen worden verwijderd.
Ventilatie
Dankzij de ventilatielucht is er een betere temperatuurverdeling in de compartimenten zodat het voedsel beter bewaard blijft
en de vochtigheid verlaagd wordt. Zorg dat ventilatieopeningen niet geblokkeerd worden.
Verse etenswaren en dranken bewaren
Levensmiddelen die een grote hoeveelheid ethyleengas afgeven en de levensmiddelen die gevoelig zijn voor dit gas, zoals
fruit, groenten en salade, moeten altijd worden zodanig worden gescheiden of verpakt dat de houdbaarheid niet achteruit
gaat; bijvoorbeeld geen tomaten samen met kiwi's of kool bewaren. Bewaar verschillende etenswaar niet te dicht bij elkaar om
voor voldoende luchtcirculatie te zorgen. Gebruik houders van recyclebaar plastic, metaal, aluminium en glas, of wikkel de
levensmiddelen in folie.
Indien u een kleine hoeveelheid etenswaar in de koelkast opslaat, raden wij aan de platen boven de crisperlade voor groente
en fruit te gebruiken, aangezien dit de koelste plek in het koelvak is. Gebruik altijd afsluitbare houders voor vloeistoffen en
etenswaar die geuren of smaken kunnen afgeven of opnemen, of dek de vloeistoffen of etenswaar af. Om te voorkomen dat
flessen omvallen, kunt u gebruik maken van de flessenhouder (beschikbaar op bepaalde modellen).
c
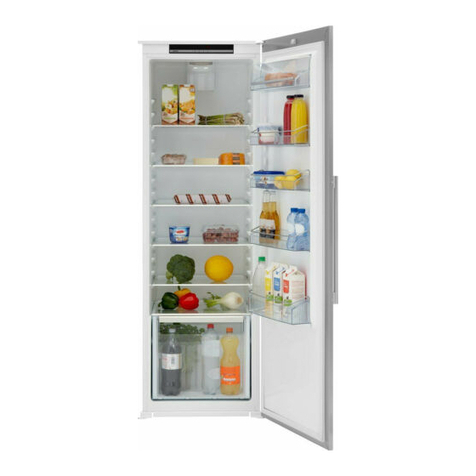
Legenda
GEMATIGDE ZONE
Aanbevolen voor het bewaren van tropisch fruit, blikjes, dranken, eieren,
sauzen, augurken, boter, jam
KOELZONE
Aanbevolen voor het bewaren van kaas, melk, zuivelproducten, delicatessen,
yoghurt
KOUDSTE ZONE
Aanbevolen voor het bewaren van vleeswaren, desserts, vlees en vis
GROENTE- EN FRUITLADE
** Voor modellen met "0 °ZONE" COMPARTIMENT is de "koudste zone" de zone die in
de legenda wordt aangegeven
Gebruiks- en Onderhoudsgids NL
4
* Voedselopslag in het diepvriescompartiment (afhankelijk van het model)
Met het diepvriescompartiment kan bevroren voedsel lang worden bewaard en kunnen verse voedingswaren worden
ingevroren. De hoeveelheid verse etenswaar die in 24 uur kan worden ingevroren, staat aangegeven op het typeplaatje. Schik
de verse etenswaar in het vriesvak in het diepvriescompartiment (zie de Beknopte Handleiding) en zorg voor voldoende ruimte
rondom elke verpakking zodat de lucht kan circuleren. Geadviseerd wordt gedeeltelijk ontdooide etenswaar niet opnieuw in
te vriezen. Het is belangrijk om etenswaar zodanig te verpakken dat het binnendringen van water, vocht of condens wordt
voorkomen.
IJsblokjes
Vul het ijsbakje voor 2/3 met water en plaats het in het diepvriescompartiment. Gebruik nooit puntige of scherpe voorwerpen
om het ijs te verwijderen.
De laden verwijderen
Trek de laden zo ver mogelijk uit, til ze op en neem ze uit. Voor een groter volume kan het diepvriescompartiment gebruikt
worden zonder de laden. Zorg ervoor dat de deur goed is gesloten nadat u het voedsel terug op de roosters/schappen hebt
gelegd.
c
A
Legenda
A. DIEPVRIESCOMPARTIMENT (als de koelkast er een heeft)
Houdbaarheidsperiode voedingsmiddelen bij verschillende temperaturen
DIEPVRIESVAK
Product Bewaarperiode (-12°C) Aanbevolen
bewaarperiode (-18°C)
Bewaarperiode (-24°C)
Boter of margarine 1 maand 6 maanden 9 maanden
Vis 1 maand 1-3 maanden 6 maanden
Vruchten (met uitzondering
van citrusvruchten) &
Groenten
1 maand 8-12 maanden 12 maanden
Vlees- ham- worst
Gebraad (rund-varken-lam)
Biefstuk of koteletten (rund-
lam-varken)
1 maand 2 maanden
8-12 maanden
4 maanden
12 maanden
Melk, verse vloeistoffen, kaas,
ijs of sorbet
1 maand 1-3 maanden 5 maanden (niet aanbevolen
voor ijs)
Gevogelte (kip-kalkoen) 1 maand 5-7 maanden 9 maanden
Houdbaarheidsperiode voedingsmiddelen bij verschillende temperaturen
KOELVAK
Product Bewaarperiode 0-3°C Bewaarperiode (3-6°C) Bewaarperiode 6-8°C
Blikjes, dranken, eieren,
sauzen, augurken, boter, jam
3-4 weken 3-4 weken 3-4 weken
Tropisch fruit Niet aanbevolen 2-4 weken 3-4 weken
Bewaar kaas, melk,
zuivelproducten,
delicatessen, yoghurt
2-5 dagen 2-5 dagen 2-5 dagen
Koude vleeswaren, desserts,
vlees en vis en zelfbereid
voedsel
3-5 dagen 1-2 dagen Niet aanbevolen

Gebruiks- en Onderhoudsgids
5
KOELVAK
Product Bewaarperiode 0-3°C Bewaarperiode (3-6°C) Bewaarperiode 6-8°C
Bewaar groenten en
fruit (met uitzondering
van tropisch fruit en
citrusvruchten)
15 dagen 10-12 dagen 4-7 dagen
* Ontdooien van het diepvriescompartiment (afhankelijk van het model)
1. Het wordt aanbevolen de temperatuur kouder in te stellen of Snelvriezen/Snelkoelen* te selecteren minstens vier uur
vooraleer het voedsel uit het vriesvak te halen, om de bewaartijd in de ontdooiingsfase te verlengen.
2. Om het compartiment te ontdooien, schakelt u het apparaat uit en verwijdert u de laden. Plaats de ingevroren
etenswaar op een koele plek. Laat de deur open, zodat het ijs kan smelten. Om te voorkomen dat er tijdens het
ontdooien water wegloopt, wordt geadviseerd een absorberende doek onderin het diepvriescompartiment te leggen
en regelmatig uit te wringen.
3. Maak de binnenkant van het diepvriescompartiment schoon en droog zorgvuldig.
4. Schakel het apparaat weer in en plaats de etenswaar terug.
Functionele geluiden
1. Tijdens de werking van het product is het normaal dat de
compressor af en toe een zoemend geluid afgeeft.
2. Borrelende en krakende geluiden zijn veroorzaakt door de passage
van het koelgas in de koelleidingen. Dit zijn normale geluiden.
3. Het is normaal krakende geluiden te "horen" wanneer de compressor
actief of niet actief is: Dit is een normaal geluid van de structuur van
het product.
4. Controleer of de vakken aan de binnenkant van de koelkastdeur, de schappen en de laden in het koelvak vastzitten en
correct geplaatst zijn, om trillingen te voorkomen.
5. Plaats geen glazen recipiënten (flessen, potten, enz.) in rechtstreeks contact met elkaar, om trillingen te voorkomen.
6. Dit apparaat is uitgerust met een compressor die werkt aan een optimale snelheid om het energieverbruik te
optimaliseren. Het kan dus gebeuren dat in bepaalde situaties (in de zomer of wanneer grote hoeveelheden voedsel
ingebracht worden) de compressor de snelheid opdrijft en dus ook meer geluiden voortbrengt.
Aanbevelingen wanneer het apparaat niet wordt gebruikt
Bij geen gebruik
Ontkoppel het apparaat van het elektriciteitsnet en leeg, ontdooi (indien nodig) en reinig het apparaat.
Laat de deuren op een kier staan, zodat lucht in de compartimenten kan circuleren. Hierdoor voorkomt u de ontwikkeling van
schimmel en onaangename geuren.
Bij een stroomstoring
Houd de deuren gesloten, zodat de etenswaar zo lang mogelijk koel blijft. Vries gedeeltelijk ontdooide etenswaar niet opnieuw
in. Bij een langdurige stroomstoring is het mogelijk dat het blackout-alarm geactiveerd wordt (bij producten met elektronica).

Gebruiks- en Onderhoudsgids NL
6
Reinigen en onderhoud
Trek de stekker uit het stopcontact of sluit de stroomtoevoer af voordat u met reinigings- of
onderhoudswerkzaamheden begint.
Gebruik geen reinigings- of schuurmiddelen. Maak de onderdelen van de koelkast nooit schoon met licht ontvlambare
vloeistoffen.
Gebruik geen stoomreinigers.
De toetsen en het display van het bedieningspaneel mogen niet gereinigd worden met middelen op basis van alcohol
of daarvan afgeleide stoffen; gebruik in plaats daarvan een droge doek.
Maak het apparaat regelmatig schoon met een doek met een oplossing van lauw water en een neutraal schoonmaakmiddel
dat geschikt is voor het reinigen van de binnenkant van een koelkast.
Om de constante en correcte afvoer van het dooiwater te garanderen,
dient u de binnenkant van de afvoer in de achterwand van het
koelkastcompartiment, in de buurt van de groenten- en fruitlade, schoon
te maken met behulp van het bijgeleverde gereedschap.

User Manual

USER MANUAL
1
INDEX
Use&Careguide ......................................................... 2
Refrigeratorlight ........................................................... 2
Replacing the led light bulb (depending on model) . . . . . . . . . . . . . . . . . . . . . . . . . . . . . . . . . . . . . . . . . 2
Shelves ......................................................................... 2
Door ........................................................................... 2
Howtousetheappliance ..................................................... 3
Firsttimeuse..................................................................... 3
Refrigeratorcompartmentandfoodstorage .............................................. 3
Howtostorefreshfoodandbeverages .................................................. 3
* Freezer compartment food storage (Depending on model) . . . . . . . . . . . . . . . . . . . . . . . . . . . . . . . . . . 4
Foodshelflifeatdifferenttempertures .................................................. 4
* How to defrost the freezer compartment (Depending on model) . . . . . . . . . . . . . . . . . . . . . . . . . . . . . . 5
Functionalsounds ................................................................. 5
Recommendation in case of no use of the appliance . . . . . . . . . . . . . . . . . . . . . . . . . . . . . . . . . . . . . . . . 5
Cleaningandmaintenance .................................................... 6

Use & Care guide EN
2
Refrigerator light
The light system inside the refrigerator compartment uses LEDs light, allowing a better lighting than traditional light bulbs as
well as a very low energy consumption. Contact the Technical Assistance Service if you need a replacement.
Important: The refrigerator compartment light switches on when the refrigerator door is opened.
Replacing the led light bulb (depending on model)
Always disconnect the appliance from the power supply before replacing the light bulb. Then follow the instructions
based on the type of light bulb for your product. Replace the light bulb with one with the same features, available from the
Technical Assistance Service and authorised sellers.
Light type 1)
To remove the light bulb, unscrew it in an anti-clockwise direction, as shown in the
figure. Wait 5 minutes before reconnecting the appliance.
LED light bulb (max 25W)
Light type 2)
If the product has LED lights, as demonstrated in the figures below, contact the Technical Assistance Service if you need a
replacement. LEDs last longer than traditional light bulbs, improve internal visibility and are environmentally-friendly.
Shelves
All of the drawers, door shelves and shelves can be removed.
Door
Door reversibility
Note: The direction of door opening can be changed. If this operation is performed by After-sales Service it is not covered by the warranty.
Follow instruction in Installation Guide.

Use & Care guide
3
How to use the appliance
First time use
Wait at least two hours, after the installation, before connecting the appliance to the power supply. Connect the appliance to
the power supply it starts the operation automatically. The ideal storage temperatures for the food are preset in the factory.
After turning the appliance on, you must wait for 4-6 hours for the correct storage temperature to be reached for a normally
filled appliance. Position the antibacterial anti-odour filter in the fan as demonstrated in the filter packaging (if available). If the
audible signal sounds, it means that the temperature alarm has intervened: press the button to switch off the acoustic alarms.
Refrigerator compartment and food storage
The refrigerator compartment allows for the storage of fresh food and drink. The refrigerator compartment defrosts completely
automatically. The occasional presence of drops of water on the internal back wall of the compartment is a sign of the automatic
defrosting phase. The defrosting water is channelled into a drain and then collected in a container, where it evaporates.
Note: the ambient temperature, how often the doors are opened and the position of the appliance may affect the internal temperatures
in the two compartments. Set the temperatures depending on these factors. In very humid conditions, condensation may form in the
refrigerator compartment, especially on the glass shelves. In this case, it is recommended that you close containers with liquids in (e.g. a pot
of stock), wrap up food with a high water content (e.g. vegetables) and turn on the fan, if there is one. All of the drawers, door shelves and
shelves can be removed.
Air ventilation
The ventilation air allows a better distribution of the temperatures inside the compartments and, consequently, better
preservation of the food and reduction of excess humidity. Do not obstruct the ventilation area.
How to store fresh food and beverages
Foods which give off a large amount ethylene gas (apples, apricots, pears, peaches, avocado, figs, prunes, blueberries, mellons,
beans) and those that are sensitive to this gas, such as fruit vegetables and salad, should always be separated or wrapped so as
not to reduce the storage life; for example do not store tomatoes together with kiwi fruits or cabbage. Do not store food too
close together to enable sufficient air circulation. Use recyclable plastic, metal, aluminum and glass containers and cling film to
wrap foods.
If you have a little quantity of food to store in the refrigerator, we recommend to use the shelves above the crisper for fruits
and vegetables since this is the coolest area of the compartment. Always use closed containers for liquids and for food that
may give off or be tainted by odor or flavor transfer or cover them. To avoid bottles falling over, you can use the bottle holder
(available on selected models).
c
Legend
TEMPERATE ZONE
Suggested for storage of tropical fruit, cans, drinks, eggs, sauces, pickles,
butter, jam
COOL ZONE
Suggested for the storage of cheese, milk, daily food, delicatessen, yogurt
COOLEST AREA
Suggested for storage of cold cuts, desserts, meat and fish
FRUIT AND VEGETABLE DRAWER
** For models with "0 °ZONE" COMPARTMENT the "coolest area" is the one
highlighted in the legend

Use & Care guide EN
4
* Freezer compartment food storage (Depending on model)
The freezer compartment allows long time storage of frozen food and freezing of fresh food. The quantity of fresh
food that can be frozen in 24 hours is written on the rating plate. Arrange the fresh food in the freezing area inside the freezer
compartment, leaving enough space around the food packages to allow air to circulate freely. It is advisable that you do not
re-freeze food that has partially defrosted. It is important to wrap the food in a way that prevents the ingress of water, humidity
or condensation.
Ice cubes
Fill 2/3 of the ice tray with water and put it back in the freezer compartment. Do not use sharp or pointed objects to remove the
ice under any circumstances.
Removing the drawers
Pull the drawers outwards as far as they will go, lift them up and remove them. To get more volume, the freezer compartment
can be used without the drawers.Make sure that the door is closed properly after putting the food back on the grilles/shelves.
c
A
Legend
A. FREEZER COMPARTMENT(If the refrigerator has one)
Food shelf life at different tempertures
FROZEN COMPARTMENT
Product Storage period (-12°C) Reccommended Storage
period (-18°C)
Storage period (-24°C)
Butter or margarine 1 month 6 months 9 months
Fish 1 month 1-3 months 6 months
Fruits (except citrus) &
Vegetables
1 month 8-12 months 12 months
Meat- Ham- sausage
Roasts (beef-pork- lamb)
Steaks or chops (beef-lamb-
pork)
1 month 2 months
8-12 months
4 months
12 months
Milk, Fresh fluid, Cheese, Ice
cream or sherbet
1 month 1-3 months 5 months (not reccomended
for ice cream)
Poultry (chicken-turkey) 1 month 5-7 months 9 months
Food shelf life at different tempertures
UNFROZEN COMPARTMENT
Product Storage period 0-3°C Storage period (3-6°C) Storage period 6-8°C
Cans, drinks, eggs, sauces,
pickles, butter, jam
3-4 weeks 3-4 weeks 3-4 weeks
Tropical fruit Not recommanded 2-4 weeks 3-4 weeks
Cheese, milk, dairy food, deli
food, yoghurt
2-5 days 2-5 days 2-5 days
Cold cuts, desserts, meat and
fish and home-cooked food
3-5 days 1-2 days Not recommanded
Store vegetables and fruits
(excluding tropical fruits and
citrus)
15 days 10-12 days 4-7 days

Use & Care guide
5
* How to defrost the freezer compartment (Depending on model)
1. It is advisable to set the temperature colder or turn on the Fast Freeze/Fast Cool* at least four hours before removing the
food from the freezer compartment, to prolong the preservation of the food during the defrosting phase.
2. To defrost, turn the appliance off and remove the drawers. Put the frozen food in a cool place. Leave the door open to
allow the frost to melt. To prevent the water from escaping during the defrost, it is advised that you place an absorbent
cloth on the bottom of the freezer compartment and wring it out regularly.
3. Clean the inside of the freezer compartment and dry it carefully.
4. Turn the appliance back on and put the food back inside.
Functional sounds
1. A buzz generated by the compressor is normal while the product is
working.
2. Gurgling and crackles are generated by the passage of the
refrigerant gas inside the cooling circuit, therefore these are normal
noises.
3. It’s possibile to "hear" creaks when the compressor is active and
inactive: it is a normal sound of the product’s structure.
4. Check that the balconies on the inside of the refrigerator door, the shelves and the drawers in the refrigerator
compartment are attached and positioned properly, to avoid possible vibrations.
5. Don’t place glass containers (bottles, jars, etc.) in direct contact with each other, to avoid vibrations.
6. This device is equipped with a compressor that operates at an optimum speed to minimize energy consumption. So
it may happen that in certain situations (in summer or if large quantities of food are introduced) that the compressor
increases the speed and therefore it is more noisy than usual.
Recommendation in case of no use of the appliance
In the event of non-use of the applicance
Disconnect the appliance from the power supply, empty it, defrost it (if necessary) and clean it.
Keep the doors slightly ajar to let air circulate inside the compartments. By doing this, you avoid the development of mould
and bad odours.
In the event of an interruption to the power supply
Keep the doors closed so the food stays cold for as long as possible. Do not re-freeze food that has partially defrosted. If there is
a prolonged power cut, the black out alarm may also activate (in products with electronics).

Use & Care guide EN
6
Cleaning and maintenance
Before any cleaning or maintenance operation, unplug the appliance from the mains or disconnect the electrical
power supply.
Never use abrasives. Never clean refrigerator parts with flammable fluids.
Do not use steam cleaners.
The buttons and control panel display must not be cleaned with alcohol or alcohol-derived substances, but with a dry
cloth.
Clean the appliance occasionally with a cloth and a solution of warm water and neutral cleaning agents specifically for cleaning
the inside of the refrigerator.
To ensure the constant and correct flow of the defrosting water, regularly
clean the inside of the drain situated in the back wall of the refrigerator
compartment near the fruit and vegetable drawer using the utensil
provided.
This manual suits for next models
1
Table of contents
Languages:
Other Atag Refrigerator manuals

Atag
Atag KD60178BF User manual

Atag
Atag KD62122A/A01 User manual

Atag
Atag KD84178BF User manual

Atag
Atag KF8178WDL User manual

Atag
Atag KD80122AF User manual

Atag
Atag KD80178BDN User manual

Atag
Atag KA2512BD User manual

Atag
Atag KA2411R/A04 User manual

Atag
Atag KS25178B User manual

Atag
Atag KS37178A User manual