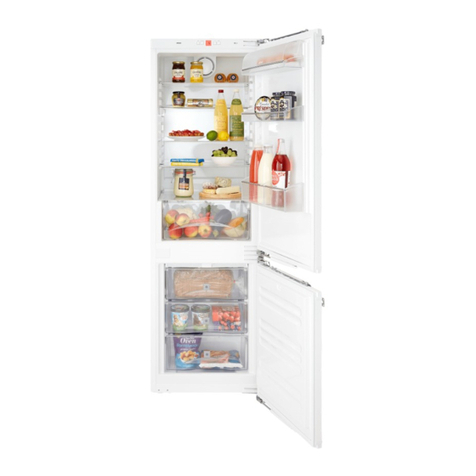
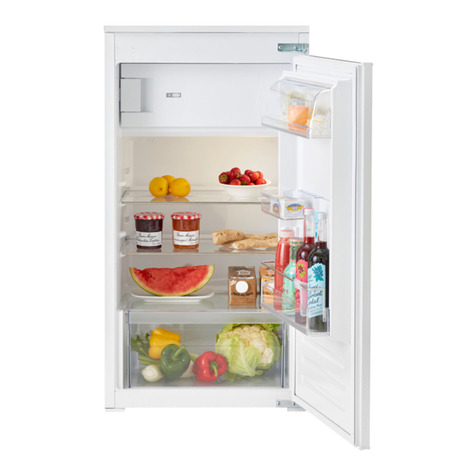
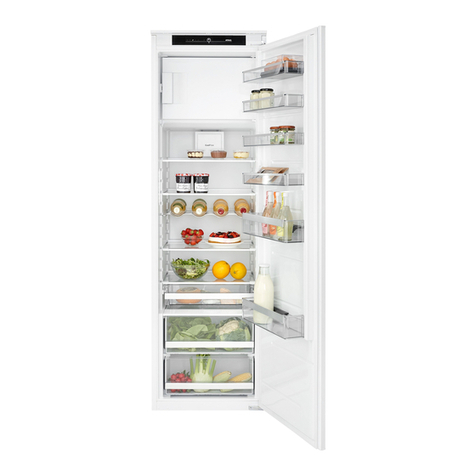
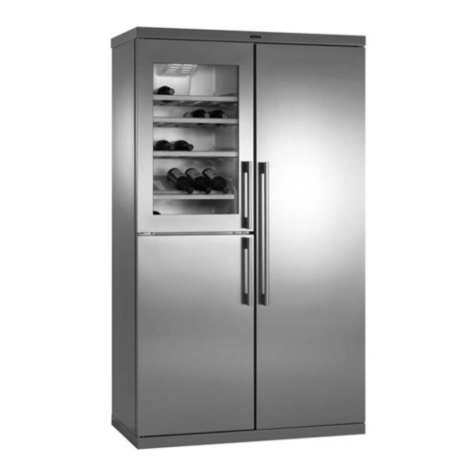
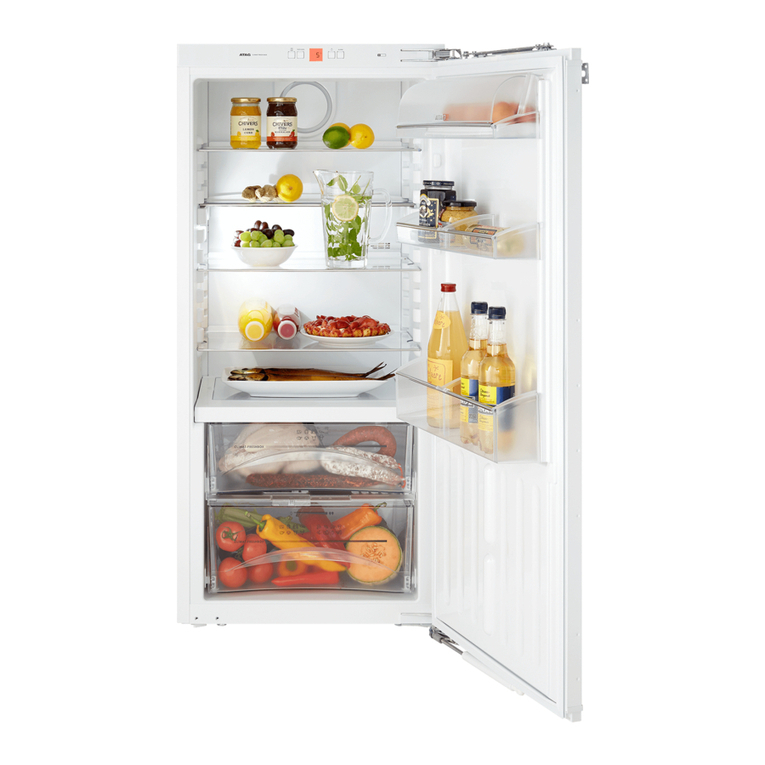
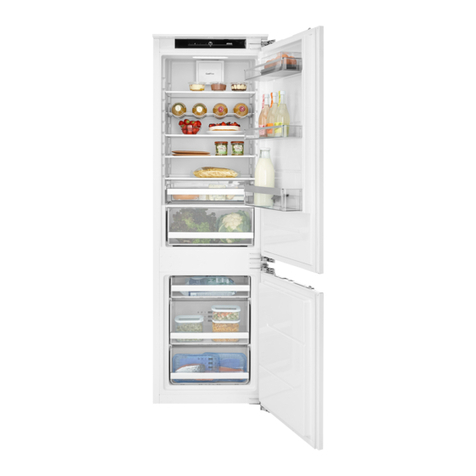
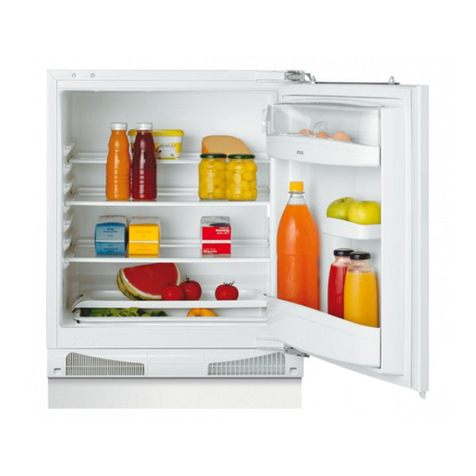
Atag KD62122A/A01 User manual

Gebruiksaanwijzing
Koelkast met vriesvak
Mode d’emploi
Réfrigérateur avec compartiment
Bedienungsanleitung
Kühlschrank mit Gefrierfach
Instructions for use
Fridge with freezer compartment
178 cm
cop_5019_608_33027 3-10-2006 17:51 Pagina 1


3
DEUTSCH Gebrauchsanweisung Seite 4
FRANÇAIS Mode d’emploi Page 10
ENGLISH Instructions Page 16
NEDERLANDS Gebruiksaanwijzing Pagina 22

Always disconnect the appliance from the power supply before replacing the light bulb. Then
follow the instructions based on the type of light bulb for your product.
Replace the light bulb with one with the same features, available from the Technical Assistance
Service and authorised sellers.
Light type 1)
To remove the light bulb, unscrew it in an anti-clockwise direction, as
shown in the figure. Wait 5 minutes before reconnecting the appliance.
- traditional light bulb (max 25W)
or
- LED light bulb (with the same features)
only available from the Technical Assistance Service
Light type 2)
If the product has LED lights, as demonstrated in the figures below, contact the Technical
Assistance Service if you need a replacement.
LEDs last longer than traditional light bulbs, improve internal visibility and are environmentally-
friendly.
16
Clean the appliance occasionally with a cloth and a solution of warm
water and neutral cleaning agents specifically for cleaning the inside
of the refrigerator. Do not use abrasive cleaning agents. To ensure
the constant and correct flow of the defrosting water, regularly clean
the inside of the drain situated in the back wall of the refrigerator
compartment near the fruit and vegetable drawer using the utensil
provided (see figure).
Before carrying out any maintenance or cleaning, take the plug out of the socket or disconnect the
appliance from the power supply.
Connect the appliance to the power supply.
In models with electronics, a sound signal may be emitted, which means that the temperature
alarm has been activated: press the sound alarm off button. Where provided, position the
antibacterial anti-odour filter in the fan as demonstrated in the filter packaging.
Note: After turning the appliance on, you must wait for 4-5 hours for the correct storage
temperature to be reached for a normally filled appliance.
USING FOR THE FIRST TIME
MAINTENANCE AND CLEANING
OF THE APPLICANCE
REPLACING THE LIGHT BULB OR LED
(depending on the model)
Light bulb
LED light bulb
LED- strip
Dragon
et2

17
Disconnect the appliance from the power supply, empty it, defrost it (if necessary) and clean it.
Keep the doors slightly ajar to let air circulate inside the compartments. By doing this, you avoid
the development of mould and bad odours.
IN THE EVENT OF NON-USE
OF THE APPLICANCE
Keep the doors closed so the food stays cold for as long as possible. Do not re-freeze food that
has partially defrosted. If there is a prolonged power cut, the black out alarm may also activate (in
products with electronics).
IN THE EVENT OF AN INTERRUPTION TO
THE POWER SUPPLY
The refrigerator compartment allows for the storage of fresh food and drink.
The refrigerator compartment defrosts completely automatically.
The occasional presence of drops of water on the internal back wall of the compartment is a
sign of the automatic defrosting phase. The defrosting water is channelled into a drain and then
collected in a container, where it evaporates.
Depending on the model, the product may be equipped with a special “Zero Degrees”
compartment, which is ideal for storing fresh meat and fish.
Warning: do not clean refrigerator accessories in a dishwasher.
Note: the ambient temperature, how often the doors are opened and the position of the appliance
may affect the internal temperatures in the two compartments. Set the temperatures depending on
these factors.
Note: in very humid conditions, condensation may form in the refrigerator compartment, especially
on the glass shelves. In this case, it is recommended that you close containers with liquids in (e.g.
a pot of stock), wrap up food with a high water content (e.g. vegetables) and turn on the fan, if
there is one.
Removing the fruit and vegetable drawer (depending on the model)
Pull the drawer outwards as far as it will go, lift it up and take it out.
To make it easier to remove the fruit and vegetable drawer, it may be necessary to empty (and
possibly remove) the two lower door shelves and then continue to remove the drawer.
Fan and antibacterial anti-odour filter (depending on the model)
The fan allows for the even distribution of the temperatures inside the compartments and,
consequently, better preservation of the food and reduction of excess humidity. Do not obstruct
the ventilation area. The fan can be turned on/off manually (see the Quick Guide); if it is turned on,
it operates automatically when necessary.
REFRIGERATOR COMPARTMENT

18
Model with separate freezer compartment
The freezer compartment allows for the storage of frozen food (for the period indicated on the
packaging) and the freezing of fresh food. The quantity of fresh food that can be frozen in 24 hours is
written on the rating plate. Arrange the fresh food in the freezing area inside the freezer compartment
(see Quick Guide), leaving enough space around the food packages to allow air to circulate freely. It
is advisable that you do not re-freeze food that has partially defrosted. It is important to wrap the food
in a way that prevents the ingress of water, humidity or condensation.
Making ice cubes
Fill 2/3 of the ice tray (if available) with water and put it back in the freezer compartment. Do not
use sharp or pointed objects to remove the ice under any circumstances.
Removing the drawers (depending on the model)
Pull the drawers outwards as far as they will go, lift them up and remove them. To get more
volume, the freezer compartment can be used without the drawers.
Make sure that the door is closed properly after putting the food back on the grilles/shelves.
For frost free models it is not necessary to carry out any defrosting procedures.
For other models, the build up of frost is a normal occurrence.
The quantity and speed of frost accumulation varies depending on the ambient conditions and
how often the door is opened. It is advisable to set the temperature colder or, if available, turn on
the quick freeze function (see Quick Guide) four hours before removing the food from the freezer
compartment, to prolong the preservation of the food during the defrosting phase. To defrost, turn
the appliance off and remove the drawers. Put the frozen food in a cool place. Leave the door
open to allow the frost to melt. To prevent the water from escaping during the defrost, it is advised
that you place an absorbent cloth on the bottom of the freezer compartment and wring it out
regularly.
Clean the inside of the freezer compartment and dry it carefully.
Turn the appliance back on and put the food back inside.
HOW TO DEFROST
THE FREEZER COMPARTMENT (depending on the model)
FREEZER COMPARTMENT
In the freezer compartment you can also freeze fresh
food. The quantity of fresh food that can be frozen in 24 hours
is written on the rating plate.
How to freeze fresh food:
• arrange the food on the grille, if present (figure 1), or directly on the
bottom of the compartment (figure 2)
• put the food in the middle of the compartment without it
coming into contact with food that is already frozen, keeping a
distance of about 20 mm (figure 1 and 2).
Models with an internal product compartment
14m_4s
12m_4s
Figure 1
Figure 2

19
STOP FROST SYSTEM (depending on the model)
The STOP FROST SYSTEM (available depending on the model) facilitates the defrost procedure
for the freezer compartment. The STOP FROST accessory (figure 1) is designed to collect some
of the frost that forms in the freezer compartment and it is easy to remove and clean, therefore
reducing the time needed to defrost the inside of the freezer compartment.
To remove the frost on the STOP FROST accessory follow the cleaning procedure demonstrated
below.
PROCEDURE TO CLEAN THE STOP FROST
ACCESSORY
- Open the freezer compartment door and
remove the upper drawer (figure 2).
- Unfasten the STOP FROST accessory
(figure 3) and remove it (figure 4), taking
care not to drop it on the glass shelf below.
Note: if the accessory is jammed or difficult
to remove, do not keep trying to remove it,
but proceed with the complete defrost of the
freezer compartment.
- Close the door to the freezer compartment.
- Remove the frost on the accessory by rinsing
it under running (not hot) water (figure 5).
- Let the accessory drip dry and dry the plastic
parts with a soft cloth.
- Reinsert the accessory by placing the back
part on the projections shown in figure 7-A,
then refasten the handle of the accessory to
the clasps above (figure 7-B).
- Reinsert the upper drawer and close the door
to the freezer compartment.
It is possible to clean the STOP FROST
accessory on its own without completely
defrosting the freezer compartment. Cleaning
the STOP FROST accessory regularly helps
to reduce the need to completely defrost the
freezer compartment.
Note: the product specifications, including
volume and energy, are calculated without the
STOP FROST accessory.
Click!!
Click!!
A
B
1
2
5
7
6
3 4

20
“ZERO DEGREES” COMPARTMENT
(depending on the model)
The “Zero Degrees” compartment is specifically designed
to maintain a low temperature and the correct humidity to
preserve fresh food for longer (for example, meat, fish, fruits
and winter vegetables).
Humidity control technology coupled with Activ0° provides
the best food preservation when the food is not completely
packed.
Turning on and turning off the compartment
The internal temperature of the compartment is approximately 0° when the compartment is turned
on.
To turn on the compartment, press the
button shown in the figure for more than
one second until the symbol lights up.
The lit symbol means that the compartment
is working. Press the button again for more
than one second to turn off the compartment.
To turn off the compartment completely, you
must remove the drawer.
For the correct functioning of the “Zero Degrees” compartment, it is necessary that:
- the refrigerator compartment is turned on
- the temperature is between +2°C and +6°C
- the drawer in the “Zero Degrees" compartment must be inserted for it to be turned on
- one of the following special functions is not selected: Stand-by, Cooling-Off, Vacation (if present),
in this case, remove the food contained in it.
Note:
- if the symbol does not light up when you turn on the compartment, check that the drawer is
properly inserted; if the problem persists contact the authorised Technical Assistance Service.
- if the compartment is turned on and the drawer is open, the symbol in the control panel may
automatically turn off. The symbol will light up again when the drawer is inserted
- regardless of the state of the compartment, you may hear a faint noise, which you should
consider as normal
- when the compartment is not in operation, the temperature inside it depends on the general
temperature of the refrigerator compartment. In this case, it is advised that fruits and vegetables
that are not sensitive to cold (berries, apples, apricots, carrots, spinach, lettuce, etc.) are stored
in it.
Important: if the compartment is turned on and food with a high water content is present,
condensation may form on the shelves. In this case, turn the function off temporarily.
Be careful when positioning food and containers that are small in size on the upper shelf of the
“Zero Degrees” compartment in order to prevent them accidentally falling between the shelf and
the back wall of the refrigerator compartment.

21
Before contacting the Technical
Assistance Service:
Restart the appliance to check if the problem
has been solved. If not, disconnect the
appliance again and repeat the procedure after
one hour.
If, after having completed the checks listed in
the guide for malfunctions and after restarting
the appliance, your appliance continues to
function incorrectly, contact the Technical
Assistance Service, clearly describing the
problem and stating:
• the type of malfunction
• the model
• the type and serial number of the appliance
(written on the rating plate)
• the Service number (if available) (the number
that is after the word SERVICE on the rating
plate placed inside the appliance)
Note:
Reversing the doors of the appliance, if
carried out by the Technical Assistance
Service, is not considered as a warranty
claim.
TECHNICAL ASSISTANCE SERVICE
Removing the “Zero Degrees” compartment:
Carry out the following steps:
- to make it easier to remove the compartment, we recommend that you empty (and possibly
remove) the lower door shelves
- turn off the compartment
- remove the compartment by rotating it upwards
- remove the white plastic shelf under the compartment
Note: it is not possible to remove the upper shelf and side supports.
To use the “Zero Degrees” compartment again, carefully reposition the white plastic shelf under
the compartment before inserting the drawer and turning the function back on.
To have a larger refrigerator volume and to reduce energy consumption, it is recommended that
you turn off the “Zero Degrees” compartment and remove the compartment.
Clean the compartment and its components occasionally using a cloth and a solution of warm
water (taking care not to submerge the white plastic shelf under the drawer) and neutral cleaning
agents specifically for cleaning the inside of the refrigerator. Do not use abrasive cleaning agents.
Before cleaning the compartment (also externally) it is necessary to remove the drawer to
disconnect the electrical supply for the compartment.

5019 600 00815 07/11
FR
DE GB NL

3
DEUTSCH Gebrauchsanweisung Seite 4
FRANÇAIS Mode d’emploi Page 10
ENGLISH Instructions Page 16
NEDERLANDS Gebruiksaanwijzing Pagina 22

Trennen Sie vor dem Ersetzen der Glühlampe stets die Spannungsversorgung des Geräts. Folgen
Sie dann den Anweisungen, je nach Glühlampentyp für Ihr Produkt.
Ersetzen Sie die Glühlampe durch eine mit den selben Eigenschaften, erhältlich über den
technischen Kundendienst oder über autorisierte Händler.
Lichttyp 1)
Drehen Sie die Glühlampe wie abgebildet gegen den
Uhrzeigersinn, um sie zu entfernen. Warten Sie 5 Minuten, bevor
Sie das Gerät wieder anschließen.
- herkömmliche Glühlampe (max. 25 W)
oder
- LED-Lampe (mit den selben Eigenschaften)
nur über den technischen Kundendienst erhältlich
Lichttyp 2)
Falls das Produkt wie unten abgebildet mit LED-Lampen ausgestattet ist, wenden Sie sich für
einen Ersatz an den technischen Kundendienst.
LEDs halten länger als herkömmliche Glühlampen, verbessern die Sicht im Gerät und sind
umweltfreundlich.
4
Reinigen Sie das Gerät gelegentlich mit einem Tuch und einer
Lösung aus warmem Wasser und speziellen Neutralreinigern
zur internen Reinigung von Kühlschränken. Verwenden Sie
keine Scheuermittel. Für einen kontinuierlichen und korrekten
Tauwasserablauf die Abflussöffnung an der Kühlraumrückwand
in der Nähe des Obst- und Gemüsefachs mit dem mitgelieferten
Werkzeug (siehe Abbildung) regelmäßig reinigen.
Ziehen Sie vor Wartungs- und Reinigungsarbeiten den Netzstecker
des Geräts oder unterbrechen Sie die Stromversorgung.
Schließen Sie das Gerät an das Stromnetz an.
Bei elektronischen Modellen ertönt möglicherweise ein Hinweiston, dies bedeutet, dass der
Temperaturalarm ausgelöst worden ist. Drücken Sie den Warnton-Ausschalter. Falls vorhanden,
platzieren Sie den antibakteriellen Geruchsfilter wie auf der Filterverpackung dargestellt im Lüfter.
Hinweis: Nach dem Einschalten des Geräts müssen Sie 4-5 Stunden warten, bis die korrekte
Lagertemperatur für ein normal befülltes Gerät erreicht ist.
ERSTER GEBRAUCH
WARTUNG UND REINIGUNG
DES GERÄTS
GLÜHLAMPE ODER LED ERSETZEN
(modellabhängig)
Glühlampe
LED-Lampe
LED- strip
Dragon
et2

5
Trennen Sie die Spannungsversorgung des Geräts, entleeren Sie es, tauen Sie es ggf. ab und
reinigen Sie es. Halten Sie die Türen leicht geöffnet, damit Luft hindurchströmen kann. Hierdurch
verhindern Sie die Bildung von Schimmel und schlechten Gerüchen.
BEI NICHTBENUTZUNG
DES GERÄTS
Halten Sie die Türen geschlossen, damit die Lebensmittel so lange wie möglich kalt bleiben.
Frieren Sie Lebensmittel nicht erneut ein, auch wenn sie nur teilweise angetaut sind. Bei einem
längeren Stromausfall wird der Stromausfall-Alarm möglicherweise ebenfalls aktiviert (bei
elektronischen Modellen).
BEI EINER UNTERBRECHUNG DER
SPANNUNGSVERSORGUNG
Im Kühlfach können frische Lebensmittel und Getränke aufbewahrt werden.
Das Kühlfach taut vollautomatisch ab.
Gelegentlich auf der Innenrückwand des Kühlfachs auftauchende Wassertropfen weisen auf die
automatische Abtauphase hin. Das Tauwasser läuft automatisch durch eine Abflussöffnung in
einen Behälter, in dem es verdampft.
je nach Modell ist das Produkt möglicherweise mit einem speziellen „Null-Grad“-Fach
ausgestattet, welches sich zur Lagerung von frischen Fleisch und Fisch eignet.
Achtung: Kühlschrankzubehör darf nicht im Geschirrspüler gespült werden.
Hinweis: Umgebungstemperatur, Häufigkeit der Türöffnung und Aufstellungsort des Geräts
können die Innentemperatur in den beiden Fächern beeinflussen. Beachten Sie diese Faktoren
bei der Temperatureinstellung.
Hinweis: Unter sehr feuchten Umgebungsbedingungen kann sich Kondenswasser im Kühlfach
bilden, vor allem auf den Glasablagen. In diesem Fall empfiehlt es sich, Behälter mit Flüssigkeiten
abzudecken (z. B. ein Topf mit Brühe), Lebensmittel mit hohem Flüssigkeitsgehalt (z. B. Gemüse)
einzuwickeln, und den Lüfter einzuschalten (falls vorhanden).
Herausnahme der Obst- und Gemüseschublade (modellabhängig)
Ziehen Sie die Schublade so weit es geht nach außen, heben Sie sie an und nehmen Sie sie
heraus.
Um das Befüllen der Obst- und Gemüseschublade zu erleichtern, ist es möglicherweise leichter,
die beiden unteren Ablagen in der Tür zu entleeren (und möglicherweise herauszunehmen), und
dann die Schublade herauszunehmen.
Lüfter und antibakterieller Geruchsfilter (modellabhängig)
Der Lüfter ermöglicht eine gleichmäßige Temperaturverteilung in den Fächern und somit bessere
Lebensmittelkonservierung und Verringerung der überschüssigen Feuchtigkeit. Blockieren Sie den
Lüfterbereich nicht. Der Lüfter kann manuell ein- und ausgeschaltet werden (siehe Kurzanleitung).
Ist er eingeschaltet, läuft er bei Bedarf automatisch.
KÜHLFACH

6
Modell mit separatem Gefrierfach
im Gefrierfach können eingefrorene Lebensmittel (für den auf der Verpackung angegebenen
Zeitraum) gelagert, und frische Lebensmittel eingefroren werden. Die Menge an Lebensmitteln,
die pro 24 Stunden eingefroren werden kann, ist auf dem Typenschild angegeben. Platzieren Sie
frische Lebensmittel im Einfrierbereich des Gefrierfachs (siehe Kurzanleitung) und lassen Sie dabei
ausreichend Platz um die Verpackungen herum zur Luftzirkulation. Frieren Sie Lebensmittel nicht
erneut ein, auch wenn sie nur teilweise angetaut sind. Die Lebensmittel müssen unbedingt auf eine
Weise eingepackt sein, die das Eindringen von Wasser, Flüssigkeit oder Kondensation verhindert.
Herstellung von Eiswürfeln
Füllen Sie die Eiswürfelschalen (falls vorhanden) zu 2/3 mit Wasser und stellen Sie sie in das
Gefrierfach. Verwenden Sie unter keinen Umständen scharfe oder spitzen Werkzeuge, um das Eis
zu lösen.
Herausnahme der Schubladen (modellabhängig)
Ziehen Sie die Schubladen so weit es geht nach außen, heben Sie sie an und nehmen Sie
sie heraus. Zur Erhöhung der Lagerkapazität kann das Gefrierfach auch ohne die Schubladen
verwendet werden.
Stellen Sie sicher, dass die Tür nach dem Platzieren der Lebensmittel auf den Gittern / Ablagen
korrekt schließt.
Bei frostfreien Modellen sind keine Abtauvorgänge erforderlich.
Bei anderen Modellen ist die Bildung von Frost normal.
Menge und Geschwindigkeit der Frostbildung hängt von den Umgebungsbedingungen ab, und
davon, wie häufig die Tür geöffnet wird. Es empfiehlt sich, die Temperatur niedriger einzustellen
oder, falls vorhanden, die Schnellgefrierfunktion (siehe Kurzanleitung) vier Stunden vor Entnahme
der Lebensmittel aus dem Gefrierfach zu entnehmen, um die Lebensmittelkonservierung in der
Abtauphase zu verlängern. Schalten Sie das Gerät zum Abtauen ab und entnehmen Sie die
Schubladen. Platzieren Sie die gefrorenen Lebensmittel an einem kühlen Ort. Lassen Sie die Tür offen,
damit der Frost abtauen kann. Es empfiehlt sich, saugfähige Tücher am Boden des Gefrierfachs zu
platzieren, und regelmäßig auszuwringen, um ablaufendes Abtauwasser einzudämmen.
Reinigen Sie den Innenraum des Gefrierfachs und trocknen Sie es sorgfältig ab.
Schalten Sie das Gerät wieder ein und geben Sie die Lebensmittel zurück in das Gerät.
ABTAUEN
DES GEFRIERFACHS (modellabhängig)
GEFRIERFACH
Im Gefrierfach können auch frische Lebensmittel
eingefroren werden. Die Menge an Lebensmitteln, die pro
24 Stunden eingefroren werden kann, ist auf dem Typenschild
angegeben.
Frische Lebensmittel einfrieren:
• Platzieren Sie die Lebensmittel auf dem Gitter, falls vorhanden
(Abbildung 1) oder direkt auf dem Boden des Gefrierfachs
(Abbildung 2)
• Platzieren Sie die Lebensmittelin der Mitte des Fachs, ohne
dass es bereits gefrorene Lebensmittel berührt, halten Sie einen
Abstand von etwa 20 mm ein (Abbildung 1 und 2).
Modelle mit einem internen Fach
14m_4s
12m_4s
Abbildung 1
Abbildung 2

7
(modellabhängig)
Das STOP-FROST-SYSTEM (modellabhängig) erleichtert den Abtauvorgang im Gefrierfach. Das
STOP-FROST-Zubehörteil (Abbildung 1) wird eingesetzt, um einen Teil des Frosts anzusammeln,
der sich im Gefrierfach bildet. Es ist leicht herauszunehmen und zu reinigen und verringert somit
die erforderliche Zeit zum Abtauen des Gefrierfachs.
Folgen Sie den unten dargestellten Reinigungsvorgängen, um angesammeltes Eis auf dem
STOP-FROST-Zubehörteil zu entfernen.
REINIGUNGSVORGANG FÜR
- Öffnen Sie die Gefrierfachtür und nehmen Sie
die obere Schublade heraus (Abbildung 2).
- Entriegeln Sie das STOP-FROST-Zubehörteil
(Abbildung 3) und nehmen Sie es heraus
(Abbildung 4), achten Sie hierbei darauf,
dass es nicht auf die Glasablage darunter
fällt. Hinweis: Falls das Zubehörteil klemmt
oder sich nicht leicht herausnehmen
lässt, beharren Sie nicht darauf, es
herauszunehmen. Fahren Sie stattdessen
mit einem kompletten Abtauvorgang des
Gefrierfachs fort.
- Schließen Sie die Gefrierfachtür.
- Entfernen Sie Eis auf dem Zubehörteil, indem
Sie es unter laufendes (nicht heißes) Wasser
halten (Abbildung 5).
- Lassen Sie das Zubehörteil abtropfen und
trocknen Sie die Kunststoffteile mit einem
weichen Tuch ab.
- Setzen Sie das Zubehörteil wieder ein,
indem Sie es hinten in die in Abbildung 7-A
dargestellten Aussparungen einführen und
dann den Griff des Zubehörteils mit den
klammern oben verriegeln (Abbildung 7-B).
- Setzen die die obere Schublade wieder ein
und schließen Sie die Gefrierfachtür.
Das STOP-FROST-Zubehörteil kann
unabhängig gereinigt werden, ohne das
Gefrierfach komplett abtauen zu müssen.
Durch regelmäßige Reinigung des STOP-
FROST-Zubehörteils muss das Gefrierfach
weniger häufig komplett abgetaut werden.
Hinweis: Die Produktdaten, einschließlich Kapazität und Energieverbrauch verstehen sich ohne
STOP-FROST-Zubehörteil.
Click!!
Click!!
A
B
1
2
5
7
6
3 4

8
(modellabhängig)
Das „Null-Grad“-Fach wurde speziell darauf ausgelegt, eine
niedrige Temperatur und die korrekte Feuchtigkeit einzuhalten,
um frische Lebensmittel länger zu konservieren (zum Beispiel
Fleisch, Fisch, Obst und Wintergemüse).
Die Technologie zur Feuchtigkeitskontrolle bietet zusammen
mit Activ0° die beste Konservierung von Lebensmitteln, wenn
diese nicht vollständig verpackt sind.
Das Fach ein- und ausschalten
Ist das Fach eingeschaltet, beträgt die Innentemperatur etwa 0 °C.
Drücken Sie die abgebildete Taste
länger als eine Sekunde bis das Symbol
aufleuchtet, um das Fach einzuschalten.
Ein leuchtendes Symbol bedeutet, dass
das Fach aktiviert ist. Drücken Sie die Taste
erneut länger als eine Sekunde, um das
Fach abzustellen. Um das Fach komplett
abzustellen, müssen Sie die Schublade
herausnehmen.
Zur korrekten Funktion des „Null-Grad“-Fachs ist Folgendes erforderlich:
- das Kühlfach muss eingeschaltet sein
- die Temperatur liegt zwischen +2 °C und +6 °C
- die Schublade im „Null-Grad“-Fach muss eingesetzt sein, damit dieses funktionieren kann
- die folgenden Sonderfunktionen sind nicht aktiviert: Standby, Abkühlen, Urlaub (falls vorhanden),
entfernen Sie in diesem Fall die enthaltenen Lebensmittel.
Hinweis:
- Leuchtet das Symbol nicht auf, wenn Sie das Fach einschalten, stellen Sie sicher, dass
die Schublade korrekt eingesetzt ist. Liegt das Problem weiterhin vor, kontaktieren Sie den
autorisierten technischen Kundendienst.
- Ist das fach eingeschaltet, aber die Schublade geöffnet, erlischt das Symbol im Bedienfeld
möglicherweise automatisch. Das Symbol leuchtet wieder auf, wenn die Schublade
eingesetzt wird.
- Unabhängig vom Zustand des Fachs ist möglicherweise ein leises Geräusch zu hören.
Dies ist normal.
- Wenn das Fach nicht in Betrieb ist, ist die Temperatur im Fach abhängig von der allgemeinen
Temperatur im Kühlfach. In diesem Fall empfiehlt es sich, hier Obst und Gemüse zu lagern,
welches nicht Kälteempfindlich ist (Beeren, Äpfel, Aprikosen, Möhren, Spinat, Kopfsalat usw.).
Wichtig: Ist das fach eingeschaltet und sind Lebensmittel mit hohem Flüssigkeitsgehalt
vorhanden, schlägt sich möglicherweise Kondensation auf den Ablagen nieder. Schalten Sie die
Funktion in diesem Fall vorübergehend ab.
Gehen Sie beim Platzieren von Lebensmitteln und kleinen Behältern auf der oberen Ablage im
„Null-Grad“-Fach vorsichtig vor, damit diese nicht versehentlich zwischen Ablage und Kühlfach-
Rückwand gelangen.

9
Bevor Sie den technischen Kundendienst
kontaktieren:
Starten Sie das Gerät erneut, um zu prüfen,
ob das Problem gelöst wurde. Trennen Sie
andernfalls die Spannungsversorgung des
Geräts erneut wiederholen Sie den Vorgang
nach etwa einer Stunde.
Sollte das Gerät nach Durchlaufen der
Checklisten im Fehlerleitfaden sowie nach
einem Neustart immer noch nicht korrekt
funktionieren, wenden Sie sich an den
technischen Kundendienst, erklären Sie das
Problem und machen Sie folgende Angaben:
• Art der Fehlfunktion
• Modell
• Typ und Seriennummer des Geräts (auf dem
Typenschild)
• Servicenummer (falls vorhanden) (die
Zahl nach dem Wort SERVICE auf dem
Typenschild im Geräteinneren)
Hinweis:
Ein Umbau der Türen des Gerät stellt
keinen Garantieanspruch dar, falls dies
durch den technischen Kundendienst
durchgeführt wird.
TECHNISCHER KUNDENDIENST
Führen Sie die folgenden Schritte durch:
- Um ein Herausnehmen des Fachs zu erleichtern, empfiehlt es sich, zuvor die beiden unteren
Ablagen in der Tür zu entleeren (und möglicherweise herauszunehmen).
- Schalten Sie das Fach ab.
- Winkeln Sie das Fach nach oben an.
- Entfernen Sie die weiße Kunststoffablage unter dem Fach.
Hinweis: Die obere Ablage und die Seitenstützen können nicht entfernt werden.
Platzieren Sie die weiße Kunststoffablage sorgfältig unter dem Fach, bevor Sie die Schublade
wieder einsetzen und die Funktion wieder einschalten, um das „Null-Grad“-Fach wieder zu
verwenden.
Um die Kapazität des Kühlfachs zu maximieren und den Energieverbrauch zu minimieren,
empfiehlt es sich, das „Null-Grad“-Fach abzustellen und herauszunehmen.
Reinigen Sie Fach und Zubehör gelegentlich mit einem Tuch und einer Lösung aus warmem
Wasser (tauchen Sie die weiße Kunststoffablage unter der Schublade auf keinen Fall in Wasser
ein) und speziellen Neutralreinigern zur internen Reinigung von Kühlschränken. Verwenden Sie
keine Scheuermittel.
Vor der Reinigung des Fachs (auch von außen) ist es erforderlich, die Schublade
herauszunehmen, um die Spannungsversorgung des Fachs zu unterbrechen.

3
DEUTSCH Gebrauchsanweisung Seite 4
FRANÇAIS Mode d’emploi Page 10
ENGLISH Instructions Page 16
NEDERLANDS Gebruiksaanwijzing Pagina 22

Débranchez toujours l'appareil de son alimentation avant de remplacer l'ampoule. Puis suivez les
consignes concernant le type d'ampoule pour votre produit.
Remplacez l'ampoule par une autre présentant les mêmes caractéristiques, disponible auprès du
Service Après-Vente et des revendeurs autorisés.
Ampoule de type 1)
Pour retirer l'ampoule, dévissez-la dans le sens inverse des
aiguilles d'une montre, comme indiqué sur la figure. Patientez
5 minutes avant de rebrancher l'appareil.
- ampoule traditionnelle (max 25 W)
ou
- ampoule à LED (présentant les mêmes caractéristiques)
uniquement disponible auprès du Service Après-Vente
Ampoule de type 2)
Si le produit comporte des ampoules à LED, comme décrit sur les figures ci-dessous, contactez le
Service Après-Vente si une ampoule doit être remplacée.
Les ampoules à LED durent plus longtemps que les ampoules traditionnelles, améliorent la
visibilité interne et sont écologiques.
10
Nettoyez l'appareil occasionnellement avec un chiffon imbibé d'une
solution d'eau chaude et d'agents nettoyants neutres pour nettoyer
l'intérieur du réfrigérateur. N'utilisez pas d'agents nettoyants
abrasifs. Pour assurer une évacuation constante et correcte de
l'eau de dégivrage, nettoyez régulièrement l'intérieur de l'orifice
d'évacuation situé sur la paroi arrière du compartiment réfrigérateur,
à proximité du bac à fruits et légumes, à l'aide de l'outil fourni avec
l'appareil (voir la figure).
Avant d'effectuer l'entretien et le nettoyage, débranchez la fiche d'alimentation électrique ou
coupez l'alimentation électrique.
Branchez le four.
Sur les modèles avec système de surveillance électronique, un signal sonore peut être émis, ce
qui signifie que l'alarme de température a été activée : appuyez sur la touche d'arrêt de l'alarme
de température. Le cas échéant, positionnez le filtre déodorant antibactérien dans le ventilateur
comme décrit dans l'emballage du filtre.
Remarque : Après avoir mis l'appareil sous tension, vous devez patienter 4 à 5 heures que la
température de stockage appropriée soit atteinte pour un appareil normalement rempli.
PREMIERE UTILISATION
NETTOYAGE ET ENTRETIEN
DE L'APPAREIL
REMPLACEMENT DE L'AMPOULE OU DE
LA LED (selon le modèle)
Ampoule
Ampoule à LED
LED- strip
Dragon
et2

11
Débranchez l'appareil de la prise secteur, puis videz-le, dégivrez-le (si nécessaire) et nettoyez-le.
Laissez les portes entrouvertes pour permettre à l'air de circuler à l'intérieur des compartiments.
Ceci empêchera la formation de moisissure et l'apparition de mauvaises odeurs.
DE L'APPAREIL
Laissez les portes fermées pour maintenir les aliments au frais le plus longtemps possible. Ne
recongelez pas les aliments partiellement décongelés. En cas de coupure de courant prolongée,
l'alarme de coupure de courant peut aussi s'activer (sur les produits avec système de surveillance
électronique).
EN CAS DE COUPURE DE COURANT
Le compartiment réfrigérateur permet le stockage d'aliments frais et de boissons.
Le compartiment réfrigérateur se dégivre entièrement automatiquement.
La présence occasionnelle de gouttes d'eau sur la paroi arrière interne du compartiment indique
la phase de dégivrage automatique. L'eau de dégivrage est acheminée jusqu'à un orifice
d'évacuation, puis est recueillie dans un récipient avant de s'évaporer.
Selon le modèle, le produit peut être équipé d'un compartiment spécial « Zéro degré », qui est
idéal pour le stockage de viande et de poisson frais.
Avertissement : ne nettoyez pas les accessoires du réfrigérateur au lave-vaisselle.
Remarque : la température ambiante, la fréquence d'ouverture des portes et la position de
l'appareil peuvent affecter les températures internes dans les deux compartiments. Réglez les
températures en fonction de ces facteurs.
Remarque : dans des conditions très humides, de la condensation peut se former dans le
compartiment réfrigérateur, surtout sur les clayettes en verre. Dans ce cas, il est conseillé de
fermer les récipients contenant du liquide (par ex. une casserole remplie de bouillon), emballez les
aliments avec une teneur en eau élevée (par ex. les légumes) et activez le ventilateur, s'il y en a
un.
Retrait du bac à fruits et légumes (selon le modèle)
Tirez le bac vers l'extérieur jusqu'à la butée, soulevez-le et retirez-le.
Pour faciliter le retrait du bac à fruits et légumes, il peut être nécessaire de vider (et peut-être
même de retirer) les deux clayettes inférieures de porte puis continuez à retirer le bac.
Ventilateur et filtre déodorant antibactérien (selon le modèle)
Le ventilateur permet la distribution homogène de la température à l'intérieur des compartiments
et, par conséquent, la conservation optimale des aliments et la réduction du surplus d'humidité.
N'obstruez pas la zone d'aération. Le ventilateur peut être activé/désactivé manuellement (voir le
guide rapide) ; s'il est activé, il fonctionne automatiquement au besoin.
COMPARTIMENT REFRIGERATEUR
This manual suits for next models
3
Table of contents
Languages:
Other Atag Refrigerator manuals