Atag KU1090BUU User manual

71
Thank you for your trust and for buying this appliance.
We hope it will successfully serve the purpose for
many years.
Refrigerator with freezer is for domestic use only.
The lower part of the appliance is refrigerator and is
used for storing fresh foods at the temperature of 0°C
and higher.
The upper part is freezer and is used for freezing fresh
foods and storing frozen foods for longer periods of
time (up to one year, depending on the kind of foods
you store). The compartment is marked with four
stars.
Before Putting Into Use . . . . . . . . . . . . . . . . . . . 72
Placing and Installation . . . . . . . . . . . . . . . . . . . 76
Description of the Appliance . . . . . . . . . . . . . . . . 77
Operation Control . . . . . . . . . . . . . . . . . . . . . . . 80
Use . . . . . . . . . . . . . . . . . . . . . . . . . . . . . . . . 81
Maintenance and Cleaning . . . . . . . . . . . . . . . . . 85
Trouble-Shooting Guide . . . . . . . . . . . . . . . . . . . 88
instructions for use
refrigerator - freezer

72
· Before connecting the appliance to the mains supply,
place it on the location where it will later on be
installed and leave it for about 2 hours, which will
reduce a possibility of malfunctions in the cooling
system due to transport handling.
· Clean the appliance, and be thorough, especially in
the interior (See Cleaning and Maintenance).
· In case the interior accessories are not correctly
placed, rearrange them as described in chapter
"Description of the Appliance".
These instructions for use are intended for the user.
They describe the appliance and its correct and safe
use. They were prepared for various types of refrigera-
tors therefore you might find in it some functions that
do not apply to your appliance and description of the
accesories that your appliance does not include.
Integrated appliances are equipped with instructions
for mounting the appliance into the kitchen unit.
The appliance should be mounted by qualified
technician and instructions are for his use only.
· Our products use environmentally friendly packaging,
which can be either recycled or disposed of in an
environmentally friendly manner. To this end,
individual packaging materials are clearly marked.
· These instructions are printed either on recycled
paper or chlorine free bleached paper.
· When your appliance finally wears out, please try
not to burden the environment with it; call your
nearest authorised service agent. (See Disposing of
the Worn Out Appliance)
instructions for use
before putting into use
we care for the environment
instructions for use
mounting instructions

73
· Try not to open the door too often, especially when
the weather is wet and hot. Once you open the
door, mind to close it as soon as possible. This is
especially important if you have an upright model.
· Check periodically if the appliance is provided with
sufficient cooling (undisturbed circulation of air
through the bottom rail openings).
· Use higher thermostat settings only when required or
recommended.
· Before loading the appliance with packages of fresh
foods, make sure they are cooled to ambient
temperature.
· Ice and frost layer increase energy consumption, so
do clean the appliance as soon as the layer is 3-5
mm thick.
· If the gasket is damaged or if it turns out that the
sealing is poor, the energy consumption is
substantially higher. To restore efficiency, replace
the gasket.
· Condenser at the bottom of the appliance must
always be clean and dust free (see Section Cleaning
of the Appliance).
· Always consider instructions stated in sections
Positioning and Energy Saving Tips, otherwise the
energy consumption is substantially higher.
· If you have bought this appliance to replace an old
one equipped with a lock that cannot be opened
from inside (lock, bolt), make sure that the lock is
broken. This will make it impossible for children to
lock themselves inside the appliance and suffocate.
· The appliance must be correctly connected to the
mains supply. (see: Connecting to the Mains Supply).
· Do not touch the cooled surfaces while the appliance
operates, especially not with wet hands, because the
skin may stick to the cold surfaces.
· Do not freeze bottles containing liquid, especially not
soft drinks, such as mineral water, sparkling wine,
beer, cola etc., because liquid expands during
freezing and the glass bottle is very likely to blow up.
instructions for use
before putting into use
tips for energy savings
important

74
· Do not eat frozen food (bread, fruit, vegetables),
because you can get frostbites.
· If the food has strange smell or color, throw it away,
because it is very likely that it is spoiled and
therefore dangerous to eat.
· Disconnect the appliance from the power supply
before repairing it (only a qualified technician should
repair it), before cleaning and before replacing the
light bulb.
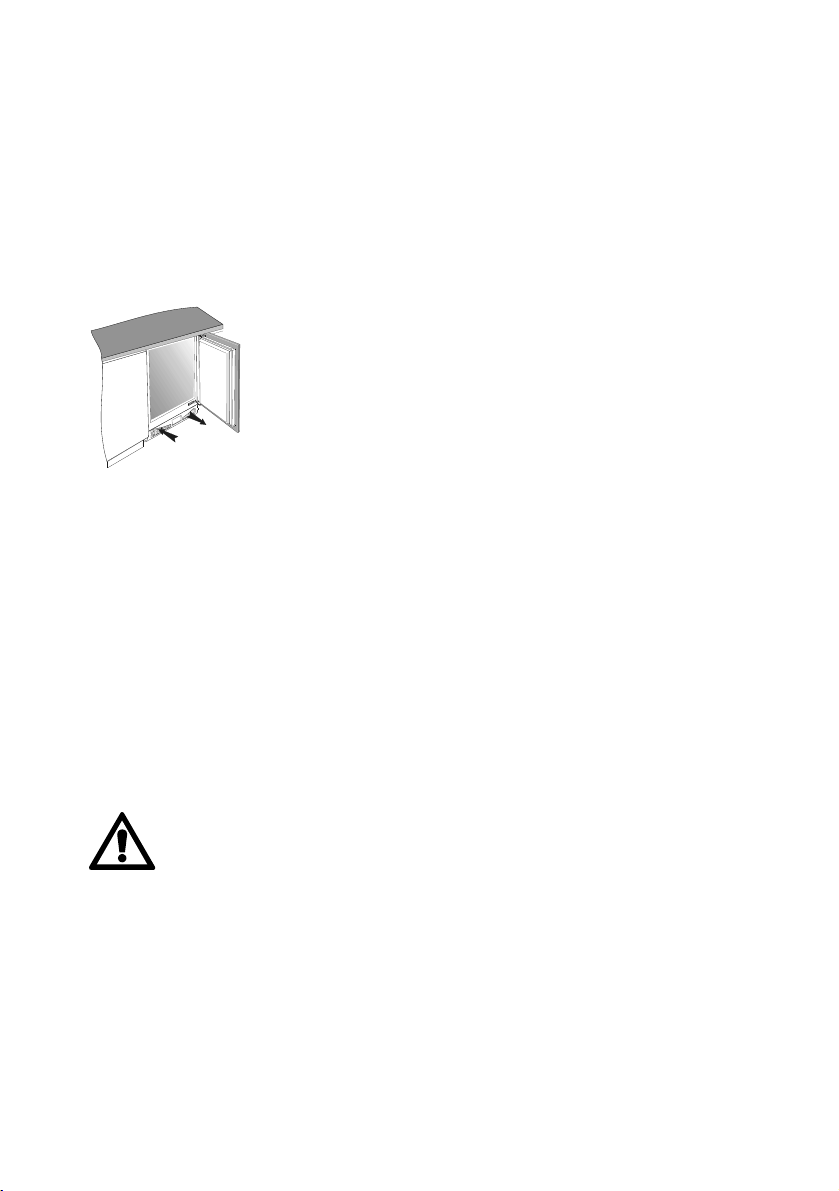
· Do not defrost the appliance with other electric
appliances (as for example with hair dryer) and never
scrape the frost layer with shrp objects. Use only
enclosed tools or tools recommended by the
manufacturer.
· For the sake of environment protection - be careful
not to damage the rear wall of the appliance (the
condenser unit or the tubes - for example when
moving the appliance) or any part of the refrigerating
system inside the appliance.
· The refrigerating system of the appliance is filled
with refrigerant and oil, so when the appliance is
damaged, handle it with care and dispose it of in
compliance with environmental protecting
precautions. (See We Care for the Environment).
· If the supply cord is damaged, it must be replaced
by the manufacturer or his service agent or a
qualified person in order to avoid hazard.
· The rating plate is inside the appliance or outside on
the rear wall.
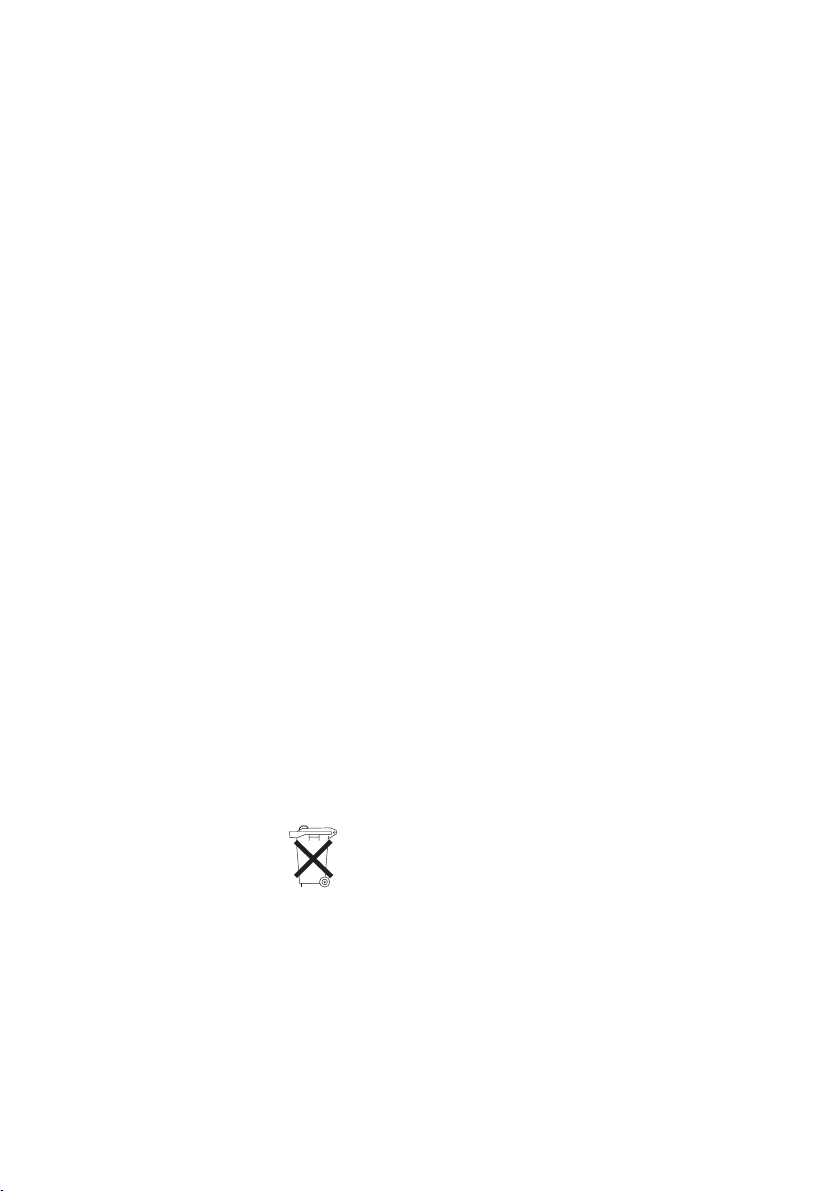
The symbol on the product or on its packaging
indicates that this product may not be treated
as household waste. Instead it shall be handed
over to the applicable collection point for the
recycling of electrical and electronic equip-
ment. By ensuring this product is disposed of correct-
ly, you will help prevent potential negative conse-
quences for the environment and human health, which
could otherwise be caused by inappropriate waste han-
dling of thisproduct. For more detailed information
about recycling of this product, please contact your
local city office, your household waste disposal service
or the shop where you purchased the product.
instructions for use
before putting into use

75
Storing Time During Power Supply Interruption
Avoid opening the freezer in case of failure or power
supply interruption! In case the interruption is extend-
ed over longer period of time (15 hours).
· When your appliance finally wears out, dispose it of.
If the appliance has a lock, break it, in order to
prevent eventual accidents (danger of children get
locked inside the appliance).
· The refrigerating system of the appliance is filled
with refrigerant and insulating substances which
should be separately treated and processed. Call
your nearest authorised service agent or specialised
servicing centre. If you don't find one, contact your
local authorities or your distributor. Be careful not to
damage the tubes on the rear wall of the appliance
(danger of pollution).
· To avoid pollution of the environment make sure not
to damage the hose at the bottom of the appliance.
instructions for use
before putting into use
disposing of the worn out appliance

76
Place the appliance in dry and regularly ventilated
room. Allowed ambient temperature depends on the
model (class) of the appliance and is stated on the
rating plate of the appliance.
Never place the appliance near heat emitting
devices (e.g. cooker, radiator, water heater or similar
devices) and do not expose it to direct sunlight.
The appliance should be positioned at least 3 cm away
from the electric or gas cooker and at least 30 cm
away from the oil or coal stove. If this is not possible,
use an appropriate insulation.
Class Ambient temparature
SN (sub-normal) from + 10°C to + 32°C
N (normal) from + 16°C to + 32°C
Connect the appliance with the cable and plug to the
power supply socket outlet with a ground terminal
(safety socket). Required nominal voltage and
frequency are indicated on the rating plate.
The connection to the mains supply and earthing have
to be made according to current standards and
regulations. The appliance resists temporary voltage
tolerance up to -6 to +6 %.
The appliance is equipped with four adjustable legs, so
that the height may be adjusted from 82 to 90 cm.
The height must be adjusted prior building the appli-
ance into the opening slot, and it should be set at
such height that the top panel of the appliance fits
exactly below the kitchen worktop (see Mounting
Instructions).
instructions for use
placing and installation
choosing the right place
connection to power cupply
adjusting the height of the appliance

77
Refrigerator (A)
Refrigerator is used for storing fresh foods for few
days.
Freezer (B)
Freezer is used for freezing fresh foods and for storing
already frozen foods.
Opening the freezer door
Shelf (1)
The shelf may be placed randomly upon any of the
guide slots within the interior of the appliance. It is
protected against sliding out.
In case you may wish to alter the position of the shelf:
- lift the shelf by hand and pull it towards you until it
reaches the crack in the guide slot;
- at the guide interruption point the shelf may be
adjusted at random height;
- select the height of your choice and push the shelf
all the way in to the rear end of the guide slot.
instructions for use
description of the appliance

78
In case you may wish to remove the shelf from the
appliance:
- lift the shelf by hand and pull it towards you until it
reaches the crack in the guide slot;
- at the guide interruption point lift the left side of the
shelf up and pull it out from the appliance in the
inclined position,
- reinsertion is carried out in the opposite procedure.
Glass shelves are protected with plastic edge frames.
Quickly perishable food should be stored on the back
i.e. the coldest part of the shelves.
Defrost WaterOutlet (2)
Regularly check the defrost water outlet and the chan-
nel, because they should never be clogged (as for
example with food rests). If clogged, use a plastic
straw and clean it.
Crisp tray and serving tray (3)
The tray at the bottom of the refrigerator is covered
with the serving tray. This cover protects the stored
fruit and vegetables from excessive drying.
instructions for use
description of the appliance

79
Door Liner
The door liner consists of various shelves or holders
used for storing eggs, cheese, butter and yogurt as
well as other smaller packages, tubes, cans etc.
The lower shelf is used for storing bottles.
Illumination in the Interior of the Refrigerator
The light for illuminating the interior of the appliance is
on, when the door is opened. The operation of the
light does not depend on the position of the
thermostat knob.
instructions for use
description of the appliance

80
The appliance is controlled with thermostat knob,
situated in the right upper part inside the appliance.
Turn the knob clockwise from STOP (0) position
towards 7and backwards.
· Higher settings on the knob (towards 7) mean lower
temperatures (colder) in all three compartments of
the appliance. At higher settings temperature in the
interior of the appliance may even drop below 0°C.
When the ambient temperature is normal, we
recommend medium setting.
· Changes of the ambient temprature affect
temperature in the interior of the appliance (choose
correct setting of the thermostat knob).
· In STOP (0) position the appliance does not operate
(the cooling system is switched off), yet power
supply is not interrupted (the light is on, when you
open the refrigerator door).
· Temperature in the refrigerator and in freezing
compartment depends on the frequency of opening
the door as well.
instructions for use
operation control
temperature selection

81
Proper use of the appliance, adequately packed food,
correct temperature and taking into account hygienic
precautions will substantially influence the quality of
the food stored.
· Foods to be stored in the refrigerator should be
properly packed as to prevent mixing various
moisture degrees and odors (in polyethylene bags or
sheet, aluminium foil, wax paper, or stored in
covered containers or bottles).
· Before storing food in the refrigerator, remove the
excessive packaging (like yoghurt in multi-package).
· Pack systematically and make sure that foodstuffs
do not touch each other (various odours may mix).
Assure adequate air circulation around packages.
· Never store inflammable, volatile or explosive
substances.
· Beverages with high alcohol percentage shall be
stored in tightly sealed bottles in vertical position.
· Food should not touch the rear wall of the
refrigerator!
· Some organic solutions like volatile oils in lemon and
orange peel, acid in butter etc. can cause damages
when in contact with plastic surfaces or gaskets for
longer period of time.
· Foods should be cooled down before storing.
· Crispy and delicate foods should be stored in the
coldest parts of the refrigerator.
· Try not to open the door too often.
· Set the thermostat to the setting where lowest tem
peratures are reached. Set the thermostat gradually
as to avoid freezing of the foods.
Use a thermometer and measure the temperature in
the individual compartments. Place the thermostat in
a glass vessel filled with water. Temperature
readings are most reliable few hour after steady
state is reached.
· Unpleasant odor inside the refrigerator is a sign that
something is wrong with foods or that your
refrigerator needs cleaning. Unpleasant odor can be
eliminated or reduced by washing the interior of the
refrigerator with a mild solution of water and
vinegar. We also recommend using activated carbon
instructions for use
use
storing fresh foods

82
filters to clean the air or to neutralize odors.
· If you plan a longer journey, make sure to remove
quickly perishable articles of food out of the
appliance before you leave.
Fresh Food Storage Time in the Refrigerator
Legend: + reccomended storage time
= possible storage time
· Carefully select food you intend to freeze; it should
be of adequate quality and suitable for freezing.
· Use correct packaging and wrap it right.
- The packaging should be air tight and shouldn't leak
since this could cause substantial vitamin loss and
dehydration of foods.
- Foils and bags should be soft enough to tightly wrap
around the foods.
· Mark packages with following data: kind and amount
of foods and the date of loading.
· It is most important that the food is frozen as
quickly as possible. Therefore we recommend the
size of the package not to be too large and to be
cooled before loading into the freezer.
· The amount of fresh foods that can be loaded in the
freezer within 24 hours is indicated on the rating
plate (freezing capacity). If the loaded amount is too
large, the quality of freezing is reduced which affects
the quality of frozen foods.
instructions for use
use
freezing fresh foods

83
· Before it starts freezing, set the thermostat to the
position 5-7 for 24 hours. 24 hours from the time
when fresh food was put in the appliance
turn the thermostat dial to the operating temperature
(see temperature selection). At the above mentioned
model it is necessary to turn OFF the switch, which
has previously been engaged.
· The next time you want to freeze fresh foods, repeat
the freezing procedure and be careful that packages
with fresh foods do not touch frozen packages.
· For freezing smaller amount of foods (up to 1 kg)
there is no need to change the thermostat setting
(see Temperature Selection).
Store the frozen food in the freezer.
Commercially Frozen Foods
The storage time and the recommended temperature
for storing commercially frozen foods are indicated on
the packaging. For storing and using consider the man-
ufacturer's instruction. When shopping, be careful and
choose only adequately packed foods provided with
complete data and stored in freezers where the tem-
perature is not higher than -18°C. Do not buy pack-
ages of food covered with frost layer. This indicates
that the package was thawed before at least once. Be
careful that packages don't start to thaw, as the tem-
perature raise reduces the quality of foods.
instructions for use
use
storing frozen foods
freezing procedure

84
Approximate Storage Time for Frozen Foods
Partially thawed or defrosted foods should be used as
soon as possible. Cold air preserves the food but it
does not destroy microorganisms which rapidly
activate after defrosting and make foods perishable.
Partial defrosting reduces the nutritional value of
foods, especially of fruits, vegetables and ready-made
meals.
Recommended thermostat position for ice making is on
the middle setting.
Fill two thirds of the ice tray with cold water or any
other liquid convenient for freezing.
Insert the ice tray into the guides or on the cooling
plate.
Time required for the ice to form, largely depends on
ambient temperature, thermostat setting and on how
often you open the door.
It usually takes 2-6 hours (depends on which model of
refrigerator you have).
With smaller refrigerators we recommend you make a
stock of ice cubes (store them in a separate plastic
box).
The easiest way to empty the ice tray is to turn the
tray around, pour it with cold water and slightly twist
it (bend it).
instructions for use
use
defrosting frozen food
how to make ice cubes
Food Storage time (in months)
123456789101112
Ve
g
etable + + +
Fruit +++
Braed, Pastries +
Milk +
Red
y
-made meals +
Meat: Beef +++
Veal + + +
Pork + + +
Poultr
y
+++
Game + + +
Minced meat +
Smoked sausa
g
es +
Fish: lean +
fat +
Offal +

85
The refrigerator requires no defrosting, since the ice at
the rear wall melts automatically. Ice, formed at the
rear end during the operation of the compressor, melts
when the compressor is off, and water drops slide
downwards through the hole in the rear wall o the
condenser collecting receptacle, placed at the bottom
of the appliance.
When the frost and ice layer in the frezing
compartment is 3-5 mm thick, you should clean the
freezer.
· Turn the thermostat knob to STOP (0) position, and
disconnect the power supply. Empty the
compartment and take care that the packages remain
frozen.
· Melted water, collected at the bottom of the
appliance, should be mopped with an absorbing cloth.
· Avoid using defrosting sprays, as they may cause
damage to the plastic parts and may be hazardous to
health.
Disconnect the power supply before cleaning the
appliance.
Do not use coarse or aggressive cleaning agents as
you can damage the surface. Be careful to remove any
cleanser agent remaining after cleaning.
· Clean the exterior with water and detergent.
Varnished surfaces are cleaned with soft cloth and
an alcohol based cleaning agent (for example glass
cleaners). You may also use alcohol (ethanol or iso-
prophylic alcohol).
The application of abrasive and specially aggressive
cleaners, such as the stainless steel cleaners, is not
appropriate for the cleaning of plastic and coated
parts.
· Remove the detachable accesories in the interior of
the appliance and clean it with water and liquid
detergent. Plastic parts cannot be washed in
washing machine.
instructions for use
maintenance and cleaning
automatic defrosting of the refrigerator
manual defrosting of the frezing compartment
cleaning the appliance

86
· Wash the interior of the appliance with lukewarm
water, in which you added one or two spoonfuls of
vinegar.
·The air openings in the bottom rail should be cleaned
or vacuumed periodically.
Dust from the condenser should be vacuumed in the
following manner:
- push the finger through the opening in the bottom
rail and release the fastener;
- pull the rail towards you and remove it;
- remove the bottom board of the kitchen cabinet
- pull the condenser dish out;
- use the vacuum cleaner to clean the dust from the
condenser;
- replace the condenser dish and the bottom rail in the
opposite order.
After cleaning, connect the appliance to power supply
and reload the packages.
In order to optimize the operation of the appliance and
save energy, it is recommended to clean periodically
the dust from the condenser at the back of the appli-
ance.
Disconnect the appliance from the mains prior the
commencement of cleaning!
· Empty the contents of the appliance.
· Remove the supporting panel from the bottom of the
kitchen cabinet.
instructions for use
maintenance and cleaning
cleaning of the condenser
periodical cleaning of the condenser

87
· Remove the screws fixing the appliance to the
kitchen worktop.
· Pull the appliance out and expose the condenser at
the back of the appliance.
· Unscrew the screws from the condenser bonnet and
remove the bonnet.
· Clean the dust and dirt from the condenser.
After cleaning return the appliance to its place, plug in
the mains power cord and fill with food.
If you do not intend to use the appliance for a longer
period, set the thermostat knob to the STOP (0)
position, disconnect the power supply, take out the
foods and defrost and clean the appliance. Leave the
door slightly open.
instructions for use
maintenance and cleaning
switch off the appliance when not in use

88
During the service, you can come across some
troubles that in most cases result from improper
handling of the appliance and can easy be eliminated.
· Check the supply in the outlet socket and make sure
the appliance is switched on (thermostat in operating
position).
· the door was frequently opened or it was left
opened for too long;
· the door is not properly closed (the door may sag,
the gasket may be polluted or damaged);
· perhaps you have overloaded the appliance with
fresh foods;
· Insufficient cooling of compressor and condenser.
Check the air circulation through the bottom rail
openings and if necessary clean or vacuum the dust
from the condenser. See Section Cleaning and
Maintenance.
Until the water is drained through the hole in the rear
and into the receptacle at the bottom of the appliance,
normal automatic defrosting of the appliance is
guaranteed.
In case the ice formation on the inner back wall is
increased (3-5 mm), ice should be manually defrosted.
Set the thermostat knob to STOP (0) position and
leave the door open. Never use electric devices for
defrosting and do not scrape the ice or frost layer with
sharp objects.
After completed defrosting, turn the knob to desired
position and close the refrigerator door.
The cause of increased ice formation may be one of
the following:
- the door does not seal well (clean the gasket if it is
contaminated, or replace it if it is damaged);
instructions for use
trouble-shooting guide
continuous operation of the refrigerating system
ice formation on the inner rear wall
the appliance fails to operate after connecting to the
mains supply

89
- the door was frequently opened or it was left
opened for too long;
- the food stored in the refrigerator was warm;
- the food or dish is touching the inner back wall.
Excessive dust upon the condenser is signaled by the
sound alarm, audible with each opening of the door,
until the fault is removed.
Check the air circulation through the bottom rail open-
ings and if necessary clean or vacuum the dust from
the condenser. See Section Cleaning and Maintenance.
Water leaks from the refrigerator if the drain hole is
clogged, or if the water drips past the collection gut-
ter.
· Clean the clogged opening, for example with a
plastic straw.
· Manually defrost the increased ice layer. See "Ice
Formation on the Inner Back Wall".
Cooling in refrigerating-freezing appliances is enabled
by the refrigerating system with compressor, which
produces noise. How noisy the appliance is depends
on where it is placed, how it is used and how old the
appliance is.
instructions for use
trouble-shooting guide
water drains into the bottom compartment of the appliance
noise
sound alarm

90
· During the operation of the compressor the noise of
liquid is heard and when the compressor is not
operating, the refrigerant flow is heard. This is a
normal condition and it has no influence whatsoever
on the lifetime of the appliance.
· After starting the appliance, the operation of the
compressor and the refrigerant flow may be louder,
which does not mean that something is wrong with
the appliance and it has no influence on the lifetime
of the appliance. Gradually the noise is reduced.
· Sometimes unusual and stronger noise is heard,
which is rather unusual for the appliance. This noise
is often a consequence of inadequate placing.
- The appliance shall be placed and levelled firmly on
solid base.
- It should not touch the wall or kitchen units standing
next to it.
- Check the accesories in the interior of the appliance,
they should be placed correctly in their positions;
also check the bottles, tins and other vessels that
might touch each other and rattle.
Before replacing the light bulb, disconnect the
appliance form the power supply. Press the cover at
the rear side (in the arrow 1 direction) and remove the
plastic cover (in the arrow 2 direction). Replace the
bulb with a new one (E14, max. 15 W). Don't forget:
the old bulb does not belong to organic waste.
Light bulb is consuming good therefore our
in-guarantee service does not relate to it.
WE RESERVE THE RIGHT TO ALTER THE SPECIFIC
ATIONS WITH NO INFLUENCE ON THE OPERATION
OF THE APPLIANCE.
instructions for use
trouble-shooting guide
bulb replacement
Table of contents
Other Atag Refrigerator manuals

Atag
Atag KD85178AFC User manual

Atag
Atag KD5188C User manual

Atag
Atag KD62122A/A01 User manual

Atag
Atag KU1090AUU User manual

Atag
Atag KF8178ADR/A01 User manual

Atag
Atag KA2011LQ User manual

Atag
Atag KA8074K1C User manual

Atag
Atag KD2178AUU/A02 User manual

Atag
Atag KD80178DN User manual

Atag
Atag KS23178B User manual

Atag
Atag KS30178B User manual

Atag
Atag KA2111DC User manual

Atag
Atag KD80102ADN User manual

Atag
Atag KU2590A/A01 User manual

Atag
Atag kd8178afa01 User manual

Atag
Atag KF8178WDL User manual

Atag
Atag KD8122BFUU User manual

Atag
Atag KS37102B User manual

Atag
Atag KA2411R/A04 User manual

Atag
Atag KS30122AUU/A01 User manual