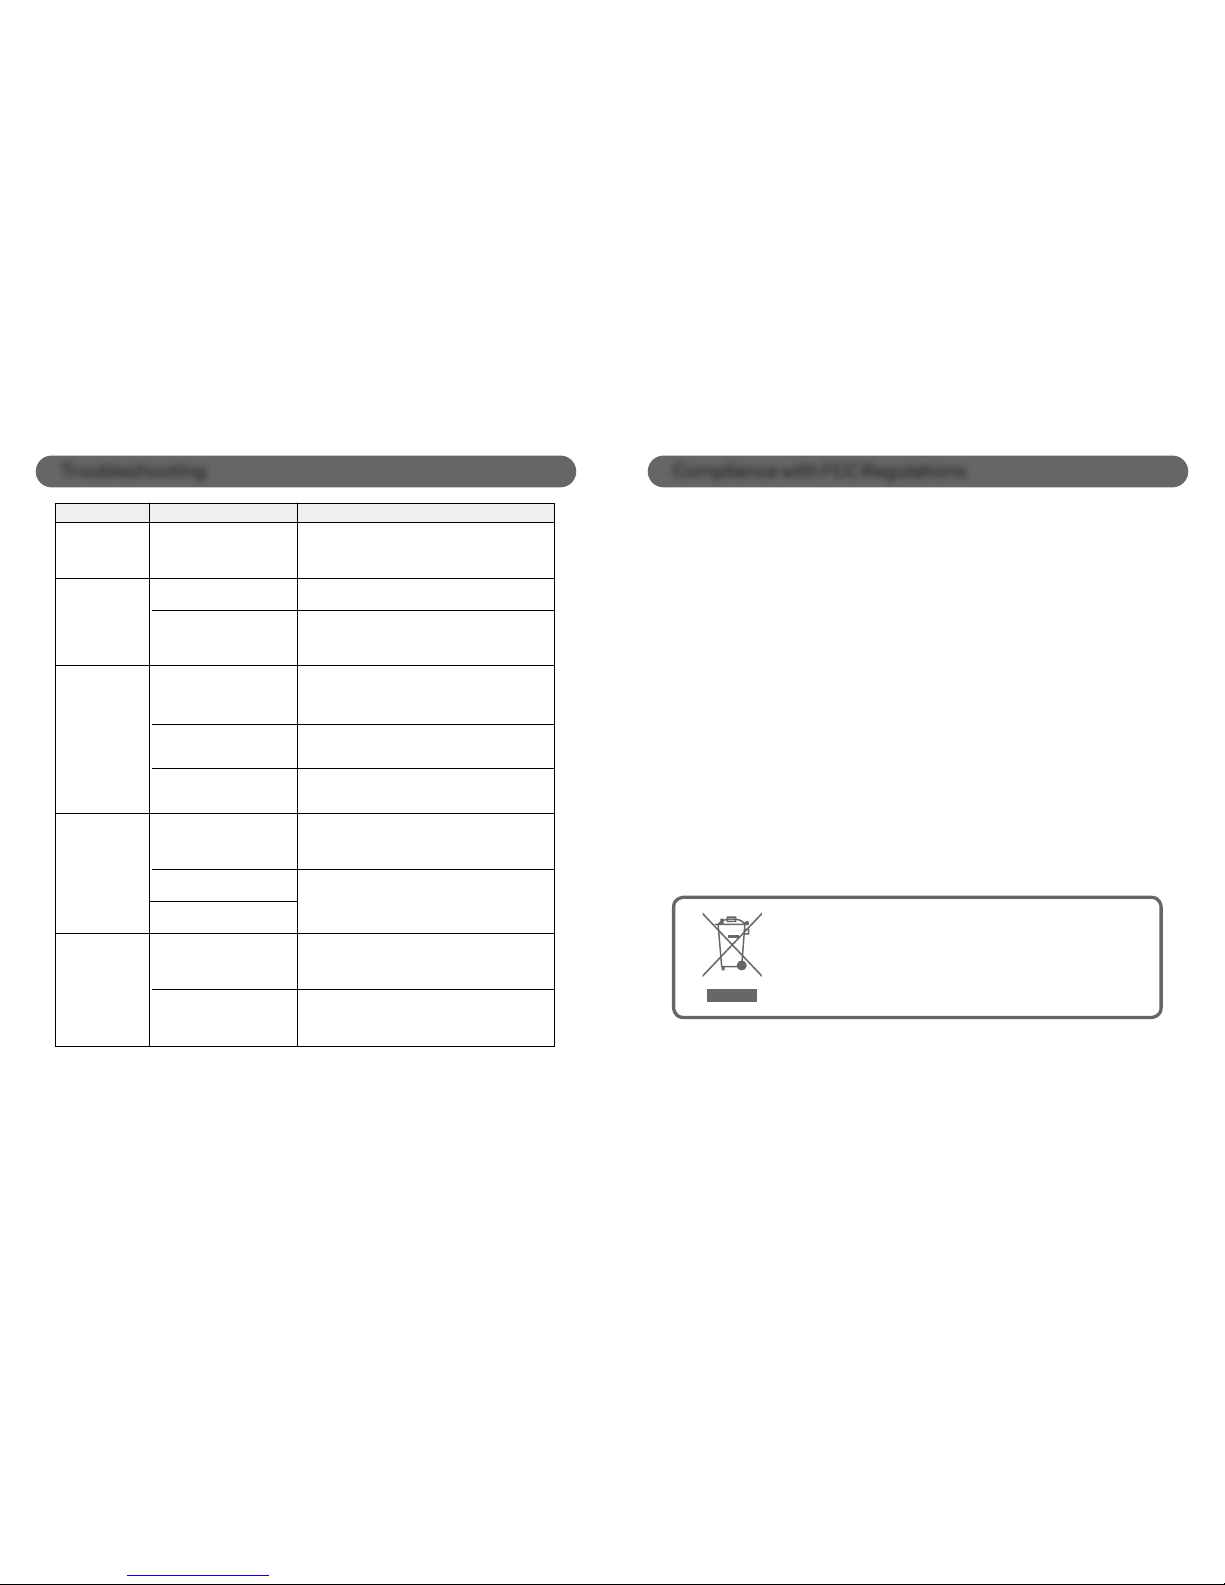
Troubleshooting
Page 18
Remarks:
If troubleshooting does not eliminate the problem, disconnect the DC IN plug from the
back of unit and reconnect it after a few seconds. This resets the unit to it’s factory default
settings and results in the deletion of all previous settings. In case the problem still exists,
see warranty information on pages 20 and 21 to obtain service.
Symptom
Unit does not
respond
(no power)
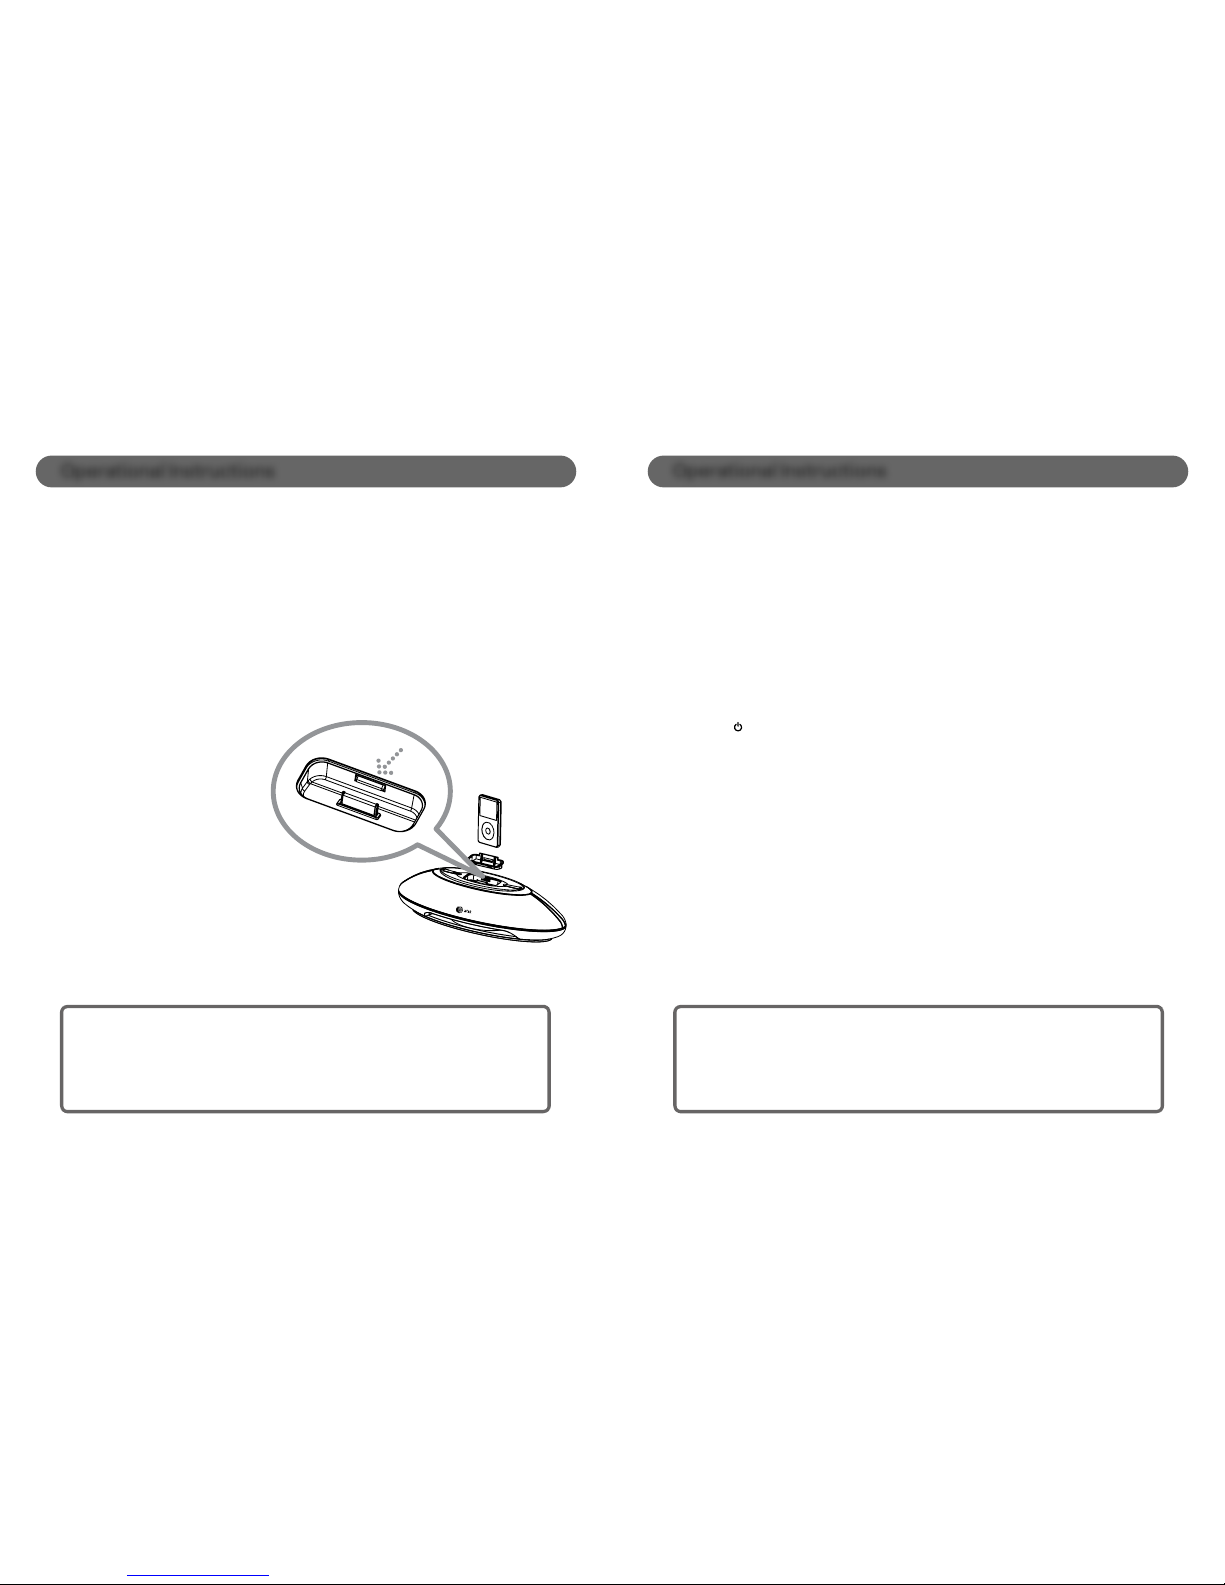
iPhone/iPod
device does not
dock properly
iPhone/iPod
device does not
respond to the unit
iPhone/iPod
device is not
charging
iPhone/iPod
device is not
playing but no
audio coming
out of the dock
speakers
Possible cause
AC adapter is not plugged into
a wall outlet or the connector is
not plugged into the DC IN jack
on the back of the unit.
iPhone/iPod device is not
installed properly.
iPhone/iPod device is not
installed properly.
iPhone/iPod device is not
installed properly.
iPhone/iPod device is not
installed properly.
Docking station is not powered
on.
iPhone/iPod device is locked
up/frozen.
iPhone/iPod device battery
has a problem.
iPhone/iPod device is locked
up/frozen.
Using first or second
generation iPod, iPod shuffle
or other devices.
Using no or wrong iPhone/iPod
device dock adapter.
Solution
Verify the wall outlet that the AC adapter is plugged
into is not controlled by wall switch and if it is,
confirm the wall switch is turned on.
Remove the iPhone/iPod device from the unit and
check for obstruction on the connections of the
docking station and of the iPhone/iPod device. Then
reset the iPhone/iPod device into the docking station.
Remove the iPhone/iPod device from the unit and
check for obstruction on the connections of the
docking station and of the iPhone/iPod device. Then
reset the iPhone/iPod device into the docking station.
Remove the iPhone/iPod device from the unit and
check for obstruction on the connections of the
docking station and of the iPhone/iPod device. Then
reset the iPhone/iPod device into the docking station.
Remove the iPhone/iPod device from the unit and
check for obstruction on the connections of the
docking station and of the device. Then reset the
iPhone/iPod device into the docking station.
Remove your iPhone/iPod device from the dock and
press the power button on the docking station. The
blue ambient light should illuminate. Redock your
iPhone/iPod device.
Make sure your iPhone/iPod device is working
properly before docking it into the unit. Please refer
to the iPhone/iPod device manual for details.
Make sure your iPhone/iPod device is working
properly before docking it into the unit. Please refer
to the iPhone/iPod device manual for details.
This unit cannot control these
iPods or other devices.
Make sure the dock adapter is the proper fit for the
iPhone/iPod device.
Compliance with FCC Regulations
Page 19
The equipment has been tested and found to comply with the limits for a Class
B digital device, pursuant to Part 15 of the FCC Rules. These limits are designed
to provide reasonable protection against harmful interference in a residential
installation. This equipment generates, uses, and can radiate Radio frequency
energy and, if not installed and used in accordance with the instructions, may
cause harmful interference to Radio communications.
However, there is no guarantee that interference will not occur in a particular
installation. If this equipment does cause harmful interference to Radio or
television reception, which can be determined by turning the equipment off
and on, the user is encouraged to try to correct the interference by one or
more of the following measures:
- Reorient or relocate the receiving antenna.
- Increase the separation between the equipment and receiver.
- Connect the equipment into an outlet on a circuit different from that to
which the receiver is connected.
- Consult the dealer or an experienced Radio/television technician for
assistance.
THE SPECIFICATION AND EXTERNAL APPEARANCE OF THE MUSIC DOCK
ARE SUBJECT TO CHANGE WITHOUT PRIOR NOTICE.
If at any time in the future you should need to dispose
of this product, please note that waste electrical
products should not be disposed of with household
waste. Please recycle where facilities exist. Check with
your local authority or retailer for recycling advice.