2
PERSONAL SAFETY
1. Wear safety glasses at all times when working with this
pump.
2. Wear a face shield, proper apparel and suitable respiratory
equipment when pumping hazardous chemicals.
3. Keep work area clean, uncluttered and properly lit.
Replace all unused tools and equipment
WARNING
MAINTENANCE
1. The pump has been designed and built to require a minimal
amount of maintenance.
2. All maintenance must be performed by qualified personnel.
PRIMING
When using the pump for the first time or after a long interval of
time, the pump may need priming. Priming is done by stroking
the handle 4-5 times to re-prime it.
Note: If the pump is not used for an extended period of time, it
may lose its prime and need re-priming.
CAUTION
1. Never let any body part come in front of, or in contact with
the pump outlet
2. In case of accident, immediately seek medical attention. Do
not try to treat the injury yourself
3. Use only genuine factory parts for repair
4. Keep all sources of fire away from the pump
1. Take the pump body from the box and adjust the height of
bung assembly (16) to be threaded into the drum
2. Screw the outlet spout (12) onto the pump head (1) along
with the teflon seal placed in the kit (17)
3. Start operating the T-Handle (7) by moving it up and down.
Within a maximum of 4 strokes, pump will start dispensing
media. The higher the lift of the handle, the greater the
discharge will be per stroke
4. Pump comes with 5 flow control tubes in the kit (17) which
can be inserted between spring (6) & nut (3) according to
the flow requirement
STEPS ON HOW TO REPLACE DAMAGED SEAL
ASSEMBLY AND OPERATION
Failure to follow all general safety information can result in a
fatality, personal injury and/or property damage.
Note: The flow control tubes will restrict the flow and each tube
will approximately reduce the flow rate by 100 ml (3.4 oz.).
Combination of tubes can be used together, but the discharge
will decrease.
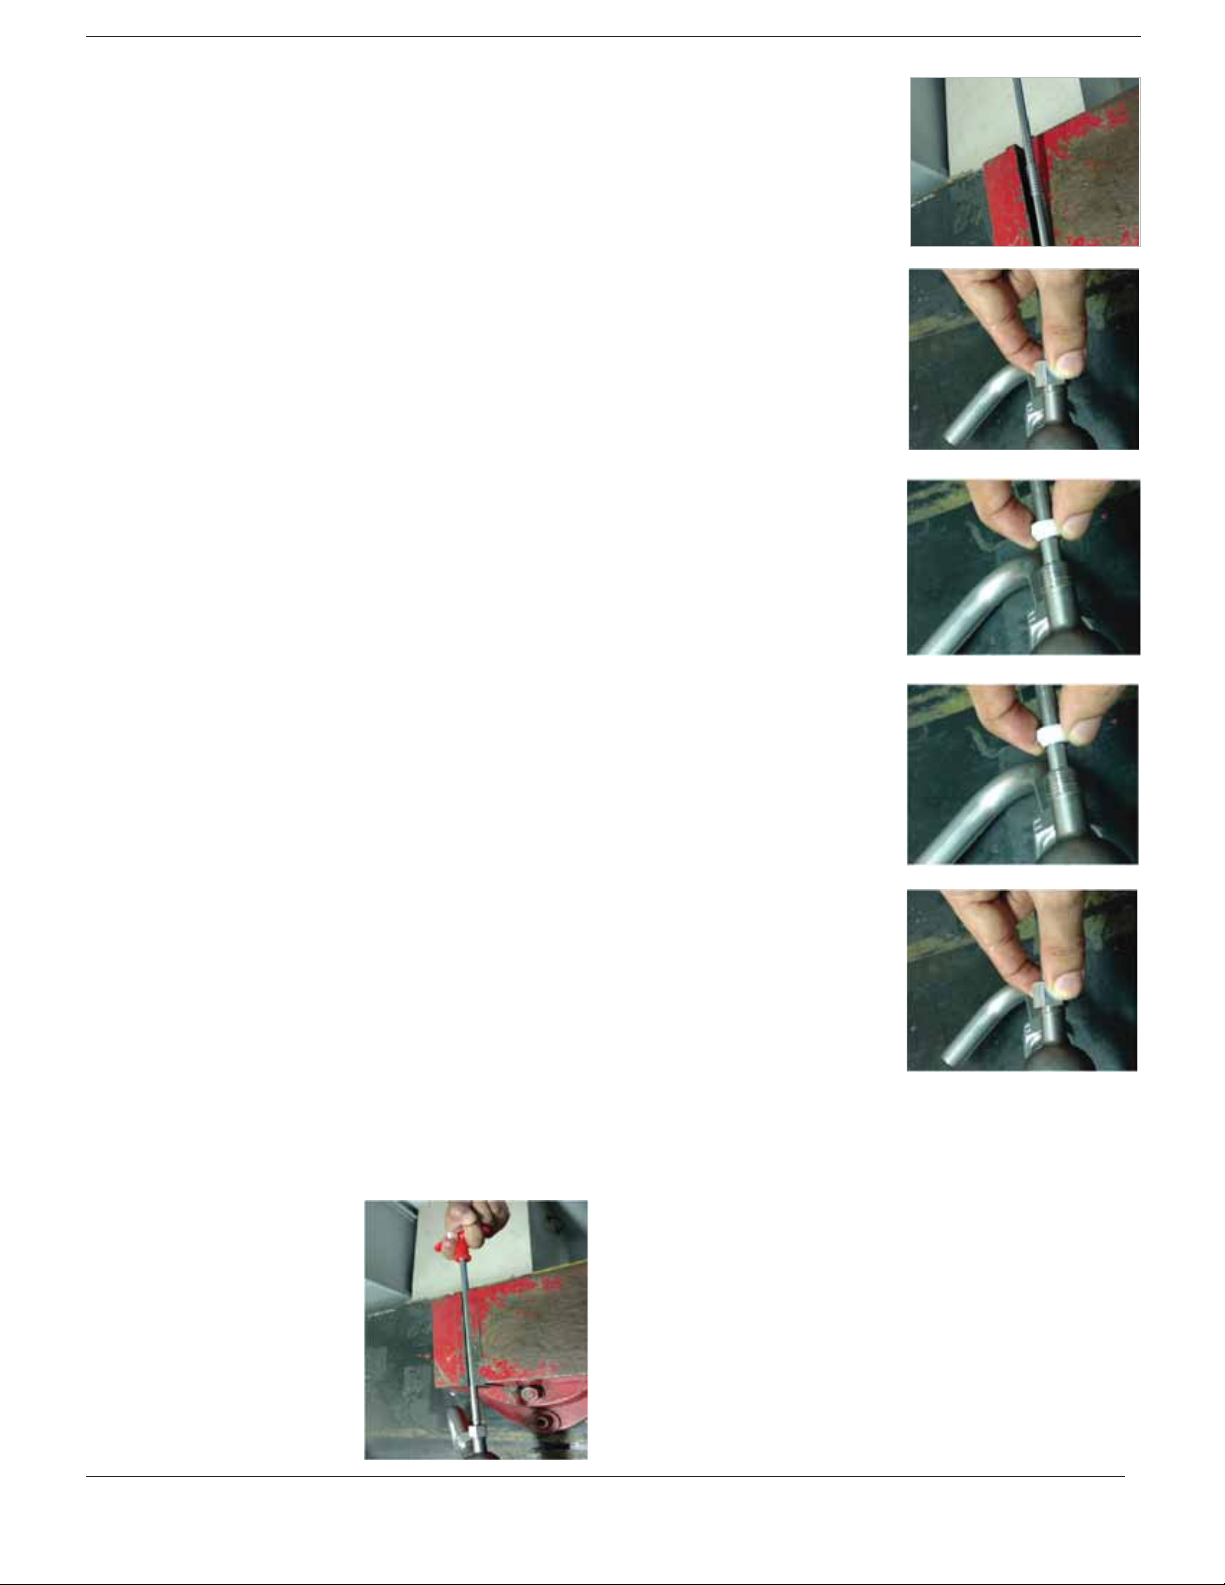
1. Hold the rod (5) in a vice
and rotate the T-Handle
(7) counter-clockwise to
disassemble it from rod.
2. Now, remove the spring
(6) from the rod (5)
3. Unscrew the nut (3) from
the rod
4. Pull the seal (4) out
5. Now take the seal (4)
to be replaced from the
kit and insert it over the
rod (5)
6. Screw the nut (3) and
place the spring (6) &
assemble the T-Handle
(7) by turning it clockwise


