ATD Tools ATD-5286 User manual

ATD-5286 MADE IN MEXICO FOR BULK FILLED UNIT
AIR OPERATED CHASSIS PUMP
50:1 RATIO, OUTPUT – 80 CU. IN./MIN.
MIN. AIR PRESSURE – 30 PSI
MAX. AIR PRESSURE – 150 PSI
MAX. OUTPUT PRESSURE – 7500 PSI
RECOMMENDED OPERATING PRESSURE 80-100 PSI
GREASE TYPE: NLGI #2
(
maximum for effective
p
erformance
)
OWNE
R
S MANUAL
RETAIN THIS MANUAL FOR FUTURE REFERENCE TO IMPORTANT WARNINGS AND
OPERATING AND MAINTENANCE INSTRUCTIONS.
PROPER USE AND MAINTENANCE OF THIS EQUIPMENT IS THE RESPONSIBILITY OF THE
OWNER AND/OR OPERATOR.
DO NOT USE THIS EQUIPMENT UNLESS YOU HAVE CAREFULLY READ AND
UNDERSTAND THE INSTRUCTIONS AND WARNINGS IN THIS MANUAL.
! WARNING !
NEVER exceed the stated maximum working pressure of the pump or of the lowest rated component in your
system.
NEVER modify any part of this equipment.
NEVER use combustible gas with this equipment.
NEVER attempt repairs while the system is under pressure.
NEVER attempt to disassemble the equipment while the system is under pressure.
ALWAYS tighten fluid connections before using this equipment
ALWAYS read/follow the fluid manufacturer’s recommendations regarding fluid compatibility.
ALWAYS read/follow the fluid manufacturer’s recommendations regarding the use of protective clothing
and equipment.
ALWAYS use an air line filter/moisture eliminator at the air inlet for the pump.
ALWAYS use air line lubrication.
REGULARLY check all equipment and repair/replace worn or damaged parts immediately.
FAILURE TO HEED THESE WARNINGS INCLUDING OVERPRESSURIZING,
ALTERING PARTS, USE OF INCOMPATIBLE FLUIDS, MISUSE, OR USE OF
DAMAGED/WORN PARTS MAY RESULT IN EQUIPMENT DAMAGE,
PROPERTY DAMAGE, FIRE, EXPLOSION AND/OR SERIOUS PERSONAL
INJURY.
SAFETY INSTRUCTIONS
Extreme caution should be used when operating this equipment as it generates very high fluid pressure.
Leaks from loose or ruptured components or material from dispensing valve can inject fluid through the skin
causing serious bodily injury and possible need for amputation. Always wear protection to prevent material
splashing onto skin or into eyes.
IMPORTANT: GET EMERGENCY MEDICAL CARE IMMEDIATELY IF ANY FLUID APPEARS TO
PENETRATE THE SKIN! INFORM PHYSICIAN OF EXACTLY WHAT WAS INJECTED. PLEASE
DO NOT TREAT THIS INJURY AS A SIMPLE CUT.

! WARNING ! – RELIEF PROCEDURE
DO NOT EVER point the dispensing valve at another person.
DO NOT EVER attempt to stop material from the dispensing valve or a leaking connection with your hand
or body.
BEFORE EACH USE, check equipment for proper operation and to insure safety devices are in place and
working properly.
NEVER modify this equipment. Modification could cause equipment malfunction and result in serious
bodily injury.
When flushing the pump with solvents, ALWAYS hold a metal part of the dispensing valve firmly to the
side of a grounded metal pail and operate pump at the lowest possible fluid pressure to reduce the risk of
injury from splashing or static sparking.
WARNING: This pump can develop 7500 PSI working pressure at 120 PSI maximum incoming air
pressure. Be sure that all system equipment and accessories are rated to withstand the maximum working
pressure of this pump. NEVER exceed the maximum working pressure of the lowest rated component in the
system. IMPORTANT: “Whip” hoses for dispensing valve are fluid pressure rated at 4500 PSI. NEVER
exceed 90 PSI, air pressure to pump when using “whip” hoses.
WARNING: Water and even moist air can cause this pump to corrode. To aid in the prevention of this
corrosion, NEVER leave the pump filled with water or air. After normal flushing, flush the pump once more
with mineral spirits or an oil based solvent, relieve pressure and leave the mineral spirits in the pump. BE
SURE TO CORRECTLY FOLLOW THE PRESSURE RELIEF PROCEDURE.
PRESSURE RELIEF PROCEDURE
ALWAYS FOLLOW THIS PROCEDURE to reduce the risk of serious bodily injury, including splashing
into the eyes. After shutting off the pump; checking/servicing any part of the system; installing/cleaning or
changing any part of the system, ALWAYS follow this procedure:
1. Disconnect the air supply to the pump.
2. Aim the dispensing valve away from yourself and others.
3. Aim the dispensing valve into an appropriate container and open until all pressure is relieved.
If you believe that the dispensing valve or hose is completely clogged or that pressure in the pump has not
been fully relieved after following the above procedure, VERY SLOWLY loosen the hose end coupling to
relieve the pressure gradually and then loosen completely. Then proceed to clear the valve or hose.
WARNING: ALWAYS follow the Pressure Relief Procedure after shutting off the pump.
WARNING: ALWAYS follow the Pressure Relief Procedure when checking/servicing any part of the
system and when installing, cleaning or changing any part of the system.
INSPECTION INSTRUCTIONS
If you believe that you have overpressurized the equipment, or if your equipment requires adjustments
or repair, contact ATD’s service center for inspection of the pump.
INSTALLATION
It is recommended that you use an air line filter/regulator/lubricatorto remove
harmful dirt and moisture from the compressed air supply and to provide automatic lubrication to the
air motor. Blow-dry the lines and hoses with air before connecting them to the system.

Instruction for Assembly of ATD-5286 Bulk filled Lubrigun
Unpack ATD-5286 Assembly from
Carton This should include the following pieces: Pump, Drum Cover (Red),
Follower Plate, Grease Control Valve, 6 Foot Grease Hose, Muffler, Air
Nipple and Rapid Disconnect Coupler and Container
Assemble Drum Cover to Pump In mose cases your pump has been preassembled and tested.
Fill Container with Lubricant This is a bulk filled unit. You can fill container 91117ME.
Unit comes ready to use with Minimal assembly required.; Release cover clamps (3) and remove the pump
/ cover assembly from the container. Ensure Follower Plate is not left in the container at the bottom.
Fill Container 91117ME with Lubricant (Grease); Ensure Follower plate is on the Downtube and not in the
container BEFORE putting filling the container with grease. (Please Read Again)
Mount cover / pump assembly with downtube onto the container filled with grease. Apply slight
pressure on the follower plate to remove air pockets.
Assemble the lubricant hose to the pump outlet body. The connections must be leakproof. Do not connect the ATD-
5218 Control Valve Yet. If it is connected, you might want to disconnect it . You want to prime the system and
purge contaminants out of the Grease Hose.
The Air Nipple 11660 has already been inserted and threaded into pump head opening. Use Teflon tape to seal threads
to prevent air leakage if necessary.
Assemble air coupler 815ME to an air hose of sufficient length so that the lubrigun can be moved to cover the
entire lubrication area with the hose attached. When air coupler 815ME is attached to air coupler nipple
11660, lubrigun is ready for operation. To release air coupler 815ME, draw back on the coupler sleeve.
DID YOU: Purchase a Filter / Regulator for your pump? The Filter / Regulator should have an
automatic dump mechanism to purge the water out of the incoming air. Water in
the compressed air system is the biggest “Killer” of Air Operated Equipment.
YES: Proceed
NO: Think about it! It is cheap insurance to keep your pump running at maximum
efficiency and the pump will last longer.
Initiating Air Motor and Pump Operation
To Start Pump: Turn on air from Air Regulator slowly. You will hear the air enter the air motor. Pump will
start quickly and then reach prime at a stall pressure. It might take as much as 60-70 PSI to get the pump
started initially. Recommended Air Pressure to operate the pump under normal conditions is 80PSI. Pump
will activate as low as 15-20PSI. For first time operation, pump will start at 50-60 PSI. After that pump will
activate at the lower pressure.
Pump will start quickly and then reach prime at a stall pressure when the control valve is attached.
Allow pump to operate: Pumping Grease into the hose. Allow approximately 1/3 Cup of Grease to flow out
of the Hose. This is to insure that any particles or contaminants or residue inside the hose do not enter
the ATD-5218 Control Valve. Stop Pump; Install the ATD-5218 Control Valve on the hose; Make sure
connections are tight; Resume operation of the pump. The pump should reach stall pressure and stop.
Test the System Pull the Trigger slowly and Grease should be ejected from the nozzle. Don’t point it
at anyone!
Never Put your Finger or Other Bodily parts near the valve control nozzle when pulling the trigger on the control valve
ATD-5218ME.
To know the amount of lubricant pressure in your system or the hose, multiply the amount of air pressure by
50. For example, if there are 100 psi of air pressure indicated on the regulator (100 psi of air entering) then
there are 5000 psi of grease pressure in the lubricant line.
This checklist was done at the factory:
Ensure that the Muffler ATD-5317 is inserted in the correct orifice.
The Lube Hose ATD-5361 has been connected to the pump. If you desire a longer hose, simply replace hose
and use Teflon tape to seal the threads. Connect ATD-5218 Control Valve to Hose.
Have you thought of a Grease Strainer for the Pump Down Tube: 99% of Pump Repairs are due to Foreign
Particles caught in the Down Tube. Ask for Strainer ATD-5356
Version ATD-5286

SERVICE INSTRUCTIONS FOR ATD-5286 (ATD-5289-1) PUMP ASSEMBLY
LUBRICATE AIR VALVE ONCE PER WEEK WITH COMMON SAE 30 MOTOR
OIL. DO NOT USE ANY TYPE OF SYNTHETIC OIL AS THIS WILL SWELL THE
BUNA N SEALS AND RENDER THE PUMP USELESS.
MAKE SURE NO FOREIGN MATERIALS SUCH AS METAL PARTS, ROCKS,
DIRT, STONES, PLASTIC PARTS CONTAMINATE THE GREASE OR THE
DOWNTUBE. WHEN FILLING THE CONTAINER.
FULL DESCRIPTION: . Bulk Fill Pail Pump with Steel Container; 50:1 Contractor
Grease Pump Assembly; w/ Container; Includes 50:1 Double Acting Grease Pump;
Rapid Disconnect Air Coupler; Air Nipple; Muffler(not shown in assembly drawing
above; Follower Plate; 6ft(1.85mtrs) High Pressure Grease Delivery Hose; Grease
Control Valve; with Container Painted in Red. Container Size: 16" High by 9 1/2"
Diameter; Output: 80 cu in/minute of grease at 100PSI NLGI#2 at 70 Degrees ambient
Temperature (.35 cu in/cycle)(Air Inlet 1/8"NPT(f); Lube Outlet: 1/4"NPT(f)). Bulk
Filled .

Trouble Shooting Guide for Pumps –ATD-5286
PROBLEM: SOLUTION:
Warning: If the Air is connected to the pump, consider the pump to be live. Do
not attempt to work on the pump or the system without disconnecting the
Air Inlet and relieving pressure in the system, both air pressure and lube
pressure. Make sure there are no live air pockets in the air motor and all
air has been bled from the Air Motor.
Pump does not Operate Check In-Line Air Pressure to the pump. Recommended Air Pressure is 80 PSI
– 100 PSI.
Pump is Leaking Air Check the Inlet Air Nipple. Use Teflon tape to seal the threads at the Air Inlet.
Silicon is not recommended since it can escape into the interior of the Air
Motor and cause damage to the valves.
Check the Quick Disconnect Coupler connection to the Air Hose. Use Teflon
tape to seal the threads at the Connection
Pump blows air through the
Muffler Check to see that the Air Inlet Nipple is installed in the correct location. Check
that the Brass Plug is installed in the Air Motor head and is not leaking air.
Question: Are you using a Filter / Regulator on the pump?
Answer: We strongly suggest the use of a Filter / Regulator on the pump. The Filter
should be a moisture evaporator with an automatic dump on it so water is
eliminated and purged from the air before entering the pump. If you do not
have a Filter / Regulator on the pump, chances are the pump head could be full
of water and this will corrode the inside of the pump and moving parts, thereby
reducing the life of the pump.
Pump does not pump material Check to see if there are any blockages in the Lubricant lines.
Pump operates, pumps
material but does not shut off. Reason: Pump is not reaching stall pressure.
1: Check that all hoses, lubricant lines and controls valves are
connected and the connections are tight. There should be no leaks.
2: Check that the hoses are SAE approved Grease Hoses and made
for pumping High Pressure Grease.
DO NOT use Oil Hose or garden hose for pumping High Pressure Grease.
Air Motor on Pump operates
but no material comes out 1: Check the follower plate.
Make sure there are no air pockets in the grease underneath the follower plate.
Push down lightly on the follower plate to ensure a positive prime.
2: Check that all hoses and control valves are fully connected
3: Check to see that there are no blockages in the lines, hoses or control valves.
Pump, hoses and valves are
connected and pump does not
pump when I pull the trigger
on the control valve
See Trouble Shooting Sequence On Following Page:
Warning: If the Air is connected to the pump, consider the pump to be live. Do
not attempt to work on the pump or the system without disconnecting the
Air Inlet and relieving pressure in the system, both air pressure and lube
pressure. Make sure there are no live air pockets in the air motor and all
air has been bled from the Air Motor.
Version ATD-5286B

QUESTION YES NO
Does the pump Air Motor
operate when it is removed
from the Grease?
Yes? Then put the pump back in the
grease. Remove the hose from the pump No? Check Air Inlet for Pressure,
and check Air Motor for Leaks at
the Air Nipple, Muffler or Seals.
If there are no air leaks and Air is
fully engaged at least 80 psi, take
the rubber part of a mallet and
slightly tap the front cover of the
Air Motor (41202) with the
rubber part only.
Sometimes and very rarely the
Toggle Valve sticks and needs to
be prodded off of the neutral
position.
Does it pump grease now
when inserted in the drum? Yes? There is a blockage in the Hose or
the Control Valve. Remove the Control
Valve from the hose and connect the hose
to the pump.
No? Return to a step above.
Does the grease pump through
the hose? Yes? Then the blockage is in the Control
Valve. Attach the control valve to the
hose. Remove the coupler from the
Control Valve. Most likely the blockage
is at the control valve.
No? Then the blockage is in the
hose.
Does the grease pump through
the Control Valve? Yes? There was blockage in the coupler
of the control valve. Clean the Coupler
out with Mineral Spirits.
No? There is a blockage in the
main body of the Control Valve.
Control Valve needs to be
disassembled and cleaned.
Is there Blockage in your
Lubricant Lines, Hoses,
Pumps and Control Valves
Common?
If yes, we suggest the use of a foot valve
strainer ATD-5356
Note: To prevent Blockage in the pump, hose, lubricant lines or control valve with
contaminated grease, or to prevent contaminated grease from entering your
bearings, we suggest the use of a Grease Strainer: ATD-5356..
Has your Pump been Outside
in the elements? Has water
entered the pump?
Yes? There is a possibility that water has accumulated inside the Air Motor.
Over time this can cause damage to the Air Motor. All pumps are packed at the
factory with a water repellent grease. Over time with water accumulating
inside the Air Motor, the grease can be flushed out.
Note: To ensure the proper operation of your Pneumatic pump, we suggest an Air
Lubricator, Moisture Evaporator and Regulator on each Pump OR at the very
least a Filter /Regulator with an automatic dump mechanism on it to purge water
out of the air.
Note: Don’t Bang on the pump with a hammer or blunt instrument. The pumps are rugged
and made for professional and industrial use but are made of Aluminum and if any
parts are dented, it will affect the operation of the pump.
Warning: If the Air is connected to the pump, consider the pump to be live. Do not attempt to work
on the pump or the system without disconnecting the Air Inlet and relieving pressure in
the system, both air pressure and lube pressure. Make sure there are no live air pockets
in the air motor and all air has been bled from the Air Motor.
Version ATD-5286B

GENERAL PUMP DIMENSIONS AND SIZE OF PUMP
DOWNTUBE LENGTH: 15-3/4”; AIR MOTOR HEIGHT: 11”
REPAIR KITS AVAILABLE:
REPAIR KIT NO: ATD-5320: SIMPLE OVERALL REPAIR KIT FOR 82716ME PUMP
REPAIR KIT NO. R83054ME; COMPLEX REPAIR KIT FOR 82716ME PUMP
REPAIR KIT NO: ATD-5322: AIR MOTOR REPAIR KIT
REPAIR KIT NO. ATD-5323: DOWNTUBE REPAIR KIT


LUBRICATE AIR VALVE ONCE PER WEEK
Loss of pressure, volume or continuous operation of pump when not in normal use indicates:
A: Foreign material lodge under Piston Ball Checks or between Upper and Lower Inlet Checks. To correct this
condition the Piston ball Checks and Inlet Checks should be removed and cleaned throughly. If sealing
surfaces between Upper and Lower Inlet Checks are rough or pitted, replace or resurface if damage is slight.
B: Shovel Rod Packing worn or damaged: Before installing new packing, inspect surface of shovel rod and
replace if rough or pitted. Do not grip Shovel Rod when disassembling lower pump tube assembly.
C: If pump continues to operate when not in normal use and lubricant level in drum drops, inspect lubricant
supply line between pump and outlet for leaks or break in line

COMPLETE PARTS LIST FOR ATD-5289-1 FOR ATD-5286
PART
NO. DESCRIPTION PART
NO. DESCRIPTION PART
NO. DESCRIPTION
10294 Tie Rod 12333 Gland Packing Nut 41202 Cover Casting
11329 Air Piston Bolt 12511 Pipe Plug 41245 Air Valve Casting
11330 Gland Packing
Spacer
14940ME Gland Packing
Spacer New Version 45605 Valve Guide Plate
11337 Air Piston Nut 30003 Packing Nut Gasket 48212 Air Piston Washer
11340 Air Motor Piston Rod 30011 Valve Cap Gasket 48213 Gland Packing Washer
11349 Piston Rod
Connector
31047 Check Seat Gasket 48235 Packing Washer
11470 Valve Cap 31048 'Connector Gasket 48237 Plunger Packing Washer
11471 Trip Rod Collar 31049 Bushing Gasket 48268 Gland Packing Washer
11472 Trip Rod Pin 31050 Gland Gasket T-2489 Valve Cover Screw
11475 Trip Shoe 31054 Pump Tube Gasket 50410 Toggle Plate Screw
11476 Trip Rod Packing Nut 33014 Air Cylinder Gasket 51009 Tie Rod Nut
11660 Air Inlet Nipple 33039 Packing Nut Gasket 55137 Trip Rod Packing Spring
11702 Check Washer 34090 Air Piston Packing 55138 Valve Seat Spring
11721 Priming Check 2-206 Plunger Packing 56038 Spring
11722 Check Stop 34110 PLUNGER PACKING 57027 Ball Stop
11723 Plunger Rod 34158 Cover Gasket 61041 Air Cylinder
11724 Priming Plunger 34180 Gland Packing 61273 Bushing Extension
11725 Priming Check Seat 34206 O-RING 61275 Priming Tube
11726 Check Seat 34368 O-Ring 61321 Pump Tube
11904 Packing Nut 34572 O-RING (NEW UNITS) 61502 Air Passage Tube
11905 Packing Cap 35073 Priming Check
Packing
66010 Equalizer Ball
11906 Valve Seat Bolt 35077 Gland Packing
(Previous Version) 66213 LOCKWASHER
11947 Trip Sleeve 35083 Trip Rod Packing 81721 Valve Slide and Seat Assembly
12209 Coupling Stud 38162 Valve Seat Gasket 90554 Plunger and Bushing Assembly
12210 Coupling Adapter 38165 U CUP PACKING
(New Version) 90560 Toggle Plate Assembly
12211 Coupling Nut 40537 Outlet Body 90691 Trip Rod Assembly
ADDITIONAL PARTS FOR ATD-5286
ATD-5218 Grease Control Valve
815ME RAPID
DISCONNECT
COUPLER
90656ME Metal Cover for the Can to accept the Air Operated Grease Pumps:
Outside Diamter 9-5/8"; Inside orifice to accept Air Operated Grease
Pump 1-1/4"; Height 2.0"
66042ME Cotter Pin 91092ME CLIP OR CLAMPLING ASSEMBLY FOR THE CAN
11660ME AIR NIPPLE
12519ME Fastener Pin
90699M
(90580ME)
50037ME MOUNTING
SCREWS
Metal Follower Plate Assembly for the Air Operated Grease Pump with
inside diameter of 1.0"; outside diameter fits a 9-0" diameter metal
circular can; Lip on the follower plate of 5/8" at the outer edge. Metal
Reinforcing collar in the center of the downtube 1.0" high to provide
stable fitting of the follower plate..
ATD-5361 HP 6FT X 1/4"
GREASE HOSE
91117M Metal Can 16" High x 9-5/8" Outside diameter (9.0" Inside Diameter)
(91081ME) with the clampling assembly with Handle

TIPS SHEET FOR A TD OIL & GREASE PUMPS
#1: Unpacking the pump; Be Careful where you lay the downtube.
The slightest foreign material like a rock, grass, stone, metal or plastic
will block the pump.
#2: Lubricate the Air Motor only with SAE 30 Common Motor Oil or
NLGI #1 Grease.
DO NOT USE ANY TYPE OF SYNTHETIC OIL IN THE AIR MOTOR
CASING. THIS INCLUDES MARVEL MYSTERY OIL OR ANY
SYNTHETIC OIL. NO!!!!!!
#3: Use an Air Regulator with Gauge: Normal Operating Pressure on
the pump is between 80-100 psi. This will deliver 4500 PSI TO 5000
PSI of Grease Pressure. OR 240-300 psi of Oil Pressure.
#4: Warranty is NULL AND VOID if used without an Air
Regulator and Guage.
#5: Water will Damage and Corrode the inside of the pump; Use a
Moisture Evacuation System on your Air line to keep water out of the
pump.
#6: Lubricate the Air Motor of the Pump, Once per Week by injecting
2-5 FL OZ’s of SAE 30 Common Motor Oil into the Air Motor Air
Inlet.
#7: The pump has been tested and spec’d at the factory and was
operated with NLGI #2 Grease under a Static Test and a Dynamic Test
(Pressure Test) for Grease Pumps and SAE Motor Oil for Oil Pumps.

PUMP DIAGNOSTIC FOR ATD GREASE PUMPS
1: PUMP DOES NOT WORK OUT OF THE BOX:
Check List:
1: Is your Air Line live – Operating?
2: Is there Air connected to the Pump.
3: Check the Air Nipple 11660ME: Is it drilled all the way
through? If you hold the air nipple up can you see light through
the other end? (not a common problem)
4: Is the Air Nipple threaded in the correct Hole which is the Air
inlet on the Air Motor NPT 1/8”;
5: The other threaded holes are the Muffler 3/8” NPT and the
Grease Outlet ¼” NPT. See Drawing in the Instruction Manual.
2: So you have Air on the Pump and it does not work?
What is the Pump Doing? Hissing air out of the Air Motor?:
1: This is not common but it does occur.
2: If it is hissing out of the Muffler, the air valve or slide
valve is stuck in the neutral postion.
3: Increase the Air Pressure to 100 PSI. Sometimes
increasing the air pressure will throw the valve up or down
and start the pump cycling.
4: If the pump has not been inserted in the grease, hold it
upside down and tap it slightly – lightly on the cement floor.
Please read the word lightly.
5: If the pump has been inserted in grease, use a rubber
mallet and tap the pump slightly on the air motor head. Do
not beat the muffler. Use only a rubber mallet not a
hammer. The air motor head is a casting and it will crack.
Note: All Grease Pumps are tested in NLGI#2 Chassis Grease at the factory. They are statically tested so they
have to pump a certain amount of grease for a stated period of time. They are also dynamically tested so they are required to hold grease
pressure for an extended period of time and at a stated rate of air pressure usually 100 psi of Air Pressure yields a grease pressure rating of 5000
PSI. Therefore problems of a new pump not working out of the box should be rare to none. However, problems can occur when unpacking and
using your new grease pump for the first time. Please always read and follow directions in the Instruction Manual. Below are some minor
trouble shooting tips to get you on your way, should you incur a problem. There is a more extensive trouble shooting manual in your instruction
booklet and we request that you consult that for more information.
5: Pump is new out of the box; Air Motor Operates
but no grease is coming out:
1: Disconnect the lube hose from the pump.
2: Seat the Follower plate; Sometimes the follower plate
catches an air pocket underneath it. Pull out the pump and
firmly push down on the follower plate to push out any air
pockets.
3: Reseat the pump by pulling the pump half way out of the
container, turning it and putting it back in the container?
4: Turn Air on to the Pump and let the pump operate. These
pumps are self priming will pick up grease and create a
vacuum under the follower plate.
5: Pump about ½ cup of grease out of the pump. You
should hear a popping noise as the air pockets are released
from the grease.
3: Is the Air Motor Hissing Air out of any of the seals
on the Air Motor:
1: This is not a common Problem.
2: It can be fixed by tightening the bolts on the Air Motor for
the Seals in Question. This would be very rare and should not
need to be done.
4: Pump is new out of the box; Air Motor
Operates but no grease is coming out:
1: Did you remove the plastic tube off of the bottom of the
pump?
2: Did you accidentally lay the pump down in any foreign
material such as metal pieces, rocks, dirt, paper, plastic, saw
dust or shavings?
3: The slightest piece of foreign material will block the
downtube of the pump. Consult the manual that accompanied
the pump for an appropriate fix.
7: Grease comes out of the pump outlet but not the
control valve.
1: The control valve is plugged. Whenever you change
hoses or have a new hose you should always pump about ½
cup of grease through the hose to remove any contaminants
inside the hose.
2: If control valve is plugged with a contaminant, you need
to remove the debris from inside the control valve.
6: Air Motor is still operating but no grease is coming out.
1: Does the container have plastic bag that holds the grease.
2: If so, try raising the pump ever so slightly and make sure
the pump does not push up against the bottom of the container.
3: Sometimes that downtube when sitting on top of the plastic
bag will try to suck up the plastic and the plastic will block the
downtube.
8: Pump was operating fine; we changed the
container of grease and now it will not pump grease:
1: Did you change the container? How did you set the pump
down when you changed the vat? A small amount of foreign
material can block the inlet of the pump
2: Reset the follower plate in the new vat of grease to expel air
pockets.
3: Try resetting the pump.
4: Disconnect the lube and operate the pump. If it pumps
grease, the control valve is clogged.
9: Pump was Operating fine; We did not change a
vat of grease; The pump will not start;
1: Check the Air Motor. Do you have water in your air line.
2: Try injecting 8-10 fl oz’s of common SAE Motor oil into
the Pump Inlet and let it sit.
3: Do not use any type of Synthetic Oil or Air Tool
Oil as this will ruin (swell) the Buna N Packings and
render the pump useless.

REPAIR KIT LISTINGS FOR THE ATD-5286 AND ATD-5289-1
COMPLEX REPAIR KIT FOR AIR MOTOR ANDDOWNTUBE 83054-ME SIMPLE REPAIR KIT FOR AIR MOTOR AND DOWNTUBE ATD-5320
FOR MODELS ATD-5217-1, ATD-5289-1, ATD-5219-1 FOR MODELS ATD-5217-1, ATD-5289-1, ATD-5219-1
QTY MODEL DESCRIPTION QTY MODEL DESCRIPTION QTY MODEL DESCRIPTION QTY MODEL DESCRIPTION
1 11340
AIR MOTOR PISTON
ROD 1 33039 PACKING NUT GASKET 1 11340 AIR MOTOR PISTON
ROD 1 34206 O RING
1 11472 TRIP PIN 1 34090 AIR PISTON PACKING 1 11472 TRIP PIN 1 34158 COVER GASKET
1 11475 TRIP SHOE 1 34206 ORING 1 11702 CHECK WASHER 1 34180 GLANDPACKING
1 11702 CHECKWASHER 1 34158 COVERGASKET 1 11721 PRIMINGCHECK 2 34368 ORING
1 11721 PRIMING CHECK 1 34180 GLANDPACKING 1 11723 PLUNGERROD 1 35073
PRIMING CHECK
PACKING
1 11723 PLUNGERROD 2 34368 ORING 1 11724 PRIMING PLUNGER 3 35077
GLAND PACKINGS OLD
VER
1 11724 PRIMING PLUNGER 1 35073
PRIMING CHECK
PACKING 1 11725 PRIMING CHECK SEAT 1 35083 TRIP ROD PACKING
1 11725 PRIMING CHECK SEAT 3 35077 GLAND PACKING OLD
VER 1 11726 CHECK SEAT 1 38162 VALVE SEAT GASKET
1 11726 CHECK SEAT 1 35083 TRIP ROD PACKING 1 30003 PACKING NUT GASKET 1 55137 TRIP ROD PACKING
SPRING
1 30003 PACKING NUT GASKET 1 38162 VALVE SEAT GASKET 1 30011 VALVE CAP GASKET 2 56038 SPRING
1 30011 VALVE CAP GASKET 1 55137 TRIP ROD PACKING
SPRING 1 31047 CHECK SEAT GASKET 4 66010 EQUALIZER BALL
1 31047 CHECK SEATGASKET 2 56038 SPRING 1 31048 CONNECTOR GASKET 4 66213 LOCK WASHER
1 31048 CONNECTOR GASKET 1 61041 AIR CYLINDER 1 31050 GLAND GASKET NEW VERSION GLAND PACKINGS
2 31049 BUSHING GASKET 4 66010 EQUALIZER BALL 1 31054 PUMP TUBE GASKET 1 34572 O RING GLAND
PACKINGS
1 31050 GLAND GASKET 4 66213 LOCK WASHER 2 33014 AIR CYLINDER GASKET 1 38165 U CUP GLAND
PACKINGS
1 31054 PUMP TUBE GASKET NEW VERSION GLAND PACKINGS 1 33039 PACKING NUT GASKET
2 33014
AIR CYLINDER
GASKET 1 34572
O RING GLAND
PACKINGS
1 38165 U CUP GLAND
PACKINGS
DOWNTUBE REPAIR KIT ATD-5323 AIR MOTOR REPAIR KIT ATD-5322
FOR MODELS ATD-5217-1, ATD-5289-1, ATD-5219-1 FOR MODELS ATD-5217-1, ATD-5289-1, ATD-5219-1
QTY MODEL DESCRIPTION QTY MODEL DESCRIPTION QTY MODEL DESCRIPTION
1 11702 CHECK WASHER 1 11340
AIR MOTOR PISTON
ROD 1 34180 GLAND PACKING
1 11721 PRIMING CHECK 1 11472 TRIP PIN 2 34368 O RING
1 11723 PLUNGER ROD 1 11475 TRIP SHOE 3 35077
GLAND PACKING OLD
VER
1 11724 PRIMING PLUNGER 1 30003 PACKING NUT GASKET 1 35083 TRIP ROD PACKING
1 11725 PRIMING CHECK SEAT 1 30011 VALVE CAP GASKET 1 38162 VALVE SEAT GASKET
1 11726 CHECK SEAT 1 31048 CONNECTOR GASKET 1 55137
TRIP ROD PACKING
SPRING
1 31047 CHECK SEAT GASKET 1 31050 GLAND GASKET 2 56038 SPRING
2 31049 BUSHING GASKET 1 31054 PUMP TUBE GASKET 1 61041 AIR CYLINDER
1 35073
PRIMING CHECK
PACKING 2 33014 AIR CYLINDER GASKET 2 66010 EQUALIZER BALL
2 66010 EQUALIZER BALL 1 33039 PACKING NUT GASKET 4 66213 LOCK WASHER
1 34090 AIR PISTON PACKING NEW VERSION GLAND PACKINGS
1 34206 O RING 1 34572
O-RING GLAND
PACKING
1 34158 COVER GASKET 1 38165
U CUP GLAND
PACKINGS

Lower Pump Tube Disassembly and Cleaning Instructions
Note #1: Check Ball (66010) may remain in
plunger after Check Seat (11726) is
removed. To remove check ball tilt pump in
vise and gently tap top of plunger at
location of two flats.
Perfom this only if you need to remove
Bushing and Plunger Assembly;
Otherwise Reassembly Pump Tube
Fig D. (See Fig. D) Removing Bushing and
Plunger Assembly (90554ME); Hold pump
tube and unscrew bushing of Piston
(90554). Bushing should slide off once
unthreaded from the Pump Tube.
Fig E. Grip two flats at top of piston plunger
with an end wrench and remove Check
Seat (11726).
Note: Unscrew Priming Check Seat
(11721) from Check Stop (11722) to remove
Support Bushing (11702) and Plunger
Packing (35073); To do this you will have to
put Check Seat (11721) in a vise and insert a
point tool such as a punch through the holes
in Check Stop (11722) to unthread Check
Stop (11722) from Check Seat (11721).
Plunger Packing (35073) incurs heavy wear and it
is advisable to replace this part if worn.
To avoid this, use a strainer for the downtube, if in a
difficult environment. In rare cases with paper
and bubble gum, the material can work its way
up into the bushing and plunger assembly
(90554) and therefore this part needs to be
disassembled and cleaned as well. If sand or
dirt is a constant problem, you will find that the
bushing and plunger assembly will wear
excessively. These two pieces are lapped and
fitted together as one. Constant Sand or Dirt
passing through the part 90554 Bushing and
Plunger can ruin the tight fit.
Procedure
FIG A.(See Fig. A) Lay pump horizontal in vise and
grip outlet body tightly in vise jaws. Hold
Extension Tube (61273) and unscrew Priming
Tube (61275).
Fig B. (See Fig. B) Pull Plunger (11724) straight out
until Plunger Rod (11723) is extended as far as
possible out of the Extension Tube (61273). Hold
bushing of Piston (90554) and unscrew Extension
Tube (61273).
Center Extension Tube (61273) between end of
piston bushing and Plunger(11724). Insert any
pointed tool in through hole atBase of Check Seat
11726.
Note: Plunger may unscrew from Plunger Rod
(11723) or plunger rod may unscrew from Check
Seat (11726). Extension Tube (61273) can be
removed from free end of Plunger Rod (11723).
Fig C: (See Fig. C) When you remove the Extension
Tube (61273) this exposes the Check Seat
(11725), Priming Check (11721), Check Stop
(11722), Support Bushing (11702) and Plunger
Packing (35073).
95% of the problemsthat ocurr with the pump
not pumping material; not holding pressure or not
operating at all have to do with foreign Material
such as Rocks, Stones, Metal, Nuts, Bolts,
Plastic, Paper and other materials being picked
up by the downtube and lodging themselves in
the extension tube or the down tube.
Cleaning: Use Mineral Spirits and a Brush to Throughly Clean all Debris out of the Foot Valve 61275 and
Extension Tube 61273; Thoroughly inspect all parts for wear or damage; Clean all Parts
Tenative Check List
1: Is the Plunger Rod 11723 bent?
2: Is the Packing 35073 excessively worn?
3: Is the Check Seat 11725 worn or has abrasions or cuts?
4: Is the plunger 11724 bent or broken?
5: 95% of the problems with the pump not pumping material; not holding pressure or not operating have
to do with foreign Material such as Rocks, Stones, Metal, Nuts, Bolts, Plastic, Paper, Gum and other
materials being picked up by the downtube and getting caught in the extension tube or the down
tube. When Changing Lube Containers, Watch where you lay the pump and what the dowtube
touches. Anything will stick to the grease on the end of the downtube.

Note #2:
You only remove that check ball (66010) if you suspect foreign
material is behind the check ball. You can perform a visual inspection after
the check ball is removed and if there is foreign debris behind the check
ball, then continue and remove the bushing and plunger assembly as well.
(See below).
Occasionally debris such as paper, bubble gum, plastic, cellophane,
plastic bags etc, have gotten wedged up inside the plunger portion of the
bushing and plunger assembly. Flats are provided on the plunger portion
to remove the complete plunger and inspect the inside.
This removal will also facilitate the easy extraction of the ball cage 57027
and ball 66010 at either end of the plunger. Be sure to note the order of
installation of the plunger assembly on the pump rod (ie which is the top
and which is the bottom). Don’t confuse the two. If you reverse the
plunger, the pump will not work correctly. Again, don’t confuse the top
and bottom of the plunger. Once you remove the two (2) ball cages
57027 and the 2 balls 66010, you should be able to look directly through a
clean orifice inside the plunger assembly. If not, then something is
blocking the inside of the plunger assembly and it must be removed. Do
not scratch the machined surfaces of the plunger or the inside of the
bushing. Normally the item in the plunger is of a nature similar to the
materials mentioned above in bold. This is not a common occurrence to
have material stuck or wedged in the plunger assembly but it has
happened.
When reassembling the plunger assembly, NOTE #1: The top and bottom
of the plunger assembly. You were careful in the beginning and noted it
when you took it apart. NOTE #2: notice the order of the ball and cage.
Starting from the bottom, it is ball ; cage; then at the top of the plunger it is
cage; ball; If you reverse this order, the pump will not operate at all.
Now use the flats on the plunger and thread the top portion of the plunger
onto the coupling (different number for different pumps). Tighten the
plunger but don’t strip the threads.
Next prepare to insert the plunger into the bushing by pushing the bushing
into the plunger rod. Please note the bushing and plunger are a lapped
pair and they are fitted at the factory. You cannot take a plunger from one
pair and change it with another bushing. The fit is a tight fit. Make sure the
Bushing is straight before you attempt to slide it on. The bushing should
just slide on. A Bit of grease inside the bushing or on the plunger will help
the insertion. Thread the bushing 90554ME onto the pump tube. Tighten
securely.
The gasket ring 31047 and 11726 is inserted onto the bottom of the
plunger. Use the milled flats to tighten 11726. Assemble the balance of
the items in reverse order to disassembly. Note the drawing to the left.
When reinstalling the bushing extension 61273(not shown), install the unit
over the other interior parts and let it hang loose. Thread the rod 11723
onto the bottom of 11726. To tighten the rod, you will have to insert a
small punch into the hole of 11726. See Fig B on page 1. We are now
tightening the rod 11723 by putting a wrench on the plunger 11724.
Assemble balance of items as shown.
Tighten all outside parts securely with wrench.

Additional Instructions: with some tips to help you
Cleaning out the Downtube with Foreign Material and Debris
Pumps: ATD-5289-1; ATD-5217-1; ATD-5219-1
You need to have the plunger all the way extended to the end of the foot valve before you start. It makes
life easier. Put a small amount of air on the unit to extend it out. When it is extended out to the bottom
of the foot valve, disconnect the air.
Start with Figure “A” in the attached photo description sheet. Do not unthread the pump tube. You
don’t need to even though it indicates the same in the sketch.
Take off the Foot Valve 61275.
#2: Unscrew the extension tube 61273; Do not Yank it out. You will need a pipe wrench to unthread
the extension tube; actually two; one on the bushing and plunger assembly piece (90554ME) to hold it
steady and the other on the extension tube to unthread the extension tube off of the end of the Bushing
and Plunger Assembly.
Stick the pointed tool (usually a punch of the correct diameter) in the check seat hole of 11726 and use
an adjustable wrench on the plunger. .
Once the plunger is off of the plunger rod (it is unthreaded) you can slide the complete unit off.
Sometimes the rod 11723 unthreads from the the check seat 11726, that is fine as well. If there are dirt,
rocks, metal or plastic in that area, clean it out. While you have it off, replace the plunger packing
35073. We offer Buna N (black), Viton(Brown) and Teflon(White). It is a wear part.
Do not unthread the bushing and plunger assembly unless you suspect there is obstruction problems. If
paper, bubble gum, plastic gets into the bushing and plunger assembly you will have to clean out the
inside of the plunger. The debris usually gets caught in the ball cages. Note the order of the ball cage in
the plunger assembly on the drawing. If you put it in reverse order the pump will not pump grease.
Starting from the bottom of the pump tube, it is ball, cage, ball cage. Look at the drawing on page 2 and
you will understand.
Assemble the unit back in the reverse order.
Normally, we pump mineral spirits through a completed repair job to clean it out and test the
pump. The mineral spirits should be pumping out on the up and down stroke. Mineral Spirits is
easier than grease if you have to dissemble the pump again because a part or parts was installed
incorrectly.

ATD528
6
Description: Bulk Fill Pail Pump with Steel Container Grease Pump Assembly
w/ Follower Plate
(
self enclosed unit
)
1. Includes 50:1 Double Acting High Pressure Pump(ATD5289-1) provides uniform pressure and
delivery on the up and down stroke
2 6'(1.85mts) High Pressure Grease Delivery Hose(ATD5361)
3. High Pressure Grease Delivery Control Valve(ATD5218)
4. Rapid Disconnect Coupler(815ME) & Air Nipple (11660ME) & Air Motor Muffler(ATD5317)
5. Steel Container Size: 16"(40.6CM) High by 9 1/2"(24.1CM) Diameter Painted in Red
6. Pump Specifications: Pump Tube Length 15-3/4"(40.01cm) & Diameter 1.0"(2.54CM); Air Motor
Height: 11.0"(27.9CM); Overall Height: 28-1/2"(72.4CM)
7. Follower Plate made of steel that fits the inside of the container.
8. 3 Rigid Steel Clamps that clamp the cover firmly in place on the container
9. Steel Drum Cover with screws that firmly fasten the cover to the base of the pump.
10: Easy Carry Handle welded to the side of the container makes for easy transportability
11. Output: 80cu in/minute (45 oz) of grease at 100PSI of NLGI #2 at 70 Degrees ambient Temperature
(.35cu in/cycle)
12. Air Inlet 1/8"NPT(f); Lube Outlet: 1/4"NPT(f);
13. These High Pressure Grease Pumps incorporate a 20 cu in Air Motor Design
14: Application: Construction Sites, Maintenance, where bulk filling is an option and portability is
priority
15: New Downtube Packings made of Viton / Teflon for longer life
16. Maximum Air Pressure: 150PSI; Recomended: 80-100PSI; Maximum Grease Pressure: 7500PSI;
Recomended: 5000 PSI; Note: Pump life reduces considerably if operating above the recommended air
pressure.
17. Two year Warranty against Defective Materials, Workmanship and Labor
18. All Pumps are Pressure Tested Statically and Dynamically in NLGI#2 Grease at the Factory for
Output, Pressure, Performance and Quality.
19. Additional Accessories Available:ATD5356 Grease Strainer for Pump Tube; ATD5253 “Z” Swivel for
the Control Valve; 84191ME Band Dolly; 66645ME Locking Swivel 1/4"(m) x 1/4"(f) ;
20. Optional Hoses Available(See Below):
ATD5362 10ft(3.04mtrs) X ¼” High Pressure Grease Hose
ATD5363 20ft (6.09 mtrs)X ¼” High Pressure Grease Hose
ATD5364 30ft ((9.14mtrs)X ¼” High Pressure Grease Hose
ATD5365 40ft (12.2mtrs)X ¼” High Pressure Grease Hose
ATD5366 50ft (15.2mtrs) X ¼” High Pressure Grease Hose
21. Complete Repair Kits Parts Available:
ATD5320: Simple Repair Kit for Grease Pumps ATD5286
ATD5322: Air Motor Repair Kit for ATD5286
ATD5323: Down Tube Repair Kit for ATD5286
22. Other Information: Weight and Dimensions:BOX Weight: 30LBS (13.6KG); BOX DIMS:
Length: 30.5"(77.5cm) X Width:14"(35.6cm) X Height: 13"(33.1cm)
Discover other fuel transfer systems and parts on our website.
Table of contents
Other ATD Tools Water Pump manuals
ATD Tools
ATD Tools ATD-5278 User manual

ATD Tools
ATD Tools ATD-5025 Operating instructions
ATD Tools
ATD Tools ATD-5225 User manual
ATD Tools
ATD Tools ATD-3425 User manual
ATD Tools
ATD Tools ATD-7487 User manual

ATD Tools
ATD Tools ATD-5226 User manual
ATD Tools
ATD Tools ATD-5062 User manual
ATD Tools
ATD Tools ATD5217 User manual
ATD Tools
ATD Tools ATD-5007 User manual
ATD Tools
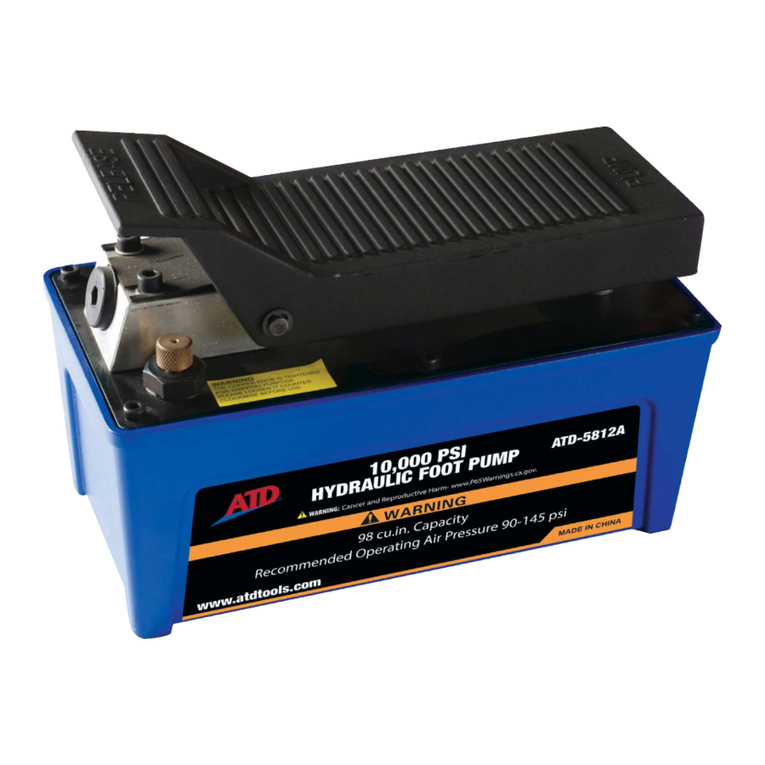
ATD Tools ATD-5812A User manual


