Rev.0 13/01/2020
Operator Panel | TURNTABLE - MAST
4
1.1.4
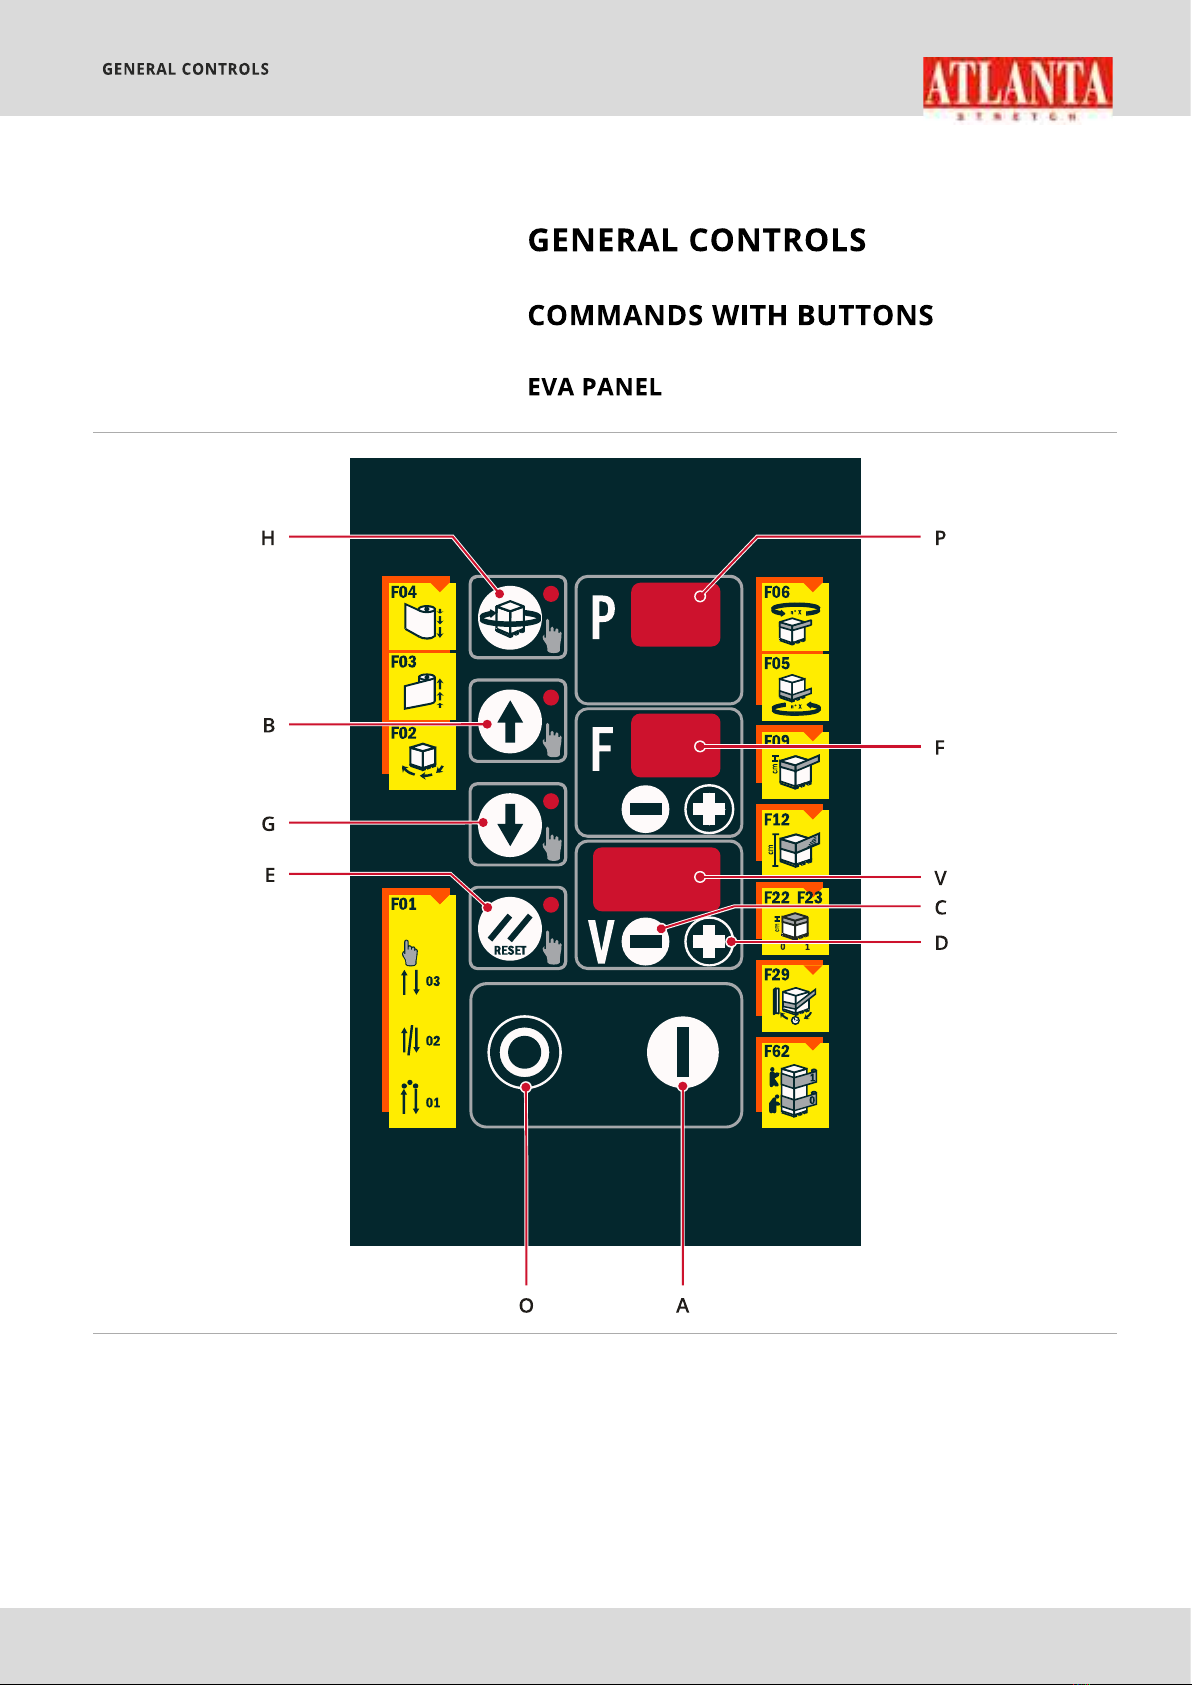
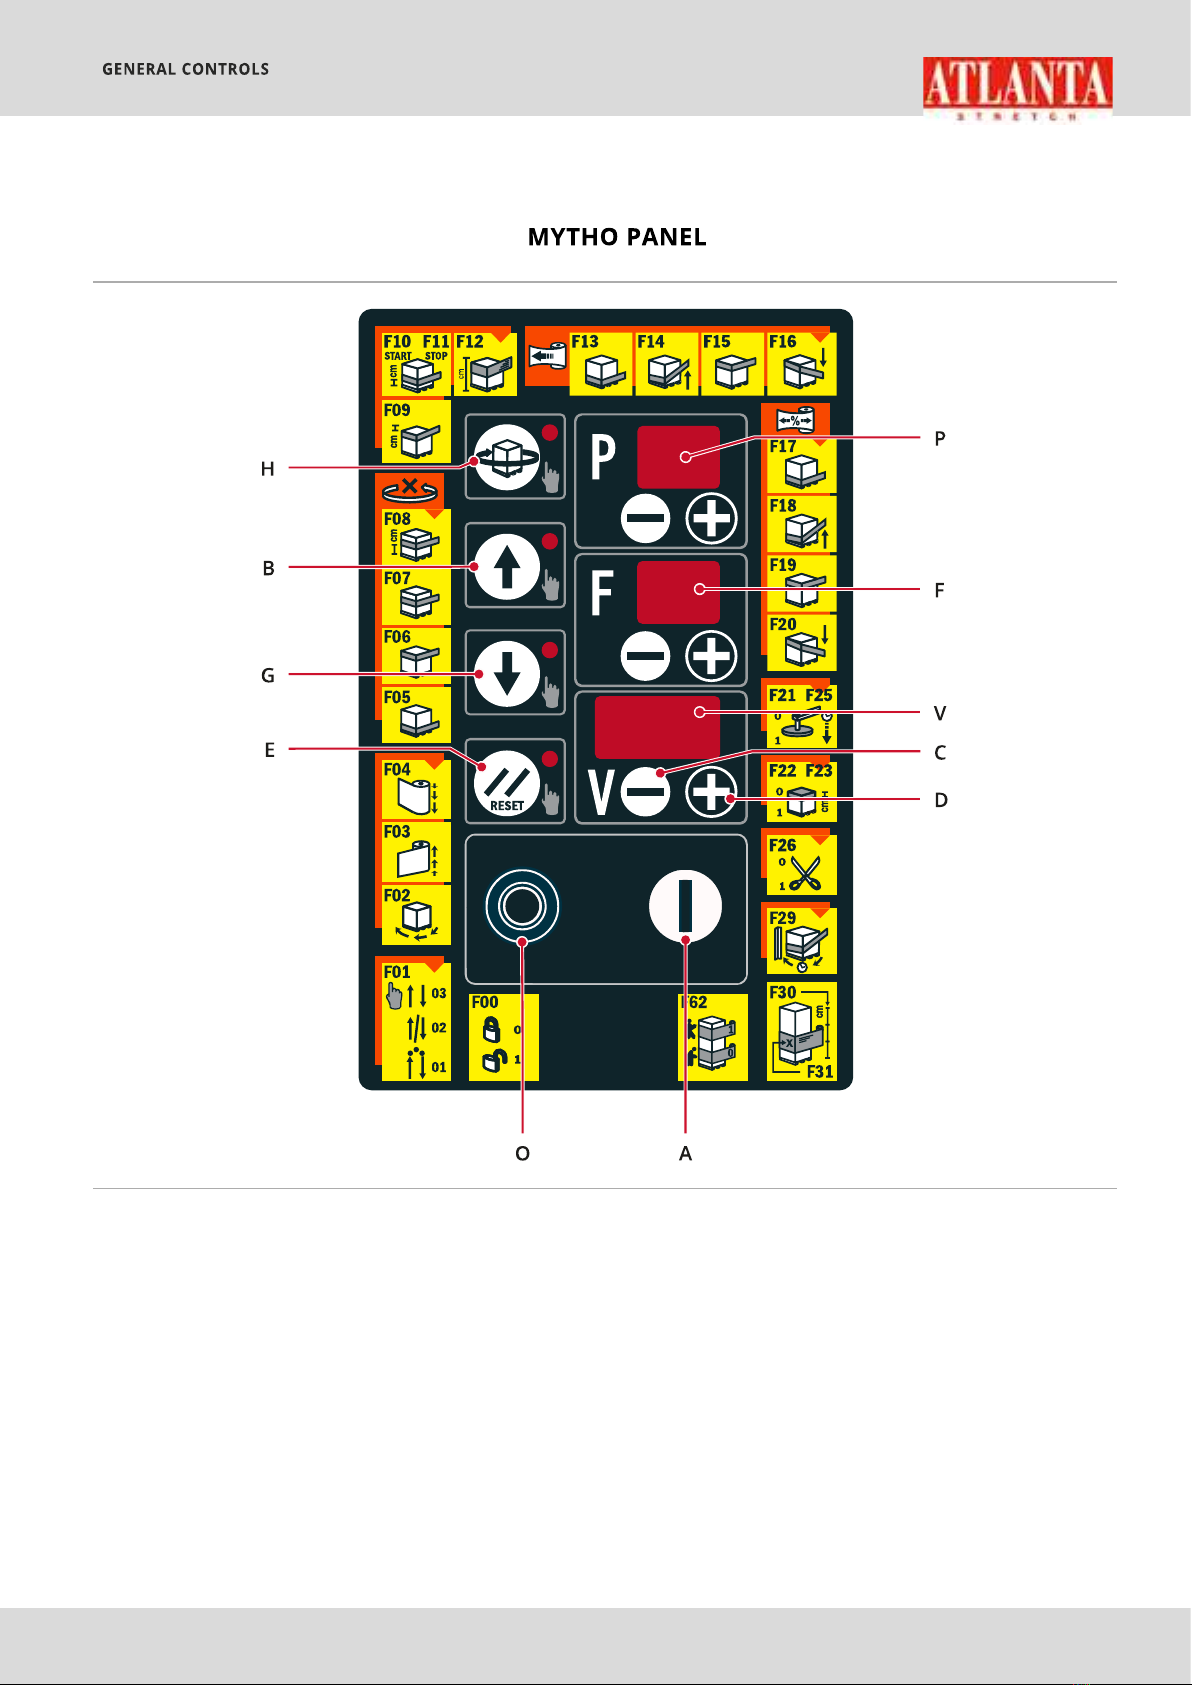
Programmed cycle START button.
B
Carriage up manual retention button.
If pressed together with
(E)
, the presser automatically rises to
the up cycle start position.
C
Decrease values button.
D
Increase values button.
E
Alarm reset
(fast pressure – less than 2 second);
Saving parameters (press until the LED flashes - more than 3
seconds);
When pressed along with the
STOP
button, it stops and resets
the cycle (the display
(V)
shows
INI
to show the cancellation).
F
2-digit display indicating the functions (parameters) of the
selected programme;
During the cycle it shows the current operating status;
CF
on the display
(V)
at the end of the cycle means the film is
depleted;
AA
on the display
(V)
means there is an alarm on the machine.
G
Carriage down manual retention button (if pressed together
with
(E)
, the carriage automatically descends to the low cycle
start position).
H
Rotating arm manual, hold down to stop the rotating arm in
phase (if pressed together with “E” the table automatically turns
to the phase position).
O STOP
cycle pause button, the rotating arm decelerates and
stops, the cycle can be resumed from the same point.
P
2-digit display showing the selected programme;
During the cycle it shows an animation of the rotation of the
platform;
NOTE
: the flashing display indicates that a parameter has been
changed).
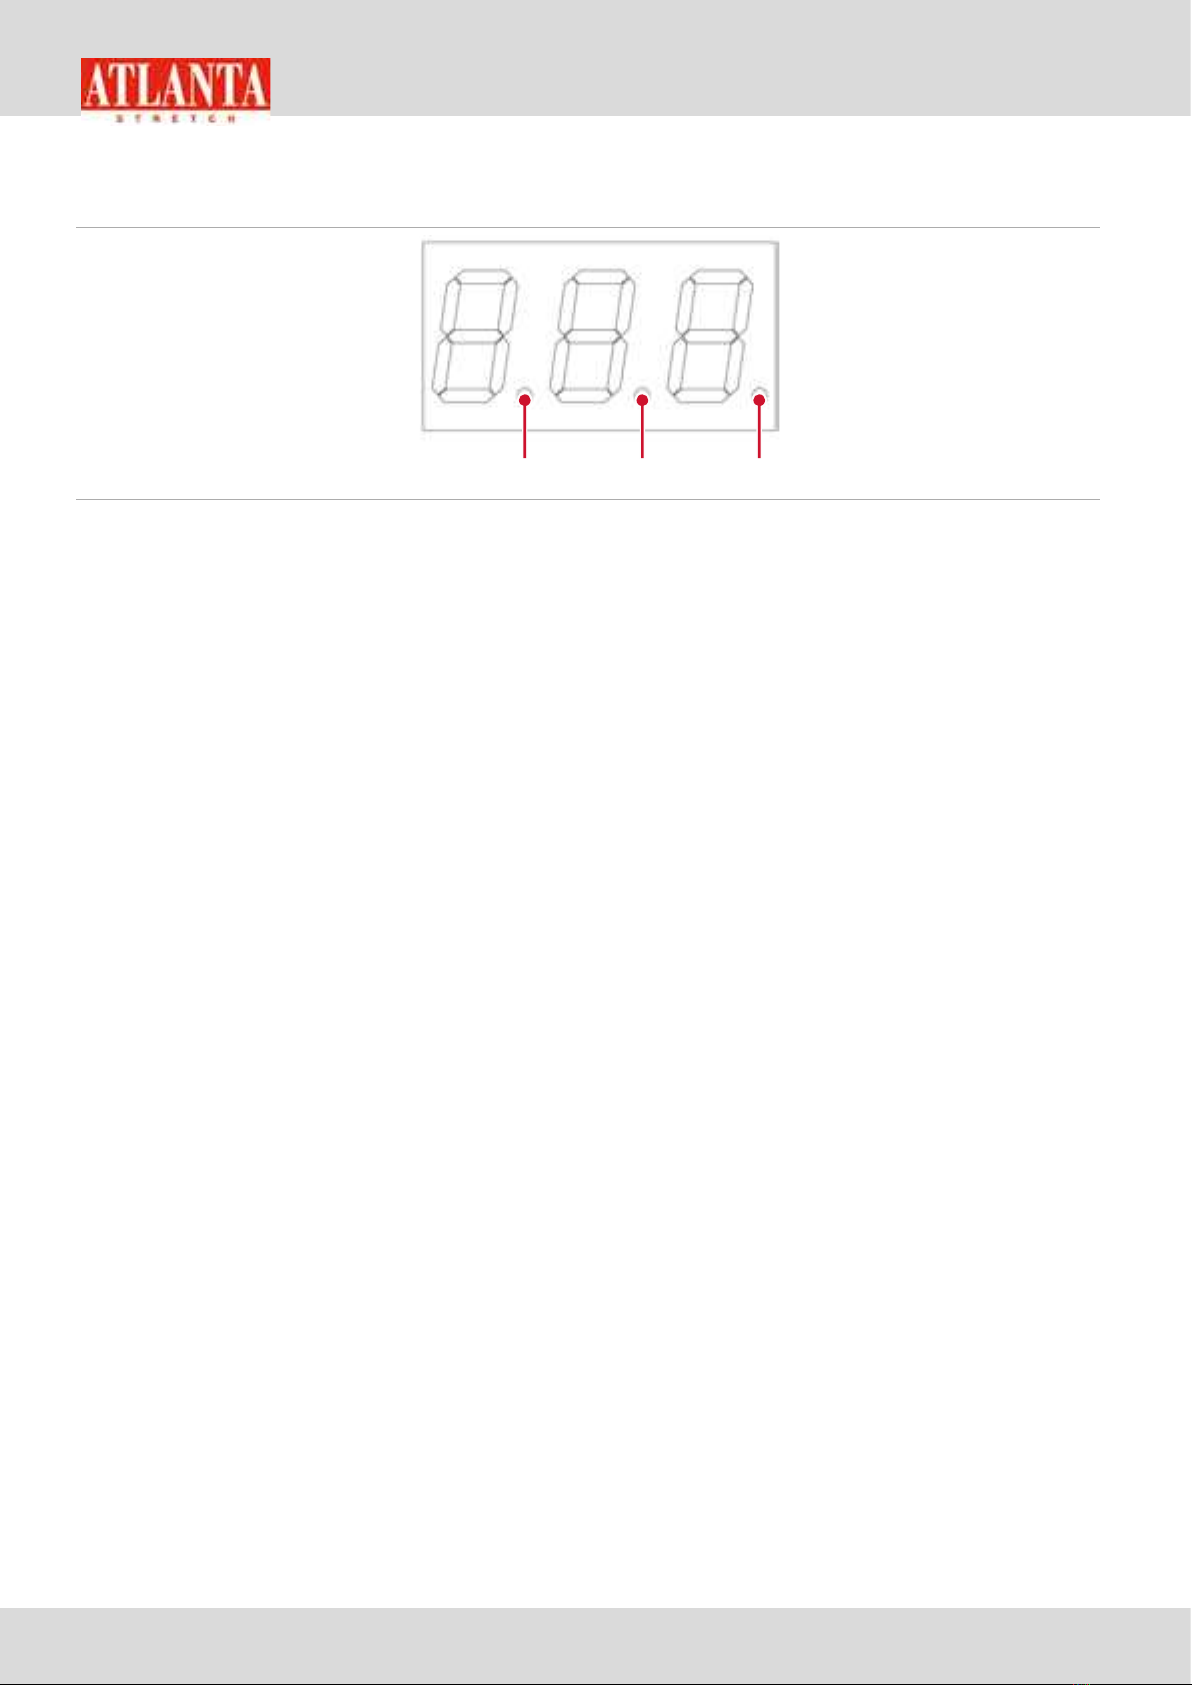
V
3-digit display indicating the value of the displayed function;
During the cycle or manually moving the film carriage, it indicates
the current height;
The central and left points are decimal points for the values.
When the right point is lit, the
V+
and
V-
the parameter values cannot be changed.