manuals.online logo
Brands
  1. Home
  2. •
  3. Brands
  4. •
  5. Atlas Copco
  6. •
  7. Power Screwdriver
  8. •
  9. Atlas Copco LUM22 SR4 Instruction sheet

Atlas Copco LUM22 SR4 Instruction sheet

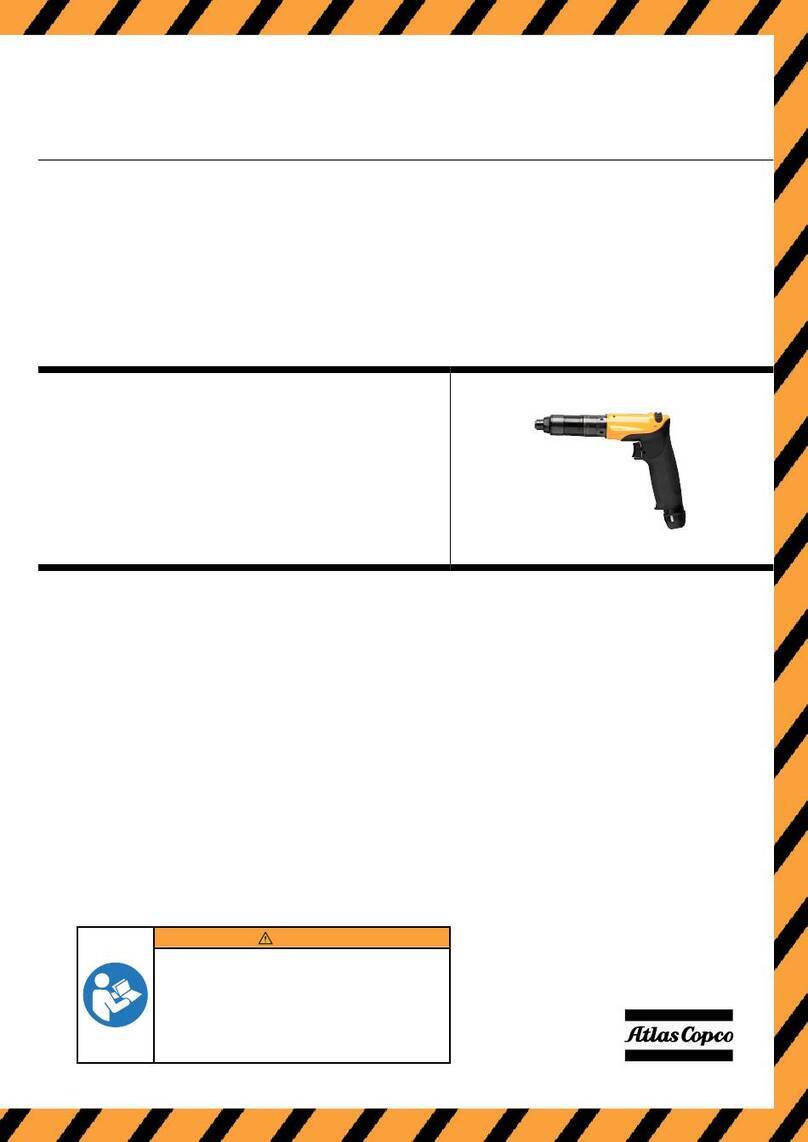
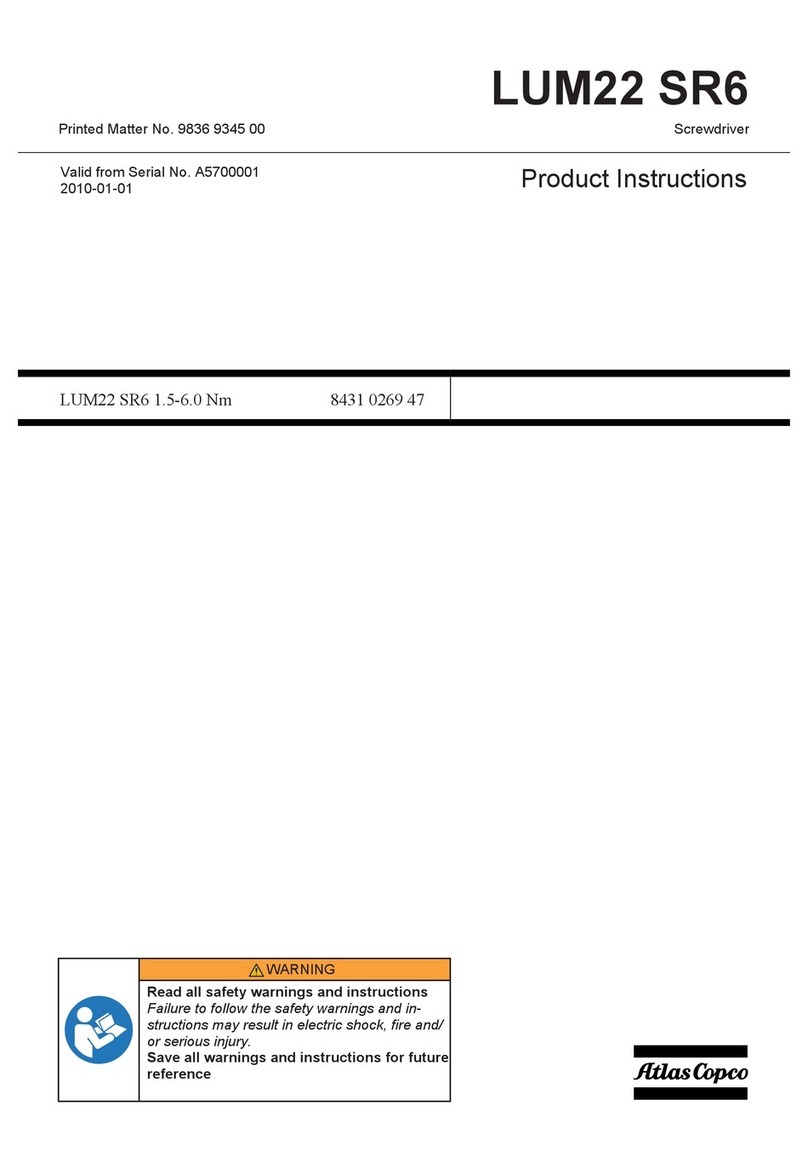
LUM22 SR4
Printed Matter No. 9836 9344 00 Screwdriver
Valid from Serial No. A5700001
2010-01-01 Product Instructions
LUM22 SR4 0.6-4.0 Nm 8431 0269 46
WARNING
Read all safety warnings and instructions
Failure to follow the safety warnings and in-
structions may result in electric shock, fire and/
or serious injury.
Save all warnings and instructions for future
reference
2© Atlas Copco Industrial Technique AB - 9836934400
Table of Contents
EN Product Instructions.......................................................................... 3
FR Instructions sur le produit .............................................................. 17
DE Produktanweisungen...................................................................... 27
ES Instrucciones del producto ............................................................ 38
PT Instruções do produto .................................................................... 47
IT Istruzioni sul prodotto..................................................................... 56
NL Productinstructies ........................................................................... 65
DA Produktanvisninger......................................................................... 74
NO Produktanvisninger......................................................................... 83
FI Tuoteohjeet...................................................................................... 92
SV Produktanvisningar....................................................................... 101
RU Инструкции по изделию ............................................................ 110
PL Instrukcje produktu ....................................................................... 119
SK Produktové pokyny....................................................................... 129
CS Pokyny týkající se produktu ........................................................ 138
HU Termékutasítások ......................................................................... 148
ZH 产品说明......................................................................................... 157
LUM22 SR4 EN Safety and operating instructions
© Atlas Copco Industrial Technique AB - 9836 934400 00 3
Safety and operating instructions
Safety instructions
Warning
• Make sure you are familiar with the operating instructions before you use
this machine.
• Before making any adjustments (e.g. setting the torque, changing bits) dis-
connect the machine from the compressed air line.
• The machine, together with any attachments and accessories, must never be
used for anything other than the designed purpose.
• Use power sockets only. For safe and economic use - replace worn sockets.
• Check that the power socket is properly fastened - replace the square drive
retainer when necessary.
• Keep your fingers and loose articles (cloths, hair) away from the outgoing
shaft.
• Do not use gloves.
• Hold the machine correctly and be aware of the reaction force.
• Check the position of the reversing valve before start.
• Check the correct clutch function after any adjustment. Decreased air pres-
sure may produce that the clutch not disconnect properly.
• Check that the suspension yoke is in good condition and correctly fastened.
• Use support handle or torque arm at high torque settings or stressed working
positions.
General information
EC DECLARATION OF CONFORMITY
We, Atlas Copco Industrial Technique AB, S-105 23 STOCKHOLM, SWE-
DEN declare that the product (with name, type and serial number, see front
page) is in conformity with the following Directive(s):
2006/42/EC
Harmonised standards applied:
ISO 11148-6
Technical file available from:
Quality Manager, Atlas Copco Industrial Technique, Stockholm, Sweden
Stockholm, 1 July 2013
Tobias Hahn, Managing Director
Signature of issuer
Safety and operating instructions EN LUM22 SR4
4© Atlas Copco Industrial Technique AB - 9836 934400 00
Installation
Installation of vibrating tools
It is recommended that a minimum length of 300 mm of flexible hose for com-
pressed air is inserted between a vibrating tool and the quick-action coupling.
Air quality
• For optimum performance and maximum machine life we recommend the
use of compressed air with a maximum dew point of +10°C. We also rec-
ommend the installation of an Atlas Copco refrigeration-type air dryer.
• Use a separate air filter of type Atlas Copco FIL. This filter removes solid
particles larger than 15 microns and also removes more than 90 % of liquid
water. The filter must be installed as close as possible to the machine/equip-
ment and prior to any other air preparation unit such as REG or DIM (please
see Air Line Accessories in our main catalogue). Blow out the hose before
connecting.
Models which need air lubrication:
• The compressed air must contain a small quantity of oil.
We strongly recommend that you install an Atlas Copco oil lubricator
(DIM). This should be set according to air consumption by the air line tool
according to the following formula:
L = Air consumption (litre/s)
D = Number of drops per min (1 drop = 15 mm3)
L* 0.2 = D
this applies to the use of long work cycle air line tools. A single point lubri-
cator type Atlas Copco Dosol can also be used for tools with short running
cycles.
Information about Dosol settings may be found under Air Line Accessories
in our main catalogue.
Lubrication-free models:
• In the case of lubrication-free tools it is up to the customer to decide on the
peripheral equipment to be used. However, it is no disadvantage if the com-
pressed air contains a small quantity of oil e.g. supplied from a fog lubrica-
tor (DIM) or Dosol system.
•Note – This does not apply to turbine tools, which should be kept oil free.
Compressed air connection
• The machine is designed for a working pressure of 6–7 bar = 600–700 kPa =
87–102 psi.
• Blow out the hose before connecting.
Installation proposal
Choosing the correct couplings, hose and clamps can be a troublesome digging
into details. To save your time and to ensure correct capacity of the airline in-
stallation, from the tapping point to the tool, we offer you an installation pro-
posal.
LUM22 SR4 EN Safety and operating instructions
© Atlas Copco Industrial Technique AB - 9836 934400 00 5
For more information please read, Atlas Copco Industrial Power Tools cata-
logue Ordering No. 9837 3000 01.
Handling
Operating instructions
See figure in Service instructions
Tightening torque
For accurate operation and safety, the tightening torque of the screwdriver must
be adjuisted correctly in relation to the screw joint. Check the torque specifica-
tion for the actual joint.
The tightening torque is adjusted by altering the tension of the clutch spring.
Turn the protection ring until the hole in the clutch housing is free. Then turn
the out going spindle until you can see the keyhole in the adjustment washer.
Turn the adjustment key clockwise to decrease and anticlockwise to increase
the torque. After the adjustment, turn the protective ring back again.
Verification of tightening torque
Atlas Copco Torque Analyser, ACTA 3000, plus an appropriately-sized in-line
transducer, IRTT together with the available test joints are recommended equip-
ment.
Torque range of the clutch springs :
Each clutch spring gives a certain torque range. Don’t adjust the torque
over the maximum recommendation as that might result in improper func-
tion and faster wear of the clutch.
The torque range of each spring is easily identified by it’s colour.
Maintenance
For maximum performance
At tough working conditions – soft joints and max. setting – lubrication of the
air is recommended.
With extreme dry air the service life of vanes and machine performance might
be reduced. A daily supply of 0.1 – 0.2 ml oil into the machine inlet will im-
prove the machine performance. Alternatively consider an automatic lubricator
device, Atlas Copco oil fog lubricator DIM, or single point lubricator DOS,
which will improve the machine performance.
Safety and operating instructions EN LUM22 SR4
6© Atlas Copco Industrial Technique AB - 9836 934400 00
Rust protection and internal cleaning
Water in the compressed air, dust and wear particles cause rust and sticking of
vanes, valves etc. An air filter should be installed close to the machine (se 'Air
quality'). Before longer standstills, flush with oil (some drops) into the air inlet,
run the machine for 5-10 seconds when absorbing the oil in a cloth.
Service instructions
Overhaul and preventive maintenance is recommended at regular intervals once
per year or after maximum 250.000 tightening depending on which occurs
sooner. More frequent overhaul may be needed, if used at high torque and long
tightening times. If the machine is not working properly, it should immediately
be taken away for inspection.
The strainer at the air inlet and the exhaust silencer should be cleaned fre-
quently or replaced in order to prevent clogging, which decreases the capacity.
At the overhauls, all parts should be cleaned accurately and defective or worn
parts (i.e. O-rings, vanes) should be replaced.
Disassembling /assembling
It is important that the machines threaded connections are tightened properly;
i.e. in accordance with the specifications on the exploded views.
Cleaning
Clean all parts thoroughly in white spirit or similar cleaning agent. To prevent
clogging and decreased power, it could be necessary to clean the strainer (if
used) and the exhaust filter between the overhauls.
Inspection
After the cleaning, inspect all parts. Damaged and worn parts should be re-
placed.
Lubrication
Lubricate specially gears, valve and clutch with grease containing molybdenum
disulphide (e.g. Molykote BR2 Plus). Lubricate o-rings and threaded connec-
tions with grease before assembling.
Spare parts
Parts without ordering number are for technical reasons not delivered sepa-
rately. The use of other genuine Atlas Copco replacement parts may result in
decreased tool performance and increased maintenance and may, at the com-
pany option, invalidate all warranties.
Grease guide Screwdrivers
Brand
General purpose
Bearings Air Lubrication
BP Energrease LS-EP2 Energol E46
Castrol Spheerol EP L2
Esso Beacon EP2 Arox EP46
Q8 Rembrandt EP2 Chopin 46
Mobil Mobilegrease XHP 222 Almo oil 525
LUM22 SR4 EN Safety and operating instructions
© Atlas Copco Industrial Technique AB - 9836 934400 00 7
Brand
General purpose
Bearings Air Lubrication
Shell Alvania EP2 Tonna R32
Texaco / Preem Multifak EP2 Aries 32
Brand Clutch / Gears Angle gears
Molycote Longterm 2 Plus
Lub. engineers LE 3752*
* except, see Clutch in exploded views
Reporting, RE - signal
Reporting (RE) machines supply an air signal that can be connected to a moni-
toring instrument that counts the number of approved tightening and detects
premature shut-off and rehits and other irregularities.
Useful information
Log in to Atlas Copco www.atlascopco.com
You can find information concerning our products, accessories, spare parts and
published matters on our website.
Ergonomic guidelines
Consider your workstation as you read through this list of general ergonomic
guidelines and see if you can identify areas for improvement in posture, compo-
nent placement, or work environment.
• Take frequent breaks and change work positions frequently.
• Adapt the workstation area to your needs and the work task.
• Adjust for convenient reach range by determining where parts or tools
should be located to avoid static load.
• Use workstation equipment such as tables and chairs appropriate for the
work task.
• Avoid work positions above shoulder level or with static holding during as-
sembly operations.
• When working above shoulder level, reduce the load on the static mus-
cles by reducing the weight of the tool, using for example torque arms,
hose reels or weight balancers. You can also reduce the load on the static
muscles by holding the tool close to the body.
• Make sure to take frequent breaks.
• Avoid extreme arm or wrist postures, particularly for operations requir-
ing a degree of force.
• Adjust for convenient field of vision by minimizing movement of the eyes
and head during the work task.
• Use the appropriate lighting for the work task.
• Select the appropriate tool for the work task.
Safety and operating instructions EN LUM22 SR4
8© Atlas Copco Industrial Technique AB - 9836 934400 00
• Use ear protection equipment in noisy environments.
• Use high-quality inserted tools or consumables to minimize exposure to ex-
cessive levels of vibration.
• Minimize exposure to reaction forces.
• When cutting:
A cut-off wheel can get stuck if the wheel is either bent or if it is not
guided properly. Make sure to use the correct flanges for cut-off wheels
and avoid bending the wheel during cut-off operation.
• When drilling:
The drill might stall when the drill bit breaks through. Makes sure you
use support handles if the stall torque is too high. The safety standard
ISO11148 part 3 recommends using something to absorb the reaction
torque above 10 Nm for pistol grip tools and 4 Nm for straight tools.
• When using direct-driven screw or nutrunners:
Reaction forces depend on tool setting and joint characteristics. The abil-
ity to bear reaction forces depends on the operator’s strength and pos-
ture. Adapt the torque setting to the operator's strength and posture and
use a torque arm or reaction bar if the torque is too high.
• Use dust extraction system or mouth protection mask in dusty environments.
Country of origin
Please refer to the information on the product label.
Spare parts
Parts without ordering number are not delivered separately for technical rea-
sons.
The use of other than genuine Atlas Copco replacement parts may result in de-
creased tool performance and increased maintenance and may, at the company
option, invalidate all warranties.
Warranty
Contact the Atlas Copco sales representative within your area to claim a prod-
uct. Warranty will only be approved if the product has been installed, operated
and overhauled according to the Operating Instructions.
Please also see the delivery conditions applied by the local Atlas Copco com-
pany.
ServAid
ServAid is a utility for providing updated product information concerning:
- Safety instructions
- Installation, Operation and Service instructions
- Exploded views
ServAid facilitates the ordering process of spare parts, service tools and acces-
sories for the product of your choice. It is continuously updated with informa-
tion of new and redesigned products.
LUM22 SR4 EN Safety and operating instructions
© Atlas Copco Industrial Technique AB - 9836 934400 00 9
You can use ServAid to present content in a specific language, provided that
translations are available, and to display information about obsolete products.
ServAid offers an advanced search functionality of our entire product range.
ServAid is available on DVD and on the web:
http://servaidweb.atlascopco.com
For further information contact your Atlas Copco sales representative or e-mail
us at:
[email protected]
Safety Data Sheets MSDS/SDS
The safety data sheets describes chemical products sold by Atlas Copco.
For more information, consult the website
http://www.atlascopco.com/.
Choose Products - Safety Data Sheets, and follow the instructions on the
page.
Technical data EN LUM22 SR4
10 © Atlas Copco Industrial Technique AB - 9836 934400 00
Technical data
Technical data
Noise and vibration emission
Noise (in accordance with ISO15744) dBA
Sound pressure level 78
Sound power level -
Uncertainty 3
Vibration total value, valid from 2010
(3-axes value in accordance with ISO28927-2) m/s2
Vibration value <2.5
Uncertainty -
Noise and Vibration Declaration Statement
These declared values were obtained by laboratory type testing in accordance
with the stated standards and are suitable for comparison with the declared val-
ues of other tools tested in accordance with the same standards. These declared
values are not adequate for use in risk assessments and values measured in indi-
vidual work places may be higher. The actual exposure values and risk of harm
experienced by an individual user are unique and depend upon the way the user
works, the workpiece and the workstation design, as well upon the exposure
time and the physical condition of the user.
We, Atlas Copco Industrial Technique AB, cannot be held liable for the con-
sequences of using the declared values, instead of values reflecting the actual
exposure, in an individual risk assessment in a work place situation over which
we have no control.
This tool may cause hand-arm vibration syndrome if its use is not adequately
managed. An EU guide to managing hand-arm vibration can be found by ac-
cessing http://www.pneurop.eu/index.php and selecting 'Tools' then 'Legisla-
tion'.
We recommend a programme of health surveillance to detect early symptoms
which may relate to noise or vibration exposure, so that management proce-
dures can be modified to help prevent future impairment.
LUM22 SR4 EN Service instructions
© Atlas Copco Industrial Technique AB - 9836 934400 00 11
Service instructions
General
Tightening of threaded connections
The tightening torques indicated in the exploded views list are established to
achieve the correct clamping force and preventing the parts from coming loose.
At service these parts must be able to open up without being destroyed. In spe-
cial circumstances (depending on application and usage) the parts may however
come loose after some time of operation. In such cases the torque could be in-
creased 10-20% and if necessary some type of low or medium threadlocking
fluid could also be applied.
Example
Operating Instructions
Torque range of the clutch spring
Free speed / Air consumption
r / min l / s
1350 7.5
Service instructions EN LUM22 SR4
12 © Atlas Copco Industrial Technique AB - 9836 934400 00
RE-signal
Air pressure monitoring, RE-signal S1
Reporting pneumatic assembly tools provide a pneumatic signal that indicates
which part of the tightening cycle the tool has reached, by means of variations
in air pressure.
In the RE-Controller box timers are triggered when certain pressure levels are
reached.
Pressure level 1 (P1) starts a timer that checks that the tightening cycle is not
too short.
Pressure level 2 (P2) starts a timer that checks the time taken from when the
clutch has been released to when the operator releases the trigger to ensure that
it is not too short.
The controller measures the differential pressure over the motor.
It should be noted that the system does not measure torque! Regular check of
installed torque/torque output of the tool must be done separately.
The RE-Controller checks the air-line pressure. One of the most common prob-
lems in air-line systems is pressure variations. If the pressure drops too much
the tool might stall and/or the torque will not be correct. The RE-Controller will
give a signal if the pressure drops too much.
The RE-Controller alerts the operator when it detects:
• Missed fasteners
• Premature tool shut-off
• Stripped threads
• Cross-threading
• Rehits
• Drop in air supply
The air pressure inside the tool is measured through a small hose (see Optional
accessories - RE-Signal kit) and converted into a digital signal. This signal is
processed in the RE-Controller. The RE-Controller gives instant visual and au-
dio feedback to the operator on whether the tightening was OK or not OK.
For further information, please see leaflet 9833 1358 01.
LUM22 SR4 EN Service instructions
© Atlas Copco Industrial Technique AB - 9836 934400 00 13
RE-Controller
Testing of tightening torque
Torque and angle testing instrument
ACTA* 3000/ 4000. For further informatiom, please see our main catalogue or
separate leaflet.
Testjoint and Transducer
Select testjoint and transducers according to minimum and maximum torque of
your tool.
Lubricate screw and elastic washers with Molykote BR2 Plus.
Soft joints
Torque range
(Nm)
Test joint
Ordering No.
Screw size Screw quality Spare screw
Ordering No.
0.2 - 0.6 4145 0958 78 M3x20 12.9 buy locally
0.6 - 2.0 4145 0959 80 M4x30 12.9 0211 1177 00
1.5 - 4.0 4145 0959 81 M6x35 12.9 0211 1251 00
3.0 - 7.0 4145 0959 82 M6x35 12.9 0211 1251 00
5.5 - 10.0 4145 0959 83 M6x35 12.9 0211 1251 00
10.0 - 25.0 4145 0959 84 M8x35 12.9 0211 1327 00
Hard joints
Service instructions EN LUM22 SR4
14 © Atlas Copco Industrial Technique AB - 9836 934400 00
Torque range
(Nm)
Test joint
Ordering No.
Screw size Screw quality Spare screw
Ordering No.
0.25 - 0.6 4145 0958 87 M3x30 12.9 buy locally
0.5 - 1.5 4145 0958 80 M4x50 12.9 0211 1181 00
1.5 - 3.0 4145 0958 81 M4x30 12.9 0211 1177 00
3.0 - 6.0 4145 0958 82 M6x60 12.9 0211 1256 00
6.0 - 9.0 4145 0958 83 M6x35 12.9 0211 1251 00
9.0 - 25.0 4145 0958 84 M8x60 12.9 0211 1332 00
In-line torque transducers - Torque/angle models
Model Drive Hex
(inch)
Drive Square
(inch)
Rated capacity
(Nm) (ft lb)
Ordering No.
IRTT 1A-I06 ½ 1 0.8 8092 1130 96
IRTT 2A‑I06 ½ 2 1.5 8092 1182 01
IRTT 5A‑I06 ¼ 5 4 8092 1182 06
IRTT 5A‑06 ¼ 5 4 8092 1182 08
In-line torque transducers - Torque models
Model Drive Hex
(inch)
Drive Square
(inch)
Rated capacity
(Nm) .ft lb)
Ordering No.
IRTT 5-I06 ¼ 5 4 8092 1129 05
IRTT 20-I06 ¼ 20 15 8092 1129 10
IRTT 20-06 ¼ 20 15 8092 1129 15
IRTT 25-10 3/8 25 18 8092 1129 20
IRTT 75-10 3/8 75 55 8092 1129 25
IRTT 180-13 ½ 180 133 8092 1129 30
IRTT 500-20 ¾ 500 369 8092 1129 35
IRTT 750-25 1 750 553 8092 1129 40
IRTT 1400-25 1 1400 1033 8092 1129 45
In-line torque transducers - Torque/angle models
Model Drive Hex
(inch)
Drive Square
(inch)
Rated capacity
(Nm) (ft lb)
Ordering No.
IRTT 2A-I06 ½ 2 1.5 8092 1130 01
IRTT 5A-I06 ¼ 5 4 8092 1130 06
IRTT 20A-I06 ¼ 20 15 8092 1130 11
IRTT 20A-06 ¼ 20 15 8092 1130 16
IRTT 25A-10 3/8 25 18 8092 1130 21
IRTT 75A-10 3/8 75 55 8092 1130 26
IRTT 180A-13 ½ 180 133 8092 1130 31
IRTT 500A-20 ¾ 500 369 8092 1130 36
IRTT 750A-25 1 750 553 8092 1130 41
IRTT 1400A-25 1 1400 1033 8092 1130 46
LUM22 SR4 EN Service instructions
© Atlas Copco Industrial Technique AB - 9836 934400 00 15
Model Drive Hex
(inch)
Drive Square
(inch)
Rated capacity
(Nm) (ft lb)
Ordering No.
IRTT 3000A-38 1½ 3000 3000 8092 1130 51
Instructions for Vane motor
Dismantling of Motor
Inspection of motor parts
•(R) To be replaced (from Service kit Ordering No. 4081 0288 90) at every
overhaul.
•End plates: Check that they not are scored or scratched. If these are shal-
low, polish with fine grinding paste against a face plate. Clean thoroughly.
•Rotor: Check that the end faces do not have any marks or burrs. Check that
the splines are not worn or cracked.
•Cylinder: Check that the bore is not scored or scratched. If these are shal-
low, polish with a fine grinding cloth.
Service instructions EN LUM22 SR4
16 © Atlas Copco Industrial Technique AB - 9836 934400 00
Assembly of Motor
Lubrication
Lubrication guide
Brand
General purpose/
Bearings
Grease
Clutch/ Gears
Grease
Angle-/ Off set
gears
Grease
Air-/ Motor Lubri-
cation
Oil
BP Energrease LS-EP2 Energol E46
Castrol Spheerol EP L2
Esso Beacon EP2 Arox EP46
Q8 Rembrandt EP2 Chopin 46
Mobil Mobilegrease XHP
222
Almo oil 525
Shell Alvania EP2 Tonna R32
Texaco Multifak EP2 Aries 32
Molycote BR2 Plus Longtterm 2Plus
Lubrication of motor parts
Note
• No grease is needed for protected Ball bearings (ex. 2Z).
• Where oil is needed, apply only a thin layer.
LUM22 SR4 FR Consignes d'utilisation et de sécurité
© Atlas Copco Industrial Technique AB - 9836 934400 00 17
Consignes d'utilisation et de sécurité
Consignes de sécurité
Attention
• Familiarisez-vous avec les instructions d’emploi avant de mettre l’outil en
service.
• Avant de procéder à un réglage quelconque (notamment le réglage du
couple ou le changement d’embouts), débranchez la conduite d’air compri-
mé de l’outil.
• L’outil et ses accessoires sont strictement réservés aux utilisations prévues
par son fabricant.
• Utilisez exclusivement des douilles. Pour une utilisation sûre et écono-
mique, remplacez toujours les douilles usagées.
• Assurez-vous que la douille est correctement fixée et si nécessaire, rempla-
cez le support du carré d’entraînement.
• Eloignez les doigts et autres parties amples (telles que les vêtements et les
cheveux) de l’axe de sortie.
• Ne pas utiliser de gants.
• Tenez correctement l’outil et faites attention à la force de réaction.
• Avant la mise en marche, vérifiez la position de la soupape de réversibilité.
• Après chaque réglage, vérifiez si la fonction d’embrayage est correcte. La
diminution de la pression d’air peut entraver la déconnexion de l’em-
brayage.
• Assurez-vous que l’anneau de suspension est en bon état et correctement
fixé.
• Quand le couple est élevé ou que les positions de travail sont contraignantes,
utilisez la poignée latérale ou le bras de couple.
Informations générales
DÉCLARATION DE CONFORMITÉ CE
Nous, Atlas Copco Industrial Technique AB, S-105 23 STOCKHOLM,
SUÈDE, déclarons que le produit (dont le nom, le type et le numéro de série fi-
gurent en première page) est en conformité avec la ou les directives suivantes:
2006/42/EC
Normes harmonisées appliquées:
ISO 11148-6
Dossier technique disponible auprès de:
Directeur de la qualité, Atlas Copco Industrial Technique, Stockholm, Suède.
Fait à Stockholm, le 1er juillet 2013
Tobias Hahn, Directeur général
Signature du déclarant
Consignes d'utilisation et de sécurité FR LUM22 SR4
18 © Atlas Copco Industrial Technique AB - 9836 934400 00
Installation
Installation d'outils vibrants
Il est recommandé d'insérer une longueur minimale de 300mm de tuyau souple
pour air comprimé entre un outil vibrant et le raccord rapide.
Qualité de l'air
• Pour assurer à la machine des performances optimums et une durée de vie
maximum, nous recommandons d'utiliser de l'air comprimé avec un point de
rosée maximum de +10°C. Nous recommandons également d'installer un
déshydrateur d'air Atlas Copco à réfrigération.
• Utilisez un filtre à air indépendant de type Atlas Copco FIL. Ce filtre retient
les particules solides supérieures à 15 microns et plus de 90 % d'eau sous
forme liquide. Il doit être placé aussi prêt que possible de la machine ou de
l'équipement et avant toute autre unité de préparation de l'air telles que des
unités REG ou DIM (voir "Accessoires de distribution d'air" dans notre ca-
talogue général). Mettez le flexible à l'air libre avant de le raccorder.
Modèles nécessitant une lubrification de l'air :
• L'air comprimé doit contenir une petite quantité d'huile.
Nous recommandons fortement l'installation d'un graisseur à brouillard
d'huile Atlas Copco (DIM). Celui-ci devra être réglé en fonction de la
consommation d'air de l'outil pneumatique conformément à la formule sui-
vante :
L = Consommation d’air (litre/s).
(voir notre documentation commerciale).
D = Nombre de gouttes par minute (1 goutte = 15 mm3)
L* 0.2 = D
cette formule s'appliquant aux outils pneumatiques à cycle de fonctionne-
ment long. Avec des outils à cycle de fonctionnement court, vous pouvez
également utiliser un lubrificateur à un seul point type Atlas Copco Dosol.
Vous trouverez des informations sur le réglage du Dosol dans notre cata-
logue général, sous le chapitre "Accessoires de distribution d'air".
Modèles sans lubrification :
• Pour les outils n'exigeant pas de lubrification, le client a le choix de l'équi-
pement périphérique à utiliser. Néanmoins, il n'y a aucun inconvénient à ce
que l'air comprimé contienne une petite quantité d'huile fournie par un équi-
pement tel qu'un graisseur à brouillard d'huile (DIM) ou un système Dosol.
•Remarque – ceci ne concerne pas les outils à turbine qui doivent rester
exempts d'huile.
Raccordement de l'air comprimé
• L'outil est conçu pour une pression d'utilisation de 6 à 7 bar = 600 – 700 kPa
= 6 – 7 kg/cm2.
• Soufflez de l’air dans le flexible avant de le connecter.
LUM22 SR4 FR Consignes d'utilisation et de sécurité
© Atlas Copco Industrial Technique AB - 9836 934400 00 19
Solution d'installation proposée
Choisir le raccord adapté, le tuyau et les colliers peut devenir un sérieux soucis
dans le détail. Pour économiser votre temps et garantir une capacité de débit de
votre installation d’air comprimé, de la ligne principale jusqu’à l’outil, nous
vous proposons une installation adaptée à chaque outil.
Pour plus d'information, veuillez vous reporter au catalogue Atlas Copco Indus-
trial Power Tools réf. 9837 3000 01.
Administration
Instructions d’utilisation
Consultez la figure des instructions de service.
Couple de serrage
Pour garantir la sécurité et le bon fonctionnement de la visseuse, ajustez correc-
tement le couple de serrage en fonction du joint de la vis. Vérifiez les spécifica-
tions de couple du joint concerné.
Vous ajustez le couple de serrage en modifiant la tension du ressort d’em-
brayage. Tournez la bague de protection jusqu’à ce que l’orifice du logement de
l’embrayage soit dégagé. Ensuite, tournez la broche de sortie jusqu’à ce que
l’orifice de la clé soit visible sur la rondelle de réglage. Tournez la clé de ré-
glage vers la droite pour diminuer le couple et vers la gauche pour l’augmenter.
Une fois le réglage terminé, tournez la bague de protection dans le sens inverse.
Vérification du couple de serrage
Nous vous recommandons d’utiliser l’Analyseur de couple Atlas Copco, ACTA
3000, ainsi qu’un transducteur en ligne de taille appropriée (IRTT) avec les
joints de test disponibles.
Plage de couples des ressorts d’embrayage :
Chaque ressort d’embrayage fournit une plage de couples spécifique. Ne ré-
glez pas le couple au-delà de la recommandation maximale sous peine d’al-
térer le bon fonctionnement de l’embrayage et de l’user prématurément.
La couleur de chaque ressort permet d’identifier aisément la plage de couples
de chacun d’eux.
Entretien
Pour obtenir un rendement maximum
Dans des conditions de travail rudes, joints mous et réglage maximum, nous
vous recommandons de lubrifier l’air.
Consignes d'utilisation et de sécurité FR LUM22 SR4
20 © Atlas Copco Industrial Technique AB - 9836 934400 00
De l’air extrêmement sec peut réduire la durée de vie des palettes et la puis-
sance de l’outil. Vous pouvez améliorer les performances de l’outil en ajoutant
quotidiennement une petite quantité d’huile (0,1 - 0,2 ml) dans l’admission ou
en utilisant un dispositif de lubrification automatique de type lubrificateur par
brouillard d’huile DIM Atlas Copco ou lubrificateur à point unique DOS.
Protection contre la rouille et nettoyage interne
L’eau de l’air comprimé, les poussières et autres particules dues à l’usure
peuvent entraîner la formation de corrosion et colmater les palettes, les sou-
papes, etc. Nous vous conseillons d’installer un filtre à air à proximité de l’outil
(voir “Qualité de l’air”). Avant d’entreposer l’outil pendant une période prolon-
gée, versez quelques gouttes d’huile dans l’admission d’air et faites tourner
l’outil pendant 5 à 10 secondes tout en épongeant l’huile à l’aide d’un chiffon.
Instructions de service
Nous vous conseillons de procéder régulièrement à la révision et l’entretien pré-
ventif de l’outil, notamment une fois par an ou après 250.000 serrages maxi-
mum, selon l’échéance la plus proche. Des révisions plus fréquentes peuvent
s’avérer nécessaires, quand l’outil est utilisé avec un couple élevé ou que les
durées de serrage sont importantes. Si l’outil ne fonctionne pas correctement, il
doit être immédiatement retiré du service et inspecté.
Le filtre de l’admission d’air et le silencieux doivent être nettoyés fréquemment
ou remplacés afin d’éviter tout colmatage susceptible de diminuer les capacités
de l’outil.
Lors de chaque révision, nettoyez convenablement toutes les pièces et rempla-
cez celles qui sont usées ou endommagées (notamment les joints toriques et les
palettes).
Démontage/montage
Il est important de serrer correctement les connexions filetées des outils, confor-
mément aux spécifications mentionnées dans les vues éclatées.
Nettoyage
Nettoyez complètement toutes les pièces avec du White spirit ou autre agent de
nettoyage similaire.
Pour éviter tout colmatage ou toute diminution de puissance, vous devez net-
toyer le filtre (le cas échéant) et le filtre d’échappement entre les entretiens.
Inspection
Après le nettoyage, vérifiez toutes les pièces. Remplacez toutes les pièces en-
dommagées ou usées.
Lubrification
Lubrifiez en particulier les engrenages, la soupape et l’embrayage avec de la
graisse contenant du bisulfite de molybdène (Molykote BR2 Plus, par exemple).
Lubrifiez les joints toriques et les connexions filetées avec de la graisse avant
de les remonter.
Pièces de rechange
Pour des raisons techniques, les pièces dépourvues de numéro de référence ainsi
que celles fournies dans les kits de service ne sont pas disponibles séparément.

This manual suits for next models

1

Other Atlas Copco Power Screwdriver manuals

Atlas Copco LUM22 SR6 Instruction sheet

Atlas Copco

Atlas Copco LUM22 SR6 Instruction sheet

Atlas Copco LUM12 SR Instruction sheet

Atlas Copco

Atlas Copco LUM12 SR Instruction sheet

Atlas Copco LTV009 R11-10 Instruction sheet

Atlas Copco

Atlas Copco LTV009 R11-10 Instruction sheet

Atlas Copco BCP BL-6-I06 Instruction sheet

Atlas Copco

Atlas Copco BCP BL-6-I06 Instruction sheet

Atlas Copco QMC41-150-I06 Instruction sheet

Atlas Copco

Atlas Copco QMC41-150-I06 Instruction sheet

Atlas Copco LUM12 PR Series Instruction sheet

Atlas Copco

Atlas Copco LUM12 PR Series Instruction sheet

Atlas Copco ETD M80ABL V2 Instruction sheet

Atlas Copco

Atlas Copco ETD M80ABL V2 Instruction sheet

Atlas Copco QMC21-25-HM4 Instruction sheet

Atlas Copco

Atlas Copco QMC21-25-HM4 Instruction sheet

Atlas Copco QMC21-05-HM4 Instruction sheet

Atlas Copco

Atlas Copco QMC21-05-HM4 Instruction sheet

Atlas Copco QMC41-250-I06 Instruction sheet

Atlas Copco

Atlas Copco QMC41-250-I06 Instruction sheet

Atlas Copco LUM22 HRX12-120 Instruction sheet

Atlas Copco

Atlas Copco LUM22 HRX12-120 Instruction sheet

Atlas Copco LUM22 HR12-RE Instruction sheet

Atlas Copco

Atlas Copco LUM22 HR12-RE Instruction sheet

Atlas Copco LTV009 R11-10-L-BL Instruction sheet

Atlas Copco

Atlas Copco LTV009 R11-10-L-BL Instruction sheet

Atlas Copco QMC41-50-I06 Instruction sheet

Atlas Copco

Atlas Copco QMC41-50-I06 Instruction sheet

Atlas Copco LUM22 HRX 3 Specifications

Atlas Copco

Atlas Copco LUM22 HRX 3 Specifications

Atlas Copco ZS 4 VSD User manual

Atlas Copco

Atlas Copco ZS 4 VSD User manual

Atlas Copco PRO S2452-P User manual

Atlas Copco

Atlas Copco PRO S2452-P User manual

Atlas Copco LUM12 HRX8-WH Instruction sheet

Atlas Copco

Atlas Copco LUM12 HRX8-WH Instruction sheet

Atlas Copco LUM12 HRX Instruction sheet
Atlas Copco

Atlas Copco LUM12 HRX Instruction sheet

Atlas Copco LUM12 HRF Instruction sheet

Atlas Copco

Atlas Copco LUM12 HRF Instruction sheet

Atlas Copco S2305 User manual

Atlas Copco

Atlas Copco S2305 User manual
Atlas Copco LUM22 HR14-K Instruction sheet

Atlas Copco

Atlas Copco LUM22 HR14-K Instruction sheet

Atlas Copco ETD M 200 ABL Instruction sheet

Atlas Copco

Atlas Copco ETD M 200 ABL Instruction sheet

Atlas Copco LUM12 HRX Instruction sheet

Atlas Copco

Atlas Copco LUM12 HRX Instruction sheet

Popular Power Screwdriver manuals by other brands

AEG 4935459427 instruction manual

AEG

AEG 4935459427 instruction manual

Black & Decker KC36LN Original instructions

Black & Decker

Black & Decker KC36LN Original instructions

Makita XRF01 instruction manual

Makita

Makita XRF01 instruction manual

Makita 6842 instruction manual

Makita

Makita 6842 instruction manual

WorkPro 19225000 instruction manual

WorkPro

WorkPro 19225000 instruction manual

Ferm ECONOMY CDM1089 Original instructions

Ferm

Ferm ECONOMY CDM1089 Original instructions

Toolson PRO-AS 12 Li Original operating instructions

Toolson

Toolson PRO-AS 12 Li Original operating instructions

Black & Decker HPL106 manual

Black & Decker

Black & Decker HPL106 manual

AEG BSS18B6 Original instructions

AEG

AEG BSS18B6 Original instructions

Makita XAD05 instruction manual

Makita

Makita XAD05 instruction manual

Berner BACIS-1 18V Original instructions

Berner

Berner BACIS-1 18V Original instructions

Parkside 100086 Operation and safety notes

Parkside

Parkside 100086 Operation and safety notes

Würth TBS 12-A operating instructions

Würth

Würth TBS 12-A operating instructions

Westfalia 83 65 80 Original instructions

Westfalia

Westfalia 83 65 80 Original instructions

Ronix 8500 manual

Ronix

Ronix 8500 manual

Fein ASCM 14 Repair instructions

Fein

Fein ASCM 14 Repair instructions

SATA 51085 user manual

SATA

SATA 51085 user manual

Kilews SKD-BN5019L Operation and maintenance manual

Kilews

Kilews SKD-BN5019L Operation and maintenance manual

manuals.online logo
manuals.online logoBrands
  • About & Mission
  • Contact us
  • Privacy Policy
  • Terms and Conditions

Copyright 2025 Manuals.Online. All Rights Reserved.