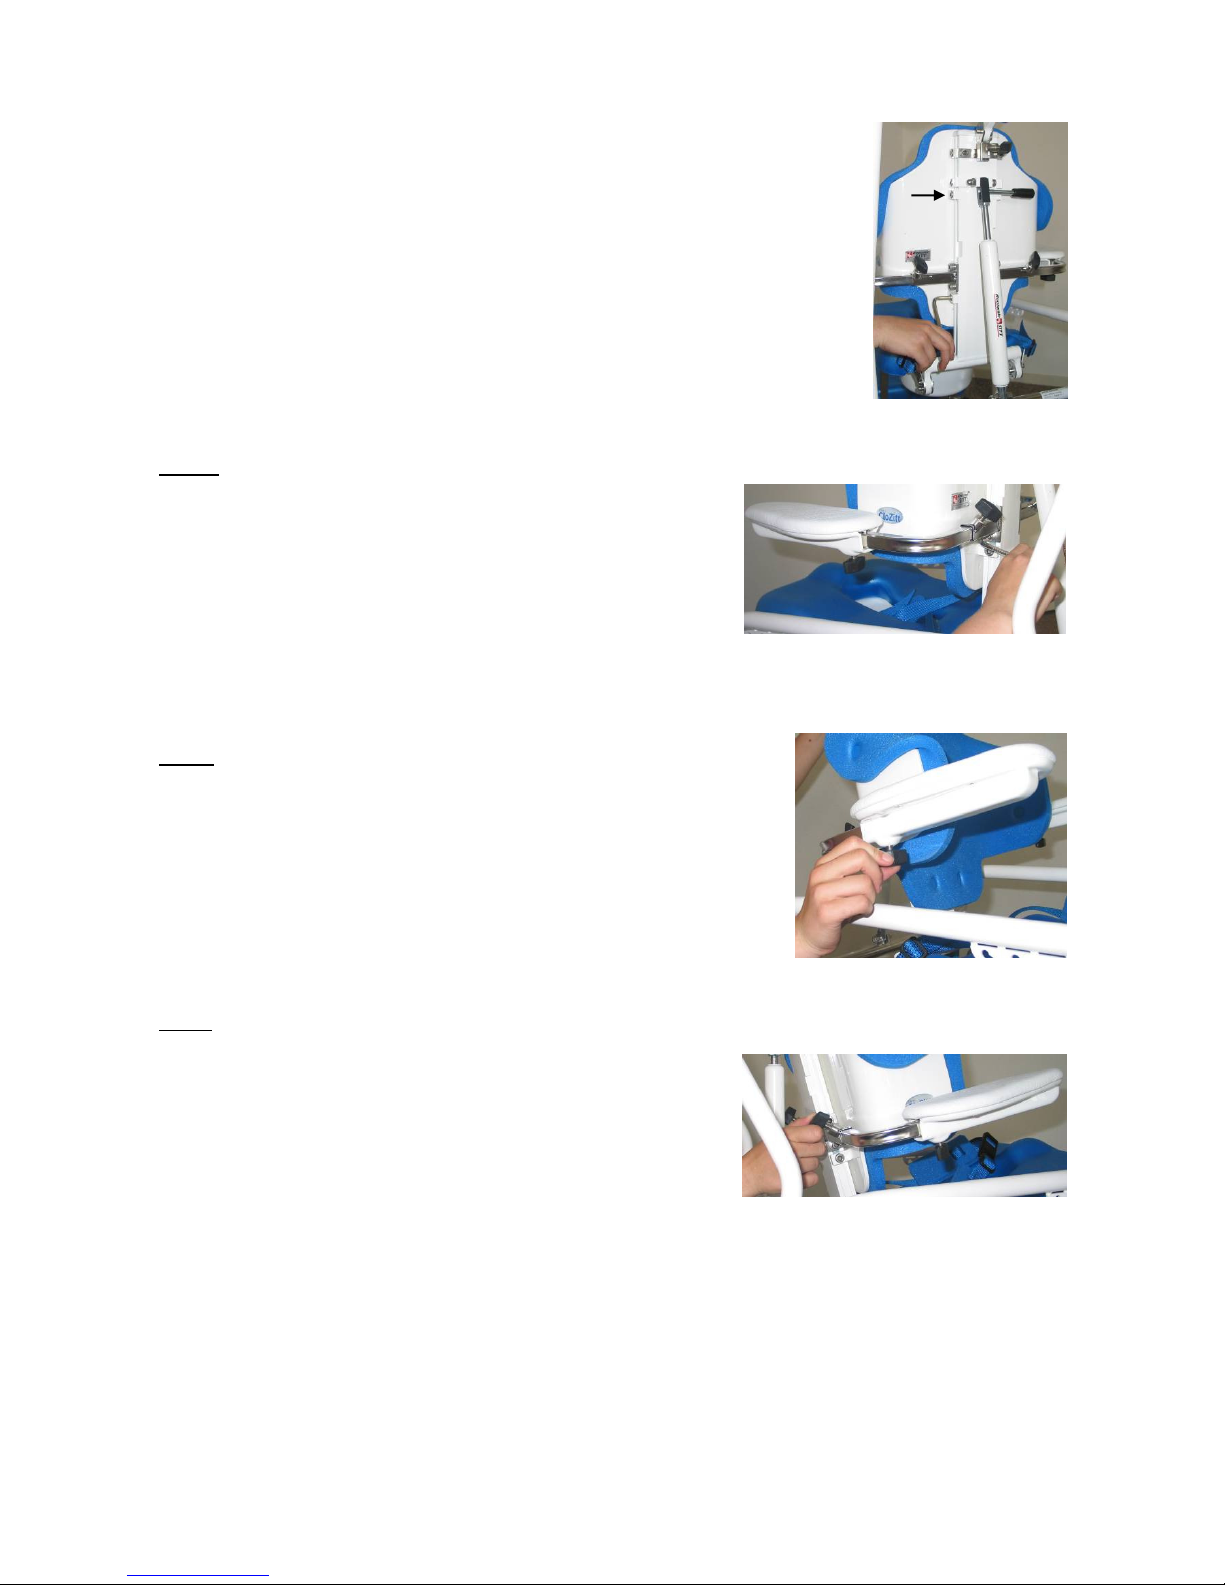
4.1.7 The height of the head support (optional)
•The 2 screws for adjusting the height of the head support are located at
the back of the backrest (see Figure 9). Hexagonal key number 6 is
required to make the adjustment.
•Loosen the adjusting screws and position the head support at the
desired height. Securely retighten the adjusting screws and verify that
the head support is securely fastened.
•The head support must be able to provide support when the head is
positioned straight above the trunk.
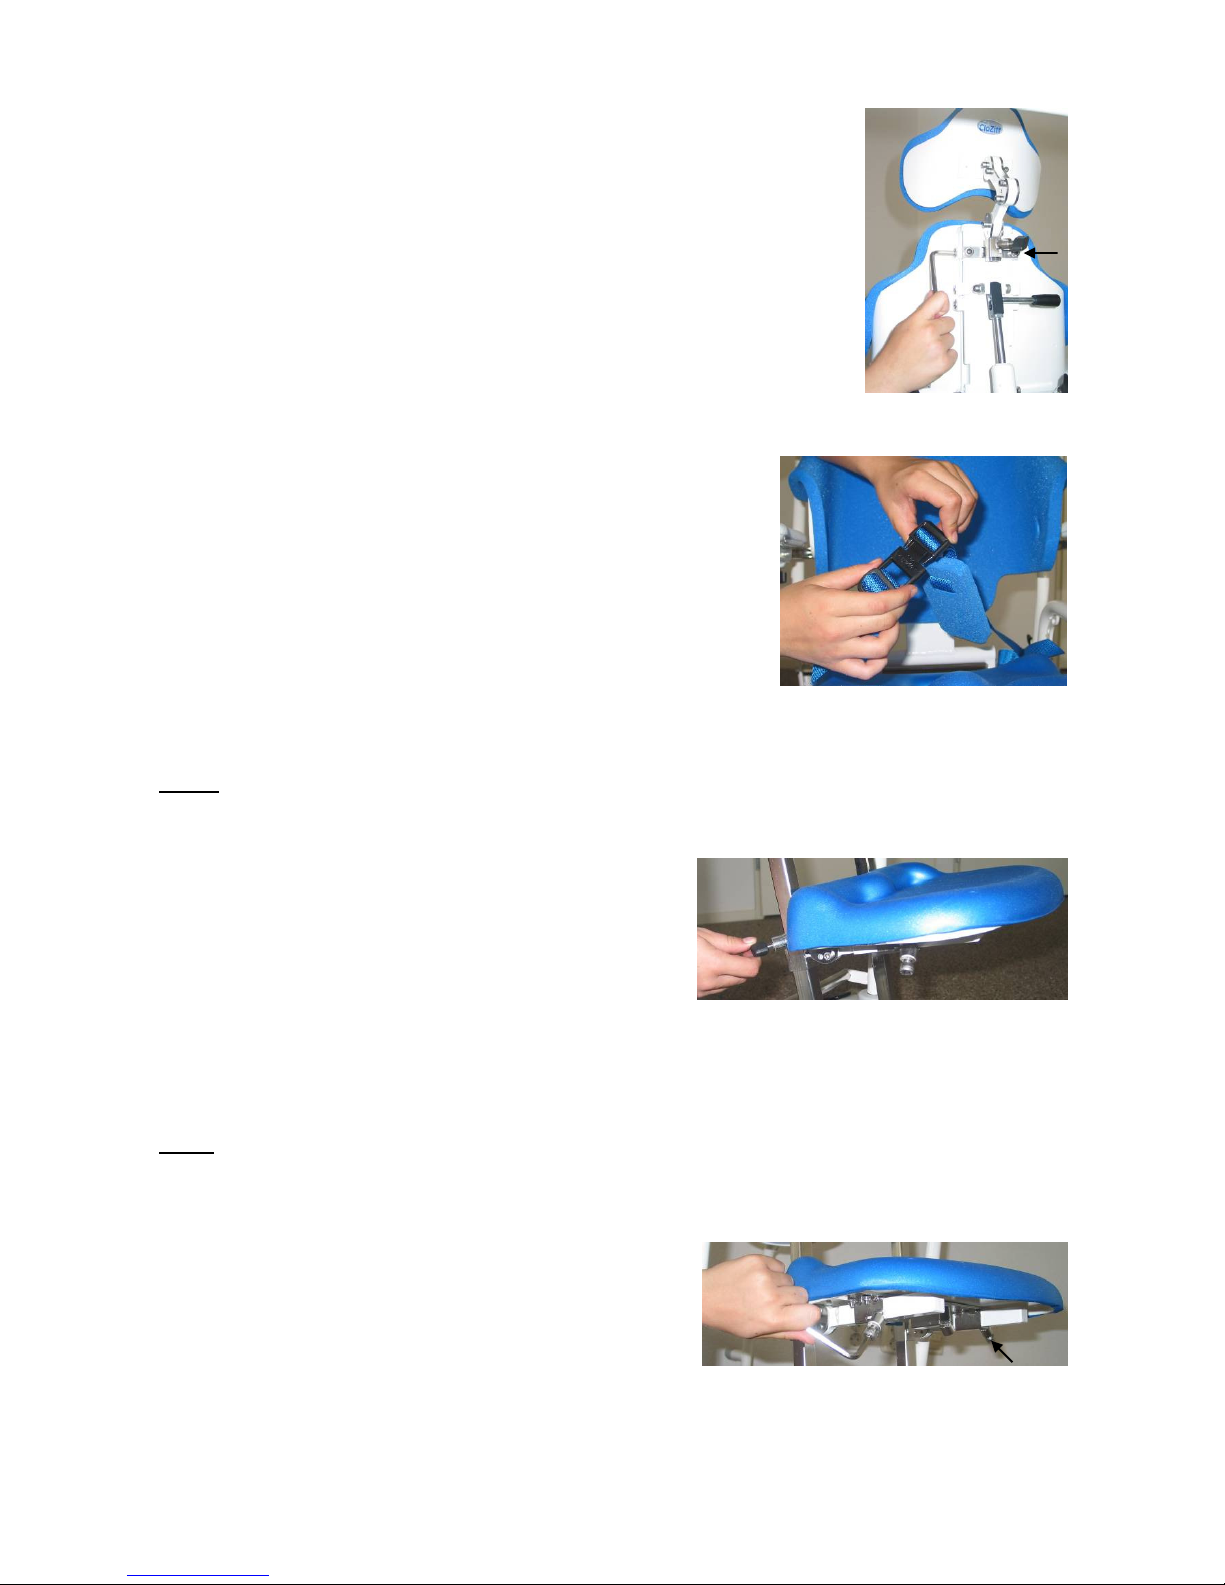
4.1.8 The belt to secure the child in position (optional)
•The belt to secure the child in position is fastened to the chair
at the back of the seat. The belt can be adjusted near the
sliding rings.
•The quick release mechanism at the front of the belt is used to
lift the child into or out of the chair (see Figure 10).
•The belt keeps the child positioned at the back of the chair
and ensures that he/she cannot slide out of the chair. The belt
must be firmly secured, but must not pinch the child.
4.1.9 The height and depth of the footrest (optional)
Height
•The 2 adjusting knobs for adjusting the height of the
footrest are located on each side of the footrest (see
Figure 11).
•Hold on to the footrest with one hand and loosen the
adjusting knobs for adjusting the height with the
other hand. Position the footrest at the desired height
and retighten the knobs securely. Make sure that the
left and right sides of the footrest are positioned at
the same height. Verify that the footrest has been
securely tightened.
•The height of the footrest must be adjusted so that
the child is seated with the knees bent at a 90°
angle.
Depth
•The adjusting screws for adjusting the depth of the
footrest are located below the footrest (see Figure
12). Hexagonal key number 6 is required to make
the adjustment.
•Loosen the adjusting screws on both sides and place
the footrest in the desired position. Retighten the
adjusting screws securely. Make sure that the depth
of the footrest is the same on the left and the right
side. Verify that the footrest has been securely
tightened.
•The depth of the footrest must be adjusted so that
the child is seated with the knees at a 90°angle and
so that the footrest provides support for the child’s
Figure 9: