Atoll Electronique MS120 User manual

OWNER’S MANUAL
STREAMER
MS120

OWNER’S MANUAL ~ STREAMER
ATOLL ELECTRONIQUE
Page 2
INDEX
You have just bought a product with exceptional audiophile performances. We really thank you for
your confidence in our products. To get the best part of your streamer, please read carefully this
manual.
– An MS120 streamer.
– A power lead.
– A RCA cord.
– A remote control.
– Two antennas.
– This manual with the warranty
certificate.
• Do not make any connections when your device is turned on.
• Install your appliance in a dry, well-ventilated place away from any source of heat.
• Do not put anything on your Streamer.
• Avoid any short circuits.
• Never connect two speakers in parallel to the same output.
SAFETY INSTRUCTIONS
• It is recommended to choose good quality cords to connect this appliance to the other
devices. Feel free to take advice from your specialist dealer.
USER ADVICES
YOU WILL FIND ENCLOSED
1.– General information...........................................................
2.– Connections......................................................................
3.– ATOLL remote control.........................................................
4.– Connecting setup...............................................................
5.– Preamp. / BY-PASS functions...............................................
6.– Uses................................................................................
Gettingstarted.............................................................
Playlists........................................................................
Playqueue....................................................................
Internet radio................................................................
Front and rear USB.......................................................
Media server.................................................................
Streaming services.........................................................
Roon and Audirvana.....................................................
Bluetooth®..................................................................
7.– Troubleshooting table.........................................................
p.3
p.4
p.5
p.6
p.7
p.7
p.7
p.10
p.10
p.10
p.10
p.11
p.11
p.11
p.11
p.12

MS120
ATOLL ELECTRONIQUE
Page 3
Power supply:
Total of capacitors:
Audio outputs:
Audio inputs:
Output stages:
Dynamic:
Switch OFF consumption:
Standby power consumption (preheating):
ON consumption:
Output impedance:
Maximum input level:
Output level:
Signal/Noise ratio:
Distortion at 1 kHz:
Bandwidth:
Rising time:
Digital/analog converter:
Dimensions:
Weight:
9 VA + 7,8 VA (audio)
5 435 µF
1 Stereo line output
2 Digital outputs: 1 Coaxial, 1 Optical Toslink
2 Stereo line inputs
4 Digital inputs: 2 Coaxial, 2 Optical Toslink
1 Bluetooth® 4,2 input
2 USB-A inputs (1 front, 1 rear)
2 Discrete stages with no feedback
123 dB
0 W
7 W
11 W
22 Ω
3,5 Vrms
2,8 Vrms
123 dB
0,0005%
5 Hz - 20 kHz
1,7 µs
BURR-BROWN PCM1796 24 bits/192 kHz - DSD128
320×210×94 mm
3 Kg
TECHNICAL DATA
1.- GENERAL INFORMATION
GENERAL INFORMATION AND ADVICES
Your ATOLL Streamer is DLNA and UPnP compatible, allowing it to work in a network with other devices. Take
the time to carefully read the getting started section of this user guide before turning on your device.
ACCEPTED FORMATS
CLEANING
WARRANTY CONDITIONS
Before any cleaning, switch off your appliance. Use a soft and dry rag to clean up the appliance. Never use
acetone, white-spirit, ammoniac, or any kind of product containing abrasive agents. Never try to clean up
inside the appliance.
The guarantee is two years period from the date of purchase. We recommend you ask your dealer to fill the
guarantee and to conserve it with your invoice. The guarantee is only available for the appliance which has
been used correctly regarding this owner’s manual.
To use your device as easily as possible, download the ATOLL Signature App from the Apple Store or
the Google Play store.
(*) The MS120 includes MQA Core Decoder, which unfolds the MQA file once to deliver better than CD-quality. The first unfold recovers
all the direct music-related information. Output is 88,2 kHz or 96 kHz. ‘MQA’ or ‘MQA Studio’ indicates that the product is decoding
and playing an MQA stream or file, and denotes provenance to ensure that the sound is identical to that of the source material. ‘MQA
Studio’ indicates it is playing an MQA Studio file, which has either been approved in the studio by the artist/producer or has been verified
by the copyright owner. MQA and the Sound Wave Device are registered trade marks of MQA Limited © 2016.
– AAC (24-96 kHz 16 bits).
– AAC+ v1/HE-AAC.
– FLAC (44,1-96 kHz 16/24 bits).
– FLAC 192 kHz/16-24 bits; available on USB-A
inputs, RJ45 link and WIFI.
– MP3 (8-48 kHz 16 bits).
– WAV (22-96 kHz 16/24 bits).
– AIFF & ALAC.
– DSD64 & DSD128.
– MQA (Master Quality Authenticated)(*).

OWNER’S MANUAL ~ STREAMER
ATOLL ELECTRONIQUE
Page 4
1) Analog audio output.
2) Analog inputs 1(1).
3) Analog inputs 2(1).
4) Optical digital output.
5) Coaxial digital output.
6) Optical digital input 1.
7) Optical digital input 2.
8) Coaxial digital input 1.
9) Trigger output(2).
10) Coaxial digital input 2.
11) Ethernet link input (RJ45).
12) USB type A input.
13) Power input.
14) ON/OFF switch.
15) WIFI connection antenna.
16) Bluetooth® antenna
connection.
17) Menu navigation keys.
18) Display.
19) USB A type input.
a) BY-PASS mode indicator led.
20) Headphone outputs (jack Ø 3,5 mm)(3).
21) Volume control down and up +& .
22) ON/OFF key & stand-by led indicator
(3)
To avoid electrostatic shock, we recommend connecting the headset when the device is switched off or on
standby. While using headphones, turn off the amplifier.
2.- CONNECTIONS
(1) These inputs can be configured in BY-PASS, see chapter 5, page 7.
(2) Trigger output: this output is used to control the switching off/on of any device equipped with a compatible
Trigger input (see instructions for use).
CONNECTING WIFI AND BLUETOOTH®ANTENNAS
You will find the antennas in the bag of the remote control.
Make sure that the WIFI and Bluetooth® antennas are correctly installed before any
connection and use.
Please use the 2 supplied antennas (identical) or an antenna with male connector.
1 2 3 4 5 6 7 8 10 11 12 13 14
9
15 16
DETAIL OF FUNCTIONS
19 18 20 2217
a)
21

MS120
ATOLL ELECTRONIQUE
Page 5
The remote control uses 2 lithium CR2032 (3V) batteries. Make sure to place +upside.
Warning: some keys may have different uses depending on the menus or context.
3.- ATOLL REMOTE CONTROL
REMOTE CONTROL FUNCTIONS
22
23
24
27
30
39
40
41
17
31
32
34
21
33
25
36
37
29
26
28
38
35
Keys already available from the front panel:
17) Menus control keys.
21) Volume control +& . These keys can be assigned to the MS120 or the
Atoll amplifier (IN and PR “se” and “signature”).
22) Standby button (2 modes: see previous chapter).
23) ALPHANUMERIC KEYS (from 0 to 9 and from A to Z). By quick press on
key (2) i.e. select a, b, c, 2, A, B, C
24) HOME: allows to return to the main menu.
25) PLAY/PAUSE.
26) SHUFFLE: button allowing random playback.
27) Access to the next track.
28) STOP
29) BY-PASS: (press for 5 seconds).
30) DISP: key to manage the intensity of the display.
31) WPS: button allowing quick WIFI connection: press this button and that of
your box simultaneously to establish the connection.
32) REPEAT: repeat either the track (symbol with 1) or the album.
33) OK: validation key in menu choices.
34) Access to the start of the track or to the previous track by double pressing. In
input menus: deletion of the last character.
35) Input selection keys: Line 1, Line 2.
36) IN/ST volume button (press for 3 seconds to change). Allows you to assign
the Volume (21) and Mute (37) keys to either the MS120 or the Atoll amplifier
(IN and PR “se” and “signature”).
37) MUTE: mute button (this function is not active in BY-PASS). This key can be
assigned to the MS120 or the Atoll amplifier (IN and PR “se” and “signature”).
38) Input selection keys: Coaxial 1, Coaxial 2, Optical 1, Optical 2.
39) FAVORITE: add (ADD) or remove (REM) from a radio station.
40) CD keys: keys to control CD and Drive Atoll players.
41) IN/PR keys: keys allowing you to control the Atoll integrateds and preamps.

OWNER’S MANUAL ~ STREAMER
ATOLL ELECTRONIQUE
Page 6
4.- CONNECTING SETUP
SOURCE MODE OR PREAMPLIFIER (BY-PASS)
TRIGGER LINK
MS120
Source
Integrated like IN200
An MS120
streamer type
Power amplier
NB.: You can switch on every line IN of the integrated.
Preamp
Power amplier
This device can be used as a source (like a CD player) or as a preamplifier which gives the ability to control
the volume.
The diagrams below show the wiring possibilities according to these different applications.
Using the Streamer as a source
directly linked to an integrated or a
preamplifier. BY-PASS mode should
be active and the BY-PASS led (a)
switch on.
Using the Streamer as a preamplifier
directly connected to a power amplifier (or
active speakers). BY-PASS mode should be
not active and the BY-PASS led (a) switch
off.
Jack
Ø 3,5 mm.
Therefore, each time the Streamer comes out of standby, the amplifier will switch on. It will also turn off each time it
is put on standby.
When the system is operating, the ON/OFF switch of your power amplier must remain in position OFF
(position (0)). If the switch is in the ON position (I), the amplier will work but not the Trigger function.
Trigger cable must be a stereo Male to Male jack plug Ø 3,5 mm (1/8”).
This appliance is equipped with a Trigger that allows the switch OFF/ON of any amplifier equipped with the
same kind of Trigger inputs (ATOLL amplifier).
Appliances must be linked as shown below:
Subwoofer

MS120
ATOLL ELECTRONIQUE
Page 7
6.- USES
GETTING STARTED
Before Switching On your appliance, connect the network cable (RJ45) to input (11). For much better results
and best performances, we highly recommend to uses a wired connection better than a WIFI connection.
Wait for the start-up screen to appear before any manipulation.
You can use the buttons of navigation (17) of the remote control or the front panel to select the different menus.
On the first connection (or changes in the network configurations) you will have to check the network settings
of your appliance. If this setup is not perfectly settled, some of the functions of the streamer (internet radios or
reading music of your server) will not be operated.
Available menus:
– Playlists.
– Internet radio.
– USB.
– Media Server.
– Qobuz.
– Tidal.
– Deezer.
– HighResAudio.
– Spotify.
– Bluetooth.
– Line 1 and 2.
– Coaxial 1 and 2.
– Optical 1 and 2.
– Settings.
VOLUME:
The volume is managed using the buttons (21) on the front panel or the remote control.
The volume level is displayed for a few seconds on the display, and it always remains indicated at the top of the
display.
On start-up, the volume is still the one that remained previously.
Volume at zero corresponds to a complete “MUTE” of the device with switching of the output relay.
SOURCES:
Your appliance has 6 inputs (unless USB, media server, Bluetooth®):
Line 1 / Line 2 / Coaxial 1 / Coaxial 2 / Optical 1 / Optical 2
These sources can be renamed from the ATOLL Signature application: Settings / Rename local inputs.
NB.: The selected source is always followed on the display by a symbol *.
CONNECTION:
Particular case: BY-PASS assignment of an input for connection to a home cinema system.
Entry into BY-PASS function is only possible on Analog inputs 1 and 2.
In this case, the volume management function is inoperative on the selected input.
To switch to this mode: select Analog input 1 or 2 then hold the BY-PASS button (29) on the remote control for 3
seconds. When the BY-PASS is active, the led (a) is on.
When an input is selected in BY-PASS mode, it will remain memorized in this mode even if the source is
changed or the power is turned off.
To deactivate this mode, press the BY-PASS button on the remote control for 3 seconds.
5.- PREAMP. / BY-PASS FUNCTIONS
Connecting an RJ45 cable automatically launched the network link. If this is done correctly ( not
blinking), your network is correctly congured. The following paragraph is optional in your case.

OWNER’S MANUAL ~ STREAMER
ATOLL ELECTRONIQUE
Page 8
NETWORK CONFIGURATION:
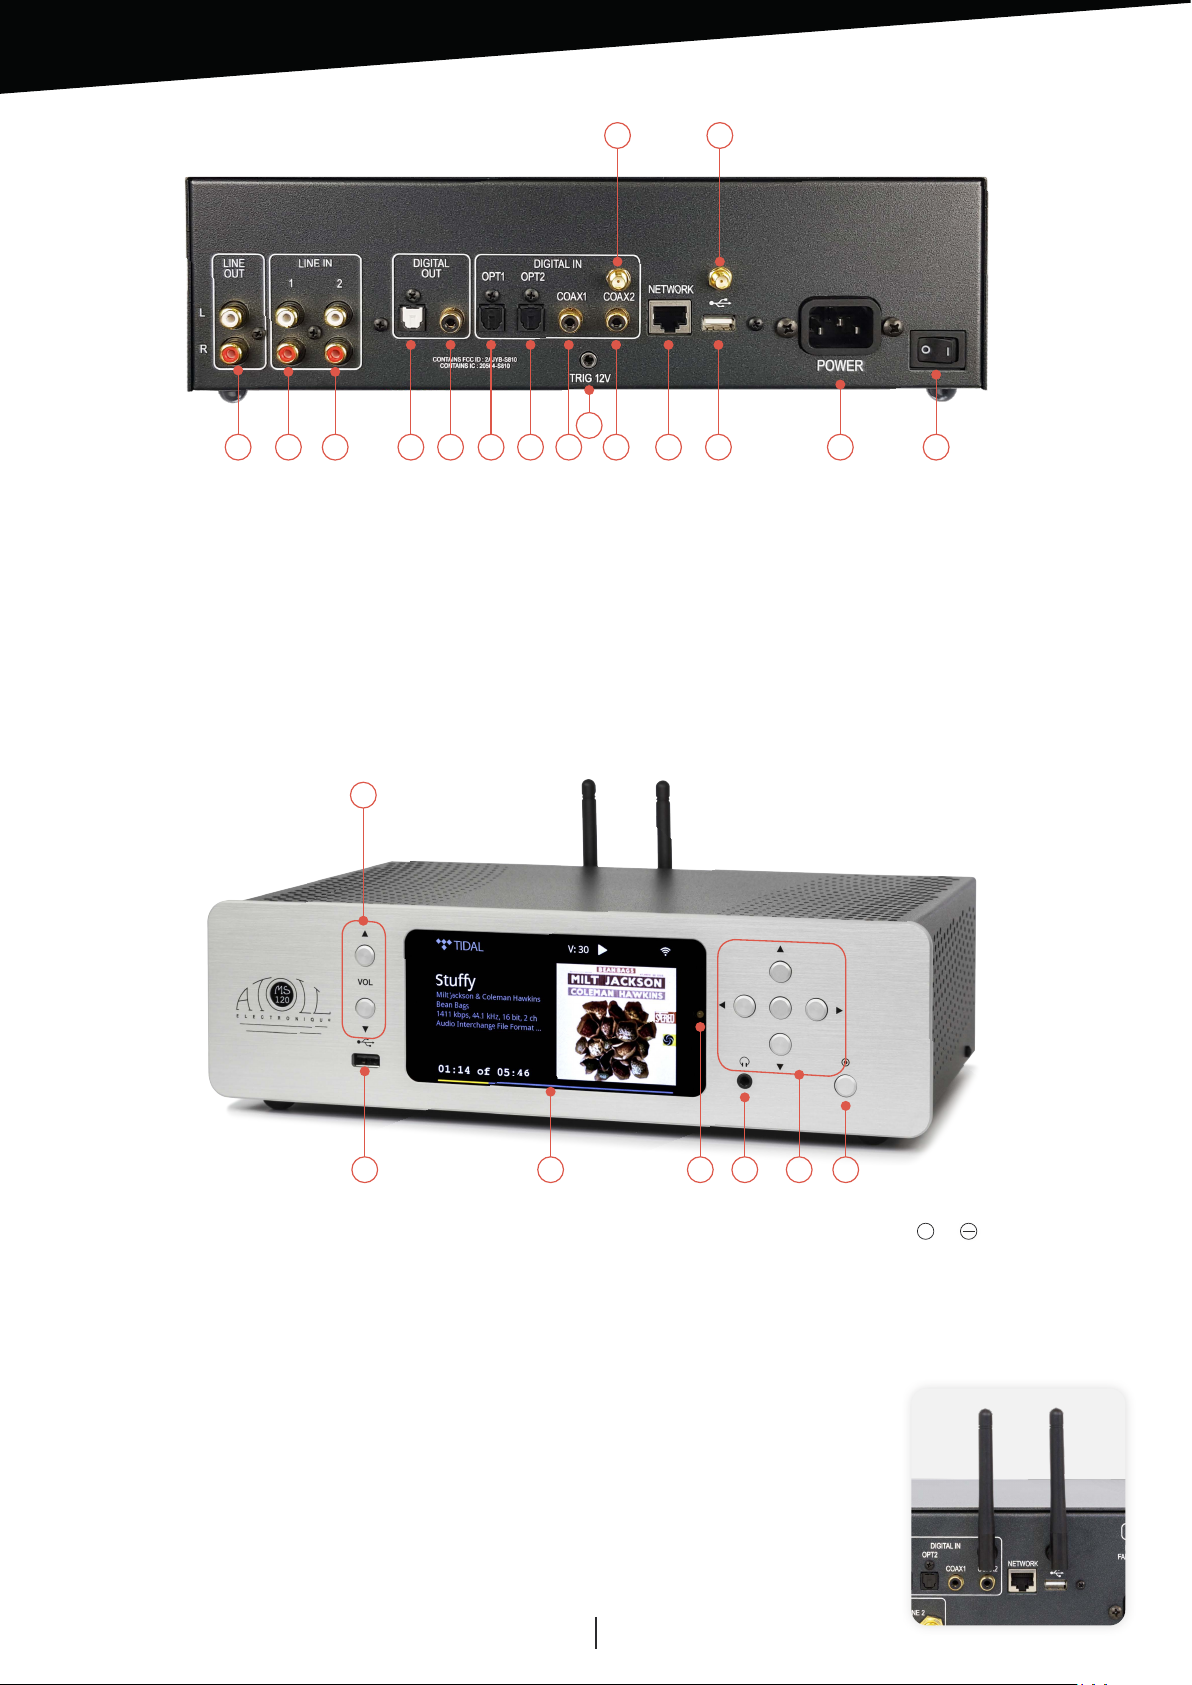
Wired: In the case of a wired connection, the association is done automatically after a few seconds. The symbol
indicates that the wired connection is established.
Your device is then ready to operate.
Wireless: When you first plug in your device (or if you change network configurations), you must configure the
connection between your Streamer and your network. Without this configuration, the operation of internet radios
and the playback of files present on your network will be ineffective.
• Go to the “Settings / Network conguration / Network type” menu.
• You will need to choose the type of network:
“Automatic”, “Wired” or “Wireless”.
– Automatic: Connecting an RJ45 cable automatically launches the network connection. This menu allows
you to choose the network connection by prioritizing the wired connection, that is to say that when the device
is wired, the connection will automatically switch to wired. When no cable is connected, then the connection
switches to WIFI.
– Wired: You can switch to automatic mode (DHCP) or enter a static IP address.
– Wireless: In the case of a “wireless” connection, the device will allow you to find available wireless networks.
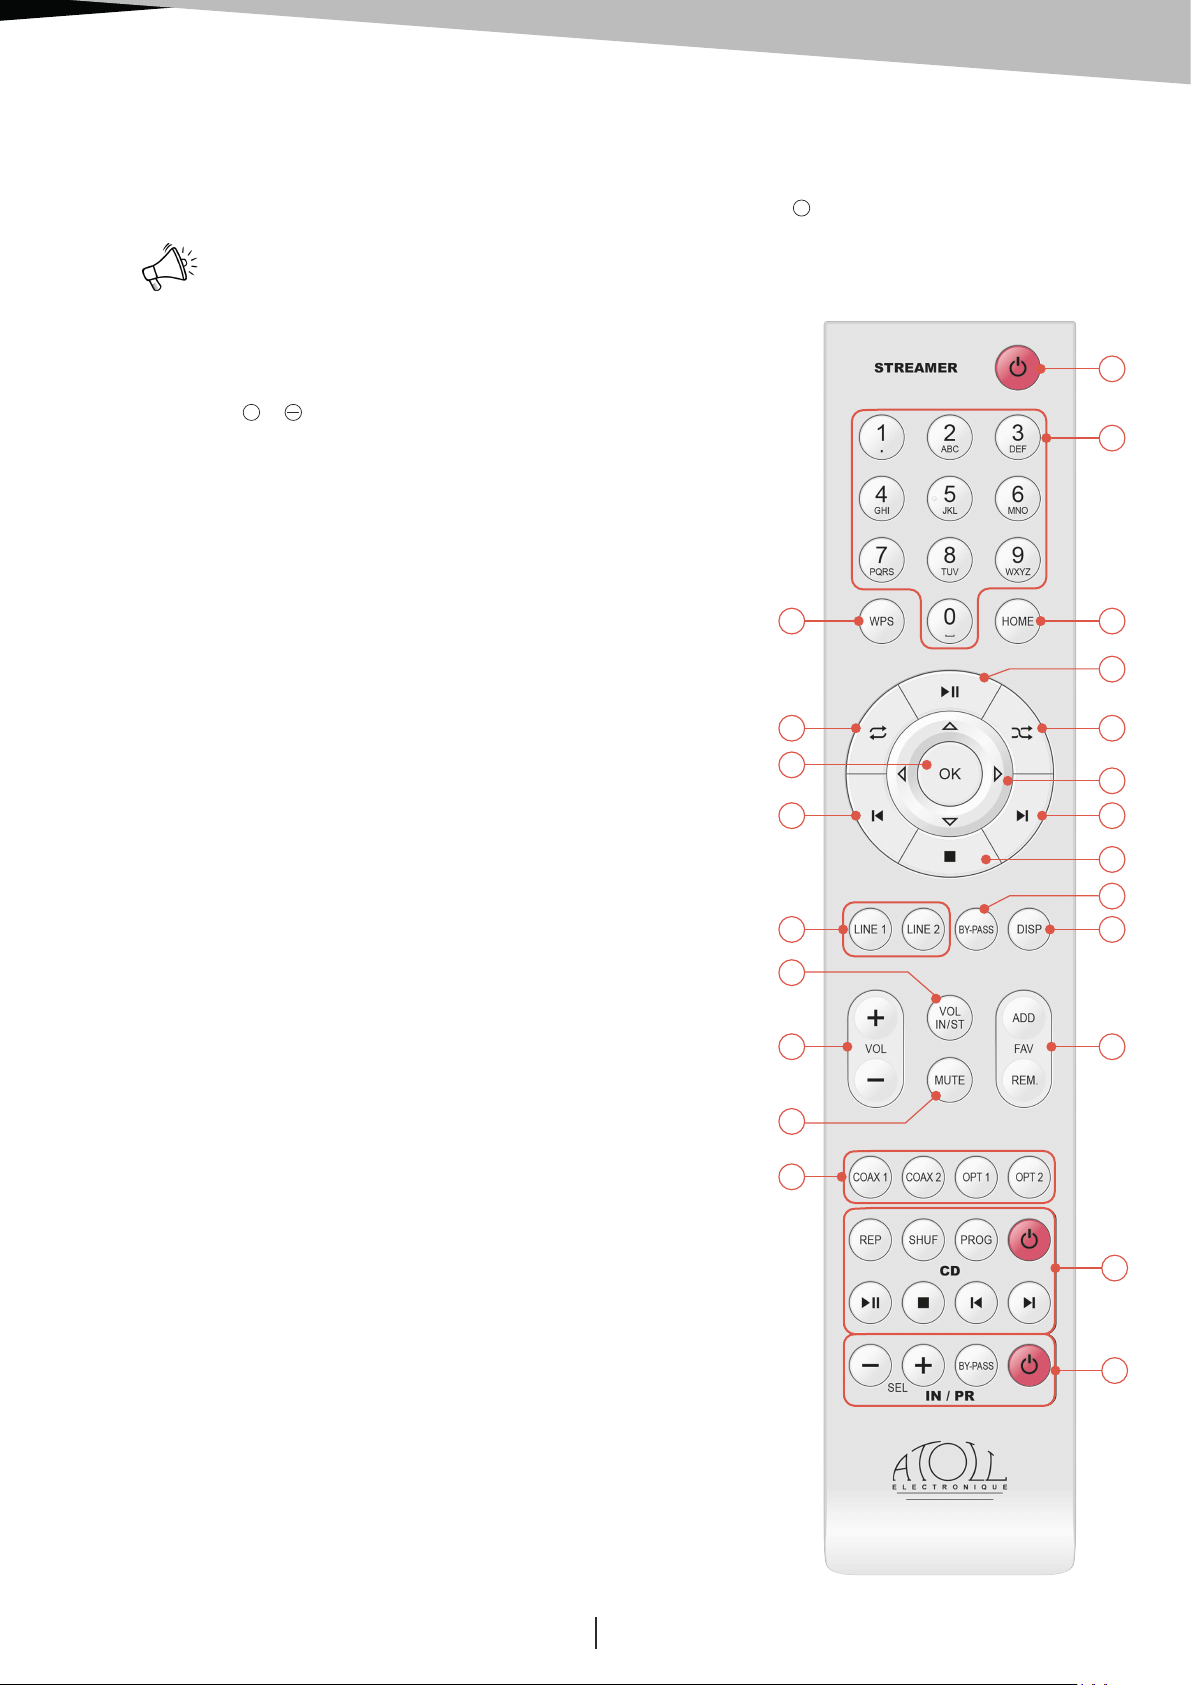
We advise you to use WPS to associate your device with your internet box (if available on it). First activate WPS
on your box, then press the WPS button (30) on the remote control, or from the menu:
“Settings / Network conguration / Wireless conguration / WPS PBC”.
The screen displays “WPS in progress” and then, when the connection is established, it displays “Connected”.
If WPS is not possible, press “Scan”. All wireless networks available in your environment will be displayed. Select
the one corresponding to yours.
Enter, respecting capital letters and without spaces, the WIFI security key which appears below your internet box.
Validate your password by pressing the “OK” key.
Conguration using the ATOLL Signature and Softap application
• Download the ATOLL Signature application on your smartphone or tablet, do not try to open this application
yet.
• Power on your network drive.
• From the “Settings” menu of your smartphone, connect to the “Softap” WIFI network (this network appears a
few minutes after turning on your network player).
• Launch the ATOLL Signature app.
• In the “Settings” menu click on “Network conguration / Wireless conguration / Scan”, select your
internet box then enter the WIFI password.
• Reconnect your smartphone to the WIFI network of your internet box.
This symbol indicates that the wireless connection is established or that the Softap is available.
NETWORK INFO:
In this menu, you’ll find all information about the network: type of network, IP address, Mask, Gateway, DNS…
LANGUAGES:
This menu allows you to select the language of all menus. You can choose between: English, German, Spanish,
French, Italian, Nederland, Polish, Portuguese, Russian, .
RETURN TO PLAY-SCREEN TIME:
This menu concerns the home screen of your device. It allows you to manage the value of the time to return to the
display of the source currently playing, when you navigate further through the menus.
MANAGE AUXILIARY INPUTS:
This menu allows you to rename the auxiliary inputs, to allow the user to identify their different inputs. It also allows
you to check/uncheck the entry of your choice so that it is displayed/hidden in the main menu of the navigation bar.

MS120
ATOLL ELECTRONIQUE
Page 9
VERSION:
This menu displays the software version that equips your machine.
FIRMWARE UPDATE:
The update can be done directly over the network. Select “Check for update”. If an update is available, it will be
done automatically. Leave the device plugged in without using it until restarting. This operation may take several
minutes. If no updates are available, the device will display “No updates available”.
POWER MANAGEMENT:
Allows the user to choose the time after which automatic standby starts:
– Standby Timeout: When the device is not playing or when no source is selected: choice between 5, 10, 15 or
30 minutes before standby.
– Max inactive play time in seconds: When the device is not playing or no source is selected: choice between 1,
8 or 24 hours before standby.
– Display intensity: This menu allows you to choose the light intensity of the display. If you choose “off” mode
the display will turn off after a few seconds. Each press of a button on the remote control or the front panel
temporarily reactivates the display. You can also choose this function directly with the DISP button (30) on the
remote control.
FACTORY RESET:
Allows you to find all the original settings. Resetting the settings will restart your device. Note that the device will
restart with an English display.
STREAMING AUDIO QUALITY:
This menu allows you to choose the quality of files in 24 bits/192 kHz or 24 bits/96 kHz.
In the event of limited internet speeds, favor 24 bits/96 kHz quality in order to preserve bandwidth.
VOLUME OF THE DIGITAL OUTPUT:
Configures variable or fixed the digital output signal depending on the volume; this makes it possible or not to
adjust the volume when using an external DAC.
This function should not be activated if you use the analog outputs.
DEVICE ID:
This menu allows you to name the device to be visible from devices such as Roon.
BALANCE:
Allows you to adjust the left-right balance: using the volume keys and +. This balance remains stored.
ATOLL Signature 2 APPLICATION:
A new free application for smartphones and tablets is available to control your
Streamer. It can be found on the Apple Store (iOS) or Google Store (Android)
download sites under the name ATOLL Signature 2.
First, make sure that your Smartphone is connected via WIFI to the same network as
your Streamer. In this case, your device appears on the screen of your Smartphone
just after starting the application, simply select it.
The application uses the data displayed on the screen: radio station logo, audio
stream, volume, etc. You can navigate the menus and adjust the analog volume
level. It is possible to exit the standard standby mode from the application: play
a song or a radio, the device exits the standby mode automatically.
These applications undergo regular updates, their operation and their
possibilities are therefore likely to evolve over time.
N.B: Note that the old ATOLL Signature application is still available for download.

OWNER’S MANUAL ~ STREAMER
ATOLL ELECTRONIQUE
Page 10
SEARCH FUNCTION:
You can access the search bar, which is always available to the user. In addition, we have implemented an intuitive
search, to easily find radio stations and podcasts, artists, albums, playlists, among others. You can also find the
latest search results in memory, and clear the entire search result, or a specific search.
CONTROL FROM A COMPUTER:
It is possible to control your streamer from a computer screen by typing in the search bar of your internet browser
the IP address of your streamer followed by /webclient:
192.168.xxx.xxx/webclient
The IP address of your streamer is available in the “Settings / Network info” menu.
It is also possible to rename your streamer by typing only the IP address of the latter in the search bar of your
internet browser.
PLAYLISTS
PLAYQUEUE
Each song played on the network can be put in the different playlists. With the application, you can rename it,
delete it, shuffle it or repeat it…
1.- Global playlist: This device allows you to create playlists with songs present on your network (USB inputs, Media
Library). Note that songs from streaming services cannot be added to these playlists.
2.- Local playlist: For each streaming service you can create specific playlists. These playlists will remain associated
with the corresponding streaming service.
This temporary playlist allows you to place songs one after the other. The location of each song can be changed
by going to the queue. Select a track from the ATOLL Signature 2 app, and swipe to move it. The songs in this list
disappear when the device is disconnected from the mains.
INTERNET RADIO
This menu allows to access for free to about 100,000 radio stations and also to podcasts.
“Favorites” menu: This menu allows you to make a selection of favorite radio stations which will be easily
accessible. When you are on a station, you can add it with the application button .To remove a radio from your
favorites, press again . These functions are also possible with the ADD FAV and REM FAV buttons (39) on the
remote control.
Different selection criteria: Favorites / Usage history / Recommendations / Local radios / Popular stations / Trends
/ High quality / New stations / Filter / Personalized radio. If you want to select a radio by location, by genre or by
genre, select “Filter”.
Personalized radio: Allows you to add a radio of your choice using its URL. You will find the radios recorded in this
way in this menu.
Suggest content: Allows you to submit a new radio station to the Airable platform (free service).
Podcasts: This menu allows a selection of podcasts according to different criteria: Favorites / Usage history /
Popular podcasts / Trends / Filters.
FRONT & REAR USB
Select one of those inputs to read all music files from a USB key or Hard Disk.
Readable files system can be FAT32, NTFS, EXT 2/3/4.

MS120
ATOLL ELECTRONIQUE
Page 11
Spotify Connect
You can access Spotify from ATOLL Signature App: Use your phone, tablet, or computer as a remote control for
Spotify. Go to www.spotify.com/connect to learn how.
The Spotify Software is subject to third party licenses and you can find it here:
Tidal Connect
You can directly stream from Tidal App to your ATOLL Streamer, by selecting your device in the menu:
Qobuz / Tidal / Deezer / HRA
You also have direct access from the app to those streaming services.
During the first use, you will need to enter your username and password.
For Tidal use the ATOLL Signature App.
Press on Username, fill it, and validate by pressing OK.
Press on Password, fill it, and validate by pressing OK. Finally press on “Log in”.
Once your account is valid, you’ll be able to get access to all services related to your account:
– Playlists that could be created.
– Favorites (albums, tracks, artists).
– Purchases (by albums or tracks).
https://www.spotify.com/connect/third-party-license
ROON ET AUDIRVANA
BLUETOOTH®
Your device allows the reception of audio signals sent from any device with a Bluetooth® transmitter (smartphone,
tablet, computer, etc.).
First pairing: Select the Bluetooth® input of the MS120 either via the application, the front panel or the buttons
on the remote control. Choose “Visible to other devices,” then “Search for other Bluetooth® devices.” Activate
Bluetooth® connectivity on your transmitting device (smartphone, tablet, computer, etc.), then select your streamer
from the list of connected devices. A list of connected devices will appear on the MS120 screen. Select your device,
then “Pair”. Once paired, return to your streamer's Bluetooth® menu, and select your paired device from the list
then press “Play”. You can also disconnect or unpair each device. Your transmitter will remain associated until the
MS120 is turned off, but it will remain visible to your transmitter.
Pair another transmitter: Before connecting a new device, disconnect the previous one. Start the Bluetooth®
connection of the new device then return to the Bluetooth® menu of the streamer.
The signal reception quality may depend on the power of the Bluetooth® transmitter on your device and the
distance between the 2 devices. Avoid being more than 5 meters from your device for correct reception without
interruption.
Your network player is 100% compatible with these gateways. Before connecting to Roon for the first time, you will
need to fill in the “Settings: Device ID” field with the reference of your device between: ST200, ST300, MS120,
SDA200, and SDA300.
Ce menu permet d’accéder à l’ensemble des fichiers présents sur le réseau. En sélectionnant ce menu, la liste des
différentes sources de données apparait. Dans chacune d’elles vous pourrez choisir : Musique / Photos / Vidéos.
Seuls les chiers de musique sont pris en compte par cet appareil.
Music: You can select music files depending on several criteria : (note that this is depending on the information
placed on the original files). Selection can be done: Files / All music / Playlist / Album / Artist / Genre / Composer.
Placing tracks in “Playlists” is always possible while pressing icon.
MEDIA SERVER
STREAMING SERVICES

ATOLL ELECTRONIQUE®
is a French Company that designs, manufactures,
and commercializes all its products.
OWNER’S MANUAL ~ STREAMER
ATOLL ELECTRONIQUE
Page 12
No sound.
Impossible to access the
Network.
No recognition of the USB stick.
Frequent loss of the WIFI
network.
The device stops responding.
Problem encountered Possible Solutions
– Check your RCA connections.
– Have you selected the correct source?
– The volume might be at zero level.
– Enter the WAP key again.
– Make sure that the antenna is the supplied
template (male connector) and that it is well screwed
on its base.
– Check if the format is compatible.
– Make sure your box and your Streamer are not
confined or too far apart.
– Choose a wired connection or with Powerline
adapters for example.
– Press 2 times on key HOME (24).
– Turn off the power switch level before restarting.
7.- TROUBLESHOOTING TABLE
WARRANTY FORM ~ MS120
To present to your dealer and to join with your purchase invoice when sending back the appliance to the service center or the
address below:
This device was made to give you complete satisfaction.
ATOLL Electronique warranty is
two years
from the date of purchase of the equipment, date, and stamp of the
seller being authentic. We recommend you keep your proof of purchase (invoice) with this coupon properly filled.
The warranty, as well as the terms of service, should be specified at the time of purchase by your dealer who will
advise you, in case of faulty behavior or failure.
This warranty covers labor and replacement of parts acknowledged to be faulty and not their normal wear
and tear caused. Devices with traces of disassembly, drop, immersion, or abnormal voltage or any cause of
degradation in the appliance and damage resulting from use contrary to the indications included in the operating
instructions, automatically lose the benefit of the guarantee.
WARRANTY CONDITIONS
Dealer’s Stamp
ATOLL ELECTRONIQUE®
Bd des Merisiers
50370 BRECEY
FRANCE
Date of purchase:
Place of purchase:
Buyer signature:
Other manuals for MS120
2
Table of contents
Other Atoll Electronique Media Player manuals

Atoll Electronique
Atoll Electronique ST200 SIGNATURE User manual

Atoll Electronique
Atoll Electronique MS120 User manual

Atoll Electronique
Atoll Electronique MA120 User manual

Atoll Electronique
Atoll Electronique ST300 SIGNATURE User manual

Atoll Electronique
Atoll Electronique MS120 User manual

Atoll Electronique
Atoll Electronique ST300 SIGNATURE User manual

Atoll Electronique
Atoll Electronique ST200 SIGNATURE User manual

Atoll Electronique
Atoll Electronique SDA300 SIGNATURE User manual

Atoll Electronique
Atoll Electronique ST200 SIGNATURE User manual