14 15
If you have an existing inflator, remove it from the end of your BCD hose. This is
usually done by cutting the disposable plastic clamp, or if fitted with a reusable
one, unthreading the screws to loosen it. The nipple of the old inflator may then
be pulled or twisted from the corrugated hose. In some instances the hose may
be glued in place for extra security with rubber cement. If so, carefully work a
screwdriver or suitable tool under the hose to break the glue bond. Be careful not
to cut or puncture the hose. If your BCD has a cable attached to the nipple of the
inflator for dumping air, push the retaining pin out of the inflator and disconnect it
from the cable.
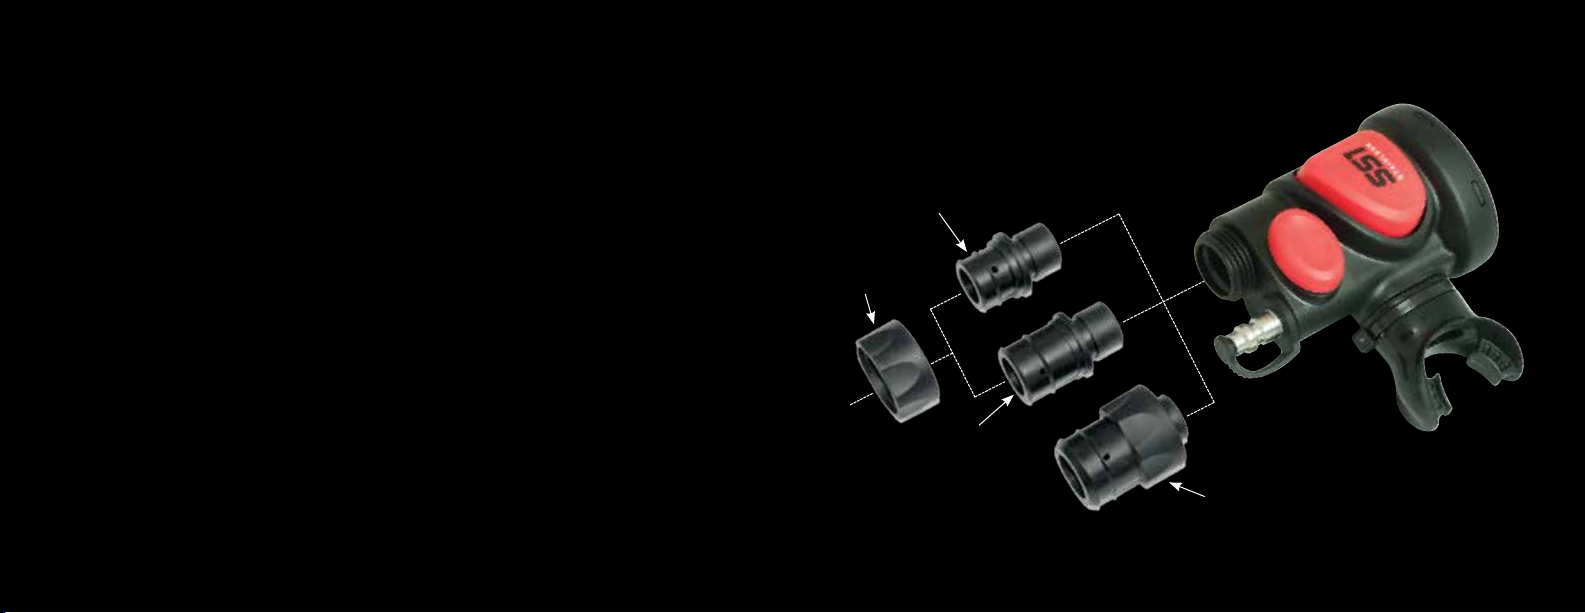
Select the appropriate sized adapter that fits
your particular BCD hose. Insert and remove
the barbed end of the adapter
to check the fit. The correct adapter
may fit snugly but should never fit
loosely. If you are using one of the
smaller adapters, slip the threaded
sleeve over the barbed end of the adapter
before connecting the cable or installing into
the corrugated hose (Fig. 4).
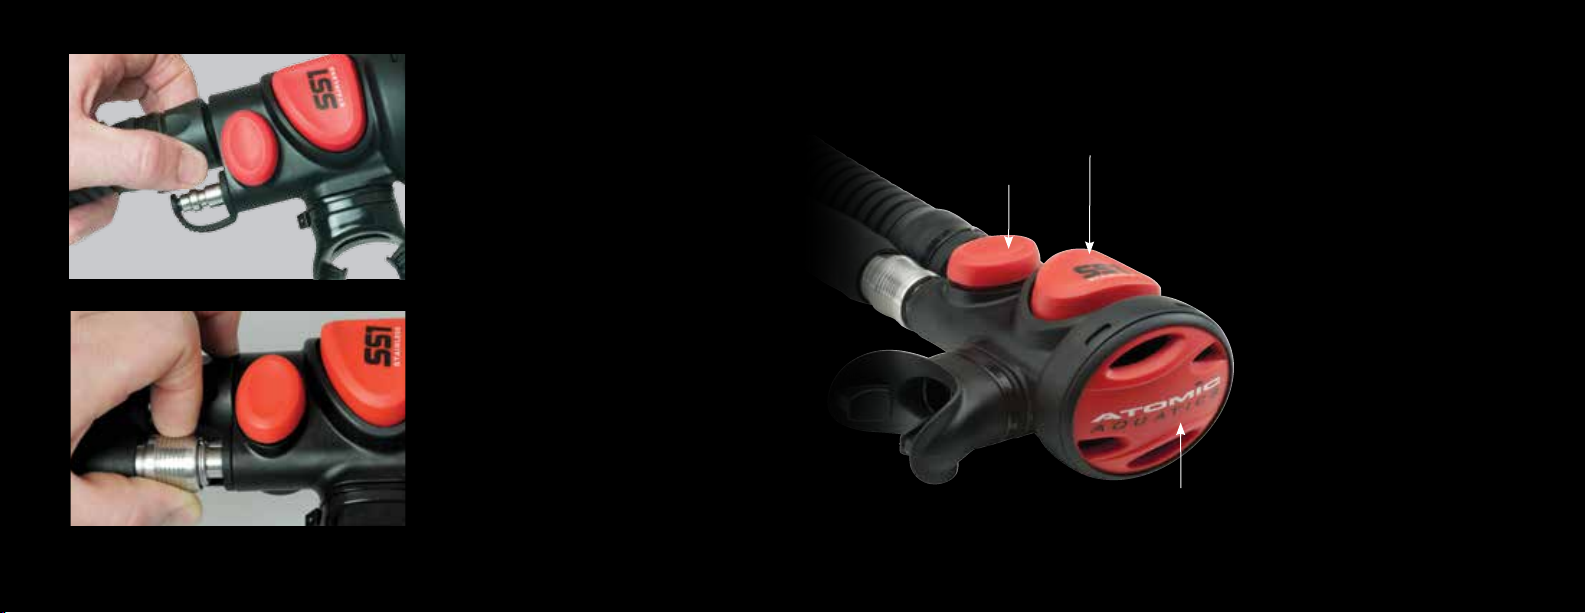
Once you have determined the proper adapter, re-connect
the cable (if present) by placing the pin through the loop of
the cable and inserting the pin though the holes in the adapter
(Fig 5). There are 3 different pins, one for each size adapter.
Be sure to use the correct pin for the adapter you are
using. The correct pin should fit completely through and be
flush with the outside diameter of the adapter. You are now
ready to secure the corrugated hose to the adapter nipple.
We recommend placing a thin coating of rubber or neoprene
(wetsuit) cement on to the outside of the adapter nipple
where it connects to the corrugated hose. Apply glue to
the inside flange of the corrugated hose, then insert the barbed nipple. Make sure
the adapter sleeve is in place and the hose is not
pushed tight against it, or it will not spin freely.
Secure the nipple to the hose with either the new
plastic cable ties or the re-usable plastic clamp that
was originally on your BCD (Fig. 6).
To attach the SS1 or Ai to the adapter, slide the
adapter into the threaded fitting on the SS1 or Ai
and tighten hand tight. It should be snug enough
that -it will not become unscrewed accidentally yet
not so tight as to damage the plastic parts (Fig 7).
Sleeve
FIGURE 4
Adapters
FIG. 5: CABLE & PIN
FIG. 6: PLASTIC CLAMPS
SET-UP