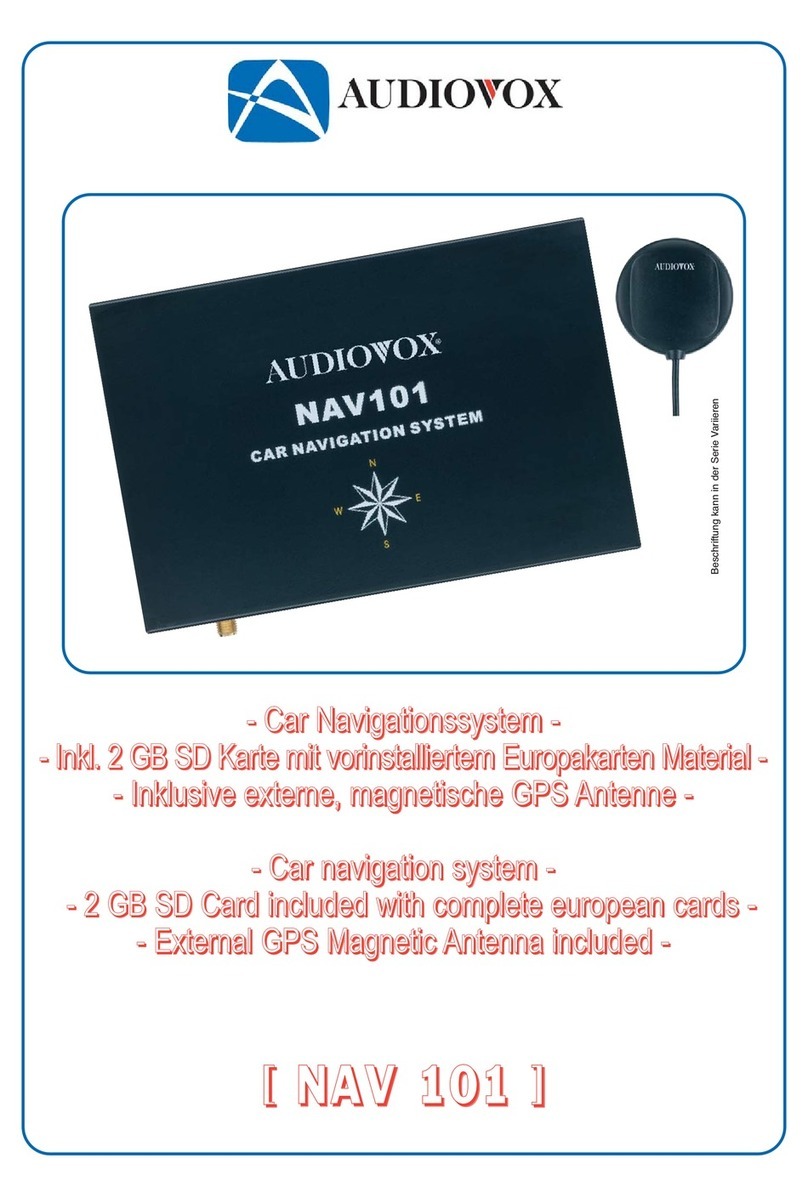
Audiovox NAV101 - NAV 101 - Navigation System User manual

38
NAV 101
Installation and Operation Manual

39
CONTENTS
Thank you for choosing a Audiovox product. We hope you will find the
instructions in this owner’s manual clear and easy to follow. If you take a few
minutes to look through it, you’ll learn how to use all the features of your new
Audiovox NAV101 navigation system for maximum enjoyment.
Introduction............................................................................................................40
Safety Information ...............................................................................................43
Installation ............................................................................................................45
Wiring Diagramm..................................................................................................47
Getting Started .....................................................................................................48
Main Features ......................................................................................................49
Choosing and Finding Locations.......................................................................... 52
Navigating ........................................................................................................... 61
Planning a Route................................................................................................. 63
Managing your Address Book ............................................................................. 65
Settings Menu ..................................................................................................... 69
Troubleshooting.................................................................................................... 74
Guaranee............................................................................................................186
Subject to technical change

40
INTRODUCTION
We hope that you enjoy using your new Audiovox NAV101 navigation system. This
manual is designed to help you get the most out of your system. This navigation
system leads you straight to your destination. You can navigate and plan your route
with an easy-to-use and intuitive interface, plan your trip to suit your personal
preferences and interests, and find and save (bookmark) interesting destinations
before you begin your trip.
Key Features
• Powered by gate5 / Nokia Smart2Go
• Teleatlas Map Data Western and Eastern Europe
• > 2 million POI (Point Of Interest)
• Speed Sensitive Zoom
• Enhanced Female TTS Voice Guidance Engine
• Standard Male / Female Voice Guidance Engine
• Turn by Turn Voice Guidance
• Back-Up Data DVD
Specifications
• Samsung S3C2440 (ARM9) 400MHz Processor
• 64MB SDRAM
• 32MB Nand Flash
• Win CE 4.2
• Storage - Internal SD Card Slot (2GB Card Included w/ Map Data pre installed)
• Sirf lll 20 Channel GPS antenna
• Operating Voltage - Received from Head Unit (11 ~ 16VDC, Negative Ground)
Subject to technical change

4
Parts List
• NAV101 navigation module
• SIRF III Antenna with magnetic mount
• Left and right mounting brackets
• Four rubber feet (to affix to the bottom of the NAV101 in the recessed area near
each corner)
• SmartBus cable (used to connect the NAV101 to the Audiovox navigation-ready
radio)
• Four 6mm (.25in) screws (to secure the left and right mounting brackets to the
NAV101 navigation module)
• One 2 Gigabyte SD Card pre loaded with map/navigation software
• Two 11mm (.4in) screws (for fastening the SmartBus cable to the radio and
NAV101)
• DVD with backup software for map data and navigation
About GPS and GNSS
The NAV101 is a vehicle GPS (Global Positioning Satellite)-based navigation
device which utilizes digital map data to guide you from your selected location A to
location B, using location information obtained from a Global Navigation Satellite
System (GNSS). A GNSS consists of a set of satellites that transmit
high-frequency radio signals containing time, direction, and distance data that can
be picked up by a receiver, allowing users to pinpoint their precise locations
anywhere around the globe. Navigation Satellite Receivers (GPS devices) use this
transmitted information to calculate an exact location on the earth.
Every point on Earth can be identified by latitude and longitude. The receiver uses
the information sent by at least three satellites and determines the coordinates of
the receiving device.
By comparing the time the signals were transmitted from the satellites and the time
they were recorded, the receiver calculates how far away each satellite is. The
distance of the receiver from three or more satellites reflects its position on the
surface of the planet. Using these distance measurements, the receiver might also
be able to calculate speed, bearing, trip time, distance to destination, altitude, etc.
The GPS position may be displayed as a point on a digital map (at least three
satellites' signals must be received) and as the GPS device moves the
corresponding trace is displayed as well.
Subject to technical change

42
Please keep in mind that although the radio signals of navigation satellites will pass
through clouds, glass, plastic, and other lightweight materials, satellite-navigation
receivers will not work underground or in some enclosed spaces.
Smart2Go navigation engine and Tele Atlas map data.
The NAV101 2GB SD card is pre-loaded with the Smart2Go navigation engine and
Tele Atlas map data. The map data covers the European Countries:
Albania, Andorra, Austria, Belarus, Belgium, Bosnia and Herzegowina, Croatia,
Czech Republic, Denmark, Estonia, Finland, France, Germany, Gibralta, Greece,
Hungary, Ireland, Italy, Latvia, Liechtenstein, Lithuania, Luxembourg, MNE,
Macedonia, Norway, Poland, Portugal, Romania, Russia, SRB, San Marino,
Slovakia, Slovenia, Spain, Sweden, Switzerland, The Netherlands, Turkey, United
Kingdom (incl. 7 PIN ZIP Code
) , Vatican city state (holy see).
Map data update
If you are in need of new or updated map data in future, then please contact:
a) Your local dealer or
b) Your distributor or
c) Our technical service department: www.audiovox.de
.
Subject to technical change

43
SAFETY INFORMATION
When the Audiovox NAV101 is first turned on, the following message appears:
You must agree to the above notice before operating the NAV101.
The following safety rules must be followed to prevent accidents that can result in
injury or death to yourself or others:
• The driver should operate the device only when the vehicle is stopped. Only a
vehicle passenger should operate the device while the vehicle is moving. When
driving, the need to view the display is minimal. Voice prompts will guide you to
your destinations.
• It is your responsibility to comply with all traffic laws.
• The NAV101 is designed to assist you in the process of reaching your
destination. It is not a substitute for attentiveness and good judgement. It is
your responsibility to disregard any unsafe, hazardous, or illegal route
suggestions.
• The device does not include, analyze, process, consider, or reflect any of the
following:
a. Legal restrictions (such as vehicular type, weight, height, width, load and
speed restrictions);
b. Road slope or grade, bridge height, width, weight, or other limits;
c. Population density;
d. Neighborhood quality or safety;
e. Availability or proximity of law enforcement, emergency rescue, medical, or
other assistance;
f. Construction work zones or hazards;
g. Road or lane closures;
h. Road, traffic, or traffic facilities' safety or condition;
i. Weather conditions;
j. Pavement characteristics or conditions;
k. Special events;
Subject to technical change

44
l. Traffic congestion.
• While every attempt is made to ensure that the database is accurate, roadways,
points of interest, and business and service locations may change over time.
• Do not use the NAV101 to navigate to a police station, hospital, etc. in an
emergency.
• Laws in some states prohibit wearing stereo headphones or may prohibit use or
placement of a navigation device while operating a motor vehicle. Please
contact your state's Department of Motor Vehicles for information.
Subject to technical change

45
INSTALLATION
The NAV101 can be used with a Audiovox navigation-ready DVD unit
(VME 9312 TS, VME 9512 TS, VME 9122TS).
Warnings
• Do not install components in areas which are susceptible to rain, moisture,
direct sunlight, extreme heat or cold, excessive dust, dirt or humidity.
• Do not install the NAV101 where it will obstruct the driver’s view or interfere with
the vehicle’s operating system or safety features (air bags, hazard light buttons,
etc.).
• Use only installation parts and hardware provided with the unit. Use of other
parts can cause malfunction and possible damage to your navigation system.
• This product should only be installed in vehicles with a 12-volt battery with
negativ grounding. Check the battery voltage of your vehicle before installation.
• To avoid shorts in the electrical system, be sure to disconnect the negative (–)
battery cable before beginning installation.
NAV101 Placement
The NAV101 should be installed under the back or front seat. It can also be
installed in the trunk, if necessary. Do not install the NAV101 where it will come in
contact with water or direct sunlight. Mount the supplied brackets to the NAV101
using the 4mm (.25in) screws provided.
NOTE:
Be sure to install the NAV101 in such a way that the SD card slot is accessible
after install, allowing for the removal/insertion of the SD card for future changes
to map data or upgrades.
WARNING!
Be sure to secure all wires/cables safely away from the steering wheel, shift
lever, and gas or brake pedal.
Subject to technical change

46
Antenna Placement
Since the NAV101 uses GPS technology for navigation, proper antenna place-
ment is crucial for optimal performance of the GPS receiver. When using GPS
antennas, the antenna plane should be parallel to the geographic horizon. There
should be nothing between the antenna and the sky to ensure a direct line-of-
sight between the antenna and available satellites.
The preferred antenna location is on the top of the front bumper or dashboard or
trunk area. When placed on the dashboard, performance may be reduced due to
obstruction caused by the window or roof.
NOTE:
Do not cut the GPS antenna cable to shorten or lengthen it.
Subject to technical change

47
Subject to technical change

48
GETTING STARTED
The initial GPS location lock is best established when your vehicle is parked. If
the device is in motion, the signal can take longer to initially connect. Once the
initial coordinates are established, the software will follow you as you move and
navigate.
NOTE:
It may take up to 5 minutes to establish the first connection. Subsequent
connections will be faster (30 seconds to 1 minute), but if you have not used the
unit for several days or are very far away from the last location you used it, it
may take up to 5 minutes again to find a strong signal.
Set time zone
Your NAV101 automatically determines the time through the GPS signal.
However, you must set your time zone.
• Select your time zone from the list. You can change the time zone later (see
“General Settings” on page 32)
• Press the confirmation icon.
View Safety Precautions
Next, a screen with safety precautions will be shown.
1. Read the safety precautions.
2. Press “I Agree” to continue to the Main Menu.
Connections
1. Insert one end of the Smartbus cable into the “DATA BUS” slot on the side of
the NAV101 and secure it with a 11mm (.4in) screw (provided). Connect the other
end of the cable to the NAV101 input on the back of your Audiovox navigation-
ready head unit (VME 9122 TS VME 9512 TS, VME 9312 TS) If using a VME
9312TS or VME 9512TS, secure the cable to the radio using a 11mm (.4in)
screw. The VME 9122 has a cable to cable connection and does not require an
anchor screw.
2. Attach the GPS Antenna to the “ANTENNA” jack on the side of the NAV101.
3. Insert SD card into the SD card slot and gently press the card in against the
spring latch until it stops, then release. The card will "lock" firmly into place inside
the SD card slot.
Subject to technical change

49
MAIN FEATURES
Main Menu
The main menu is your central point of access to all functions of your NAV101.
It allows you to set your destination, manage your favorites and control all
settings of your device.
The “Main Menu” consists of the following options:
• View Map: Press to view your current location on the Tracking Map.
• Drive to...: Choose your destination – either by searching for an address,
choosing an entry from the POI (POINT OF INTEREST) directory, selecting a
location from the map, or by choosing a destination from a saved list of recently
visited locations or favorites (see “Choosing and Finding Locations” on page 15).
• Settings: Configure your navigation to suit your needs. Define general settings
(e.g. time, language, or system of measurement), configure your map (e.g. 2D or
3D mode, day or night mode, map complexity) or load a map of a different
region, set the route options (e.g. choose to avoid or allow toll roads or ferries),
or change the volume (see “Settings Menu” on page 69).
Map Tracking and Browsing
The map is the core component of your NAV101. It will be centered on your
current location by default, provided you have a GPS connection. You can
browse the map, display information about the different locations shown on it and
choose them for routing and navigating. The map knows two basic states, the
Tracking and the Browsing mode.
Subject to technical change

50
In Tracking mode, the map follows your actual position (GPS position), displaying
information about your geographic position, your speed, etc. The GPS position is
indicated by a green arrow or a haircross.
Use a stylus or your finger to browse the map and enter Browsing mode. The
selected position will be identified by a crosshair ( cursor. The screen is
highlighted in orange when in Browsing mode.
POI symbols e.g. Churchand Mail
Subject to technical change
Current car position

51
NOTE:
Pressing an icon on the map opens an overlay window with information about the
selected item.
• To zoom in or out, press the + or – icons. After pressing one of the icons, the
zoom slider will appear, enabling smooth zooming.
• With the compass icon (in the bottom left hand corner) you may adjust the
orientation.
• If you want to return to the tracking mode, press the button.
Navigation Screen
The navigation screen displays your route (in blue) and your surroundings. A
green arrow identifies your current position. The red arrow will indicate the
direction of your next turn. The upcoming maneuver is also visualized in the
upper left corner, along with the distance to that turn. When you come up to a
turn, you will hear a voice command at the appropriate time.
On the left, additional information, including the current and estimated arrival time
and the distance to your destination, is displayed. For one-way streets, the transit
direction is indicated with a red arrow. For more information about navigation, see
“Navigating” on page 51.
Next Maneuver Next Turn/Junction/Exit Number
Current Position
Distance to Next Manuever
Speed
Current Time /
Estimated Arrival Time
Distance to Destination
Subject to technical change

52
CHOOSING AND FINDING LOCATIONS
This section describes the different ways of finding and choosing locations. You
can search for an Address, search POI (Point of Interest) directories and city
guides, select a recent destination or choose from your Address Book, or select a
location on the Map.
NOTE:
If a route is in progress when you exit the NAV101 system, the unit will prompt
“Do you want to resume the last route?” when you resume operation.
Finding an Address
Find addresses through the Address search. Just enter information about the
desired target, select a hit from the results list and use the address found for
different purposes, like showing it on a map, planning your route, and navigating.
1. From the main menu, press Drive to....
2. Press Address. The “Find Address” window will be displayed:
• Your NAV101 offers a convenient interactive look-ahead search function to
prevent misspelling. Only keys that lead to a search result can be pressed – all
others are greyed out.
Subject to technical change

53
• After entering the second character, only letters that can be used to spell an
existing destination will be available for selection of the third character, the fourth
character, and so on.
• Continue entering characters until you have narrowed down the search to only
one result, or press the OK button to display a list of search results, from which
you can choose.
• If at any point you want to backspace and delete characters, press the
backspace button (<-) on screen.
• To add a space, press the space bar ( _ ).
• If you need to enter an apostrophe ('), use the space key instead.
• Special symbols can be accesed by pressing the “ä and ü” button.
3. Select Country
a. Press the “Country.” data field to access the “Select State” screen.
b. Choose a state from the list by pressing to highlight it. Use the scroll bar on
the right of the screen to view all of the choices.
c. Press the OK button to choose the highlighted Country. and return to the “Find
Address” screen.
4. Select a City.
a. Press the “City” data field to access the “Enter...” screen.
b. Use the on-screen keypad to enter the City name. If the first two characters
are not part of an existing City name, “No entries found” appears on the screen.
c. Press the OK button to select the entered name or select from a list of
matches based on the letters you entered.
d. Press the OK button to choose the highlighted City and return to the “Find
Address” screen.
Subject to technical change

54
5. Enter Zip Code
You may enter a known zip code instead of the Cityname to advance faster.
6. Select a Street.
a. Press the “Street” data field to access the “Enter...” screen.
b. Use the on-screen keypad to enter the Street name. If the first two characters
are not part of an existing Street name, “No entries found” appears on the
screen.
c. Press the OK button to select the entered name or select from a list of
matches based on the letters you entered.
d. Press the OK button to choose the highlighted Street and return to the “Find
Address” screen.
6. Select a street No.
a. Press the “No.” data field to access the “Enter...” screen.
b. Use the on-screen keypad to enter the street Number.
c. Press the OK button to enter the street Number. If the Number you entered is
not an existing street Number, “House number not found. Street will be used
for destination.” appears on the screen. You will automatically return to the
“Find Address” screen.
7. Press the MENU button to view the following screen:
• To navigate to the location, select Navigate.
• To use the location for planning a route, select Waypoint.
• To save the location as a bookmark, select Save.
• To view the location on the map, select On Map.
Subject to technical change

55
Searching for and Choosing a POI (Point Of Interest)
The POI finder allows you to quickly find points of interest, like gas stations and
restaurants, in a database of millions of POIs. These places can be near your
current position (the default) or at any other location.
Browse POIs
1. From the main menu, press POI Search. The “POI Search” window will be
displayed:
2. Select an area for the POI search. Although the text in the white Where? box
shows your current location, you must press the Where? button to set your
current location for the POI search or enter a new location.
Subject to technical change

56
a. To search for a POI in another location, press the “Where?” button. A screen
with navigation options appears.
b. Press the corresponding button to search for a new address using the
“Enter...” screen (Find Address), My Address Book, or your current GPS Position.
To skip this step and return to the “POI Search” screen press Back.
3. On the “POI Search” screen, select one of the following POI categories:
Automotive, Overnight, Dining, Sights, Shopping, Leisure, Service, Transport. A
menu with subcategories will be shown.
Subject to technical change

57
4. Select a sub-category from the POI Search list. A list of POIs will be shown.
Use the scroll bar on the right side of the screen to see all of the choices.
• To return to the previous category, press the button.
5. Press a POI to select it and display the following navigation options:
• To navigate to the location, select Navigate.
• To use the location for planning a route, select Waypoint.
• To save the location as a bookmark, select Save.
• To view the location on the map, select On Map.
• Press Description to view detailed information about the chosen POI, including
address and telephone number, when available.
Subject to technical change
Other manuals for NAV101 - NAV 101 - Navigation System
3
Table of contents
Other Audiovox Car Navigation System manuals

Audiovox
Audiovox NAV 104 User manual

Audiovox
Audiovox NAV 102 - NAVIGATION SOFTWARE User manual

Audiovox
Audiovox In - Dash Navigation Radio Instruction manual

Audiovox
Audiovox LCMR4N User manual

Audiovox
Audiovox NAV101 - NAV 101 - Navigation System User manual

Audiovox
Audiovox VME 9725 NAV User manual

Audiovox
Audiovox VXE 7020 NAV Planning guide

Audiovox
Audiovox LCM7N 7 User manual

Audiovox
Audiovox ADV800XM User manual