manuals.online logo
Brands
  1. Home
  2. •
  3. Brands
  4. •
  5. Audiovox
  6. •
  7. Portable DVD Player
  8. •
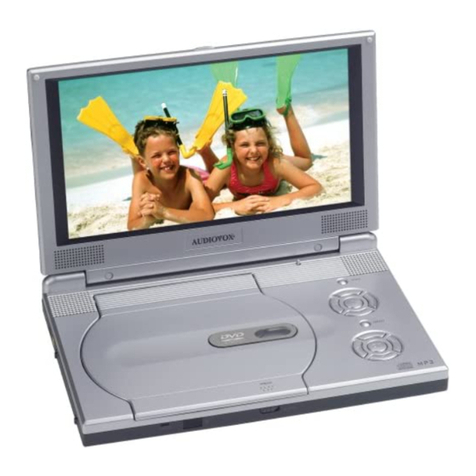
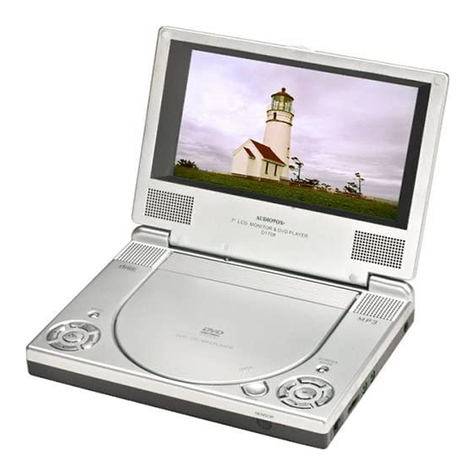
  9. Audiovox D1998PK - 9" Slim Line Portable DVD Player User manual

Audiovox D1998PK - 9" Slim Line Portable DVD Player User manual

Operation Manual
PORTABLE DVD PLAYER
READ THESE INSTRUCTIONS THOROUGHLY PRIOR TO CONNECTING AND OPERATING YOUR DVD PLAYER.
PLEASE RETAIN THIS MANUAL IN CASE YOU NEED IT FOR FUTURE REFERENCE.
THE ILLUSTRATIONS AND GRAPHICS IN THE MANUAL ARE FOR REFERENCE ONLY AND SUBJECT TO CHANGE WITHOUT NOTICE.
Model: D1998PK
Notice:
This Product incorporates copyright protection technology that is protected by method
claims of certain U.S. Patents and other intellectual property rights owned by Macrovision
Corporation and other rights owners. Use of this copyright protection technology must be
authorized by Macrovision Corporation, and is intended for home and other limited viewing
uses only unless otherwise authorized by Macrovision Corporation. Reverse engineering or
disassembly is prohibited.
Notice:
An LCD panel and/or video monitor may be installed in a motor vehicle and visible to the
driver if the LCD panel or video monitor is used for vehicle information, system control, rear
or side observation or navigation. If the LCD panel or video monitor is used for television
reception, video or DVD play, the LCD panel or video monitor must be installed so that these
features will only function when the vehicle is in “park” or when the vehicle’s parking brake is
applied.
An LCD panel or video monitor used for television reception, video or DVD play that
operates when the vehicle is in gear or when the parking brake is not applied must be
installed to the rear of the driver’s seat where it will not be visible, directly or indirectly, to the
operator of the motor vehicle.
Notice:
The D1998PK DVD Player contains a built in battery. To obtain the best performance from
your DVD Player please refer to the following battery care instructions:
CHARGING THE D1998PK
When charging the DVD Player the power switch should be set to off. The DVD Player can be charged
using the AC to DC adaptor or the vehicle DC power adaptor. When the battery is fully discharged the unit
will require approximately 8 hours to fully recharge the battery. While the unit is charging the LED indicator
will blink. Once the unit is fully charged the LED will remain on. When the battery is fully charged, the unit
will play for approximately 2.5 hours. You should charge the unit once a month to ensure the unit will be
operational for 2 hours.
Do not charge the DVD Player in the vehicle when the vehicle is not running
1
Introduction
Thank you for selecting the D1998PK portable DVD Player. The main features include a 9" Screen (16:9 Aspect Ratio) Liquid
Crystal Display (LCD) monitor and a DVD Player. The unit applies the latest state of the art electronics and is designed for use in
hotels, offices, home or vehicle. The unit is constructed to provide years of reliable, trouble-free service, and is compact so that
you can take it with you anywhere and is designed for quick and easy installation. Please read the entire instruction manual
supplied with this product prior to operation. The documentation will assist you in installing the system properly to obtain the best
equipment performance. Please save this manuals for later use.
Cautions and Warnings
1. Placement
To prevent fire or electric shock, do not expose this appliance to rain or moisture. Do not place the set on an unstable cart,
stand, tripod, bracket or table to prevent it from falling. Keep the unit away from strong magnets, heat sources, direct sunlight,
excessive dust. If the unit is brought directly from a cold to a warm location, moisture may condense inside the unit. When you
move it from a cold to a warm location, wait for about one hour before operating the unit, or remove the disc and leave the unit
turned on until the moisture evaporates.
2. Installation
Ensure that the D1998PK is installed and used in accordance with the instructions and illustrations provided in this manual.
3. Objects and Liquids
Do not push objects of any kind into the unit through openings; do not spill or spray liquid of any kind on or in the system (this
may result in a fire or electric shock). Do not place anything heavy on the unit. To ensure proper ventilation and proper
operation, never cover or block the slots and openings with a cloth or other material.
4. Disassembly
Do not attempt to disassemble the cabinet or replace the battery. There is a risk of electric shock and/or exposure to Laser
Radiation. Contact qualified service personnel if your system is in need of repair.
5. Cleaning Unit
When cleaning, make sure the system is unplugged from the power source. Do not use liquid cleaners or aerosol cleaners.
Use a cloth lightly dampened with water for cleaning the exterior of theDVD Player system only.
6. Disc
Do not use irregularly shaped discs such as heart or star-shaped discs as they may cause the unit to malfunction. Do not stick
paper, tape or glue on the disc. Do not expose the disc to direct sunlight or heat sources such as hot air ducts. Do not touch the
surface of disc. Handle the disc by its edge. Clean the disc by wiping the disc from the center out with a cleaning cloth. Remove
the disc from the unit and store it in its case after playing. Some playback operations of discs may be intentionally fixed by
software producers. Since this unit plays discs according to the disc contents the software producers designed, some
playback features may not be available. Also refer to the instructions supplied with the discs.
7. Regional Coding
Both the DVD Player and disc are coded by region. These regional codes must match in order for the disc to play. If the
codes don’t match, the disc won’t play. This unit’s code is region 1. DVD’s with other regional codes cannot be played in
this unit.
Contents
1. 1 x 9” LCD Monitor and DVD Player With Built-In Battery
2. 1 x AC to DC Adapter
3. 1 x Remote Control w/Battery (CR2025)
4. 1 x Instruction Manual
5. 1 x Audio/Video Cable
6. 1 x DC Power Adapter
7. 2 x Wired Headphones
8. 1 x Carry Bag With Straps
2
OVERVIEW OF THE DVD PLAYER: 1. LCD SCREEN
2. SPEAKERS
3. DISC COVER
4. DISC COVER OPEN BUTTON
5. VOLUME DOWN BUTTON
6. VOLUME UP BUTTON
7. ZOOM & SLOW BUTTON
8. REPEAT & DISPLAY BUTTON
9. MENU & TITLE BUTTON
10. AUDIO & SUBTITLE BUTTON
11. STOP & BUTTON
12. SETUP & SEARCH BUTTON
13. NAVIGATION DOWN & FAST BACKWARD BUTTON (tt)
14. NAVIGATION LEFT & PREVIOUS BUTTON (9)
15. NAVIGATION RIGHT &NEXT BUTTON (:)
16. OK (PLAY/PAUSE) BUTTON
17. NAVIGATION UP & FAST FORWARD BUTTON (uu)
18. POWER INDICATOR
19. REMOTE SENSOR
20. HEADPHONE JACK
21. HEADPHONE JACK
22. AUDIO OUT JACK
23. VIDEO OUT JACK
24. CHARGE INDICATOR
25. POWER ON/OFF SWITCH
26. DC IN 9V JACK
27. BATTERY COMPARTMENT
Remote control unit
1. SETUP BUTTON
2. DISPLAY BUTTON
3. PREV. BUTTON (9)
4. NAVIGATION UP BUTTON (p)
5. NAVIGATION LEFT& F.BWD BUTTON (tt)
6. OK/ENTER BUTTON
7. NAVIGATION DOWN BUTTON (q)
8. NUMERIC BUTTONS
9. SUBTITLE BUTTON
10. ZOOM BUTTON
11. REPEAT A-B BUTTON
12. NEXT BUTTON (:)
13. REPEAT 1/ALL BUTTON
14. NAVIGATION RIGHT & F.FWD BUTTON (uu)
15. MENU BUTTON
16. STOP BUTTON (<)
17. AUDIO BUTTON
18. ANGLE BUTTON
19. PLAY/PAUSE BUTTON (uII)
3
5 6
18 19
1
2
3
4
17
16
14
12
10
8
15
13
11
9
7
27
20 22 25
21 23 24 26
1
2
3
4
5
6
7
8
9
14
10
15
18
11
16
12
17
19
13
VEHICLE INSTALLATION:
INSTALLING THE DVD PLAYER ON A SEAT BACK IN A CAR
1. Unfold the carry bag, and place the DVD Player on the bag beneath the elastic straps. Ensure that the unit's corners are
secured by the elastic straps.
2. Secure the upper portion of the carry bag to headrest support bars using the headrest strap. Adjust the headrest strap
until the bag is firmly secured.
3. Secure the lower portion of the carry bag to the vehicle seat back using the seat back strap. Adjust the seat back strap until
the bag is firmly secured.
4
CONNECTING THE DVD PLAYER TO
OTHER DEVICES
When connecting the DVD Player to a TV ensure that the
DVD Player and other devices (TV set and/or amplifier) to
be connected to the DVD Player are set to OFF.
Avoid blocking ventilation holes of the connected devices and
ensure that air can circulate freely.
Observe wire color coding when connecting audio and video
cables.
(Yellow - Video)
(Red - Audio Right)
(White - Audio Left)
CONNECTING TO THE VEHICLE DC
ADAPTOR
The vehicle power adaptor is designed for use with vehicles
that have a 12V or 24V, negative ground electrical system.
WARNING:
Disconnect the car power adaptor when not in use.
To the vehicle DC accessory socket
CAUTION:
ŸUse the unit only with the supplied car power adaptor, use
with other car power adaptors could damage the unit.
ŸThe recommended car power adaptor is for use with this
unit only. Do not use it with other equipment.
ŸIn the interest of traffic safety, do not operate the unit or
view the video while driving a vehicle.
ŸMake sure the unit is fastened securely to prevent it from
moving from its mounting location in the vehicle in the
event of an accident.
ŸAfter use, disconnect the car power adaptor from both the
unit and vehicle DC power adaptor socket.
CHARGING THE D1998PK
When charging the DVD Player the power switch should be
set to off. The DVD Player can be charged using the AC to
DC adaptor or the vehicle DC power adaptor. When the
battery is fully discharged the unit will require approximately 8
hours to fully recharge the battery.
While the unit is
charging the LED indicator will blink. Once the unit is fully
charged the LED will remain on. When the battery is fully
charged, the unit will play for approximately 2.5 hours. You
should charge the unit once a month to ensure the unit will be
operational for 2 hours. Do not charge the DVD Player in the
vehicle when the vehicle is not running
The battery must be
charged at least 8 hours prior to first use.
NOTE: If you plan not to use the battery for an extended
period of time (one week or longer), we recommend that you
fully charge the battery. For longer periods of storage, please
recharge the battery at least once every two months to
maintain the battery in optimum condition.
Precautions related to Battery Recharge:
1. Once the battery is fully discharged, immediately recharge
(regardless of whether you plan to use battery or not) in order to
maximize battery life.
2. Recharge efficiency will degrade when environmental
o o o o
temperatures drop below 50 F (10 C) or exceed 95 F (35 C).
3. During this period, please recharge the battery at least once
every two months to avoid irreparable to the battery.
5
FUSE REPLACEMENT FUSE
Power on the TV set and select video input mode.
Power on the audio system which is connected to the unit.
A/V cable
AUDIO R AUD IO L VID EO IN S-VID EO Y UV IN PUT
AV AUDIO/V ID EO INP UT
TV SET
Audio input
(Black)
Video input
(Yellow)
OPERATION
GETTING STARTED
1. Slide the POWER switch to turn on the unit.
2. Press the OPEN button to open the disc tray.
3. Place a disc onto the disc cover hub with label side up.
4. Close the disc cover and playback will start automatically.
5. When the DVD menu screen appears, use the navigation
buttons to select a preferred chapter number, then press OK
(PLAY/PAUSE) (uII) button to start playback.
ADJUST THE VOLUME
Press the VOLUME UP (+)/DOWN (-) buttons to increase or
decrease the volume.
SKIP AHEAD OR BACK (:) (9)
Press the NEXT (:) or PREV (9) button once during
playback to skip forward or backwards. DVDs have chapters
and CDs have tracks.
RAPID FAST FORWARD/ REVERSE
To scan the disc forward or backward at X2, X4, X8, X16, X32
normal speed during playback, press the F.FWD button (uu)
or F.BWD button(tt) on the main unit or press and hold the
F.FWD button or F.BWD (uu) button on the remote control
several times.
Press OK (PLAY/PAUSE) (uII) button to resume normal play.
STOP PLAYBACK
Press the STOP button to stop playback; the DVD Player will
activate its resume function when the STOP button is
pressed. Press the OK (PLAY/PAUSE) (uII) button and
playback will resume from the point it was stopped. Open the
disc tray or press the STOP (<) button one more time to
clear the resume function.
SLOW-MOTION PLAY (DVD)
Press and hold the ZOOM/SLOW button during playback, the
disc will be played at 1/ 2 normal speed at first. Each time
the button is pressed, the playback speed will become slower
at 1/4, 1/8, 1/16 increments of normal speed.
Press the OK (PLAY/PAUSE) (uII) button and normal play
will resume.
6
JPEG PLAYBACK
Picture slide shows begin automatically after the CD
containing the images is loaded into the DVD Player.
JPEG images contained in the folders are displayed on the
LCD screen. Use the navigation buttons to select the desired
folder and then press OK (PLAY/PAUSE) (uII) button to
confirm.
The files in this folder are displayed and you can select your
favorite pictures using the up/down navigation buttons and
press OK (PLAY/PAUSE) (uII) button to start playback.
A preview of the picture will be displayed while you scroll
across the filenames.
VIEWING JPEG FILES
1. PLAY MODES
During playback, press the STOP (<) button to enter preview
mode
2. SKIP TO NEXT/PREVIOUS PICTURE
Press the NEXT (:) button to skip to the next picture or the
PREV (9) button to access the previous picture.
If no key is pressed for a few seconds, the DVD Player will
skip to next picture automatically.
3. ROTATE PICTURES
Press right navigation (:) button to rotate the picture Clockwise
and the left navigation (9) button to rotate the picture
Counterclockwise.
4. HORIZONTAL AND VERTICAL PICTURE ROTATION
Press up navigation (p) button to rotate the picture vertically.
Press DOWN navigation (q) button to rotate the picture
horizontally.
5. PICTURE ZOOM IN/OUT
Press ZOOM/SLOW button and the picture will zoom in and
out as the button is pressed. When the picture is enlarged,
you may use the navigation buttons to view parts of the picture
that are out of the image area.
REPEAT
Press REPEAT 1/all button during play, it will repeat play one
chapter/title or repeat all (for DVD disc), or repeat play a track
or all tracks (for CD).
A-B Repeat Play
Repeating sections between two specific points(A-B repeat)
1. Press REPEAT A-B button during play at the point where
repeat play is to be started(A).
2. Press REPEAT A-B button at the point where repeat play is
to be ended (B). Repeat play of the selection between
points A and B starts.
3. Press REPEAT A-B button to return to normal play.
SEARCH FOR A SCENE
1. Press and hold SETUP&SEARCH button on the unit
several times during playback until the desired scene is
displayed on the screen.
2. Input the desired number or time using the numeric
buttons.
3. Press OK (PLAY/PAUSE) (uII) button to confirm and the
playback from the desired scene will start.
4. The Search menu will automatically clear if no buttons are
pressed on the remote control or the unit.
ZOOM PLAY
Press the ZOOM/SLOW key repeatedly to enlarge (zoom in)
the picture by 2, 3, and 4 times normal size, or reduce (zoom
out) by 1/2, 1/3, 1/4 normal size.
Press this key once more when the picture is at 1/4 size and
the picture will return to normal size.
The enlarged pictured can be scrolled using the Navigation
buttons.
ON SCREEN DISPLAY INFORMATION
When the DVD Player is in operation, press the DISPLAY
button on the remote control or press and hold
AUDIO&DISPLAY button on the main unit. The screen will
display DVD information (title number, chapter number, title
elapsed time, remaining title time, chapter elapsed time, and
remaining chapter time).
CHANGING AUDIO SOUNDTRACK LANGUAGE (DVD)
The audio soundtrack language can be changed to a different
language from the one selected at the initial settings (This
function is only available on discs which contain multiple
audio soundtrack languages.
—Press the AUDIO button during DVD disc play, the sound
track language changes with the current sound track
number shown on the TV screen.
—Pressing the AUDIO button during CD disc play will
change audio output mode: MONO L, MONO R, MIX-
MONO and stereo.
NOTE: When no soundtrack languages are recorded, on
the disc, the AUDIO button will be non -operational.
MULTI-ANGLE VIEWING (DVD ONLY)
Press the ANGLE button during playback to display the
number of angles being played and then select the desired
angle to view the scene.
NOTE: Only DVDs initially shot with multi-angle scenes
will have this function.
CHANGING SUBTITLE LANGUAGE (DVD ONLY)
Press the SUBTITLE button on the remote or press and hold
AUDIO and SUBTITLE button on the main unit during
playback. The subtitle language shown on the screen will
change when the button is pressed. When the desired
language appears, release the button to view subtitles in that
language.
NOTE: Only DVDs recorded with multi-language subtitles
will have this function.
7
INITIAL SETTINGS
Initial settings allow you to personalize the DVD player
settings to your preference. Once the initial settings are set
they are retained in the DVD Player until modified.
ADJUSTING INITIAL SETTINGS
1. Press SETUP button.
2. Use the navigation buttons to select the feature you want
to modify. Use the navigation buttons to perform changes.
Press OK (PLAY/PAUSE) (uII) button to confirm
modifications.
3. Use navigation buttons to switch to another feature setting
on the main page.
4. Press SETUP button to exit main page.
1. General Setup
1.1 TV DISPLAY - Used to select the TV output mode.
Options: 4:3PS: Pan & scan mode
4:3LB: Letter box mode
WIDE16:9 Wide screen mode
1.2 ANGLE MARK - Used to determine whether or not the
DVD disc contains the multi-angle feature. If the feature is
present the icon will be displayed on the screen.
On: Icon will be displayed
Off: Icon will be turned off
1.3 OSD LANG - Used to select different On Screen Display
languages.
1.4 SCREEN SAVER - When the DVD Player is inactive for
several minutes, a DVD logo will scroll across the screen.
Options: On: Screen saver is enabled
Off: Screen saver is disabled
2. Speaker Setup
Downmix LTRT
Speaker Setup Page
2.1 Downmix
Options: LT/RT-Left/Right speaker balance mode
STEREO - Select this option if you don't have a 5.1
channel amplifier.
4. Preference setup
To set the DVD Player to your preferences press the power
button on the front panel. Do not place a disc in th DVD
Player. Press the SETUP button and access the Preference
Page. Select the various functions to be adjusted using the
navigation buttons.
General Setup Page
Angle Mark ON
OSD Lang ENG
Screen Saver
TV Display Wide
ON
Preference Page
3.1 BRIGHTNESS - Adjusts the brightness of the screen.
3.2 CONTRAST - Adjusts the contrast of the screen.
3.3 HUE - Adjusts the hue of the screen.
3.4 SATURATION - Adjusts the saturation color level of the
screen.
3. Video setup
Brightness 00
Video Setup Page
Contrast 01
Hue 01
Saturation 01
TV Type NTSC
Audio ENG
Subtitle OFF
Disc Menu ENG
4.1 TV TYPE
Options: PAL/MULTI/NTSC
4.2 AUDIO - Selects the audio language on a DVD which
contains multiple language.
4.3 SUBTITLE - Selects the preferred subtitle language on a
DVD which contains multiple subtitle language.
4.4 DISC MENU - Selects the menu language on a DVD
which contains multiple menu languages.
4.5 PARENTAL - Selects the viewing rating levels of DVD
which contains rating levels.
4.6 DEFAULT - Restores all settings to factory settings
Parental
Default
5. Password Setup
Password Mode
Password
Password Setup Page
5.1 PASSWORD MODE
Options: ON/OFF
5.2 PASSWORD
Option: Change
Select to change password
5.2.1 OLD PASSWORD
5.2.2 NEW PASSWORD
5.2.3 CONFIRM PWD
Changing Password Procedure :
1) Enter the old password in the OLD PASSWORD.
2) Enter new password in the NEW PASSWORD.
3) Enter the new password again in CONFIRM PWD.
You may reset the password at any time by using the default
password. The default password is: 3308
Hold discs by the edge so the surface will not be soiled with finger prints. Finger prints, dirt and scratches can
cause skipping and distortion.
Do not write on the label side with a ball-point pen or other writing utensils.
Do not apply benzine, thinner or other liquids that will damage the disc.
Be careful not to drop or bend the disc.
Install only one disc on the disc tray.
Do not try to close the disc tray when the disc is not seated properly.
Be sure to store the disc in it's case when not in use.
DISC HANDLING PRECAUTIONS
TROUBLESHOOTING
If your DVD Player does not seem to be functioning properly, check the items below before you contact Audiovox Tech Support.
Symptom Check
Make sure the AC adapter is securely plugged into an AC outlet.
Turn the power off and then back on.
Check that the battery pack is charged. If not, recharge it.
Check that the battery is inserted correctly observing polarity and
The battery may be defective. Replace it with a new one.
Check that the transmitted signal is directed at the remote control sensor on the DVD Player.
Remove any obstacles between the remote control and remote control sensor on the DVD Player.
Check that the Audio/Videos cables are securely connected.
Check that the disc is a DVD (region number 1 or all) or an Audio CD.
Do not use a disc that contains scratches or dirt.
Check that the label-side of the disc is facing up.
Check that the TV channel is set to VIDEO or AV if using the DVD Player with a TV.
Player does not turn on or
suddenly turns off.
Remote control won't work.
No picture or sound
Check that the screen display is on.
Check that the DVD Player display panel is in the open position. If closed, the audio will be muted.
Check the volume setting. If set to the lowest setting, turn up volume level.
Check that the headphones are plugged into the PHONES jack.
Speakers cannot be used with the headphones plugged in .
Check that the battery is properly installed and AC Adapter is properly connected.
Use a disc without scratches or dents.
No picture
No sound
No picture and sound
Distorted video or sound
8
WIRED HEADPHONES
CAUTION
BE sure to set the headphone volume to its lowest setting before plugging in the Headphone jack to avoid volume levels
that could cause damage to hearing.
To listen to the DVD audio output using the headphones plug the headphone plug into Headphone jack 1 or
Headphone jack 2. When the headphones are plugged into either jack the speakers are disabled.
Check that headphones are not plugged into the unit..
AUDIOVOX ELECTRONICS CORP. (the Company) warrants to the original retail purchaser of this
product that should this product or any part thereof, under normal use and conditions, be proven
defective in material or workmanship within 12 months from the date of original purchase, such
defect(s) will be repaired or replaced with reconditioned product (at the Company's option) without
charge for parts and repair labor. A game controller, if supplied, is similarly warranted for ninety (90)
days.
To obtain repair or replacement within the terms of this Warranty, the product is to be delivered with
proof of warranty coverage (e.g. dated bill of sale), specification of defect(s), transportation prepaid,
to the Company at the address shown below.
This Warranty does not extend to the elimination of externally generated static or noise, to
correction of antenna problems, to costs incurred for installation, removal or reinstallation of the
product, or to damage to digital memory/media devices, gaming devices, discs, speakers,
accessories, or electrical systems.
This Warranty does not apply to any product or part thereof which, in the opinion of the Company,
has suffered or been damaged through alteration, improper installation, mishandling, misuse,
neglect, accident, or by removal or defacement of the factory serial number/bar code label(s). THE
EXTENT OF THE COMPANY'S LIABILITY UNDER THIS WARRANTY IS LIMITED TO THE
REPAIR OR REPLACEMENT PROVIDED ABOVE AND, IN NO EVENT, SHALL THE COMPANY'S
LIABILITY EXCEED THE PURCHASE PRICE PAID BY PURCHASER FOR THE PRODUCT.
This Warranty is in lieu of all other express warranties or liabilities. ANY IMPLIED WARRANTIES,
INCLUDING ANY IMPLIED WARRANTY OF MERCHANTABILITY, SHALL BE LIMITED TO THE
DURATION OF THIS WRITTEN WARRANTY. ANY ACTION FOR BREACH OF ANY WARRANTY
HEREUNDER INCLUDING ANY IMPLIED WARRANTY OF MERCHANTABILITY MUST BE
BROUGHT WITHIN A PERIOD OF 24 MONTHS FROM DATE OF ORIGINAL PURCHASE. IN NO
CASE SHALL THE COMPANY BE LIABLE FOR ANY CONSEQUENTIAL OR INCIDENTAL
DAMAGES FOR BREACH OF THIS OR ANY OTHER WARRANTY. No person or representative is
authorized to assume for the Company any liability other than expressed herein in connection with
the sale of this product.
Some states do not allow limitations on how long an implied warranty lasts or the exclusion or
limitation of incidental or consequential damage so the above limitations or exclusions may not
apply to you. This Warranty gives you specific legal rights and you may also have other rights which
vary from state to state.
U.S.A.: AUDIOVOX ELECTRONICS CORPORATION, 150 MARCUS BLVD. HAUPPAUGE,
NEW YORK 11788 1-800 -645-4994 .
12 MONTH LIMITED WARRANTY
Applies to Audiovox Video Products
128-5495F
9
®
10
This page intentionally left blank
© 2008 Audiovox Electronics Corporation 128-8405B

Other Audiovox Portable DVD Player manuals

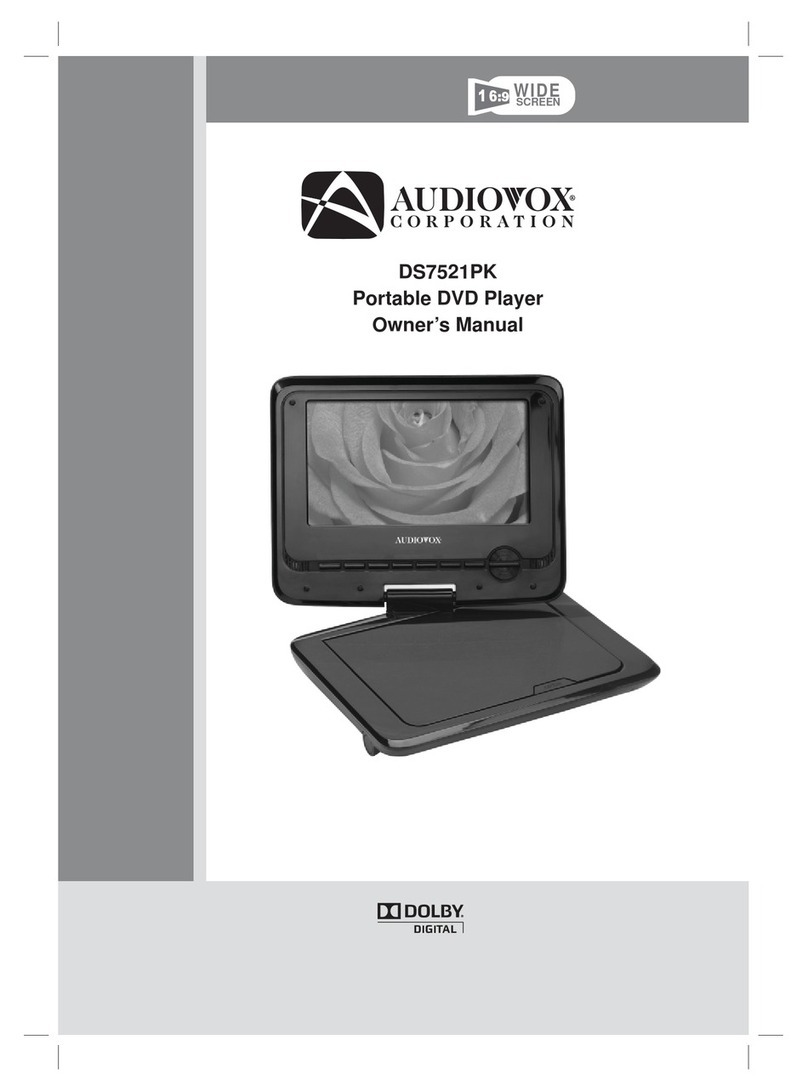
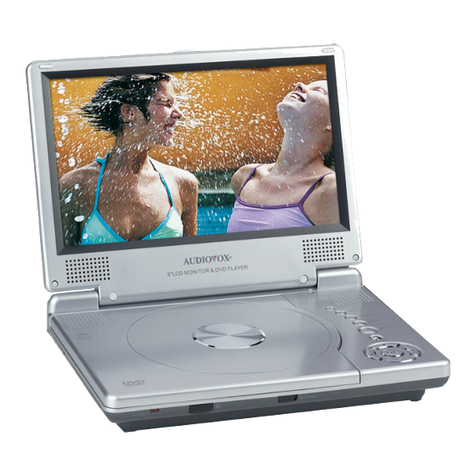
Audiovox D1915 - DVD Player - 9 User manual

Audiovox

Audiovox D1915 - DVD Player - 9 User manual

Audiovox D1718ES - DVD Player - 7 User manual

Audiovox

Audiovox D1718ES - DVD Player - 7 User manual

Audiovox DVD1500 User manual

Audiovox

Audiovox DVD1500 User manual

Audiovox D1705 User manual

Audiovox

Audiovox D1705 User manual

Audiovox D1530 User manual

Audiovox

Audiovox D1530 User manual

Audiovox D705 User manual

Audiovox

Audiovox D705 User manual

Audiovox DT7 User manual

Audiovox

Audiovox DT7 User manual

Audiovox DS7321 User manual

Audiovox

Audiovox DS7321 User manual

Audiovox D1830 User manual

Audiovox

Audiovox D1830 User manual

Audiovox VBP50 User manual

Audiovox

Audiovox VBP50 User manual

Audiovox D1917PK User manual

Audiovox

Audiovox D1917PK User manual

Audiovox D1805 User manual

Audiovox

Audiovox D1805 User manual

Audiovox VBP3800 User manual

Audiovox

Audiovox VBP3800 User manual

Audiovox VBP58 User manual

Audiovox

Audiovox VBP58 User manual

Audiovox VE1020 User manual

Audiovox

Audiovox VE1020 User manual

Audiovox DS2058 User manual

Audiovox

Audiovox DS2058 User manual

Audiovox DT102 User manual

Audiovox

Audiovox DT102 User manual

Audiovox D1888PK User manual

Audiovox

Audiovox D1888PK User manual

Audiovox DS9521PK User manual

Audiovox

Audiovox DS9521PK User manual

Audiovox D1750T User manual

Audiovox

Audiovox D1750T User manual

Audiovox MVDV4A User manual

Audiovox

Audiovox MVDV4A User manual

Audiovox D1708ES User manual

Audiovox

Audiovox D1708ES User manual

Audiovox D1718PK - DVD Player - 7 User manual

Audiovox

Audiovox D1718PK - DVD Player - 7 User manual

Audiovox Eddie Bauer PE702 User manual

Audiovox

Audiovox Eddie Bauer PE702 User manual

Popular Portable DVD Player manuals by other brands

Sylvania SDVD7014 Product features

Sylvania

Sylvania SDVD7014 Product features

Sony DVP-FX850 operating instructions

Sony

Sony DVP-FX850 operating instructions

NextBase SDV1102-B operating instructions

NextBase

NextBase SDV1102-B operating instructions

Lenoxx PDVD700 instruction manual

Lenoxx

Lenoxx PDVD700 instruction manual

Philips PD7007/51 user manual

Philips

Philips PD7007/51 user manual

Philips PET1002 Specifications

Philips

Philips PET1002 Specifications

Philips PET729 quick start guide

Philips

Philips PET729 quick start guide

LENCO DVP-840 manual

LENCO

LENCO DVP-840 manual

Philips PD7032/05 quick start guide

Philips

Philips PD7032/05 quick start guide

Goodmans GDVDPLY01 user manual

Goodmans

Goodmans GDVDPLY01 user manual

Philips PET941D/79 user manual

Philips

Philips PET941D/79 user manual

Toshiba SDKP74SWN owner's manual

Toshiba

Toshiba SDKP74SWN owner's manual

Polaroid PDV-077PT Operation manual

Polaroid

Polaroid PDV-077PT Operation manual

Sony BDP-SX910 operating instructions

Sony

Sony BDP-SX910 operating instructions

Philips PD7032T/05 user manual

Philips

Philips PD7032T/05 user manual

ProScan PDVD8737 user manual

ProScan

ProScan PDVD8737 user manual

Sens S800PD owner's manual

Sens

Sens S800PD owner's manual

Digital reasures CINEMATIX user guide

Digital reasures

Digital reasures CINEMATIX user guide

manuals.online logo
manuals.online logoBrands
  • About & Mission
  • Contact us
  • Privacy Policy
  • Terms and Conditions

Copyright 2025 Manuals.Online. All Rights Reserved.