TABLE
OF
CONTENTS
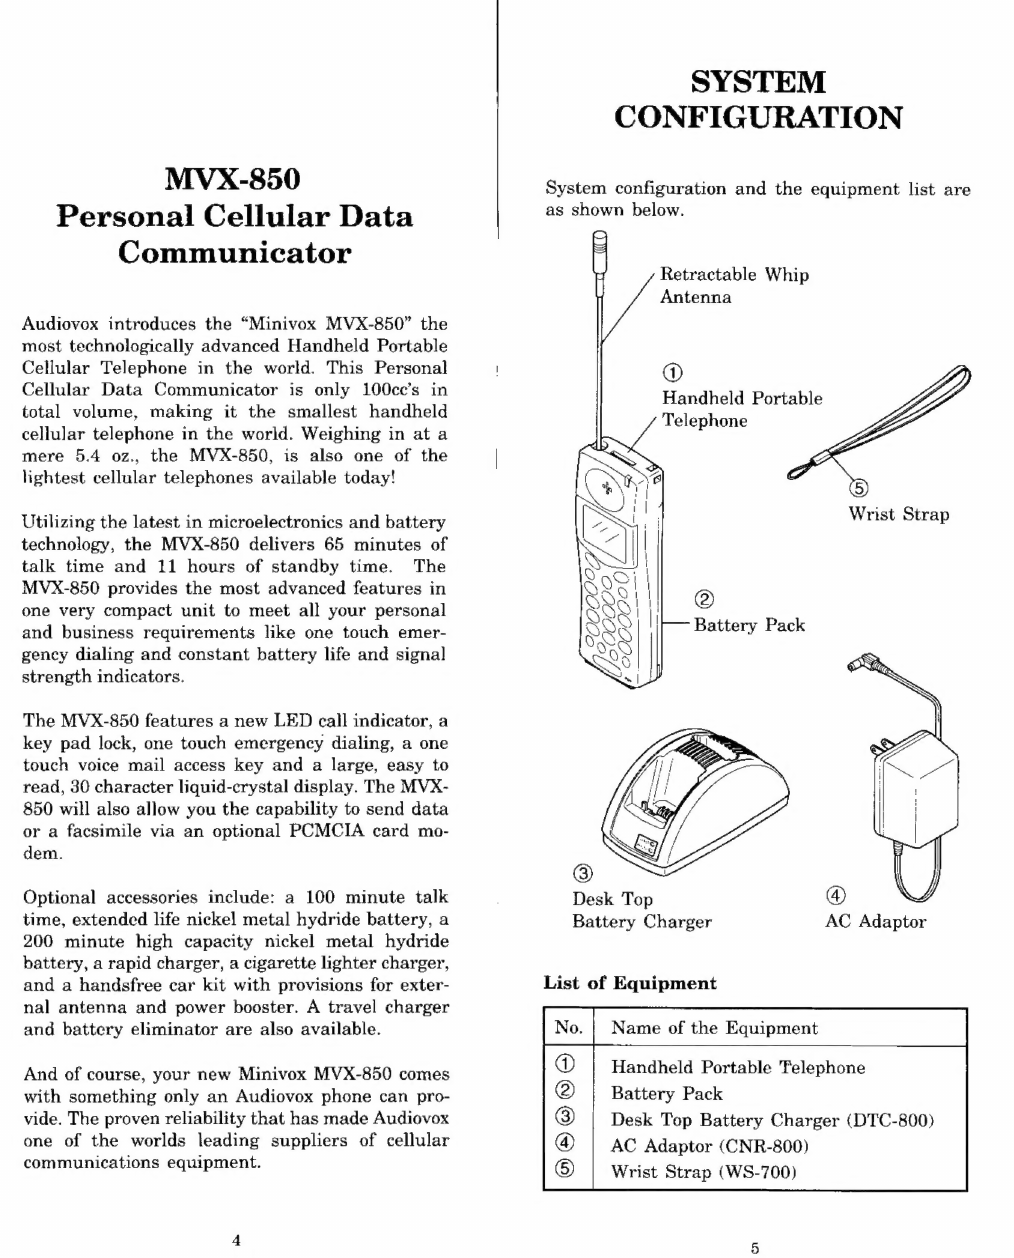
SYSTEM
CONFIGURATION
........ccccsccssscsssesneeees
5
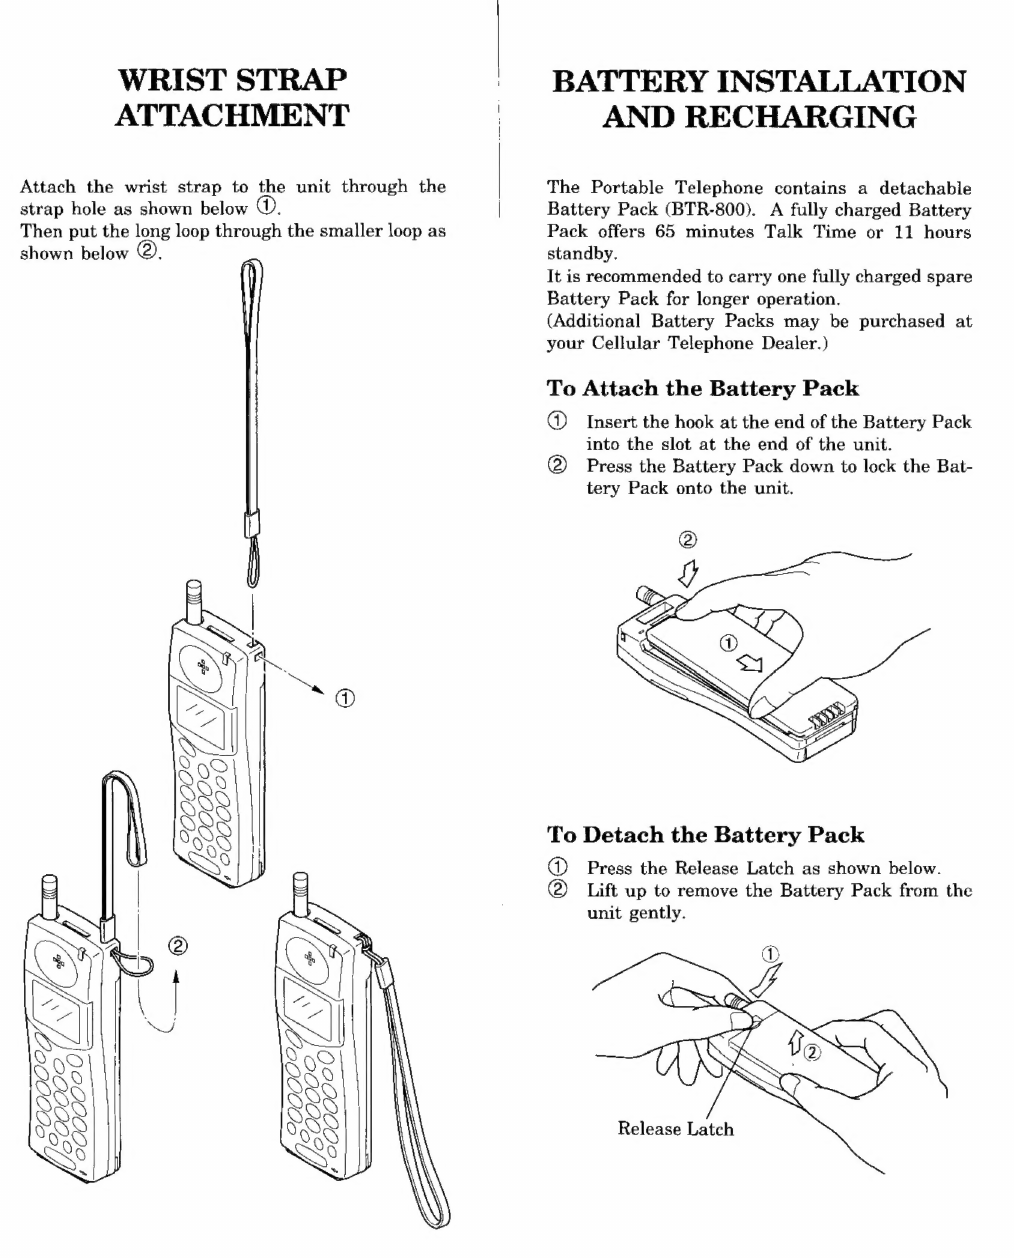
WRIST
STRAP
ATTACHMENT
...........ccccceseeee
6
BATTERY
INSTALLATION
AND
RECHARGING
aiessiesesnsstates
ion
oi
nana
soosasternasnouskes
7
To
Attach
the
Battery
Pack
To
Detach
the
Battery
Pack
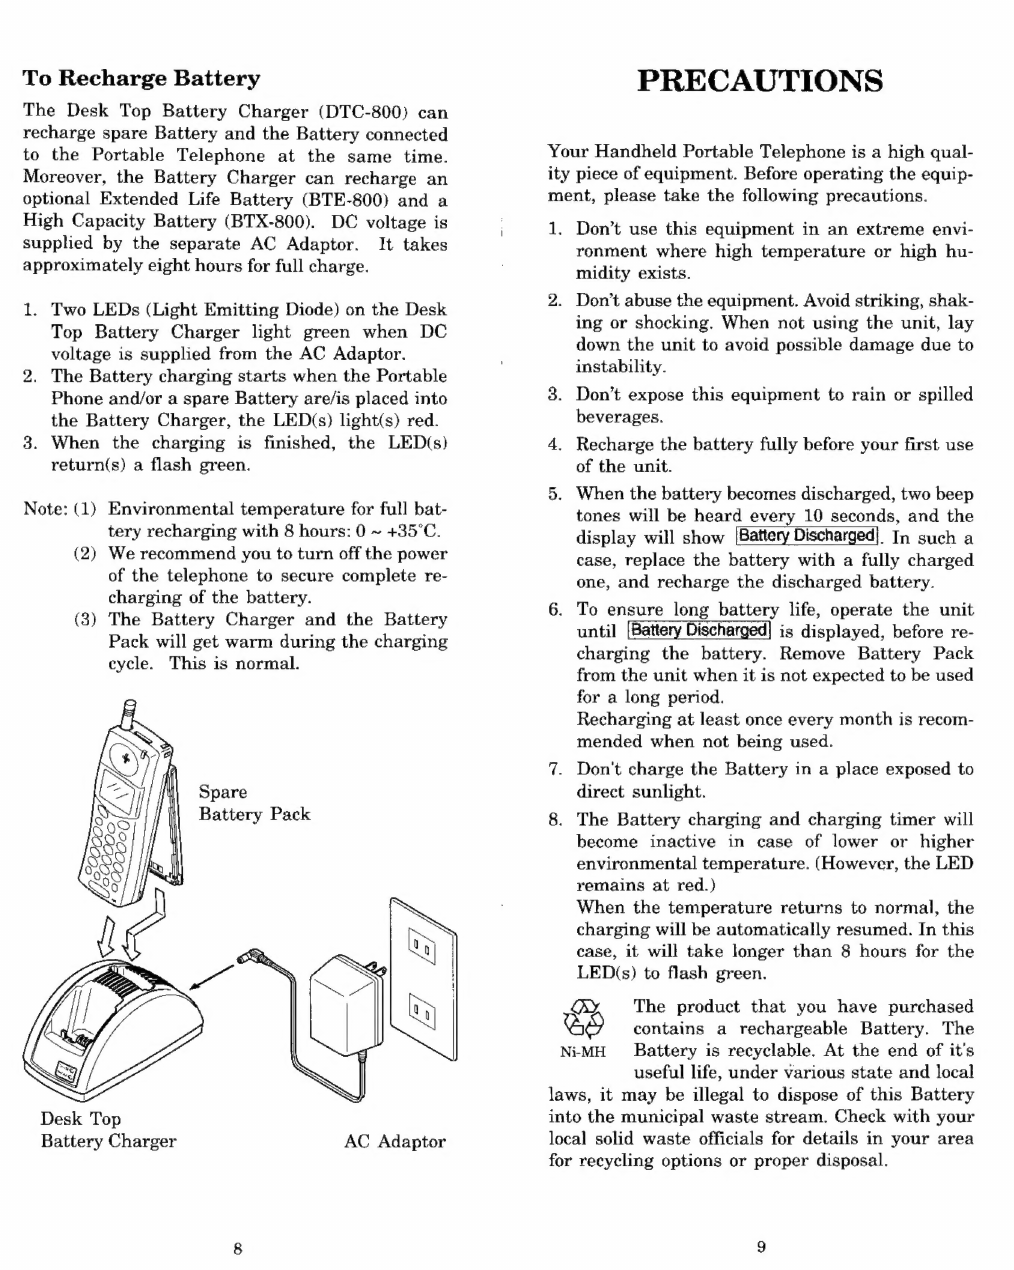
To
Recharge
Battery
PRECAUTIONS
sosiaa
erii
9
GENERAL
SPECIFICATIONS
.....0.0...
eee
10
FEATURES
AND
OPTIONS
20...
cccceesesesseeeees
11
FUNCTIONS
vibe
ako
akay
aka
fon
ia
eti
ea
pise
eta
inven
12
BASIC
OPERATION
i0i0itriin
res
aeitesasosisovavioutèvinsyen
14
Turning
the
Unit
On/Off
+
Antenna
Position
e
Receiving
Signal
Strength
Indicator
+
Battery
Level
Indicator
To
Store
a
Number
in
Memory
To
Recall
a
Number
from
Memory
To
Review
the
Prefix
Display
Own
Telephone
Number
Repertory
Memory
Scroll
Automatic
Storing
into
a
Vacant
Memory
Address
Secret
Memory
e
To
Store
the
Secret
Number
e
To
Confirm
the
Secret
Number
To
Lock
the
Unit
Automatic
Lock
To
Unlock
the
Unit
Keypad
Lock
Backlighting
On/Off
Control
Volume
Control
e
Earpiece
¢
Alert
Tone
MEMORY
NAME
TAG
....20000220roreoeoeeeooosososasnnonosn
20
To
Enter
Names
using
Alpha
(Letters)
To
Store
Name
with
Phone
Number
To
Recall
from
Memory
with
Name
ALPHA
SEARCH
oc
cccss
yok
ae
vese
assi
asesns
aske
idskasponkae
22
PLACING
TELEPHONE
CALLS
ue
23
To
Place
a
Call
If
the
Call
Fails
to
Go
Through
Automatic
Redial
(NAM
Option)
Terminating
a
Call
To
Receive
Calls
Any
Digit
Key
Answering
Alert
Tone
Selection
Silent
Alert
Automatic
Answering
2
Anti-fraud
Security
Feature
To
Place
a
Call
with
a
Number
in
the
Memory
Speed
Dialing
Last
Three
Number
Redial
Programmable
Emergency
Call
(NAM
Option)
One
Touch
Emergency
Call
To
Mute
a
Phone
Conversation
VOICE
MAIL
DIALING
LW
eee
reeeneees
28
To
Store
Numbers
To
Place
a
Call
CALL
RESTRICTION
(NAM
OPTION)
............
29
To
Set
Call
Restricted
Mode
END-TO-END
SIGNALING.....!222rreeeooooeraroeoeooonooan
30
Touch
Tone™
from
Memory
Link
Dialing
e
To
Link
Number/To
Store
Linked
Numbers
in
Memory-
e
To
Place
Linked
Numbers
SCRATCH-PAD
DIALING
wo...
eee
ccceeeceeeees
32
SCRATCH-PAD
DIALING
WITHOUT
KEYING
TONES
oo...
33
CALL
TIME
DISPLAY
....0?ree000rrreeeoeeaeoosoresoooonereon
33
To
Display
the
Talk
Time
of
the
Last
Call
To
Display
the
Outgoing
Call
Timer
Only
To
Display
the
Cumulative
Talk
Time
To
Clear
the
Timer
One
Minute
Beep
(NAM
Option)
SID
MANAGEMENT
(NAM
OPTION)..............
34
A/B
SYSTEM
SELECTION
......cccccsceccsssscsseseseneee
35
MULTIPLE
CITY
REGISTRATION
..................
36
LAST
RESCAN
SID
INDICATOR
......ccccccssseee--
36
RADIO
FREQUENCY
(RF)
CHANNEL
INDICATOR
oossoo
37
AUTOMATIC
CALLS
IN
ABSENCE
INDICATOR
siaine
n
kN
37
FUNCTION
MENU
..eecsccsssssssssssssessseceesssesssnsessee
38
SERIAL
DATA
MODE
n
40
FUNCTION
ALL
RESET
.0..c..ccsccsssescssesossseserseeee
40
IMPORTANT
SAFETY
INFORMATION
..........
41
WARNING
ke
a
kab
ANA
41
ACCESSORY
CATALOG...
44
Touch
Tone™
is
a
registered
trade
mark
of
AT
&
T.
3