87 NORR instructions NORR instructions
EN
EN
WARNING
Any load leg should be in contact with the
vehicle floor and any straps restraining the
child should be adjusted to the child’s body.
The straps should not be twisted.
After your child is placed in this enhanced
child restraint, the safety harness must be
used correctly. Ensure that any lap strap is
worn low down, so that the pelvis is firmly
engaged, shall be stressed.
Any luggage or other objects liable to cause
injuries in the event of a collision shall be
properly secured.
Always secure child in enhanced child
restraint, even on short trips, as this is when
most accidents occur.
Children are not left in their enhanced child
restraint system unattended.
Consult the distributor for issues concerning
maintenance, repair and part replacement.
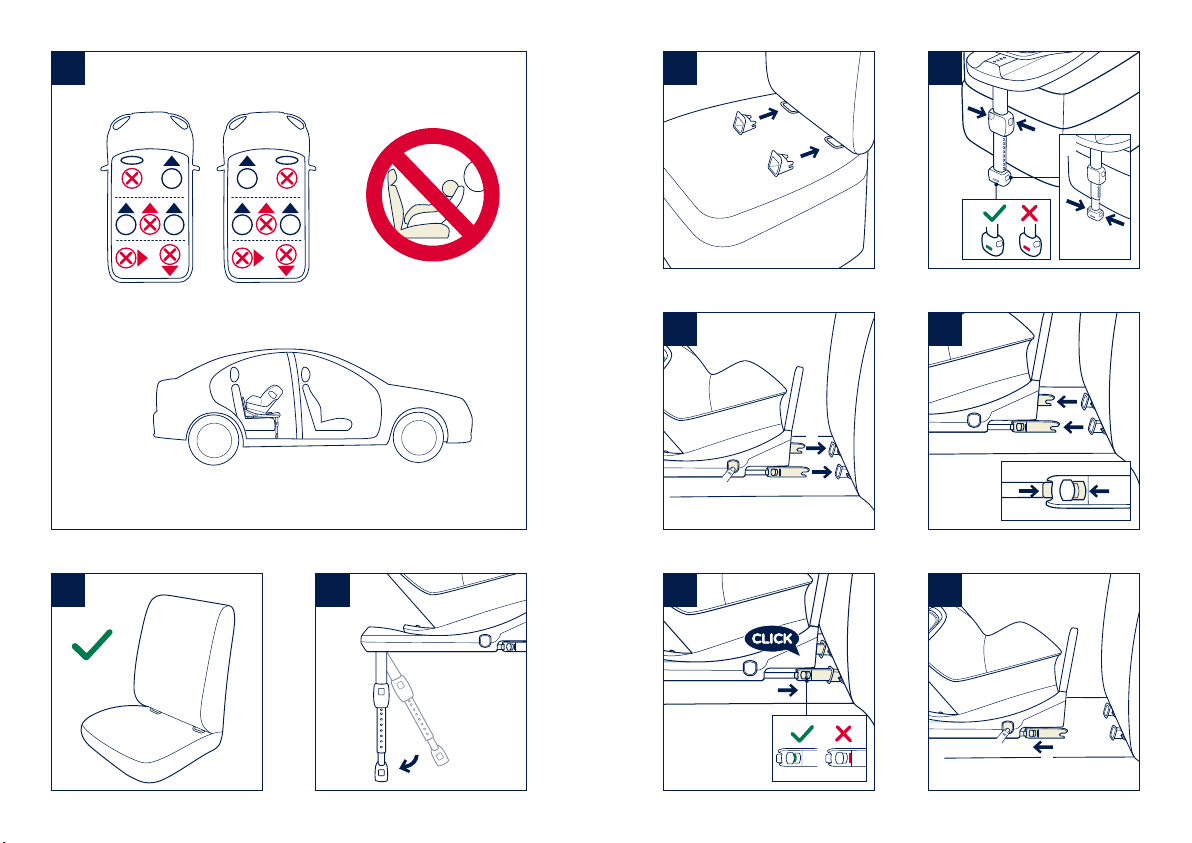
Correct Installation is only permitted by use
of the ISOFIX connectors.
Do take care so that the rigid items and
plastic parts of an enhanced child restraint
system shall be so located and installed that
they are not liable to become trapped by a
moveable seat or in a door of the vehicle.
Frequently check the ISOFIX guides for dirt
and clean them if necessary. Reliability can
be effected by ingress of dirt, dust, food
particles etc.
Must use the rebound bar.
Please keep this enhanced child restraint
away from sunlight, otherwise it may be too
hot for the child’s skin. Always touch the
enhanced child restraint before placing child
in it.
Please check before you purchase this
enhanced child restraint to make sure it can
be installed properly in your vehicle.
Remove this enhanced child restraint from
the vehicle seat when it is not in use for a
long period of time or it is not in regular use.
This enhanced child restraint should be
replaced when it has been subject to violent
stresses in an accident. An accident can
cause damage to it that you cannot see.
The enhanced child restraint system must be
used with manufacturer supplied soft goods
and accessory.
The soft goods is an integral part of the
child restraint system in terms of its safety
performance.
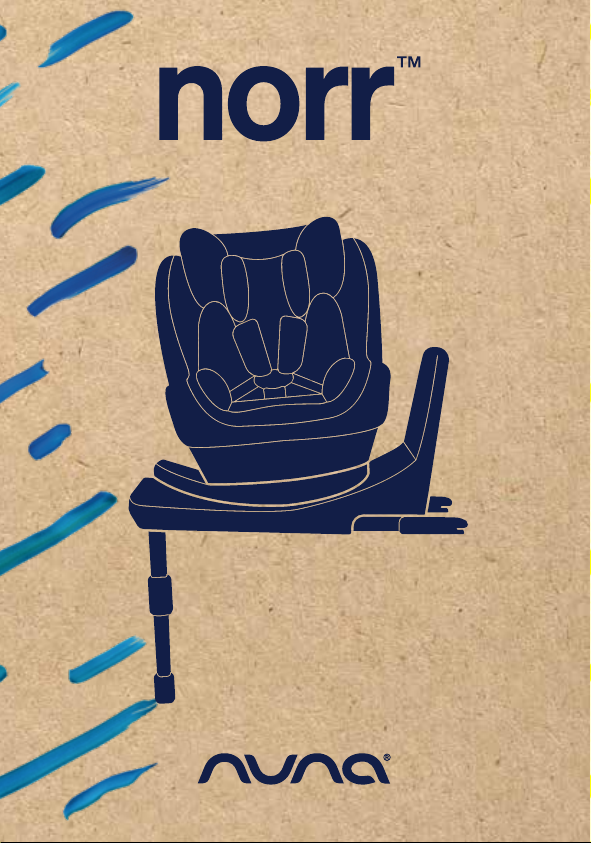
DO NOT use the rearward facing enhanced
child restraint systems in seating positions
where there is an active frontal airbag
installed. Death or serious injury may occur.