EnglishList of Parts
Item Pictures Description
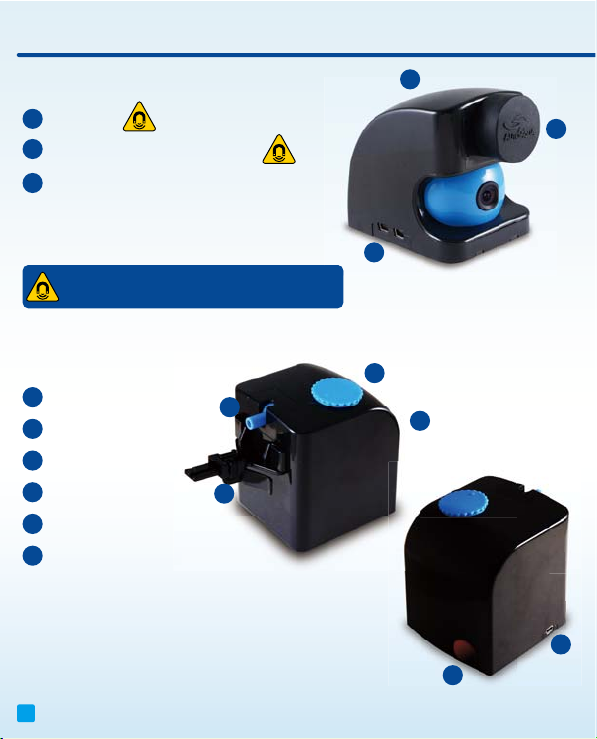
QEye
QShooter
Holder
Remote Control
Power Adapter
Power Adapter
Cable 200 cm
Connection
Cable 50 cm
Wet Side Magnet
for QEye
IR Remote Control Feeding
Universal Power Supply
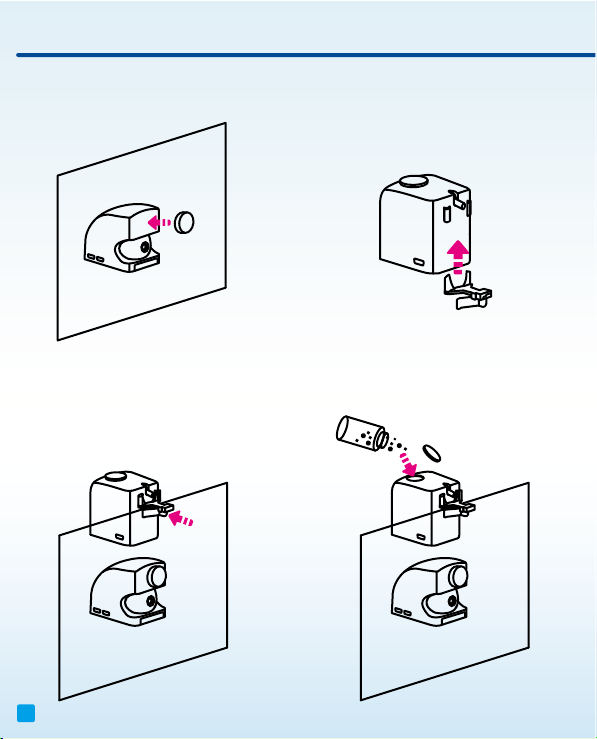
Connect QEye with QShooter
Connect QEye with Power
Adapter
Mount QEye on The Tank
(Max. Tank Thickness: 0.75 inch/19mm)
Attach QShooter to The Tank
(Max. Tank Thickness: 1 inch/25.4mm)
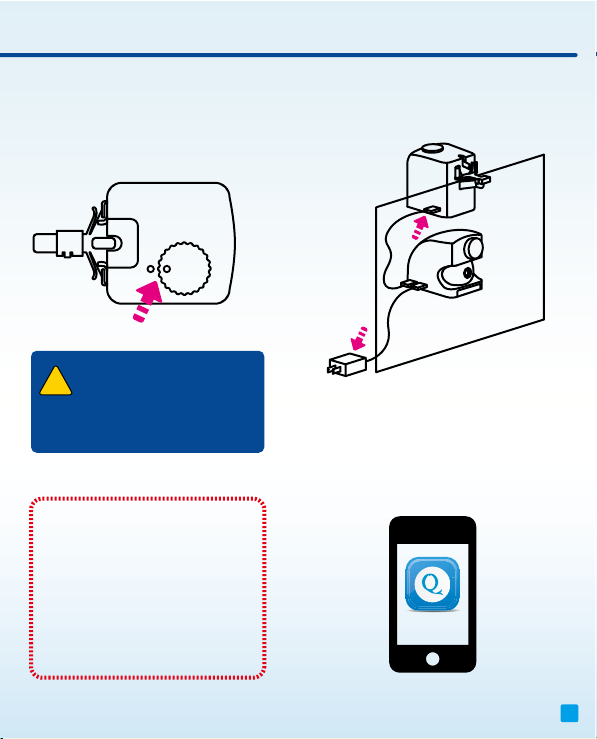
Auto Feeder to Shoot Pellets
(Max. Pellet Size : 2.0 mm)
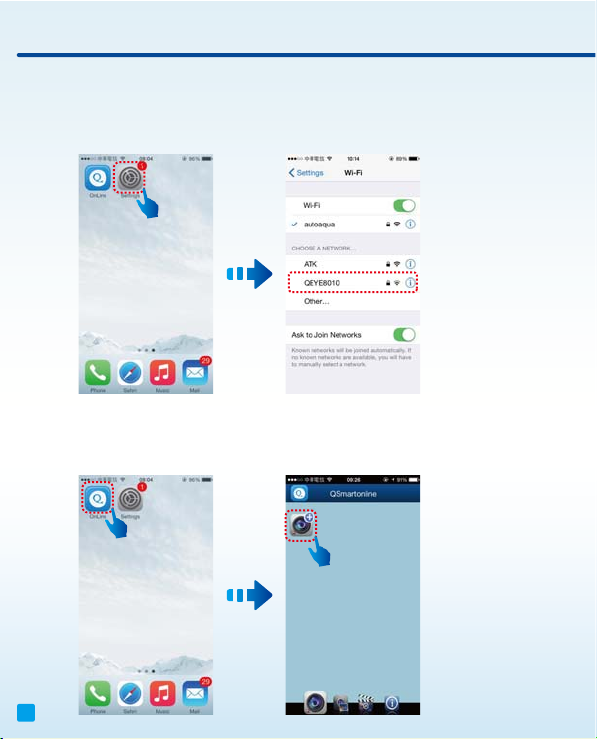
WiFi Viewing Aquarium
(An extra antenna for better signal strength)
02