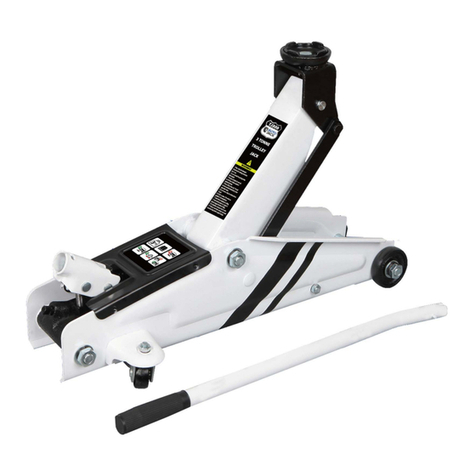
Autojack TJ250 Installation manual

SAFETY AND OPERATING MANUAL
TROLLEY JACK
TJ250
TJ250
ORIGINAL INSTRUCTIONS
Made in China
160120 Version 1

TJ250
TABLE OFCONTENTS
Safety Precautions .01
MachineDetails ..03
Operation .04
Maintenance ....06
Troubleshooting ..07
DeclarationofConformity 09
Parts list ..10
Parts Diagram 11

TJ250
01
SAFETYPRECAUTIONS
Important: Read these instructions carefully. Note THE SAFE
OPERATIONAL REQUIREMENTS, WARNINGS AND
CAUTIONS.
USE THIS JACK CORRECTLY AND WITH CARE FOR THE
PURPOSE FOR WHICH IT IS INTENDED. Failure to do so may
cause damage or personal injury. Retain THESE INSTRUCTIONS
for future use.
-Ensure the jack is in sound condition and good working order. Take
action for immediate repair or replacement of damaged parts.
-Use genuine parts only. The use of improper parts may be
dangerous.
-Locate the jack in a suitable, well-lit working area. Keep working
area clean and tidy and free from unrelated materials.
-Use the jack on level and solid ground, preferably concrete. Avoid
tarmacadam as jack may sink in.
-Place wedges under the wheels of vehicle, but ensure the jack
wheels are free to move and that there are no obstructions.
-Ensure the vehicle handbrake is engaged, engine is switched off
and transmission is in gear (or “PARK” if automatic).
-Ensure minimum distance of 0.5m between vehicle and static
objects such as doors, walls, etc., to allow for vehicle tilting.
-Ensure there are no passengers in the vehicle and that all non-
essential persons keep a safe distance whilst the jack is in use.
-Place jack under lifting points recommended by vehicle
manufacturer (see vehicle hand book). Ensure lifting point is stable
and centred on Saddle.
-NO RESPONSIBILITY IS ACCEPTED FOR INCORRECT USE OF
THIS PRODUCT.

TJ250
02
SAFETY PRECAUTIONS
DANGER: Use the jack for lifting only, NOT for supporting the lifted
load.
-Use suitable capacity
axle stands under the vehicle before
proceeding with any task.
-Ensure there are no persons or obstructions beneath the vehicle
before lowering.
-DO NOT operate the jack if damaged.
-DO NOT work under the vehicle until axle stands have been
correctly positioned.
-DO NOT exceed the rated capacity of the jack (3.0tonne).
When lifting a load of maximum capacity or close to it, it is
recommended that the effort be reduced by the use of
assistance during this operation.
-DO NOT adjust the safety overload valve.
-DO NOT jack vehicle if there is a risk of spillage of fuel,
battery acid, or other dangerous substances.
-DO NOT allow the vehicle to move while supported by the
jack, or use the jack to move the vehicle.
-DO NOT top up the hydraulic system with brake fluid. Use
hydraulic jack oil only and use a qualified person to maintain
jack hydraulic system.
-DO NOT allow untrained persons to operate the jack and DO
NOT use the jack for purposes other than which it is designed.
-DO NOT allow persons to ride on the jack.
-When not in use store the jack, fully lowered, in a safe, dry,
childproof area.

TJ250
03
MACHINE DETAILS
Specifica ons
Capacity - 2.5 Tonne
Min. Saddle height - 80mm
Max. Saddle height - 515mm
Length - 722mm
Weight - 34.1KG
Product Features
8
9
7
6
5
4
3
2
1
load:360-515mm
1. Bottom floor jack pump
handle
2. Pump handle socket
3. Floor Jack frame
4. Pump handle hex bolt
5. Pump system
6. Castor wheel
7. Fixed wheel
8. Saddle
9. Lifting arm

TJ250
04
Operation
The owner and/ or operator shall
have an understanding of the
product, its operating characteristics
and safety operating instructions
before operating this device.
Safety information shall be
emphasized and understood. If the
operator is not fluent in English, the
product and safety instructions shall
be read to and discussed with the
operator in the operator’s native
language by the purchaser/owner or
his designee, making sure that the
operator comprehends their contents.
Inspection
a. Visual inspection shall be made
before each use of the jack by
checking for abnormal
conditions, such as cracked
welds, leaks, and damaged,
loose, or missing parts.
b. Other inspections shall be made
as per product operating
instructions.
c. This jack should be inspected
immediately if the jack is
believed to have been subject to
an abnormal load or shock. It is
recommended that this
inspection be made by a
manufacturer’s or supplier’s
authorised repair facility.
d. Owners and/or operators should be
made aware that the repair of this
equipment may require specialised
knowledge and facilities. It is
recommended that an annual
inspection of the product be made
by a manufacturer’s or supplier’s
authorised repair facility and that
any defective parts, safety labels or
signs be replaced with
manufacturers or supplier’s specified
parts.
Damaged Equipment
Any jack that appears to be damaged
in any way, is found to be worn, or
operates abnormally must be
removed from service until repaired.
It is recommended that necessary
repairs are to be made by a
manufacturer’s or supplier’s authorised
repair facility, if repairs are permitted by
the manufacturer or supplier.
Alterations
Due to the potential hazards
associated with this type of equipment,
no alterations shall be made to the
product.
Attachments & Adapters.
Only attachments and/or adapters
supplied by the manufacturer shall be
used.

TJ250
05
Before use
a. Before using jack for the first
time, purge the hydraulic unit in
order to eliminate any air in the
system. Place handle onto the
release valve and open valve by
turning the handle anti-
clockwise, place handle back
into the jacking point and pump
for 30 to 40 seconds. When
complete, close the release
valve by turning the valve
clockwise. When lifting a load of
maximum capacity or close to it,
it is recommended that the effort
be reduced by the use of
assistance during this operation.
b. Prior to each use, visual
inspection shall be made to the
jack by checking for abnormal
conditions, such as cracked
welds, leaks, and damaged,
loose, or missing parts.
c. Consult the vehicle owner’s
manual to determine the location
of the jack points.
d. Be sure to set the vehicle in park
with the emergency brake on
and wheels secured and
checked.
e. Be sure that the vehicle and the
jack are on a hard, level surface.
To Lift
1. Turn the release valve clockwise
to the closed position. Do not
over tighten.
2. Position the jack under the
specified lift point.
3. Begin lifting by pumping the
handle up and down.
4. Immediately after lifting, support
the vehicle with appropriate
rated jack stands.
5. Turn the release valve slowly
counter clockwise to lower the
vehicle onto the jack stands.
To Lower
1. Turn the release valve clockwise
to the closed position. Do not
over tighten.
2. Pump the handle up and down
to lift the vehicle off the jack
stands.
3. Remove the jack stands. Do not
get under or let anyone under
the vehicle while lowering.
4. Turn the release valve slowly
counter clockwise to lower the
vehicle onto the ground.

TJ250
06
MAINTENANCE
NOTICE: Useonly agood grade of hydraulic
oil.Neverusebrake fluid,motoroil,
transmission fluid,turbine oil oranyother
fluids.
ISO-VG22 equivalent hydraulicoil is
recommended.
IMPORTANT: NO RESPONSIBILITY IS
ACCEPTEDFOR INCORRECT USEOFTHIS
PRODUCT.
Check and Refill Oil
1. Removehydraulicunit cover, ifcoveris
provided.
2. With jackinthefullyloweredandlevel
position,removetheoilfillerplug.
3. Recommendedoil levelshouldbejust
coveringinnercylinderasseenfromtheoil
fillerplughole.
4. Donotoverfill.Alwaysfillwith new,clean
hydraulicjackoil as recommendedabove.
5. Replaceoilfillerplug.Then replacetheunit
cover.
Lubricationandcleaning
Periodically clean and lubricate all moving
partsand pivotpoints.
AirVentingProcedures
1. With the jackin the fully lowered
position and releasevalve open,
remove the oil fillerplug.
2. Inserthandle intothehandle sleeve
and pump rapidly several times.
Replaceoil fillerplug.
3. Turn the releasevalve clockwisetothe
closeposition.
4. Pump the handle until the liftarm
reachesthe maximum heightand
continue topumpseveral timesto
remove the trapped air in the system.
5. Turn the releasevalve counter
clockwiseone full turn andlowerthe
liftarm tothe lowestposition,using
forceon saddle the if necessary.
6. Carefully and slowly pinch the oil filler
plug toreleasepressurised air.
7. Repeat above stepsuntil trapped air is
completely vented.

T250
07
Problem Possible Cause Remedy
Jack will
not lift the load. 1) Overloaded.
2) Oil level low.
3) Release valve not
correctly closed.
4) Air in system.
5) Piston rod not
functioning.
6) Packing worn or
defective.
1) Be sure to use jack the with
adequate capacity.
2) Top up oil level.
3) Check and close release
valve.
4) Open release valve and
pump the handle a few times.
Close valve and re-try.
5) Clean and replace oil.
6) Replace packing.
Jack doe
s not lift high
enough or feels “Spongy”.
1) Oil level too high or
too low.
2) Worn seals.
3) Air in system.
4) Release valve not
closed.
1) Fill or remove excess oil.
2) Return jack to local service
agent.
3) Open release valve and
pump the handle a few times.
Close valve and re-try.
4) Check and close release
valve.
Jack lifts
poorly 1) Pump packing or
valves malfunctioning.
2) Oil is dirty.
3) Air in the system.
1) Replace packing and/or
clean valves.
2) Replace oil.
3) Open release valve and
pump the handle a few times.
TROUBLESHOOTING

TJ250
08
Problem Possible Cause Remedy
Jack lifts but will not hol
d load. 1) Release valve partially
open.
2) Dirt on valve seats.
3) Air in system.
4) Faulty seals.
5) Packing worn or
defective.
1) Check and close release
valve.
2) Lower jack, close release
valve. Place foot on front wheel
and pull up lifting arm to its full
height by hand. Open the
release valve to lower arm.
3) Open release valve and pump
the handle a few times. Close
valve and re-try.
4) Replace packing or contact
local service agent.
5) Replace packing.
Jack will not lower completely. 1) Unit requires lubrication
2) Piston rod bent or damaged
3) Jack frame/link system
distorted due to
overloading/poor positioning
4) Air in system
5) Release valve partially closed
6) Jack spring damaged or
unhooked.
1) Oil all external moving parts.
2) Replace rod or contact local
service agent.
3) Replace damaged parts or
contact local service agent.
4) Open release valve and pump
the handle a few times. Close
valve and re-try.
5) Check and fully open release
valve.
6) Replace spring or contact
local service agent.
Jack does not lower at all. 1) Release valve closed.1) Check and fully open
release valve.
TROUBLESHOOTING

TJ250
09

EP82
-
3
09
TJ250
10
PARTS LIST
REF# PART# DESCRIPTION QTY
1 TZ830026-GS.3 Power unit assembly 1
2 T830023.4.1(asm) Universal joint assembly 1
3 GB308-6 Steel ball bearing Ø6mm 1
4 TF1201C-29 Oil plug 1
5 Return spring 2
6 Cotter pin Ø4X45mm 1
7 Coupling connector 1
8 GB894.1-25 C-clip Ø25mm 4
9 Supporting shaft 1
10 Lifting arm assembly 1
11 T830003L-16 Pin for saddle 1
12 T825011L-3 Saddle 1
13 GB894.1-16 C-clip Ø16mm 2
14 Connecting rod pintle 2
15 Frame assembly 1
16 T830018-1 Front wheel 2
17 GB894.1-18 C-clip Ø18mm 2
18 Washer M16 2
19 GB859-16 Spring washer M16 4
20 GB6170-M16 Nut M16 4
21 T83508.6(ASM) Rear caster assembly 2
22 Spring washer M12 4
23 Socket head cap screw M12X25mm 2
24 Back shaft 1
25 Nut M12 2
26 Handle Socket 1
27 QLZ2C-1a Handle socket screw M10X19mm 1
28 GB894.1-12
C-clip Ø12
mm
1
29 T825011CL.2-3 Contact roller 1
30 T825011CL.2-2 Pin for contact roller 1
31 Washer M18 2
32 Spring washer M18 2
33 Shoulder bolt M18x54mm 2
34 T825011BCL-2 Cover plate 1
35 GB845 Socket head cap screw 4
36 Position shaft 1
37 T84004-7 Rubber sleeve 2
38 GB859-8 Spring washer M8 2
39 GB823- M8X16
Pan head combination drive machine screw M8X16mm 2
40 T830018Z.2a Handle assembly 1
41 T83508.5-4 Handle lock pin 1
42 T830026.MF Seal kit 1

EP82
-
3
09
TJ250
11
PARTS DIAGRAM
Table of contents
Other Autojack Jack manuals
Popular Jack manuals by other brands
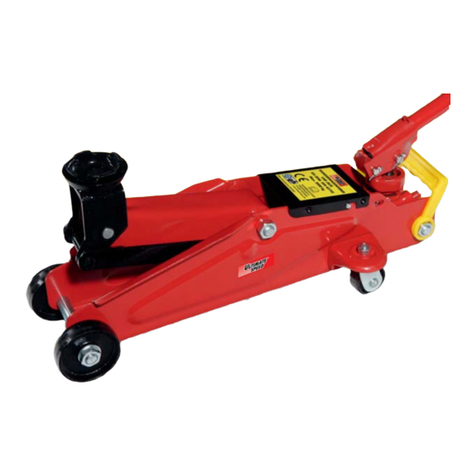
ULTIMATE SPEED
ULTIMATE SPEED KH 3046 operating instructions

Clarke
Clarke STRONG-ARM VPJ300 Installation and maintenance instructions
Cornwell Tools
Cornwell Tools CTJTRJ22T operating manual
Summit
Summit SUM-917072 owner's manual
MARTINS Industries
MARTINS Industries MFJ-PL2T manual
Evercraft
Evercraft 776-2007 manual
Torin
Torin T92007AT Operator's instruction manual
Sealey
Sealey 1025HL.V2 instructions
Hi-Force
Hi-Force JCS Series Operating instructions manual
Challenger Lifts
Challenger Lifts RJ4.5 Installation, operation & maintenance manual
Weaver
Weaver WA-72B OPERATION & SERVICE INSTRUCTIONS
Michelin
Michelin Ratchet Locking Jack Stands user guide
