AutomationDirect DFT-AN-1A User manual

UB
10...30VDC
IA
200mAmax.
Housing PBTP
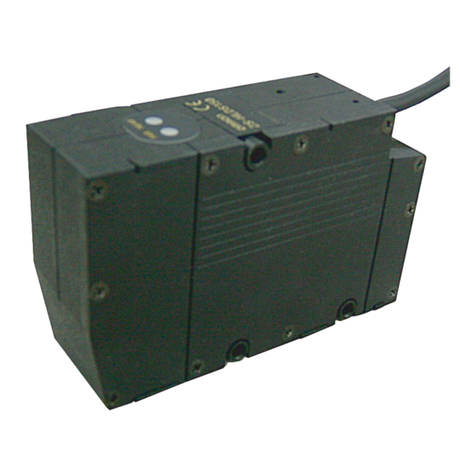
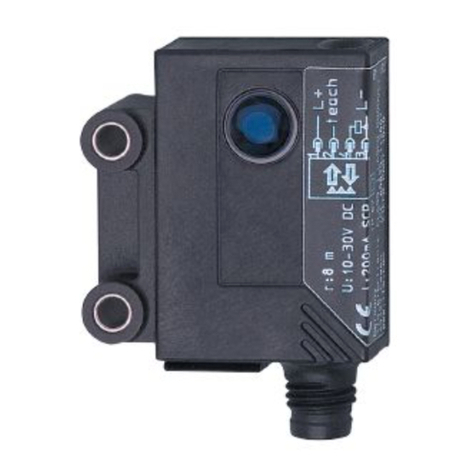
Amplifier for synthetic optical fibers
Partnumber
Sensing range (on mat white paper)
with CF-DB1-20
Wiring
NPN type - light/dark-ON output
COVADC117
(1)
(4)
(2)
(3)
schwarz
noir
black
blau
bleu
blue
+U
Teach
A
0V
B
R
39 V
braun
brun
brown
Last
charge
load
39 V
39 V rosa
rose
pink
100 k
W
6V8
47 k
W
47 k
W
Dimensions:
These proximity switches must not be used
in applications where the safety of people is
dependent on their functioning. Terms of
delivery and rights to change design reserved.
Max. distance / sensitivity
Remove target and background.
Execute Teach 1.
Placeemitterandreceiversothat
no light is transmitted. Execute
Teach 1.
Min. distance / sensitivity
Placefiber-opticheadabout5 mm
from white paper. Execute Teach
1.
Place emitter and receiver in
direct contact so that a maximum
of light is transmitted. Execute
Teach 1.
Remote teach launching
Launch by L signals or by closing
a contact at the “Teach” input.
Teach 1
: Remove target.
: Position target.
Send pulses T1 and T3.
Timing: T1, T3 = 0.5 ... 2 sec
T2 = 1.5 ... 2 sec
Teach 2
: Position target and back-
ground.
: Remove target.
Send pulse T1, then
: Remove target, leave back-
ground in position.
: Position target.
Send pulse T3.
Timing: T1, T3 = 0.5 ... 2 sec
T2 ≥≥
≥≥
≥3 sec
+U
A
0V
B
Teach
(1)
(4)
(2)
(3)
schwarz
noir
black
blau
bleu
blue
39 V
braun
brun
brown
39 V
39 V
rosa
rose
pink
100 k
6V8
47 k
47 k
DFT-AN-1A
200 mm
Ø4Ø 4
31,1
31,1
4
89
60
60
10
OUT
max
Time
Enter
Signal
Mode Status
Teach 1Teach 1
Teach 2Teach 2
Adjust
Delay
StretchStretch
Light-On
SWISS MADESWISS MADE
2,3
6,3
Ø 3,4Ø 3,4
46
46
35
3513
13
10,8
10,8
Ø4Ø 4
Device mounting
Mounting of the device is most
easily effected by snapping
/
onto a top-hat rail (according
to DIN / EN 50022).
Alternatively, fixing can be
effected using M3 screws
through the fixing holes
provided.
Toremove the device from the rail,
push towards the optical fiber ,
and lift .
Fixing the optical fibers
Lift catch .
Insert the optical fibers through
the two holes provided into
the device.
Lower catch .
Important:
Wheninserting the optical fibers,
the resistance of the device’s in-
ternal O-ring seal must be over-
come.
The optical fibers must be fed
right to the stop without fail.
The optical fibers must not be
crushed.
The sequence (emitter /
receiver) is usually immaterial,
however:
With coaxial optical fibers, the
optical fiber bundle must be
connected on the receiver side
. The emitter and receiver
openingsare markedwith arrows
on the housing.

Teach 1
Teach 2
Adjust
Delay
Stretch
Setting of the sensing range (teach) is carried out in one cycle, and can
be manually fine adjusted at any time (using the Adjust function, see
below).
Diffuse sensors : Teach only takes place on the background.
The target is not taken into consideration. The device adjusts
itself automatically to approximately 80% of the background
distance.
Through-beam sensors : Teach is effected with a target
located in the beam. The device automatically adjusts itself so
that approximately 80% of the darkening created by the target
triggers the switching process.
Diffuse sensors : Remove target, leave or place background in
position.
Through-beam sensors : Leave or place target in position.
Activate Teach 1 mode by pressing the Mode key twice.
Press /Enter key.Teach successful: The Status LED blinks green
for 5 seconds. The device is ready for use.
Setting of the sensing range (teach) is carried out in two cycles, and can
be manually fine adjusted at any time (using the Adjust function, see
below).
Diffuse sensors : Teach is effected firstly on the target, then
on the background. The device automatically adjusts itself to a
distance between that of the target and that of the background.
Through-beam sensors : Teach takes place firstly without the
target, then with the target located in the beam. The device
automatically adjusts itself to part of the darkening created by the
target.
Diffuse sensors : Position (or leave) target and background.
Through-beam sensors : Remove target.
Activate Teach 2 mode by pressing the Mode key 3 times.
Press /Enter key,the first cycle begins. Teach successful: The
Status LED lights up green. The device is ready for the second cycle.
Diffuse sensors : Remove target, leave background in position
Through-beam sensors : Position target.
Press /Enter key,the second cycle begins. Teach successful: The
Status LED blinks green for 5 seconds. The device is ready for use.
The detection zone can be set manually, or when set by the teach
function, can be manually fine adjusted. All activated functions (except
delay and stretch) are in operation, and the output switched.
Activate Adjust mode by pressing the Mode key 4 times.
For each press on the /Time key, the current detection zone is
increased by 1 increment.
For each press on the /Enter key, the current detection zone is
reduced by 1 increment.
Return to working mode by pressing the Mode key.
Switching of the output is delayed by the set time. In this way, short-term
disturbances can be suppressed. All activated functions (except delay
and stretch) are in operation, and the output switches.
Activate Delay mode by pressing the Mode key 5 times.
Pressing the /Enter key switches the delay (factory setting: 10
msec) on or off. The current status is shown by the Status LED (green
= Delay switched on).
Each time the /Time key is pressed, the delay time is increased by
10 msec, up to a maximum of 150 msec.
Return to working mode by pressing the Mode key.
Switching of the output is stretched by the set time. In this way, even
short pulses can be detected. All activated functions (except delay and
stretch) are in operation, and the output switches.
Activate Stretch mode by pressing the Mode key 6 times.
Pressing the /Enter key switches the stretching (factory setting: 10
msec) on or off. The current status is shown by the Status LED (green
= Stretch switched on).
Each time the / Time key is pressed, the stretch time is increased by
10 msec, up to a maximum of 150 msec.
Return to working mode by pressing the Mode key.
Setting of the output function (factory setting Light-ON, i.e. light switching
in operation as diffuse sensor, dark switching as through-beam sensor).
Activate Light-ON mode by pressing the Mode key 7 times. The current
status is shown by the Status LED (Light-ON LED off / Dark-ON
LED on).
Pressing the /Enter key changes the output function.
Return to working mode by pressing the Mode key.
Light/Dark-ON
Teach 1
Teach 2
Status
Mode
Adjust
Delay
Stretch
Light-ON
SWISS MADE
Signal
Time
max
OUT
Enter
Teach 1
Teach 2
Status
Mode
Adjust
Delay
Stretch
Light-ON
SWISS MADE
Signal
Time
max
OUT
Enter
Teach 1
Teach 2
Status
Mode
Adjust
Delay
Stretch
Light-ON
SWISS MADE
Signal
Time
max
OUT
Enter
Teach 1
Teach 2
Status
Mode
Adjust
Delay
Stretch
Light-ON
SWISS MADE
Signal
Time
max
OUT
Enter
Teach 1
Teach 2
Status
Mode
Adjust
Delay
Stretch
Light-ON
SWISS MADE
Signal
Time
max
OUT
Enter
Teach 1
Teach 2
Status
Mode
Adjust
Delay
Stretch
Light-ON
SWISS MADE
Signal
Time
max
OUT
Enter
Cutting the optical fibers
Cut synthetic optical fibers to the
desired length. Use only the
cutting tool delivered with the
optical fibers.
A maximum of 3 cuts should be
made per cutting-tool hole.
Separating the optical fibers
Grasp the optical fiber ends with
both hands and pull both strands
apart to a length of about 50 mm.
According to the type (above all
for thin-fiber executions), prior
twisting helps.
Optical fiber mounting
(All diameters refer to the optical
diameter.)
No bending should occur in zone
“A”.
Fiber Ø 1 mm A ≥≥
≥≥
≥20 mm
Fiber Ø 0.5 mm A ≥≥
≥≥
≥10 mm
Fiber Ø 1.5 mm A ≥≥
≥≥
≥30 mm
High-flexibility fiber A ≥≥
≥≥
≥5 mm
Thebendingradius should not be
less than “R”.
Fiber Ø 1 mm R ≥≥
≥≥
≥25 mm
Fiber Ø 0.5 mm R ≥≥
≥≥
≥10 mm
Fiber Ø 1.5 mm R ≥≥
≥≥
≥40 mm
High-flexibility fiber R ≥≥
≥≥
≥2 mm
Bendablelight-outlet tubesshould
be bent as little as possible; best
bent around a cylindrical object.
Maximum 3 bends.
Tube Ø 2.5 mm r ≥≥
≥≥
≥20 mm
Tube Ø 1.2 mm r ≥≥
≥≥
≥10 mm
This product is protected by one or several of the
followingUSpatents:5182612,5767444,5675143,
5764351,6031430,6130489,6133654,6133988.
Furtherpatentspending.
A
A
R
R
split twist
r
Other AutomationDirect Accessories manuals
