manuals.online logo
Brands
  1. Home
  2. •
  3. Brands
  4. •
  5. Avago
  6. •
  7. Media Converter
  8. •
  9. Avago HEDR-5 High Resolution Series Installation and operating instructions

Avago HEDR-5 High Resolution Series Installation and operating instructions

HEDR-5xxx High Resolution Series
Three Channel Quick Assembly Encoders
Application Note 5560
Introduction
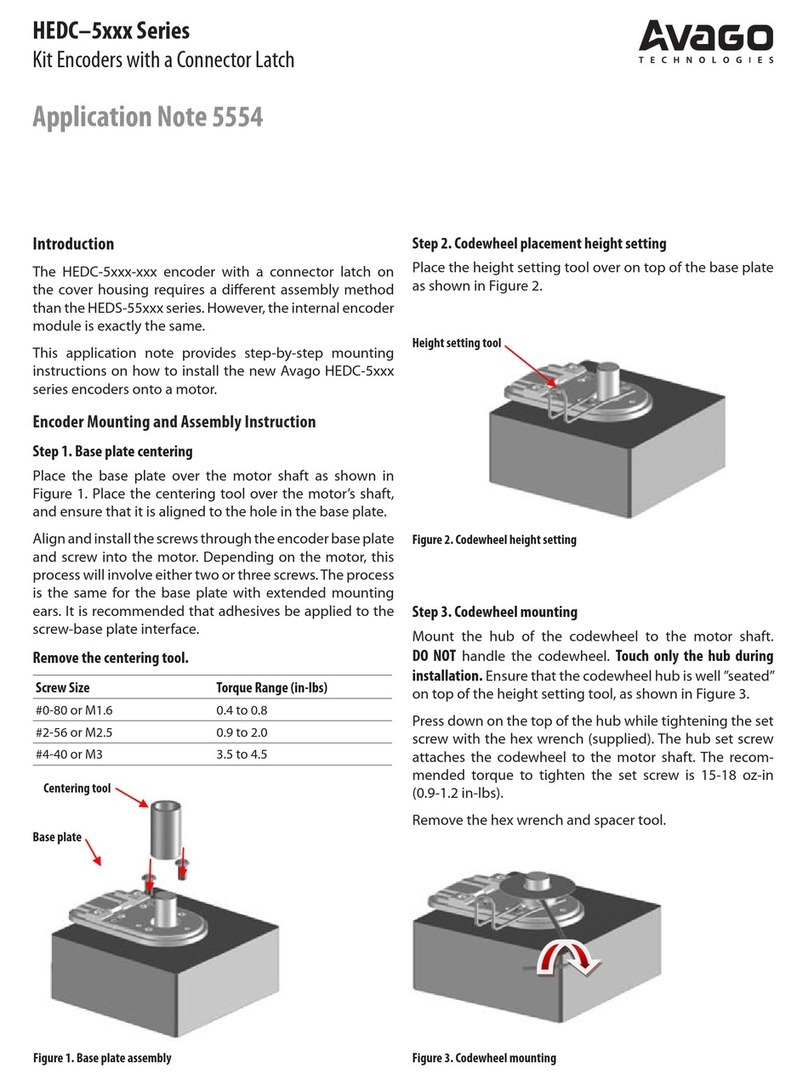
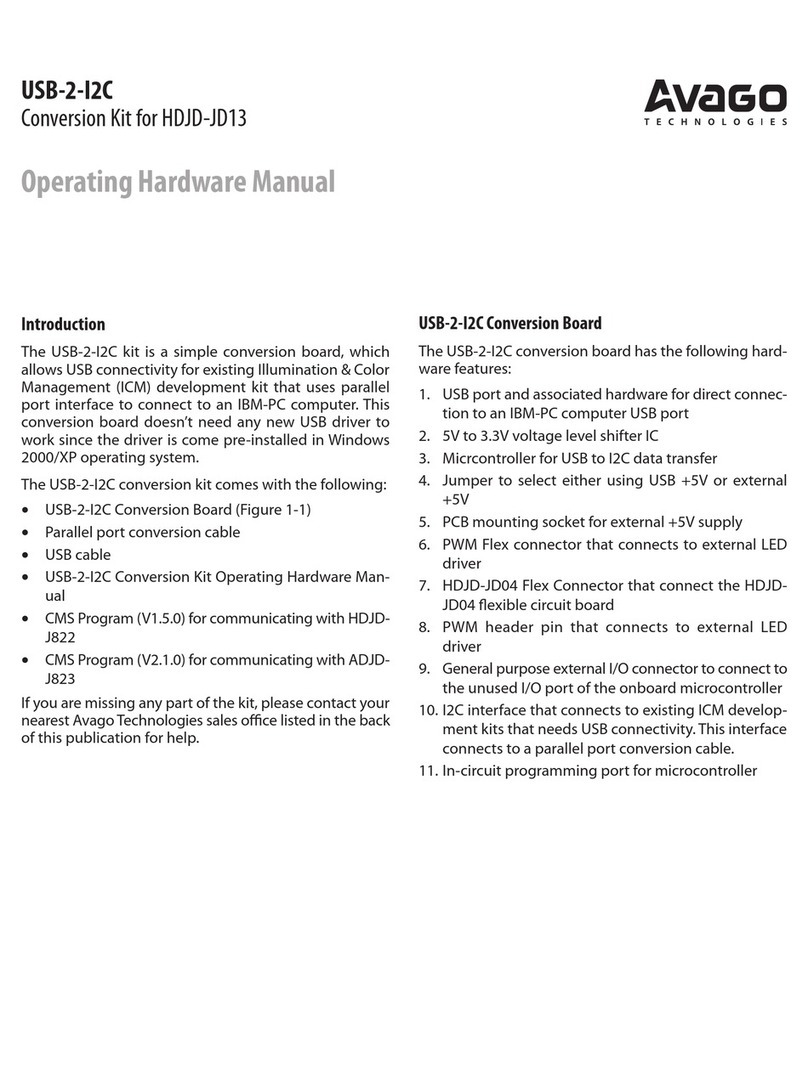
This application note provides step by step instructions
for mounting the new Avago HEDR-5xxx series encoders
onto a motor.
The Avago HEDR-5xxx series encoders are designed to
cater for existing HEDS-5xxx series users who wish to up-
grade due to higher CPR requirements. Therefore the base
plate and outer diameter of these encoders are compat-
ible with the legacy HEDS-5xxx series.
The Avago HEDR-5xxx series have been specially designed
for easy installation while ensuring that the chance of n-
ger contact with the internal code wheel is eliminated.
Encoder Mounting and Assembly Instruction
The HEDR-5xxx comes in the form of 3 parts; namely
the base plate, centering tool and encoder body unit.
See gure 1.
Figure 3. Recommended motor mounting dimension
Align and install the screws* through the encoder base
plate and into the motor. See gure 3. Refer to Table 1 for
recommended torque.
* Depending on the motor type, two or three screws will be required.
Figure 2. Base plate to motor shaft assembly
Step 1. Centering the base plate
Place the base plate over the motor shaft as shown in g-
ure 2. Slide the centering tool over the motor shaft, and
ensure that it is aligned to the hole in the center of the
base plate.
Figure 1. HEDR-5xxx exploded assembly view
Centering tool
Base plate
Screws
Encoder
body unit
Table 1. Recommended screw torque settings
Screw Size Torque Range (in-lbs)
#0-80 or M1.6 0.4 to 0.8
#2-56 or M2.5 0.9 to 2.0
NOTE: It is recommended that adhesives be applied to the screw-base
plate interface to prevent the screws loosening during operation.
Note: Screws are not included
For product information and a complete list of distributors, please go to our web site: www.avagotech.com
Avago, Avago Technologies, and the A logo are trademarks of Avago Technologies in the United States and other countries.
Data subject to change. Copyright © 2005-2014 AvagoTechnologies. All rights reserved.
AV02-3824EN - October 28, 2014
Figure 4. Base plate after screw tightening and centering tool removed
Step 2. Remove the centering tool
Step 3. Encoder body unit assembly
With the base plate centered to the shaft as seen in Figure
4, mount the encoder body unit to the motor’s shaft. See
gure 5.
Figure 5. Mounting encoder body unit to the base plate
Step 4. Lock codewheel onto the motor shaft
Insert the hex wrench into the set-screw opening of the
encoder body unit and apply a downward force (as indi-
cated by arrow), then tighten the set screw. See Figure 6.
The recommended torque is 15-18 oz-in (0.9-1.2 in-lbs).
Figure 7. Closing up the set screw outlet
Figure 8. Completed assembly
Figure 6. Tightening encoder body unit set-screw to the motor’s shaft
Perform the same action on the opposite side of the en-
coder. Note that you will need to pull the“L-shape”mecha-
nism down and to the right instead.
The closure is considered complete when the “hinge” is
clearly visible through the set-screw openings on both
sides of the encoder body unit. See gure 7 (AFTER)
The completed encoder assembly is now ready for opera-
tion. See gure 8.
Screw head,
max height
= 2.1mm
Shown here
are two snap
points
Press body
unit down
Set screw
outlet
opening
Tightened
clockwise
Hex Wrench
(1.5mm)

Set screw
“Hinge”
Hex wrench to pull the cover leftwards “L-shape”
BEFORE AFTER
Press t the encoder body unit to the base plate, ensuring
that all four snap points are well locked.
The set screw tightening process will:
1. Lock the code wheel's hub to the motor shaft
2. Physically align the code wheel's index position to that
of the detector IC (index channel may not necessarily
be triggered electrically).
Step 5. Release codewheel and close set-screw outlet
Using the hex wrench, pull the“L-shape”protrusion down
and to the left. See gure 7 (BEFORE). This action releas-
es the internal codewheel holding mechanism and also
serves to close the set-screw opening.
* 1.5mm Hex wrench should be used to fasten M3 set screw in Figure 6

Other Avago Media Converter manuals

Avago USB-2-I2C User manual

Avago

Avago USB-2-I2C User manual

Avago HEDS-8949 User manual

Avago

Avago HEDS-8949 User manual

Avago HEDC-5 Series Installation and operating instructions

Avago

Avago HEDC-5 Series Installation and operating instructions

Avago AED -8 Series Instruction Manual

Avago

Avago AED -8 Series Instruction Manual

Popular Media Converter manuals by other brands

Renishaw QUANTIC RESM40 installation guide

Renishaw

Renishaw QUANTIC RESM40 installation guide

MDR Electronics MX-3297 manual

MDR Electronics

MDR Electronics MX-3297 manual

Insignia NS-HZ308 Quick setup guide

Insignia

Insignia NS-HZ308 Quick setup guide

Pixel Magic Crystalio II owner's guide

Pixel Magic

Pixel Magic Crystalio II owner's guide

Denon DVP-602CI specification

Denon

Denon DVP-602CI specification

Audio Technica ATW-SC410 user manual

Audio Technica

Audio Technica ATW-SC410 user manual

TR-Electronic LMR-70-1200 SSI manual

TR-Electronic

TR-Electronic LMR-70-1200 SSI manual

HAMTRONICS TD-2 manual

HAMTRONICS

HAMTRONICS TD-2 manual

Allied Telesis AT-FS201 Series installation guide

Allied Telesis

Allied Telesis AT-FS201 Series installation guide

Sonifex Redbox RB-ADDA2 User handbook

Sonifex

Sonifex Redbox RB-ADDA2 User handbook

SIIG JU-DV0112-S1 installation guide

SIIG

SIIG JU-DV0112-S1 installation guide

Matrox CronosPlus Installation and Hardware Reference

Matrox

Matrox CronosPlus Installation and Hardware Reference

Marklin Digital MAXI 60955 manual

Marklin Digital

Marklin Digital MAXI 60955 manual

NAIM UnitiLite quick start guide

NAIM

NAIM UnitiLite quick start guide

Speaka Professional 989340 operating instructions

Speaka Professional

Speaka Professional 989340 operating instructions

Digitus DN-82212 Quick installation guide

Digitus

Digitus DN-82212 Quick installation guide

Asus Essence 3 user manual

Asus

Asus Essence 3 user manual

ADF Web EnOcean user manual

ADF Web

ADF Web EnOcean user manual

manuals.online logo
manuals.online logoBrands
  • About & Mission
  • Contact us
  • Privacy Policy
  • Terms and Conditions

Copyright 2025 Manuals.Online. All Rights Reserved.