5
LEVELING:
Thewinerefrigeratorshouldbeinstalledonafirmandlevelsurfacethatwillbeabletosupporttheentire
weightofafullyloadedunit.Itisimportantforthewinerefrigeratortobeleveledinordertoworkproperly.
Itcanberaisedorloweredbyrotatingtheplasticsheathsaroundeachofthefeetonthebottomofthe
machine.Ifyoufindthatthesurfaceisnotlevel,rotatethefeetuntilthewinerefrigeratorbecomeslevel.
Youmayneedtomakeseveraladjustmentstolevelit.Werecommendusingacarpenter’sleveltocheckthe
machine.Turnthelevelingfeettotherighttolowerthatsideoftherefrigerator.Turnthelevelingfeetto
thelefttoraisethatsideoftherefrigerator.
RECOMMENDEDGROUNDINGMETHOD:
Foryourpersonalsafety,thisappliancemustbegrounded.Itisequippedwithapowersupplycordhavinga
3‐pronggroundingplug.Tominimizepossibleshockhazard,thecordmustbepluggedintoamating3‐
prongedwallsocket,andgroundedinaccordancewiththeNationalElectricalCodeandlocalcodesand
ordinances.Ifamatingwallsocketisnotavailable,itisthepersonalresponsibilityofthecustomertohavea
properlygrounded,3‐prongwallreceptacleinstalledbyaqualifiedelectrician.
Beforeyoumoveyourwinerefrigeratorintoitsfinallocation,itisimportanttomakesureyouhavethe
properelectricalconnection.Astandardelectricalsupply(115V,60Hz),properlygroundedinaccordance
withtheNationalElectricalCodeandlocalcodesandordinances,isrequired.Itisrecommendedthata
separatecircuit,servingonlyyourwinerefrigerator,beprovided.Usereceptaclesthatcannotbeturnedoff
byaswitchorpullchain.
Thefuse(orcircuitbreaker)sizeshouldbe15Amps.
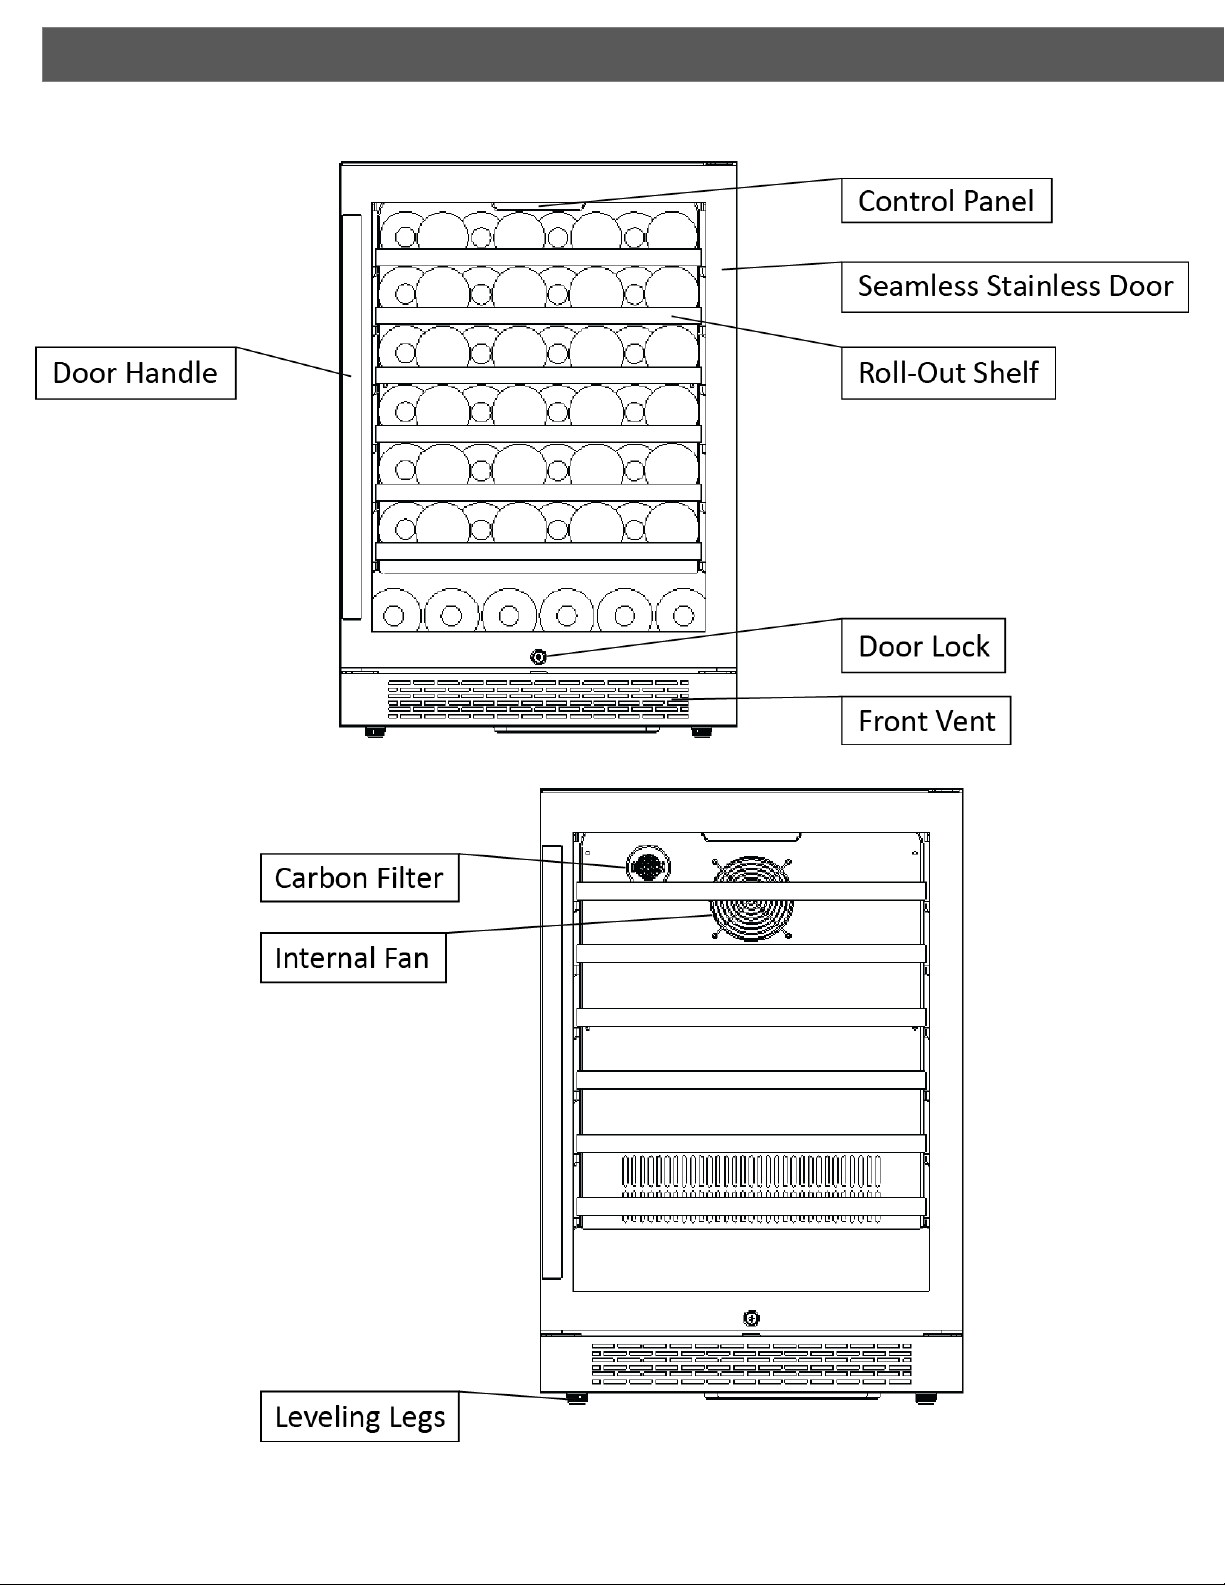
InstallingYourDoorHandleandShelves
INSTALLINGTHEDOORHANDLE:
1. Openthedoorandcarefullypullthedoorgasketaroundtheareawherethehandleistobeinstalled.
2. InserteachPhillipsheadscrewthroughthegasketsideofthedooruntilthescrewpassesthroughthe
door.
3. AlignthehandlewiththescrewsandtightenusingaPhillipsheadscrewdriveruntilthehandleisflush
againstthedoorframe.
Caution:Donotover‐tightenthescrewsasthismaycausedamagetothehandleortothestainlesssteel
door.
4. Carefullypressthedoorgasketintoitsoriginalposition.
ElectricalShockHazard!
Plugintoagrounded3‐prongoutlet.
Neverremovethegroundingprongfromtheplug.
Neveruseanadaptertobypassthegroundingprong.
DONOTuseanextensioncord.
Failuretofollowtheseinstructionscanresultinfire,electricalshock,orpersonalinjury.