manuals.online logo
Brands
  1. Home
  2. •
  3. Brands
  4. •
  5. Avaya
  6. •
  7. Conference Phone
  8. •
  9. Avaya IX B199 User manual

Avaya IX B199 User manual

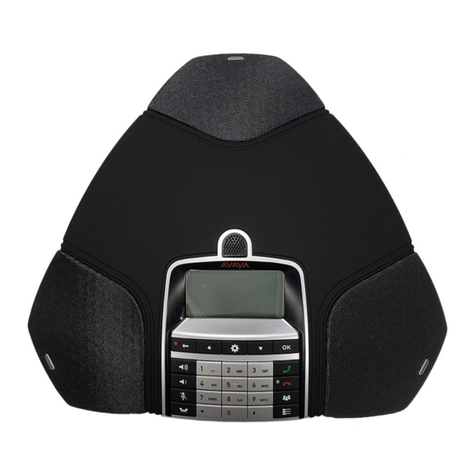
Avaya IX™ Conference Phone
B199 Quick Reference Guide
Release 1.0.1
Issue 2
March 2020
© 2019-2020, Avaya, Inc.
All Rights Reserved.
Overview
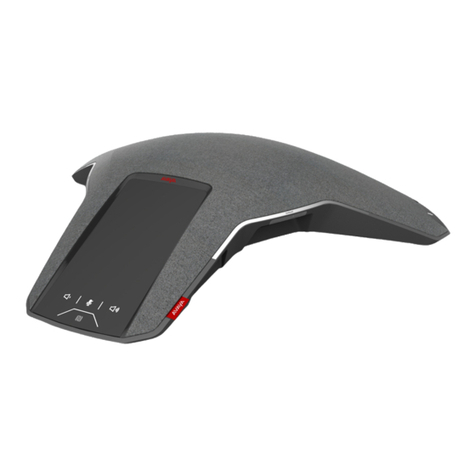
Physical layout
Figure 1: Front view of Avaya IX™ Conference Phone
B199
The following table lists the buttons and the other
elements of B199 Conference Phone.
Callout
number
Description
1 Mute buttons
2 Volume down button
3 Volume up button
4 NFC tag
5 Touch screen
6 LED status indicators
Connection layout
Figure 2: Connection layout of Avaya IX™ Conference
Phone B199
The following table lists the sockets and ports available on
B199 Conference Phone for connection.
Callout
number
Description
1 PoE/Ethernet connection socket
2 USB Type-A
3 Micro-USB Type-B
4 Audio expansion ports
5 Kensington® security lock port
6 NFC tag for Bluetooth LE
LED status indicators
LED color Description
Steady red Microphones are on mute.
Flashing red A call is on hold. Microphones and the
speaker are turned off.
Steady green A call is in progress.
Flashing green An incoming call is ringing.
LED Off The phone is inactive.
Handling calls
Making a call
Use this procedure to make a call with Avaya IX™
Conference Phone B199.
1. On the phone screen, tap the Dialpad icon.
2. On the displayed dial pad, dial the number you want
to call.
3. (Optional) To edit a dialed number, tap the Delete
icon.
4. Tap the Make Call icon.
The phone starts dialing the number. The LEDs show
a steady green light. When the other person answers,
you can see the duration of the call on the screen.
If the other person discards your call, the phone
shows you the following message: All possible
destinations are busy.
Answering a call
Use this procedure to answer an incoming call. When
there is an incoming call, the phone plays a ringtone, the
green LED starts flashing, and the phone displays the
number of the calling person on the screen.
1. On the phone screen, tap the Answer icon.
When you answer the call, the phone displays the
timer. You can control the duration of the call.
2. To end the call, tap the Hang Up icon.
Answering a call while on another call
Use this procedure to answer an incoming call when you
are on a call without dropping the first call. When there is
a second incoming call, the phone shows the caller’s
number and the green LED starts flashing.
1. On the phone screen, tap one of the following:
a. Answer: To answer the second call, and put the
first call on hold.
b. Hang Up: To ignore the second call, and continue
the first call.
2. Go on with the call.
B199 Conference Phone stops ringing.
Redialing a number
Use this procedure to redial the number from your call list.
1. On the phone screen, tap the Recent icon.
The phone displays the list of the last incoming,
outgoing and missed calls.
1
2. Scroll through the list and select the number you want
to call.
The phone displays the following information about
the call:
• Number
• Date or time
• Direction
3. Tap the Make Call icon to redial the number.
The phone dials the selected number.
Conference calls
Setting up a conference call
Use this procedure to set up a conference call on your
phone.
1. Tap the Dialpad icon.
2. Dial the number of the first person that you want to
include in the conference call.
3. When the person answers, tap Add Participant.
The phone displays the Add Participant screen.
4. Dial the number of the second person that you want to
include in the conference call.
You can choose the number in the Recent tab from
the recent calls list or dial the number using the
Dialpad.
5. Tap Conference when the called party answers.
The phone displays the conference call window and
starts the conference call. The conference call window
displays the names or numbers of the participants on
the call and a call timer.
Adding a participant to a conference call
Use this procedure to add participants to an ongoing
conference call.
Start a conference call.
1. On the phone screen, tap Add Participant.
The phone displays the Add Participant screen.
2. To add a participant, do one of the following:
• On the Recent tab, choose the number of the
person that you want to include in the conference
from the recent calls list.
• Dial the number using the Dialpad.
3. When the called person answers the call, tap
Conference.
The phone includes the called person into the
conference call.
Managing an active conference call
• To put a participant of a conference call on hold, do the
following:
1. On the phone screen, tap the participant’s number
or the icon.
2. Tap the Hold icon to put the participant on hold.
3. Tap the On Hold icon for the participant to rejoin
the conference call.
• To talk privately with a participant of a conference call,
do the following:
1. On the phone screen, tap the participant’s number
or the icon.
2. Tap the Talk Private icon to talk privately with the
participant.
The phone puts all other participants on hold and
they are not able to listen to the discussion
between you and the selected participant.
3. Tap the Conference icon to rejoin the conference
call.
• To drop a participant from a conference call, do the
following:
1. On the phone screen, tap the participant’s number
or the icon.
2. Tap the Hang Up icon.
The phone drops the participant from the
conference call.
• To split an ongoing conference call into several calls,
do the following:
1. On the phone screen, tap the Split icon.
The phone places all participants to separate calls
and puts the calls on hold.
2. To resume the call with any one of the
participants, tap the participant’s entry and then
the On Hold icon.
3. Tap the Conference icon to connect all the
separate calls to the conference call.
Phone management application
Avaya® Conference Assistant
You can manage your Avaya IX™ Conference Phone B199
from a mobile phone or a tablet if you have Avaya®
Conference Assistant installed on the device. You can
download and install Avaya® Conference Assistant free
from App Store and Google Play like any other
application. You can use the NFC tag to easily start
downloading the application. For that, you must bring the
mobile device with the NFC enabled to the NFC tag on the
conference phone, and the web browser on the mobile
device opens the web page with the application in App
Store or Google Play.
Pairing and connecting devices
Use this procedure to pair your Avaya IX™ Conference
Phone B199 with Avaya® Conference Assistant on your
mobile device the first time when you use them together.
After that, they connect with one touch when you run the
application near the conference phone.
The connection range is up to 20 meters. The connection
breaks if this range is exceeded. You see a request to
reconnect when Avaya® Conference Assistant is within the
range of B199 Conference Phone. Reconnection requires
only one touch.
Important:
You can pair up to 100 mobile phones or tablets with
your B199 Conference Phone. But only one user
connection is active at a time.
Install Avaya® Conference Assistant on your mobile
device.
1. On your mobile device, open Avaya® Conference
Assistant.
The mobile phone displays the closest B199
Conference Phone.
2. To select the phone you want to connect, perform one
of the following actions:
• If your mobile device displays B199 Conference
Phone you want to connect, tap Connect on the
mobile device screen.
• If your mobile device does not display B199
Conference Phone you want to connect, tap Skip
and then tap the connection symbol in the upper left
corner of your mobile device screen.
The mobile device displays the list of available
conference phones.
The mobile phone displays a pairing code on the
screen.
3. Enter the code with the keypad on the conference
phone.
4. Tap Ok on the conference phone to start pairing.
When the devices are paired, both Avaya®
Conference Assistant and B199 Conference Phone
display the connection symbol.
The conference phone and Avaya® Conference
Assistant remain paired while they are close to one
another.
2
Disconnecting devices
Use this procedure to disconnect your Avaya IX™
Conference Phone B199 from the mobile device with
Avaya® Conference Assistant installed.
Ensure that B199 Conference Phone is connected to a
mobile device with Avaya® Conference Assistant installed.
• To disconnect from the mobile device, do the following:
1. In Avaya® Conference Assistant, tap the
connection symbol in the upper left corner of the
screen.
2. (Optional) Under Change device, select another
conference phone to connect to.
You can do it if there are other conference phones
available nearby.
The application starts connecting to the selected
conference phone.
3. Tap the Disconnect button near the highlighted
connected device name.
The connection symbol in the upper left corner of
the screen becomes inactive.
• To disconnect from B199 Conference Phone, do one of
the following:
- Tap Conference Assistant > Disconnect Device.
- Tap Settings > Conference Assistant >
Disconnect Device.
The phone shows the Avaya® Conference Assistant
icon and informs that the application is disconnected.
Checking the calendar and scheduled
events
Use this procedure to check your calendar on your mobile
device with Avaya® Conference Assistant installed. Then
you can arrange calls with the paired Avaya IX™
Conference Phone B199 and Avaya® Conference
Assistant.
You must allow your mobile device with Avaya®
Conference Assistant to connect to your calendar and
agenda.
1. On your mobile device, open Avaya® Conference
Assistant.
2. Tap the Calendar icon.
The mobile phone shows all calendar events on the
screen. Some of these events are meeting invitations
with the meeting information included. In the Overview
tab, you see the time, duration, and title of the
meeting. In the Participants tab, the application shows
the list of persons invited to the meeting.
3. Select a conference call from the list.
The mobile phone displays an overview and a list of
other participants of the conference call. Avaya®
Conference Assistant finds the phone numbers, PIN
codes, and meeting links in the calendar.
Participating in a conference call from
the calendar
Use this procedure to participate in a conference call from
the calendar accessible with Avaya® Conference
Assistant.
Your calendar must contain an invitation to a conference
call. The contact information in the conference invitation
must comply with the E164 international phone number
standard. This guarantees that Avaya® Conference
Assistant interprets the information correctly.
1. After you receive a notification about the upcoming
conference call on your mobile device, open Avaya®
Conference Assistant.
The application finds the closest Avaya IX™
Conference Phone B199.
2. In the conference room, pair Avaya® Conference
Assistant and Avaya IX™ Conference Phone B199.
3. Connect to the meeting from the mobile device by
tapping the conference in the calendar.
Avaya® Conference Assistant dials the phone number
and enters the PIN code from the conference call
invitation.
Starting an unscheduled call
Use this procedure to start a call that is not scheduled in
the calendar. You will have complete control over Avaya
IX™ Conference Phone B199 during the call from your
mobile device with Avaya® Conference Assistant installed.
Ensure that Avaya IX™ Conference Phone B199 is paired
with Avaya® Conference Assistant.
1. Do one of the following to choose a number to call:
• Select a number from your Contacts list.
• Select a number from your Favorites list.
• Select a number from the your recent calls list.
• Dial a number using the keypad.
The phone dials the number, and the call starts. The
screen displays the name and the number of the
person called.
2. (Optional) Do one or more of the following:
a. Adjust the volume on the screen of you mobile
device by moving the Volume up slider.
b. Add additional participants by tapping the Add
Participant icon.
c. Split the conference call to separate calls by
tapping Conference.
d. Mute the microphone by tapping Microphone
Muted. To unmute, tap Microphone Muted
again.
e. Enter Dual Tone Multi Frequency (DTMF) digits
by tapping Keypad.
f. Put the call for any participant on hold by tapping
Arrow > Hold.
g. Talk to any participant in private by tapping
Arrow > Talk Private.
h. Disconnect any participant from the call by
tapping Arrow > Hang Up.
3. To end the call, tap the Hang Up icon.
Managing contacts
Use this procedure to manage contacts with Avaya®
Conference Assistant.
1. On your mobile device, open Avaya® Conference
Assistant.
2. Tap the Contacts icon.
3. To add a contact to your favorite contacts list, tap the
Contacts tab and press the star symbol near the
selected contact.
4. To open a list of your favorite contacts, tap Favorites.
5. To create a new conference group in the phone book,
tap Groups > Plus on the screen.
Features and accessories
Expansion of the phone coverage
You can use your Avaya IX™ Conference Phone B199 on
larger conference tables or when the number of a meeting
participants is greater than 10. In this case you can
ensure high-level quality of audio signal by expanding the
phone coverage in the room without a PA system. You can
do it by connecting Smart Mic expansion microphones to
the phone or by cascading several B199 devices in a
daisy chain.
Arranging a daisy chain
Use this procedure to arrange a daisy chain of one master
B199 phone and one or two slave conference phones or
expansion microphones.
If you arrange the daisy chain made of several conference
phones, prepare the connection cables. The cables in the
3
Avaya Daisy Chain kit are 5 and 10 meters long. You can
purchase the Avaya Daisy Chain kit as an accessory.
The cable of the Avaya Smart Mic is 3 m long.
1. Connect the cable to the audio expansion port on the
phone.
There are 2 audio expansion ports on B199
Conference Phone.
2. Connect the other end of the cable to the audio
expansion port of the other phone.
In case of expansion microphones, the other end of
the cable is fixed in the device.
Defining the mode of the phone
Use this procedure to define the mode of your Avaya IX™
Conference Phone B199 in a daisy chain.
• To define the mode of your B199 Conference Phone
through the web interface, do the following:
1. On the web interface, click Basic.
2. In Daisy Chain Mode, select the required mode
from the drop-down list.
The options are:
-Master. This is the default mode.
-Slave
3. Click Save.
• To define the mode of your B199 on the phone, do the
following:
1. Log in as the administrator.
2. On the phone screen, tap Settings > Phone >
Daisy Chain.
3. Select the required mode.
The options are:
-Master
-Slave
4. Return to the home screen.
The phone restarts application to apply the changes.
Disabling the daisy chain mode
You can disable the Daisy Chain mode through the web
interface or from the phone.
Ensure that the phone displays the Daisy Chain icon.
• To disable the Daisy Chain mode from the web
interface, do the following:
1. On the web interface, click Basic.
2. In Daisy Chain Mode, select Master.
3. Click Save.
• To disable the Daisy Chain mode from the phone, do
the following:
1. Touch the phone screen and enter the
administrator password.
2. Tap Phone > Daisy Chain.
3. Select the Master mode.
4. Tap twice to return to the home screen.
Application restarts and restores the Master
status.
4

Other manuals for IX B199

1

Other Avaya Conference Phone manuals

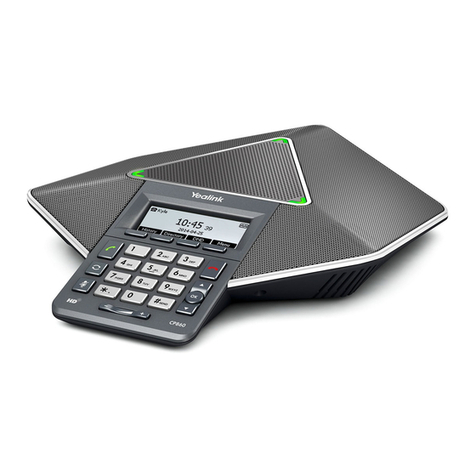
Avaya B149 User manual

Avaya

Avaya B149 User manual

Avaya B199 User manual

Avaya

Avaya B199 User manual

Avaya B199 User manual

Avaya

Avaya B199 User manual

Avaya B129 User manual

Avaya

Avaya B129 User manual

Avaya 1408 User manual

Avaya

Avaya 1408 User manual

Avaya B179 SIP User manual

Avaya

Avaya B179 SIP User manual

Avaya B169 User manual

Avaya

Avaya B169 User manual

Avaya B179 Instruction Manual

Avaya

Avaya B179 Instruction Manual

Avaya B109 User manual

Avaya

Avaya B109 User manual

Avaya 2033 User manual
Avaya

Avaya 2033 User manual

Avaya B149 User manual

Avaya

Avaya B149 User manual

Avaya B189 User manual

Avaya

Avaya B189 User manual

Avaya 1030 User manual

Avaya

Avaya 1030 User manual

Avaya 1692 IP User manual

Avaya

Avaya 1692 IP User manual

Avaya 1692 User manual

Avaya

Avaya 1692 User manual

Avaya B179 User manual

Avaya

Avaya B179 User manual

Avaya B199 Instruction Manual

Avaya

Avaya B199 Instruction Manual

Avaya B149 User manual

Avaya

Avaya B149 User manual

Avaya B179 User manual

Avaya

Avaya B179 User manual

Avaya B179 SIP Instruction Manual

Avaya

Avaya B179 SIP Instruction Manual

Avaya B179 User manual

Avaya

Avaya B179 User manual

Avaya B189 Assembly Instructions

Avaya

Avaya B189 Assembly Instructions

Avaya B169 User manual

Avaya

Avaya B169 User manual

Avaya B169 User manual

Avaya

Avaya B169 User manual

Popular Conference Phone manuals by other brands

V-tech ErisStation VCS754A quick start guide

V-tech

V-tech ErisStation VCS754A quick start guide

Polycom SoundStation IP 4000 Technical bulletin

Polycom

Polycom SoundStation IP 4000 Technical bulletin

NEC SoundStation IP 7000 quick start guide

NEC

NEC SoundStation IP 7000 quick start guide

Polycom SoundStation IP 4000 Specifications

Polycom

Polycom SoundStation IP 4000 Specifications

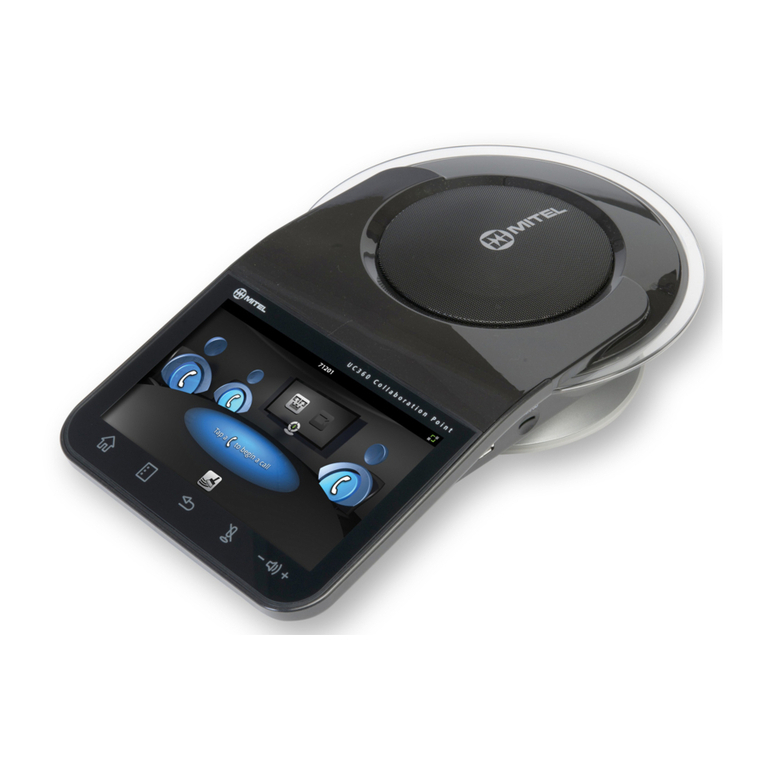
Mitel UC360 installation guide

Mitel

Mitel UC360 installation guide

Polycom SoundStation 2W Application note

Polycom

Polycom SoundStation 2W Application note

Polycom COMMUNICATOR C100S user guide

Polycom

Polycom COMMUNICATOR C100S user guide

Polycom SoundStation2 Specifications

Polycom

Polycom SoundStation2 Specifications

Clear One MAX WIRELESS datasheet

Clear One

Clear One MAX WIRELESS datasheet

GE 28031 Series user guide

GE

GE 28031 Series user guide

Auerswald COMfortel C-400 Provisioning guide

Auerswald

Auerswald COMfortel C-400 Provisioning guide

Shure Conference Phone user guide

Shure

Shure Conference Phone user guide

Revolabs 10-FLXUC1000 Installation and operation guide

Revolabs

Revolabs 10-FLXUC1000 Installation and operation guide

Cisco 8832 quick start

Cisco

Cisco 8832 quick start

Polycom 2 Specifications

Polycom

Polycom 2 Specifications

AudioCodes RX50 Getting started guide

AudioCodes

AudioCodes RX50 Getting started guide

Cisco 7832 instructions

Cisco

Cisco 7832 instructions

Planet Networking & Communication ICF-1600 Quick installation guide

Planet Networking & Communication

Planet Networking & Communication ICF-1600 Quick installation guide

manuals.online logo
manuals.online logoBrands
  • About & Mission
  • Contact us
  • Privacy Policy
  • Terms and Conditions

Copyright 2025 Manuals.Online. All Rights Reserved.