AVEIS COMMUNICATION (SHENZHEN) CO., LTD
Address: 303B, Building K, Nantaichuangzhigu, Xixiang, Baoan, Shenzhen, China 518000
Whatsapp :+8613554937406 Email: info@aveisftth.com
www.aveisftth.com
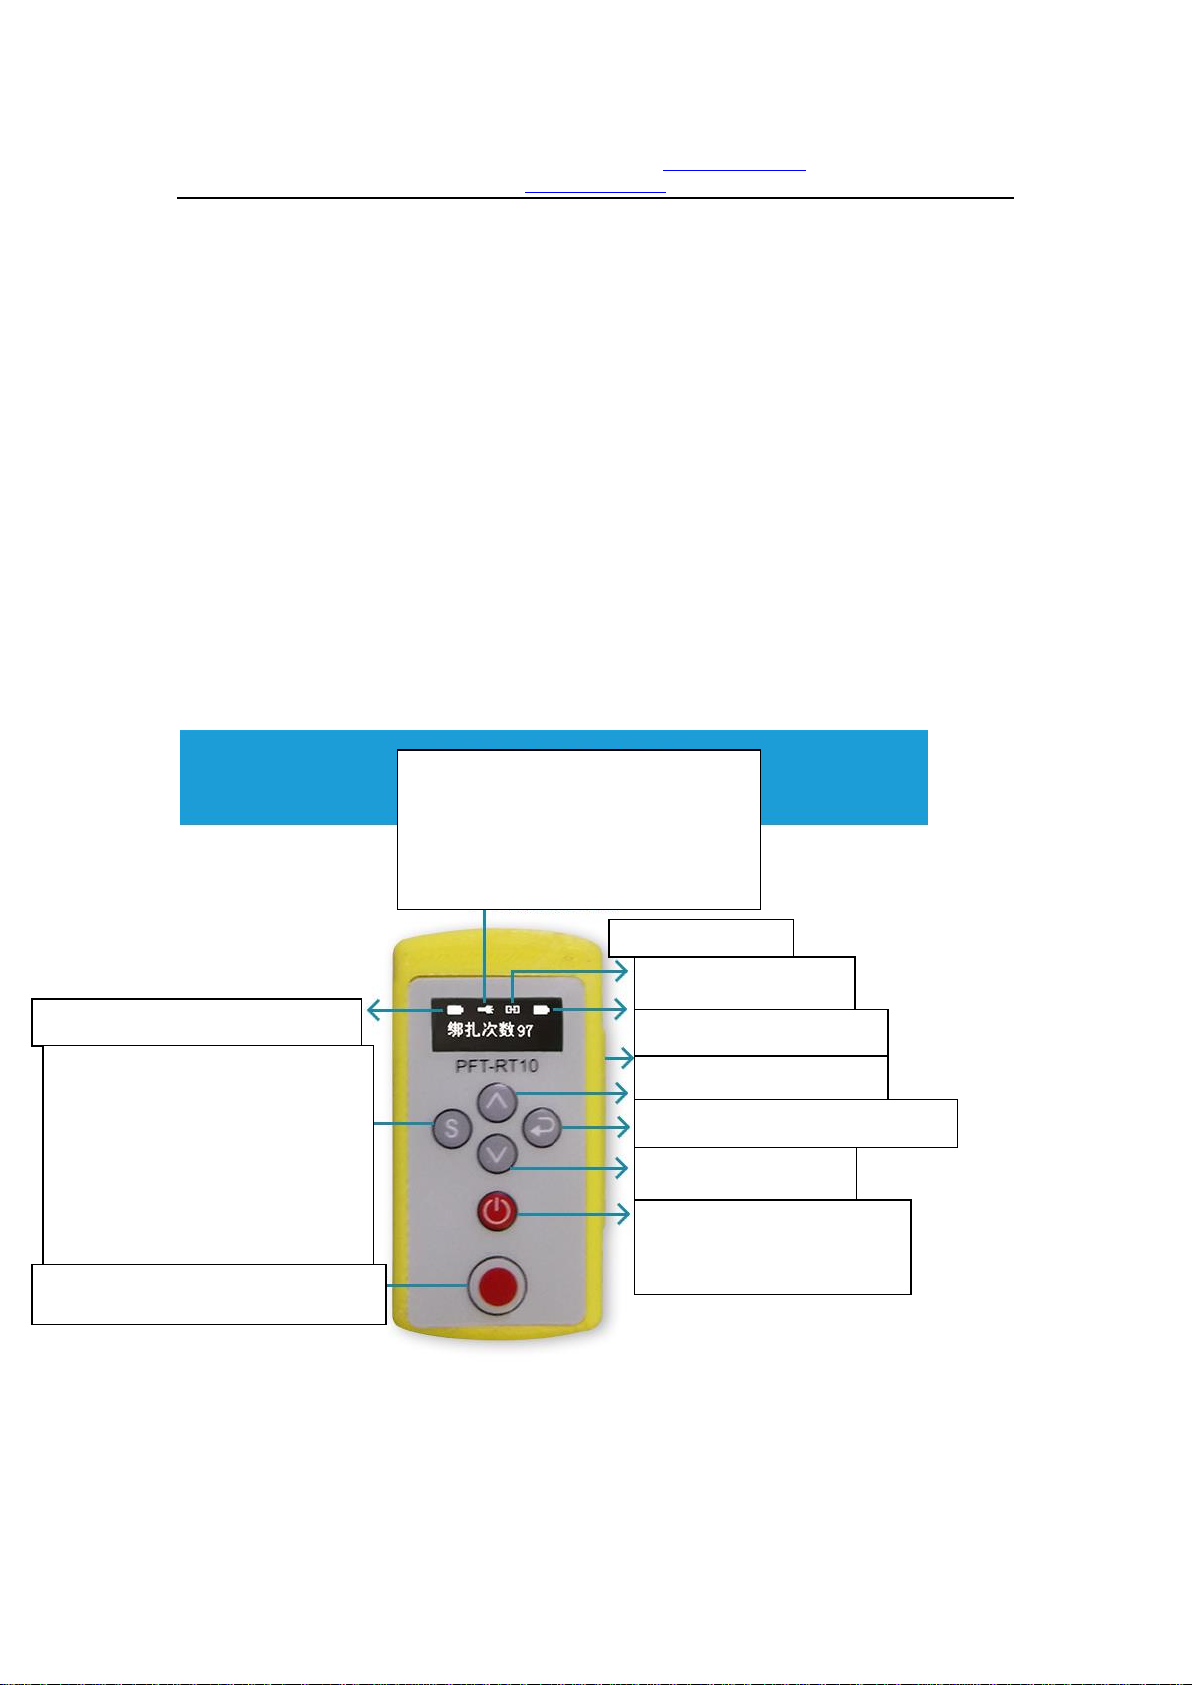
Users can decide which tie line mode to use based on actual conditions.
3. Adjust the incoming line speed to quickly install the wire and remove the wire
4. The current number of lashings is displayed, the count can be cleared.
5. There are two ways to charge the main battery: 1 can be removed and the battery can be
directly connected to the charger for charging. 2 The battery does not need to be removed.
Plug the charger directly into the jack on the main unit for charging.
6. Wireless remote control USB interface design, easy to use, outdoor charging without
charging
7. the remote control distance is 50 meters, this can be used in the partition wall.
8. With lighting, it is convenient for nighttime or poor lighting
9. Remote control snap-on design, stuck on the pole to prevent loss, one person can operate
10. With on-screen display function, the customer can clearly see whether the remote control
and the host are connected successfully, the power remaining in the remote control and the
host, the number of lashings, the number of ligatures, the tightness of the ligature, and
whether the illumination is turned on, etc.
11. There is a round hole on the right side of the remote control. You can restart the remote
control with one button.
Instructions:
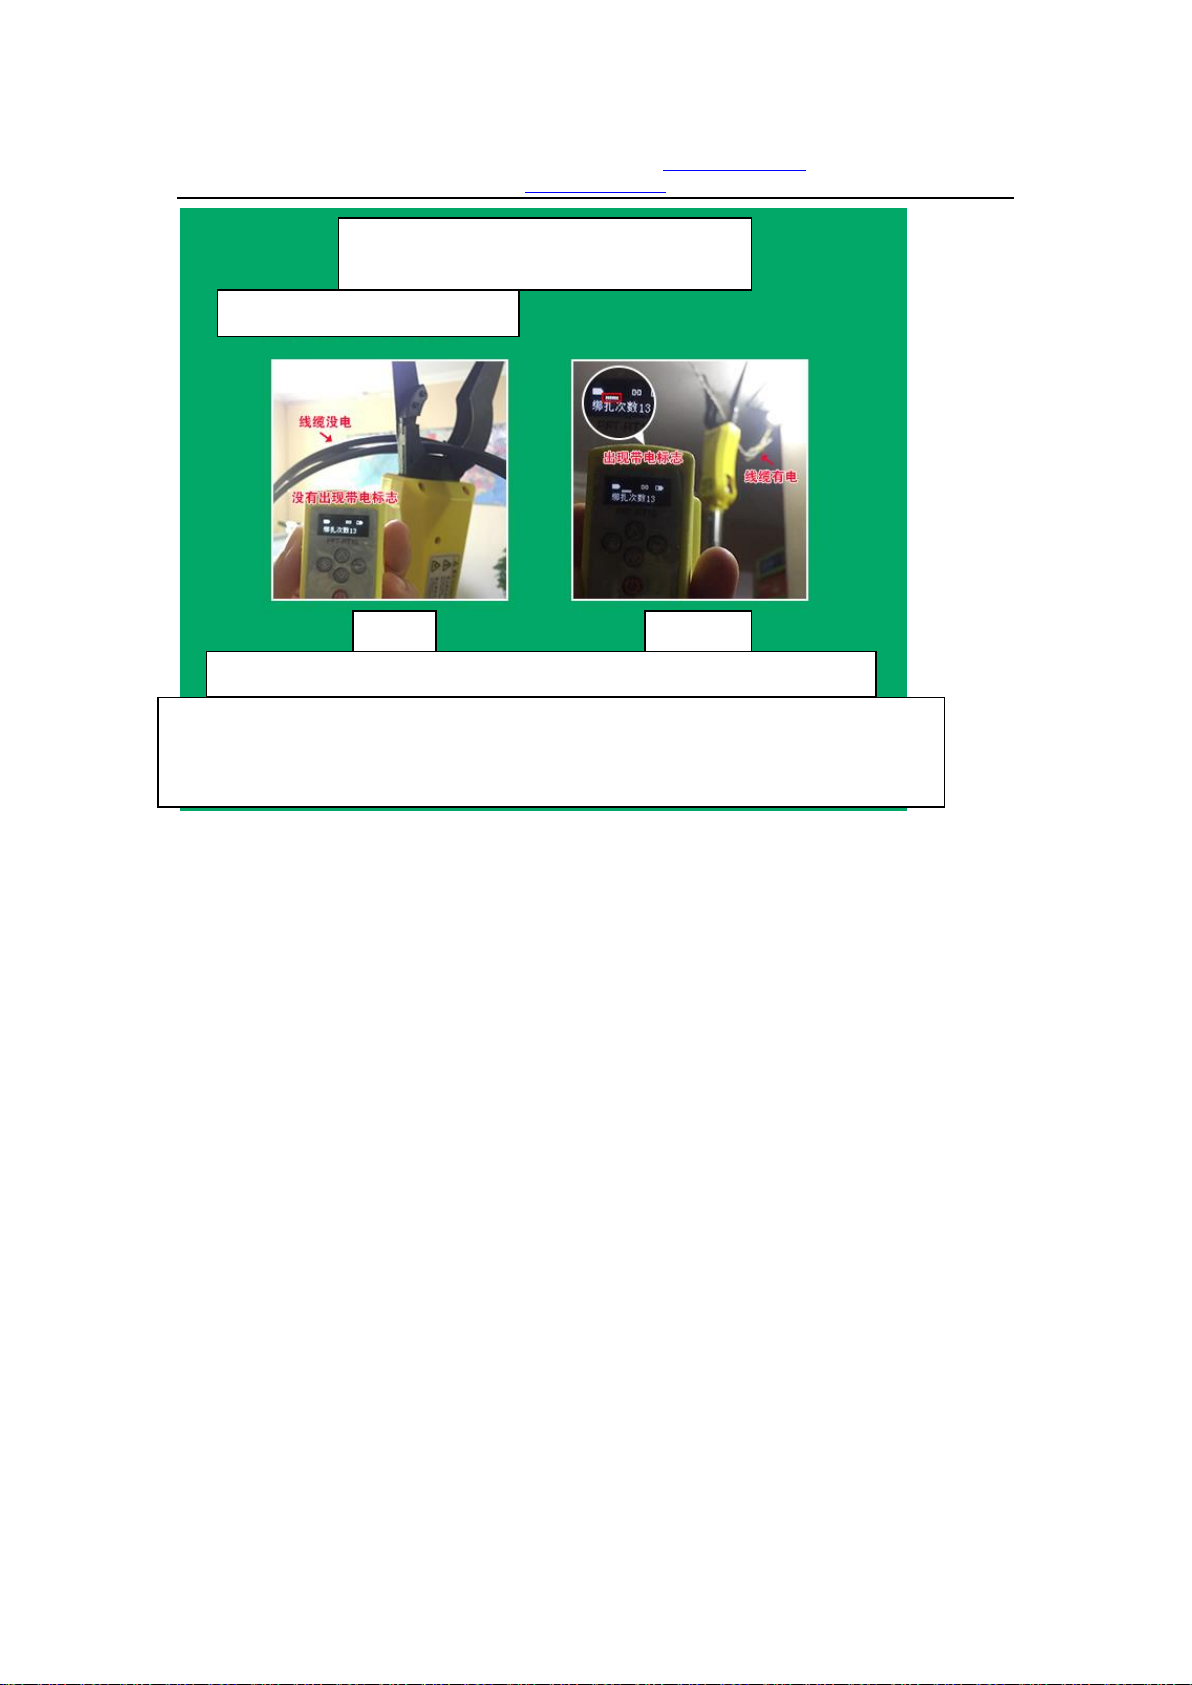
1. Remove the battery insulation rod and charge the lithium battery. The
green light is on is accompalished, and the charging time is about 3 hours.
After the battery is fully charged, the host is turned on and the main switch
is turned on. At this time, the buzzer will sound a beep, indicates that the
machine is powered;
You can also charge directly without removing the lithium battery. Open the dust cap on the
head socket and plug the charger directly into the head jack to charge.
2. Rotate and remove the dome of the fixed cable tray in the middle of the
machine and then load our customized silk disk into the specified position;
3. Take out a tray and pull it straight for 10 cm, insert it into the rectangular
inlet hole of the machine, feed it to the bottom forward, insert the cable
tray, and rotate the dome tightly (if the wire is not straightened, easy to
cause the wire, the wire can not enter the specified track);
4. Turn on the remote control switch first, and the word “PFT” will appear on
the remote control screen. Then turn on the main unit switch and wait for
the connection success flag on the remote control. The remote control is
successfully connected to the host. At this time, the line speed above the
remote control can be adjusted, and the wire is taken out for testing. The
up is the upshift, the down is the downshift, and the down button to 0 is
the stop. Pressing 1/2/3 up on the wire is taken out, indicating that the wire