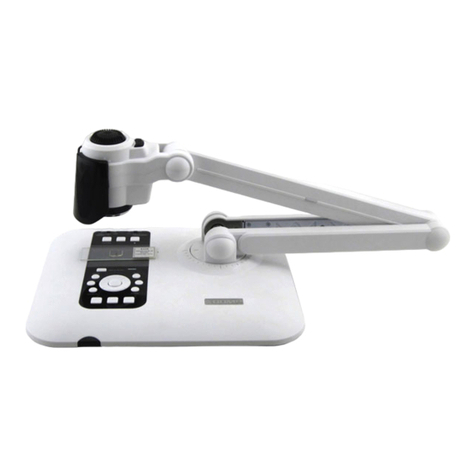
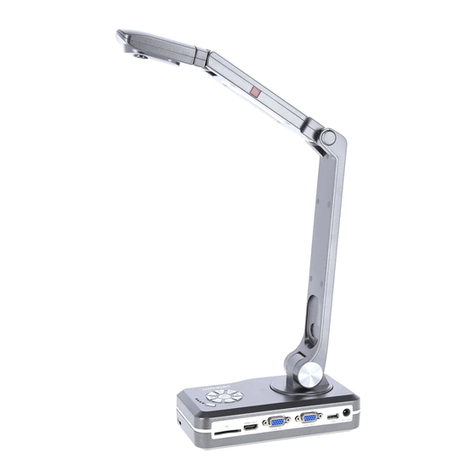
AVerVision M70HD User manual

AVerVision M70HD
User Manual

Federal Communications Commission Statement (Class A)
NOTE- This equipment has been tested and found to comply with the limits for a
Class A digital device, pursuant to Part 15 of the FCC Rules. These limits are
designed to provide reasonable protection against harmful interference in a
residential installation. This equipment generates uses and can radiate radio
frequency energy and, if not installed and used in accordance with the instructions, may cause
harmful interference to radio communications. However, there is no guarantee that interference
will not occur in a particular installation. If this equipment does cause harmful interference to
radio or television reception, which can be determined by tuning the equipment off and on, the
user is encouraged to try to correct the interference by one or more of the following measures:
Reorient or relocatethereceivingantenna.
Increasethe separationbetweentheequipmentand receiver.
Connect the equipment into an outlet on a circuitdifferentfromthattowhichthereceiver is
connected.
Consult the dealer or an experiencedradio/televisiontechnicianfor help.
Class A ITE:
Class A ITE is a category of all other ITE which satisfies the class A ITE limits but not the class
B ITE limits. Such equipment should not be restricted in its sale but the following warning shall
be included in the instructions for use:
Warning - This is a class A product. In a domestic environment this product may cause radio
interference in whichcase the user may be required to take adequate measures.
COPYRIGHT
© 2015 AVer Information Inc. All rights reserved.
All rights of this object belong to AVer Information Inc. Reproduced or transmitted in any form
or by any means without the prior written permission of AVer Information Inc. is prohibited. All
information or specifications are subject to change without prior notice.
TRADEMARKS
“AVer” is a trademark ow ned by AVer Information Inc. Other trademarks used herein for
description purpose only belong to each of their companies.
NOTICE
SPECIFICATIONS ARE SUBJECT TO CHANGE WITHOUT PRIOR NOTICE. THE
INFORMATION CONTAINED HEREIN IS TO BE CONSIDERED FOR REFERENCE ONLY.
WARNING
TO REDUCE RISK OF FIRE OR ELECTRIC SHOCK, DO NOT EXPOSE THIS APPLIANCE TO
RAIN OR MOISTURE. WARRANTY VOID FOR ANY UNAUTHORIZED PRODUCT
MODIFICATION.
THE MARK OF CROSSED-OUT WHEELED BIN INDICATES THAT THIS PRODUCT
MUST NOT BE DISPOSED OF WITH YOUR OTHER HOUSEHOLD WASTE.
INSTEAD, YOU NEED TO DISPOSE OF THE WASTE EQUIPMENT BY HANDING
IT OVER TO A DESIGNATED COLLECTION POINT FOR THE RECYCLING OF
WASTE ELECTRICAL AND ELECTRONIC EQUIPMENT. FOR MORE
INFORMATION ABOUT WHERE TO DROP OFF YOUR WASTE EQUIPMENT FOR
RECYCLING, PLEASE CONTACT YOUR HOUSEHOLD WASTE DISPOSAL
SERVICE OR THE SHOP WHERE YOU PURCHASED THE PRODUCT.

Remote Control Battery Safety Information
- Store batteries in any cool & dry place.
- Do not dispose used batteries in domestic waste. Dispose batteries at special
collection points or return to stores if applies.
- Remove the batteries if they are not in use for long period of time. Battery leakage
and corrosion can damage the remote control, dispose batteries safely.
- Do not mix and use old and new batteries.
- Do not mix and use different types of batteries: alkaline, standar d (carbon-zinc) or
rechargeable (nickel-cadmium).
- Do not dispose batteries in a fire.
- Do not attempt to short circuit the battery terminals.
警告使用者
這是甲類的資訊產品,在居住的環境中使用時,可能會造成射頻干擾,在這種
情況下,使用者會被要求採取某些適當的對策。

T
Ta
ab
bl
le
e
o
of
f
C
Co
on
nt
te
en
nt
ts
s
T
Ta
ab
bl
le
e
o
of
f
C
Co
on
nt
te
en
nt
ts
s.....................................................................................1
Package Contents.........................................................................................1
Optional Accessories....................................................................................1
Get Familiar with the AVerVision M70HD.......................................................2
Right Panel..............................................................................................................................2
Rear Panel..............................................................................................................................3
Left Panel................................................................................................................................3
Control Panel..........................................................................................................................4
Remote Control......................................................................................................................5
Making the Connections ...............................................................................8
Set the TV-RGB Switch Setting ...........................................................................................8
Connect to a Monitor or LCD/DLP Projector.....................................................................8
Connect to a Monitor or LCD/DLP Projector with HDMI Output interface ....................9
Connect to a Computer with HDMI Input interface...........................................................9
Connect to a TV...................................................................................................................10
Connecting the Power.........................................................................................................10
Connect to a Computer.......................................................................................................11
Connect to a Computer via USB.......................................................................................11
Connect an External Microphone......................................................................................12
Connect anAmplified Speaker...........................................................................................12
Connect to a Microscope....................................................................................................13
Setting Up AVerVision M70HD.....................................................................14
Camera Head.......................................................................................................................14
MechanicalArm....................................................................................................................15
Infrared Sensor.....................................................................................................................15
Mounting the M70HD on a Flat Surface...........................................................................16
Anti-glare Sheet....................................................................................................................16
External Memory Storage...................................................................................................17
I
In
ns
se
er
rt
t
a
an
n
S
SD
D
C
Ca
ar
rd
d..............................................................................................................17
I
In
ns
se
er
rt
t
a
a
U
US
SB
B
F
Fl
la
as
sh
h
D
Dr
ri
iv
ve
e..................................................................................................17
OSD MENU..................................................................................................18
Navigate the Menu and Submenu.....................................................................................19
Image.....................................................................................................................................19
Brightness...........................................................................................................................19
Contrast...............................................................................................................................19
Mode....................................................................................................................................20
Effect....................................................................................................................................20
Mirror...................................................................................................................................20
Advanced............................................................................................................................20
Auto Image.........................................................................................................................21
Exposure.............................................................................................................................21
White Balance....................................................................................................................21

Focus...................................................................................................................................21
Presentation..........................................................................................................................22
Spotlight..............................................................................................................................22
Visor.....................................................................................................................................22
PIP.......................................................................................................................................23
Split Screen........................................................................................................................23
Timer....................................................................................................................................24
Saturation...........................................................................................................................24
Setting....................................................................................................................................24
Capture...............................................................................................................................24
Resolution...........................................................................................................................24
Quality.................................................................................................................................25
Type.....................................................................................................................................25
Interval.................................................................................................................................25
Recording...........................................................................................................................25
Storage................................................................................................................................25
Format.................................................................................................................................26
USB to PC ..........................................................................................................................26
Flicker..................................................................................................................................26
System...................................................................................................................................27
Language............................................................................................................................27
Output Display...................................................................................................................27
Backup................................................................................................................................27
Save Setting.......................................................................................................................27
Recall Setting.....................................................................................................................27
Information..........................................................................................................................28
Default.................................................................................................................................28
Playback................................................................................................................................28
Slide Show..........................................................................................................................28
Interval.................................................................................................................................28
Slide Show Effect..............................................................................................................29
Current Storage.................................................................................................................29
DeleteAll.............................................................................................................................29
Annotation.............................................................................................................................29
Connecting a USBmouse................................................................................................30
Using theAnnotation Control Panel...............................................................................30
Transfer CapturedImages/Videos toa computer ...............................................31
Technical Specifications .............................................................................32
Image...................................................................................................................................32
Optics..................................................................................................................................32
Power..................................................................................................................................32
Lighting................................................................................................................................32
Input/Output........................................................................................................................32
Dimension...........................................................................................................................33
External Storage................................................................................................................33
RS-232 Diagram Connection .......................................................................33
RS-232 Cable Specifications.......................................................................33

RS-232 Transmission Specifications...........................................................34
RS-232 Communication Format........................................................................................34
RS-232 Send Command Table..........................................................................................34
RS-232 Get Command Table.............................................................................................39
Troubleshooting..........................................................................................40
Limited Warranty.........................................................................................42
Limitations of Warranty...............................................................................42
Disclaimer of Warranty................................................................................42
Limitation of Liability ..................................................................................43
Governing Law and Your Rights..................................................................43

1
P
Pa
ac
ck
ka
ag
ge
e
C
Co
on
nt
te
en
nt
ts
s
Make surethefollowingitems areincludedinthepackage.
AVerVision M70HD
RS-232/CVBS Cable
USB Cable
Power Adapter (12V, 2A)
* The power adapter will vary
depending on the standard
power outlet of the country
where it is sold.
RGB Cable
Remote Control
(batteries included)
Software & Manual CD
O
Op
pt
ti
io
on
na
al
l
A
Ac
cc
ce
es
ss
so
or
ri
ie
es
s
MicroscopeAdapter
(28mm & 34mm Rubber Coupler are included)
Light Box
Anti-glare Sheet
Carrying Bag

2
G
Ge
et
t
F
Fa
am
mi
il
li
ia
ar
r
w
wi
it
th
h
t
th
he
e
A
AV
Ve
er
rV
Vi
is
si
io
on
n
M
M7
70
0H
HD
D
(8)
(5)
(7)
(6)
(1)
(2)
(3)
(4)(9)
(fig. 1.1)
Name
Function
(1) Camera head
Contain thecamera sensor.
(2) Camera lens
Focus the image in the camera.
(3) Control panel
Easy access tovarious functions.
(4) Built-in MIC
Recordaudio whenrecordingvideoclip.The recordedsoundwillbe
in monophonic.
(5) Arm
Extendable for view ingcoverage.
(6) Leftpanel
Connections for LCD monitor usingHDMI cable, microphone,
speaker,computer, SD card, andTV-RGB display output switch.
(7) IR sensor
Receive remote controlcommands.
(8) Rear panel
Connections for power,computer for RGBinput display and LCD
monitor usingRGB cable.
(9) Right panel
On/off switchfor USBflashdriveport and power button.
Right Panel
(3)
(2)
(1)
(fig. 1.2)
Name
Function
(1) USB PC - USB Flash
Drive switch
Switchtoright(►) for audiovideo recordingdirectly toa
USB flashdriveand left (◄) w hen connecting AVerVision
M70HD to a computerusing a USB cable.
(2) USB Thumb Drive port
Insert a USB flashdriveforaudio videorecordingstorage.
(3) Power button
Turn theunit on/standby mode.

3
Rear Panel
(4)
(1)
(2)(3)
(fig. 1.3)
Name
Function
(1) AntitheftSlot
Attach aKensingtoncompatible security lockor antitheft
device.
(2) DC12V port
Connect the power adapter intothis port.
(3) RGB INPUT port
Input the signalfroma computer or other sources and pass it
throughto the RGB OUT port only.Connect this portto the
RGB/VGA output portof a computer.
(4) RGB OUTPUT port
Connect theAVerVisionM70HD to any display devicewith
RGB cable
Left Panel
(1) (8)
(6)
(7)
(5)
(4)
(3)
(2)
(fig. 1.4)
Name
Function
(1) Mini USB port
Connect to aUSB port of a computerwithaUSB cableand use
AVerVisionM70HD as aUSB Camera or transfer thecaptured
images/videos either fromthe memory sourcetocomputer.
(2) HDMI IN
Connect an externalHDMI sourceas aninput viathis port
(3) HDMI OUTPUT
Output the videosignalfromthe main systemon an LCD monitor
withHDMI interfaceusingHDMI cable.
(4) MIC port
Connect a 3.5mm plug microphone. The built-in mic willbe
disabled whenanexternalMIC is connectedtothis port.
(5) Speaker port
Connect to anamplified speaker.
(6) RS-232/CVBS port
Connect the RS-232/CVBS cableinto this port.The RCA jack
outputsthe videosignal fromthe camera toa TV orvideo
equipment. The RS-232 jack is usedto connecttocomputer serial
portor to any controlpanel or for centralized controlif desire.
(7) TV-RGB switch
TV switchtooutputdisplay videofromRS232/CVBS (viaRCA
connection),andRGB to RGB and HDMI OUTPUT ports.
(8) SD cardslot
Insert theSD cardwiththelabel facingup.

4
Control Panel
(7)
(8)
(10)
(11)
(12)
(1)
(2)
(3)
(4)
(6)
(9)
(5)
(13)
(fig. 1.5)
Name
Function
(1) MENU
Open and exitthe OSD menu.
(2) RECORDING
Start/Stop audio & video recording.Audioandvideorecordingcanbe
savedona SD cardor an USB Flash driveonly. See HHUExternal
Memory StorageUHH.
(3) CAP/DEL
- Capture picturein Camera mode. In continuous capturemode,
press this buttonagain to stop.
- Delete the selectedpicture/videoinPlayback mode.
(4) PLAYBACK
View &playbackcapturedstillimages and audio video files.
(5) FREEZE / STOP
- Pause or resumeimage display in Camera mode.
- Stop audio & videoplaybackin Playback mode.
(6) Built-in MIC
Recordaudio automatically whenrecordingvideoclip.
(7) CAMERA / PC
SwitchbetweenCameraandComputer.
(8) ▲,▼,◄, & ►
- Pan and zoom-in image (abovedigital zoomlevel) in both live and
playbackmode.
- Select options in OSD menu.
- Use ▲&▼ to increase and decrease the video playback volume.
- Use ◄&► to play the video backw ard and forward.
- Move the Spotlight frameand Visor screencover.
(9) ZOOM IN
Increasethe image magnification in cameraand pictureplayback
mode.
(10) ZOOM OUT
Decreasetheimage magnification in cameraand pictureplayback
mode.
(11) ENTER
- Make a selectionin Playback mode and OSD menu.
- Start/Pause video playback.
(12) AUTO FOCUS
Adjustthefocus automatically.
(13) LAMP
Turn theoverheadlight on/off.

5
Remote Control
The remote control requires two (2) “AAA” size batteries (supplied), make sure batteries
are installed properly before use. You can access all the features of AVerVision M70HD
with the remote.
Name
Function
(18)
(14)
(11)
(7)
(8)
(5)
(2)
(1)
(22)
(13)
(4)
(3)
(15)
(12)
(17)
(23)
(20)
(19)
(9)
(6)(16)
(10) (21)
(fig. 1.6)
(1) POWER
Turn theunit on/standby.
(2) CAMERA
Camera mode displays thevideosignal
fromthe built-in camera.
(3) RECORD
Start/Stop audio & video recording.Video
recordingcanonly be savedeither in a
SD memory cardor a USB flashdrive.
(4) CAPTURE
Capture still image in Camera mode. In
continuous capturemode, press this
button again to stop.
(5) VISOR
Call the Visor submenu. Visor covers part
of the presentationscreenandallow
presenter torevealthe material as desire.
In the Visor submenu,the following
options are available.
ON/OFF –selectto run/canceltheVisor.
Press to move to the nextselection.
Shade –setthe opacity level of the
coveredarea.The shadedareawill
completely turns black whenitis setto
level 100. Press to move to the
nextselection.
OK –press for thesettingtotake
effect. If youselectON, upperpartof the
presentationscreenis slightly exposed.
Use the ▲,▼,◄, & ► buttons to reveal
more of the coveredarea;andOFF will
closethe submenu.
To turn off Visor,press again.
(6) ROTATE
Rotate the image by 90°in Camera
mode andPlayback mode.
(7) MENU
Open and exitthe OSD menu.

6
Name
Function
(18)
(14)
(11)
(7)
(8)
(5)
(2)
(1)
(22)
(13)
(4)
(3)
(15)
(12)
(17)
(23)
(20)
(19)
(9)
(6)(16)
(10) (21)
(fig. 1.6)
(8) ▲,▼,◄, & ►
- Pan and zoom-in image (abovedigital
zoomlevel) in both live andplayback
mode.
- Select options in OSD menu.
- Use ▲&▼ to increase and decrease
the videoplaybackvolume.
- Use ◄&► to play the video backw ard
and forward.
- Move the Spotlight frameand Visor
screencover.
(9) AUTO
FOCUS
Adjustthefocus automatically.
(10) ZOOM +/-
- Increase/decreasetheimage
magnification in camera andpicture
playbackmode.
- Use to easily page upand page down
16-thumbnail picturepreview.
(11) ZOOM
RESET
Reset zoomlevel to 100%.
(12) PLAYBACK
View thecapturedpicture/videofromthe
memory in 16-thumbnail images.
(13) PC 1/2
PC mode displays the videosignal from
the RGB INPUT portof M70HD.
(14) FREEZE /
STOP
- Freezelive images.
- Stop video playback.
(15) SPOTLIGHT
Call the Spotlight submenu.Spotlight
overlays abox frameon the presentation
screen.Youcanadjustthebox sizeand
move it around.
In the Spotlight submenu, the following
options are available.
ON/OFF –selectto run/cancelthe
Spotlight. Press to move tothe next
selection.
Shade –setthe opacity level of thearea
outsidethe box.The shadedareawill
completely turns black whenitis setto
level 100. Press to move to thenext
selection.

7
Name
Function
(18)
(14)
(11)
(7)
(8)
(5)
(2)
(1)
(22)
(13)
(4)
(3)
(15)
(12)
(17)
(23)
(20)
(19)
(9)
(6)(16)
(10) (21)
(fig. 1.6)
(15) SPOTLIGHT
Color –selecttheSpotlight framecolor.
Press to move to the nextselection.
OK –press for thesettingtotake
effect. If youselectON, the framewill
appear and blink, usethe ▲,▼,◄, & ►
buttonsto adjustthe framesizeand
press tosetthe desiredsize;and
OFF willclosethe submenu.
To turn off Spotlight,press again.
(16) SPLIT
SCREEN
Divide thescreeninto two.Oneside
displays thelive image fromthebuilt-in
camera andthe otherside displays 8-
thumbnail sizepicture/videofromthe
memory.
(17) MODE
Select from6 typeof modes:
Sharp - adjust the contrast alongthe
edges making text appear more visible.
Graphics - adjustthegradient of image.
Motion - increaseframerate.Sufficient
lighting is required whenusingthis
mode.
Microscope- automatically adjust
optical zoomfor microscopic viewing.
Macro - settoview whenobject is only
5 –10cmaway fromthecamera.
Infinite - settoview whensubjectis at
least 80cmawayfromthecamera.
(18) TIMER
Call the Timer submenu. Select to
Start/Pause/Stop the timer countdown
and setthe timer duration.
(19)
- Make a selectionin Playback mode
and OSD menu.
- Play/Pause videoplayback.
(20) LAMP
Turn theoverheadlight on/off.
(21) BRIGHTNES
S +/-
Adjustthebrightness.
(22) DEFAULT
Reset to factory defaultsetting.
(23) DEL
Delete the selectedpicture/videoin
Playback mode.

8
M
Ma
ak
ki
in
ng
g
t
th
he
e
C
Co
on
nn
ne
ec
ct
ti
io
on
ns
s
Before makingtheconnection,makesurethepowerof all devices areturned off. If you
are not sureonwhereto connect, simplyfollow the illustratedconnections below andalso
refer to the usermanualofthe device you are connecting theAVerVision M70HD with.
S
Se
et
t
t
th
he
e
T
TV
V-
-R
RG
GB
B
S
Sw
wi
it
tc
ch
h
S
Se
et
tt
ti
in
ng
g
The TV-RGB switchdeterminesthedisplayoutputselection.Switchit to RGB (right) to
output signal usingRGB/HDMI connectionand TV (left) to outputsignal using RCA
connection.(see fig. 1.4 # 6)
Switch
AVerVision Port
Display Device Port
RGB
RGB OUTPUT
To
RGB INPUT
HDMI OUTPUT
HDMI INPUT
TV
RS232/CVBS
(use RS-232/CVBS cable)
VIDEO IN
C
Co
on
nn
ne
ec
ct
t
t
to
o
a
a
M
Mo
on
ni
it
to
or
r
o
or
r
L
LC
CD
D/
/D
DL
LP
P
P
Pr
ro
oj
je
ec
ct
to
or
r
Locate the RGB (VGA) input port of the graphics display device and connect it to RGB
OUTPUT port of AVerVision M70HD.
Make suretheTV/RGB switchis setto RGB.

9
C
Co
on
nn
ne
ec
ct
t
t
to
o
a
a
M
Mo
on
ni
it
to
or
r
o
or
r
L
LC
CD
D/
/D
DL
LP
P
P
Pr
ro
oj
je
ec
ct
to
or
r
w
wi
it
th
h
H
HD
DM
MI
I
O
Ou
ut
tp
pu
ut
t
i
in
nt
te
er
rf
fa
ac
ce
e
Locate the HDMI input port of the display device and connect it to HDMI OUTPUT port of
AVerVision M70HD.
Make suretheTV/RGB switchis setto RGB.
C
Co
on
nn
ne
ec
ct
t
t
to
o
a
a
C
Co
om
mp
pu
ut
te
er
r
w
wi
it
th
h
H
HD
DM
MI
I
I
In
np
pu
ut
t
i
in
nt
te
er
rf
fa
ac
ce
e
Locate the HDMI output port of the computer of laptop and connect it to HDMI in port of
AVerVision M70HD.
- Make suretheTV/RGB switchis setto RGB.
- To displaycomputerimage,pressCamera/PCbuttononthe controlpanel or
remotecontrolto switchAVerVision M70HD to computermode.
- For laptopto outputdisplayimage,usethekeyboard command(FN+F5)to
switchbetweenthedisplaymodes.Fordifferent command,pleasereferto
your laptopmanual.

10
C
Co
on
nn
ne
ec
ct
t
t
to
o
a
a
T
TV
V
Locatethe VIDEO or SCART RGB (if applicable)inputportof theTV or Video equipment
(i.e., VCR) to recordyour presentationandconnectitto RCAjack of RS-232/CVBS cable
(optional).
C
Co
on
nn
ne
ec
ct
ti
in
ng
g
t
th
he
e
P
Po
ow
we
er
r
Connectthe poweradapterto a standard100V~240VAC power outlet. The unit
automaticallyinstandbymodeoncethe poweris connected.Press to turn on.
Power adapter Wall outlet

11
C
Co
on
nn
ne
ec
ct
t
t
to
o
a
a
C
Co
om
mp
pu
ut
te
er
r
Locatethe RGB (VGA) output port of the computerorlaptop andconnect it to RGB INPUT
port of AVerVision M70HD. The video signal from theRGB INPUT port is streamed to RGB
OUTPUT port.
- To displaycomputerimage,pressCamera/PCbuttononthe controlpanel
or remotecontrolto switch AVerVision M70HD to computermode.
- For laptopto outputdisplayimage,usethekeyboard command(FN+F5)
to switchbetweenthe displaymodes.Fordifferentcommand,pleaserefer
to your laptopmanual.
C
Co
on
nn
ne
ec
ct
t
t
to
o
a
a
C
Co
om
mp
pu
ut
te
er
r
v
vi
ia
a
U
US
SB
B
Locatethe USB port of the computerorlaptop and connectit to USB port of AVerVision
M70HD. This enables youto use AVerVision M70HD as a USB Camera orto transferthe
capturedpictures/videos from the memory and to computer. Also see “Transfer Filefrom
AVerVision M70HD to PC”.
Make suretheUSB FlashDrive switch(see fig. 1.2 #1) is setto the left.

12
C
Co
on
nn
ne
ec
ct
t
a
an
n
E
Ex
xt
te
er
rn
na
al
l
M
Mi
ic
cr
ro
op
ph
ho
on
ne
e
Pluga 3.5mm monomicrophoneto port.The built-inmicrophoneonthecontrolpanel
willbe disabledwhenanexternal microphoneis connected.Therecordedaudiowillbein
monophonicsound.
C
Co
on
nn
ne
ec
ct
t
a
an
n
A
Am
mp
pl
li
if
fi
ie
ed
d
S
Sp
pe
ea
ak
ke
er
r
Pluga 3.5mm plugamplifiedspeakerto port. Only the audiofrom the video playback is
supported.
We recommendconnectinganamplifiedspeakertotheAudio output port.
Take cautionwhenusingearphones.Adjustthevolumedownonthe
remoteto prevent hearingdamageduetoloudness.

13
C
Co
on
nn
ne
ec
ct
t
t
to
o
a
a
M
Mi
ic
cr
ro
os
sc
co
op
pe
e
ConnecttheAVerVision M70HD to a microscopeenablesyou to examinemicroscopic
objects ona bigscreen.
1. Changetheimagedisplaymodeto
Microscope.Press MENU > select
IMAGE tab > selectMODE > select
(microscope) andpress .
2. Aim the cameraheadat the farthest
pointand press AUTO FOCUS.
3. Adjust the focus of the microscope.
4. Select the appropriate rubbercoupler
size for the microscopeeyepiece and
insertit in the microscopeadapter.
5. Removethe microscopeeyepiece
from the microscopeandconnectitto
the microscopeadapterwiththe
rubbercouplerinserted.Fastenthe3
bolts until the adaptersecures the
eyepiece.
Microscope
eyepiece
Microscope
adapter
Microscope
For the eyepiece, we suggest
using15.5mm eyereliefor higher.
6. Attach the microscope adaptertothe
AVerVision camerahead.Then
connectit to theAVerVision and
microscope.

14
S
Se
et
tt
ti
in
ng
g
U
Up
p
A
AV
Ve
er
rV
Vi
is
si
io
on
n
M
M7
70
0H
HD
D
This sectionprovides usefultips onhowto adjustthe AVerVision M70HD to meetyour
needs.
C
Ca
am
me
er
ra
a
H
He
ea
ad
d
The cameraheadcanturn freely at 90°to the leftand rightand upand down.
90°
90°
90°
90°
If the cameraheadis inuprightposition,you can alsopress ROTATE on the remote
controltwice to rotate the image in180°.
Table of contents
Other AVerVision Document Camera manuals
AVerVision
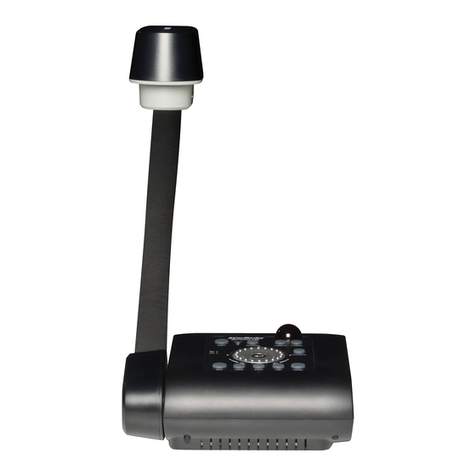
AVerVision F30 Specification sheet
AVerVision
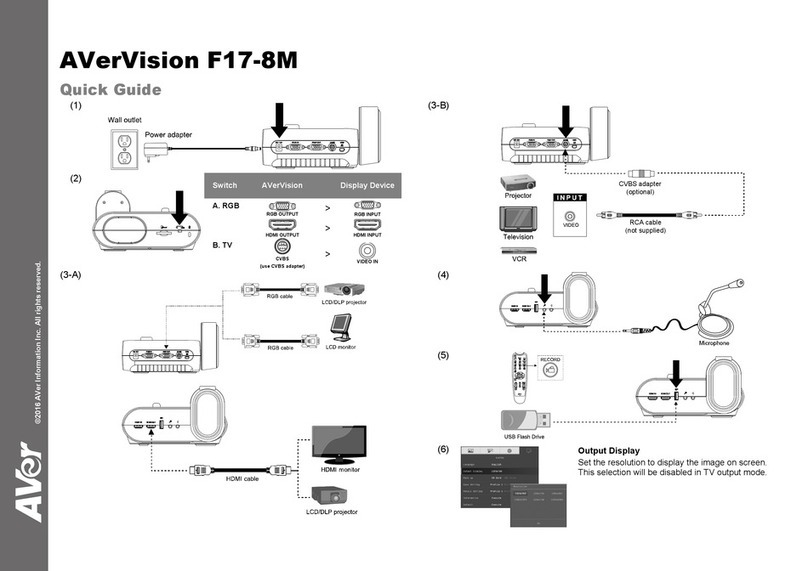
AVerVision F17-8M User manual

AVerVision
AVerVision M30 User manual
AVerVision
AVerVision M30 User manual
AVerVision
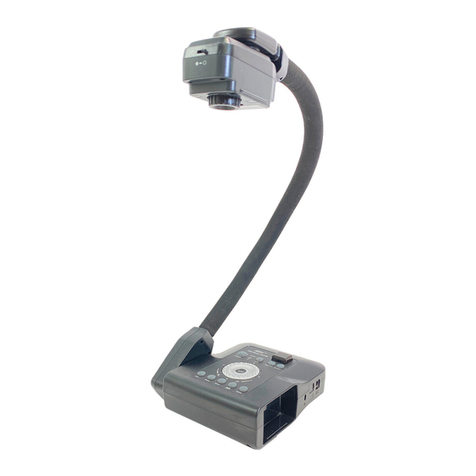
AVerVision CP135 Operating instructions

AVerVision
AVerVision F30 Reference guide

AVerVision
AVerVision 300AF+ User manual
AVerVision
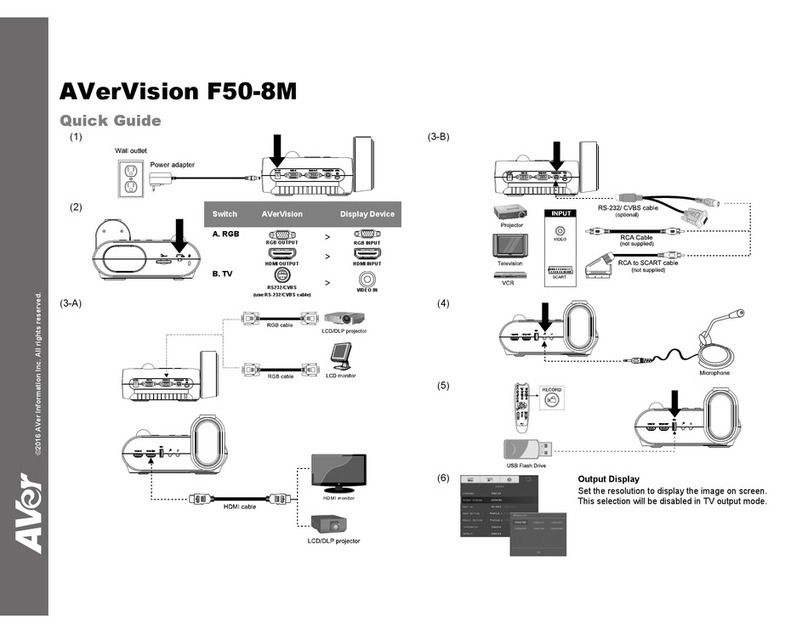
AVerVision F50-8M User manual

AVerVision
AVerVision U10 User manual
AVerVision
AVerVision W30 User manual

