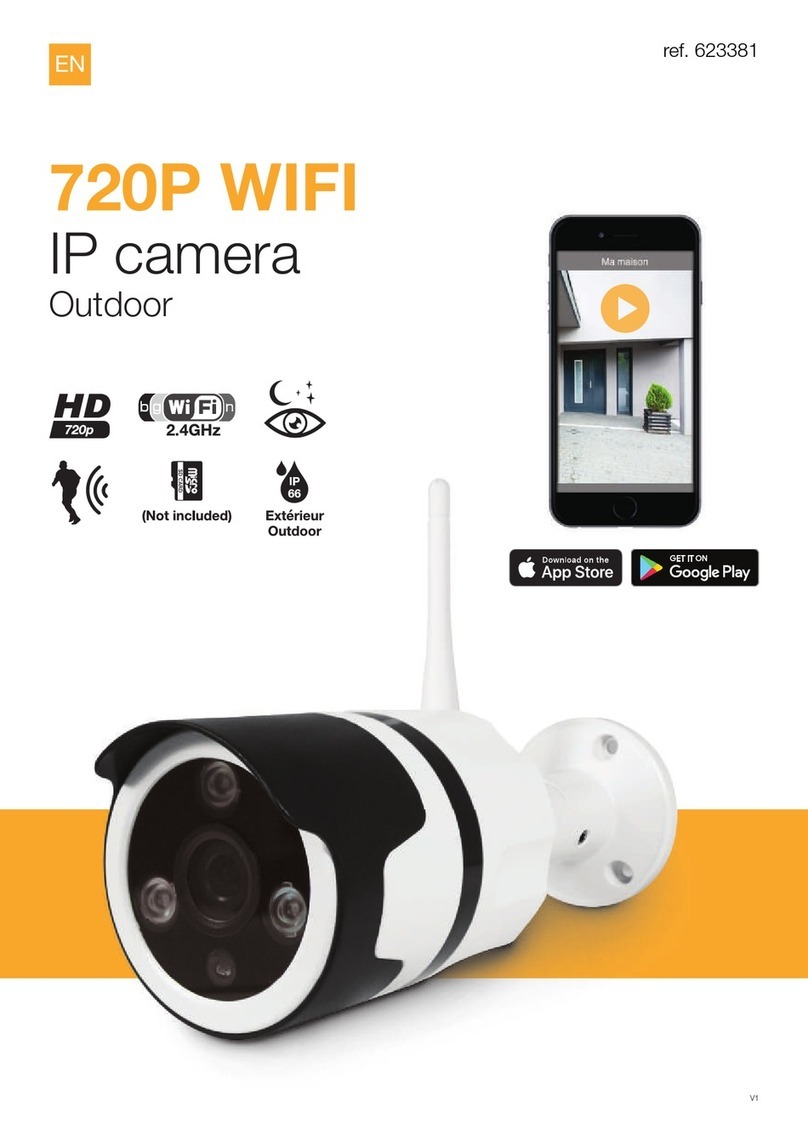
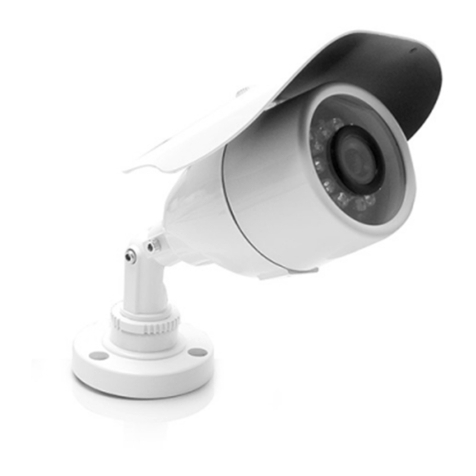
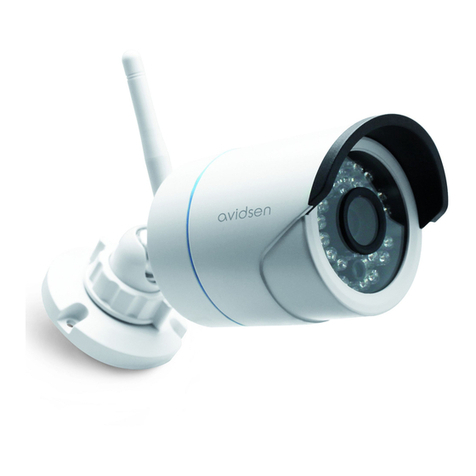
Avidsen 123881 User manual

EN 720P WiFi IP camera
Outdoor
ref. 123881
www.avidsen.com
(Not included)
2.4GHz
720p
(Not included
)
2.4GHz
720p
#REC
Google Play
Free available on
Available on the
Fr
ee available o
ee available o
n
n
ee available onee available o
V1

CONTENTS
A - SAFETY INSTRUCTIONS 05
1 - OPERATING PRECAUTIONS 05
2 - MAINTENANCE AND CLEANING 05
3 - RECYCLING 05
B - PRODUCT DESCRIPTION 06
1 - KIT CONTENTS 06
2 - CAMERA 06
3 - MAINS ADAPTOR 07
C - INSTALLATION 08
1 - INSTALLING THE CAMERA 08
2 - CONNECTING THE CAMERA 08
3 - INSERTING A MICRO SD CARD (NOT INCLUDED) 09
D - CONFIGURATION 10
1 - CONFIGURING THE CAMERA AND ADDING IT TO THE APP 10
2 - ACCESS TO ALL SETTINGS 11
2.1 - CONFIGURATION 11
2.2 - INFORMATION AND CHANGING THE CAMERA NAME 11
2.3 - MOVEMENT DETECTION AND ALERTS 12
2.4 - SETTINGS FOR RECORDING ON THE MICRO SD CARD 13
E - OPERATION 14
1 - LIVE VIDEO 14
2 - PLAYING CAMERA RECORDINGS 14
3 - PLAYING ALERT VIDEOS 15
4 - ACCOUNT AND LOCAL STORAGE OF YOUR PHOTOS/VIDEOS 15
5 - ALBUM MANAGEMENT 16
5.1 - IOS 16
5.2 - ANDROID 16

3ENEN
3EN
F - RESETTING 18
G - FAQ 19
H - TECHNICAL AND LEGAL INFORMATION 21
1 - TECHNICAL CHARACTERISTICS 21
2 - WARRANTY 21
3 - HELP AND ADVICE 21
4 - PRODUCT RETURNS/AFTER SALES SERVICE 22
5 - DECLARATION OF CONFORMITY 22


5EN
720P WIFI IP CAMERA
A - SAFETY INSTRUCTIONS
1 - OPERATING PRECAUTIONS
• The cameras must not be installed where the
lens filter may be vulnerable to scratching and
dirt.
• Do not expose the lens to direct sunlight or any
reflected light source.
• Do not daisy-chain extension cords and/or
multi-socket adapters.
• Do not install near acidic chemicals, ammonia
or sources of toxic gases.
• The installation and use of the camera must
comply with local laws.
2 - MAINTENANCE AND CLEANING
• Always unplug the product from the mains
before carrying out any maintenance.
• Never use abrasive or corrosive substances to
clean the products.
• Use a soft, slightly damp cloth.
• Never use an aerosol to spray the product as
this may damage the internal workings.
3 - RECYCLING
This logo denotes that devices which are
no longer in use must not be disposed of
as household waste. They are likely to
contain hazardous substances that are
dangerous to both health and the
environment. Return the equipment to
your local distributor or use the recycling collection
service provided by your local council.
Pour en savoir plus :
www.quefairedemesdechets.fr

6
EN
720P WIFI IP CAMERA
B - PRODUCT DESCRIPTION
1 - CONTENTS OF THE KIT
2 - CAMERA
Front view
SET
FWK
1
2
3
710
6
8
9
4
5
5x 3
4x 3
3x 1
1x 1
SET
FWK
2x 1
1Camera
2Mains adaptor
3Antenna
4Wall plugs for attaching the base
5Screws for attaching the base
1Antenna
2Protective Shield
3Lens
4Light for night vision
5Twilight sensor
6Adjustable stand
712 VDC 1A mains adaptor power supply included in the kit
8Green detection indicator
9WiFi reset button
10 Micro SD card housing cover

7EN
720P WIFI IP CAMERA
B - PRODUCT DESCRIPTION
3 - MAINS ADAPTER
A 230Vac 50Hz / 12Vdc 1A mains adapter is supplied in the kit for the camera power supply. Do not use other
power supplies as they could damage the camera and invalidate the warranty.

8
EN
C - INSTALLATION
720P WIFI IP CAMERA
1 - INSTALLING THE CAMERA
• Mount the camera using suitable screws and wall plugs for the type of surface (the screws and plugs
supplied are suitable for solid walls).
• Make sure the camera is properly secured to prevent it from falling.
Wall mounting Ceiling mounting
2 - CONNECTING THE CAMERA
SET
FWK

9EN
C - INSTALLATION
720P WIFI IP CAMERA
3 - INSERTING A MICRO SD CARD (NOT INCLUDED)
Your camera has a micro SD card slot, which gives it an internal storage memory. The maximum size is 64 GB.
This use is optional, but it is necessary if you want the camera to record independently.
Tool needed: Thin, cross-headed screwdriver with PH1 bit holder (Philips).
Carry out the following operations on a flat and well-lit surface:
• Remove the two screws from under the camera using your screwdriver.
• Remove the cover, taking care not to lose the black O-ring.
black O-ring
• Please insert the microSD card
• Put the cover back on, making sure that the black O-ring is positioned correctly, and properly tighten
the two external screws to ensure the camera is watertight.
Note: These operations must be carried out with the camera disconnected from the mains power supply.

10
EN
D - CONFIGURATION
720P WIFI IP CAMERA
1 - CONFIGURING THE CAMERA AND
ADDING IT TO THE APP
Download the Avi-cam IP application from
the appstore or Google Play and then launch the
application.
Important: first connect your smartphone or tablet
to the WiFi network that your camera should be
using.
Network compatibility: 2.4 GHz - 20/40 auto - WPA/
WPA2
Not compatible with 5 GHz WiFi, not compatible
with WEP encryption.
Special characters (#!»&@ etc.) in your security key
or network name as well as HT40 (forced 40 MHz
bandwidth) may lead to connection difficulties.
Please check the WiFi settings of your gateway
with your Internet service provider if you experience
connection difficulties.
• Log in to your account by tapping “se connecter”
[log in] and enter your username and password,
finish by tapping “Se connecter” [log in].
• If you don’t already have an account, tap
“s’enregistrer” [register]
Fill in the “E-mail” [Email] and “Mot de passe”
[Password] fields
Email: “indiquez une adresse e-mail valide” [enter a
valid email address].
Mot de passe [password]: choose a personal
password containing letters and numbers between
6 and 30 characters long.
Click on “Envoyez le code de vérification” [send
the confirmation code]
Check your inbox in order to obtain the code, which
you will then enter into the “entrer le code de
vérification” [enter the confirmation code] field.
Once you have entered the confirmation code, finish
by clicking on “Terminer” [Finish] or “s’enregistrer”
[Register].
Note:if, after 5 min, you still have not received the
email with the code, please make sure the message
was not sent to your
“courrier indésirable” [junk mail] or “SPAM” [Spam]
folder.
When you log into your account for the first time,
tap “Ajout appareil” [Add device] in the centre of
the screen.
Otherwise, tap the “+” button at the top left corner
of the interface.
• Tap “connexion de ma caméra” [connect my
camera] and follow the on-screen instructions.
Enter the password for the WiFi network to which
your smartphone or tablet is connected, then
tap “Suivant” [Next]. Turn the volume on your
smartphone or tablet up to maximum and place it
within 20 cm of the camera. Tap “Envoi Message
Sonore” [Send Sound Message] to configure and
add your camera. If the device hasn’t been added
at the end of the countdown, but the green LED
on your camera remains on for between 30 and
60 seconds, tap “Envoi Message Sonore” [Send
sound message] again.
11 EN
D - CONFIGURATION
720P WIFI IP CAMERA
Your camera will appear in the list and you can
access its video and settings.
2 - ACCESS TO ALL SETTINGS
2.1 - Configuration
From the list of cameras, click the icon to display
the configuration menus:
3
2
5
7
9
10
4
1
6
8
1Return to the list of cameras
2Accessing camera information (name, IP,
MAC, Version, etc.)
3Enables/disables the green status LED on
the camera
4Enables image inverting
5Configuration menu for movement detection
alerts
6Configuration menu for recording quality on
the micro SD card
7
Implementing a locking scheme to protect
your camera’s live viewing and recordings.
8Allows you to add a guest account on your
camera to allow others to access your
camera
9Changing the camera’s WiFi network: to add
a new WiFi network, you must first connect
to the new network with your smartphone
(the camera must be within reach of the old
and the new WiFi network)
10 Remove the camera from your Avi-cam IP
account
2.2 - Information and changing the camera
name
To change your camera’s display name, or access
your camera’s information, click on the icon on
the camera, and press the “nom actuel” [Current
name] of your camera.

12
EN
D - CONFIGURATION
720P WIFI IP CAMERA
You will receive the following information:
2
4
6
8
1
3
5
7
1Return to the list of cameras
2Menu to rename your camera
3
Allows you to add information about your
camera, location, owner, (useful if you share
your camera with a guest account)
4Displays your camera’s current IP address
5Displays your camera’s current MAC address
6Displays the name of the WiFi network the
camera is connected to
7Displays your camera’s Firmware version
8Displays information about the micro SD
card if present
2.3 - Movement detection and alerts
To access the movement detection and alerts
menu, click on the icon on the camera, and
press “alerte” [Alert].
Note: If a micro SD card is inserted and you enable
alerts, a 30-second recording will automatically be
triggered when movement is detected.
(iOS)
(Android)
2
3
5
9
1
4
67 8
1Return to the list of cameras
2Enabling/disabling movement detection
3
Enabling/disabling the sound alert on your
smartphone: push notification
4Selecting the sound to play when receiving
push notifications on your smartphone
5Selecting the detection sensitivity: Low/
normal/high
6Selecting the movement detection start time
7Activation range
8Selecting the movement detection end time
9Android only: OK button to save time slot

13 ENEN
D - CONFIGURATION
720P WIFI IP CAMERA
2.4 - Settings for recording on the micro
SD card
To access the recording on the micro SD card
menu, click on the icon on the camera, and
press “Stockage vidéo” [Video storage].
2
4
1
3
5
1Return to the list of cameras
2Enable/disable continuous recording on
micro SD card (not included)
Recording quality selection:
3
Fluid = 50KB/s (~2GB/day)
4LD = 100KB/s (~3GB/day)
5HD = 200KB/s (~6GB/day)

14
EN
E - OPERATION
720P WIFI IP CAMERA
1 2 3
1List of cameras
2Alerts
3
Profiles menu and local recording
1 - LIVE VIDEO
From the list of cameras , click the image or
name of your camera to display the live video:
2
3
8
1
5
6
4
7
1Return to the list of cameras
2Enables full-screen mode
3
Current date and time of camera
4Selection of display quality
5Not available on this model
6Triggers video recording (stored on your
smartphone)
7Not available on this model
8Trigger taking a picture (stored on your
smartphone)
2 - PLAYING CAMERA RECORDINGS
From the list of cameras , click on the “relecture”
[playback] button under the camera name.
Select the date to view the corresponding video.
*Confirm with OK (Android)
or
*Confirm with Select (iOS)
If a video is available at the selected date and time,
playback will start automatically.
2
3
4
7
1
5
6

15 ENEN
E - OPERATION
720P WIFI IP CAMERA
1Return to the list of cameras
2Enables full-screen mode
3
Video viewing
4Video progress bar
5Triggers video recording (stored on your
smartphone)
6Starts playing the alert record
7Trigger taking a picture (stored on your
smartphone)
Note: During live viewing, you can
take photos or record the video on your Smartphone.
You will find them in the “Mon compte” [My
account] section.
3 - PLAYING ALERT VIDEOS
Press the Alert menu at the bottom of the interface
.
This menu will show the different alerts your camera
will display when movement detection is enabled
and your camera has a micro SD card.
3
4
1
2
1Displaying the date and time of alert
2Name of the camera that raised the alert
3
New message indicator:
UNREAD = video not viewed
No red triangle = video already viewed
4Tap the camera image to start playing the
alert
Note: When playing back an alert record, you can
take photos or save the clip to store them locally on
your Smartphone. You will find them in the “Mon
compte” [My account] section.
2
3
4
7
1
5
6
1Return to the list of cameras
2Enables full-screen mode
3
Video viewing
4Video progress bar
5Triggers video recording (stored on your
smartphone)
6Starts playing the alert record
7Trigger taking a picture (stored on your
smartphone)
4 - ACCOUNT AND LOCAL STORAGE OF
YOUR PHOTOS/VIDEOS
Press the “Mon compte” [My account] menu at
the bottom of the interface.
This menu displays your account management:
password and recovery options, access to videos
and photos stored in the avi-cam IP app, as well
as information about the app version.

16
EN
E - OPERATION
720P WIFI IP CAMERA
1
2
3
4
1Changing your password and configuring
password recovery options in case of
forgotten password (security question,
emergency e-mail)
2Album containing your manually taken
photos and videos while playing back a
camera
3
Information on the application
4Logs out of your account
5 - ALBUM MANAGEMENT
5.1 - iOS
2
4
1
3
1Return to previous menu
2Enables content management
3
Creation date of the album files
4Displays your photos and videos stored in
the app, tapping on a photo or video will start
playback.
Pressing “gestion du contenu” [content
management] displays new Options
2
5
3
1
4
1Exits the content management menu
2Selects all available content
3
Pressing an image or video selects or
deselects it
4Displays the export to iOS photo album
menu (click on “Stockage smartphone”
[Smartphone storage] to start exporting the
selected items)
5Delete the selected photos and videos
5.2 - Android
2
3
4
1
1Return to previous menu
2Enables content management
3
Creation date of the album files
4Displays your photos and videos stored in
the app, tapping on a photo or video will start
playback

17 ENEN
E - OPERATION
720P WIFI IP CAMERA
Pressing “Editer” [edit] displays new Options
2
3
4
1
1Exits the content management menu
2Selects all available content
3
Pressing an image or video selects or
deselects it
4Delete the selected photos and videos
Note: With an Android smartphone or tablet, your
photos or videos can be accessed directly from your
device’s file browser in the following location:
-
If your Android device has an SD card:
SD card / Avidsen / screenshot / name of your
account /
- If your Android device doesn’t have an SD card:
Internal SD / Avidsen / screenshot / name of your
account /

18
EN
F - RESETTING
720P WIFI IP CAMERA
In a problem occurs, the WiFi configuration can be
reset by holding the SET button for 3 to 5 seconds.
Once reset, the camera will start up again. After 30
seconds, it is available for reconfiguration.
Note: Pressing the SET button does not delete the
camera pairing from your app

19 ENEN
G - FAQ
720P WIFI IP CAMERA
Symptoms Possible causes Solutions
Unable to install the avi-cam IP
app on my Android device
You have an out-of-date or
incompatible version of Android
on your device
Please contact the technical
support of your device’s
manufacturer in order to obtain a
recent Android version.
Google Play checks all the key
components needed to run
the application properly. If your
equipment does not meet the
necessary criteria, the installation
will not complete
Try the installation on a different
Android device.
Unable to install the avi-cam IP
app on my Apple device
The version of iOS on your device
is not up to date
Update the operating system on
your device.
Your device is not supported.
Avi-cam IP is compatible with
iPhone 4S/iPad 2 and newer
models (iOS 8)
The app freezes or there are
bugs
You experience problems
configuring the app or accessing
your camera(s).
Please uninstall the app and
reset your camera(s)
To complete the installation,
please now add your camera(s)
Failure to configure your camera
using a WiFi network from your
smartphone or tablet
Connection to the camera is too
slow or the device is too far from
the internet hub
Move the camera and
smartphone closer to the box/
modem/router.
The smartphone/tablet are linked
to an incompatible WiFi network
Please ensure that your
smartphone/tablet is linked to a
2.4GHz network
Cannot connect to camera over
local network
Network/power supply issue Check your network and
electrical connections.
Network configuration problem
Check your camera’s network
connection settings. Reset
your camera if it is no longer
accessible.
Cannot connect to camera over
a 3G or 4G Internet link but it
works when connected to a
local network
Network configuration problem Check your device settings (box,
router, firewall)
Incorrect video settings Check the video settings and
reduce the quality if necessary
Your home Internet speed
is insufficient to support the
connection from your smartphone
/ tablet
Check that the available
bandwidth exceeds 0.5M
bits per second (upload and
download) in the case of low-
quality display; or that it exceeds
2M bits per second in the case
of high-quality HD

EN 20
G - FAQ
720P WIFI IP CAMERA
Symptoms Possible causes Solutions
Poor quality or shaky image Incorrect video settings
Check the video settings and
reduce/increase the quality if
necessary
Movement detection is triggered
unnecessarily
Unsuitable movement detection
settings
Reduce the sensitivity of
detection.
When movement is detected, no
Push alert is received.
Unsuitable movement detection
settings
Please check the configuration
of the camera, the enabled alerts
and the motion sensitivity.
The application is not authorised
to send a Push alert
Please check your avi-cam IP
rights within your iOS application
Security and Privacy settings or
Android application settings
PUSH Notifications only work
when the app is displayed on
the Android screen
Avi-cam IP is not allowed to run
in the background, or has been
completely closed
Relaunch avi-cam IP. Make
sure that no other management
or power saving application
automatically closes the
application in the background.
Your Android device has reached
the maximum limit of applications
launched simultaneously
Close the applications or
increase the limit of simultaneous
applications in your device
settings.
Pairing issues The camera is already paired with
another user account.
You must log in to the account
shown in the error message to
delete the camera before you
can add it to your new account.
If the specified account does not
belong to you, ask the current
owner to remove the camera
from the account or add your
account as a guest
Table of contents
Other Avidsen Security Camera manuals

Avidsen
Avidsen IRIS Series User manual

Avidsen
Avidsen 623382 User manual

Avidsen
Avidsen YLVA 2+ User manual

Avidsen
Avidsen 123985 User manual

Avidsen
Avidsen 123982 User manual

Avidsen
Avidsen IPC282-Miw User manual

Avidsen
Avidsen HomCam2 360 User manual

Avidsen
Avidsen HomeCam360 User manual

Avidsen
Avidsen 123882 User manual

Avidsen
Avidsen 123985 User manual

Avidsen
Avidsen 623381 User manual

Avidsen
Avidsen IPC281-Ex User manual

Avidsen
Avidsen 123985 User manual

Avidsen
Avidsen 123982 User manual

Avidsen
Avidsen HomeCam3 User manual

Avidsen
Avidsen HomeCam Battery User manual

Avidsen
Avidsen 623380 User manual

Avidsen
Avidsen HomeCam WR360 User manual

Avidsen
Avidsen IRIS Series User manual