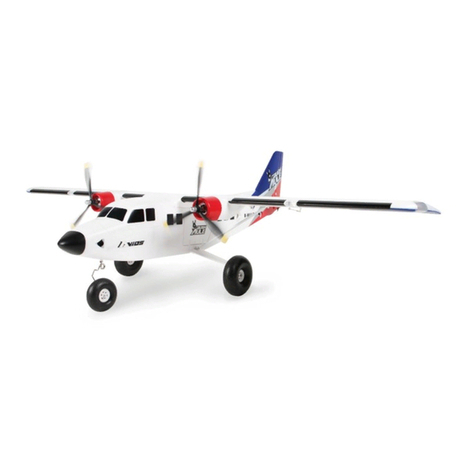
Avios KingTwin 1700 User manual

INSTRUCTION MANUAL
For intermediate to advance pilots only.

Please read this instruction manual fully and become completely familiar with the features of this product
before operating. Failure to operate this product correctly could result in damage to the product, personal
property and cause serious injury. This is a sophisticated hobby product and is NOT a toy. It must always be
operated with caution, common sense and some basic mechanical ability. This manual provides instructions
as to the assembly, safe operation and maintenance of this hobby product. It is highly recommended that you
follow and read fully the instructions and warnings stated in this manual including safety, assembly, set-up and
flying guidelines in order to operate this product correctly and avoid damage or serious injury.
WARNING
As the user of this product you and you alone are responsible for operating it in a manner that does not
endanger yourself and others around you or result in damage to the product or property of others. This
product is operated via a radio controlled system that in some cases can be subject to interference from
sources outside of your control. Interference may result in a momentary loss of control so it is always
recommended that this product be used in a suitably open outdoors space.
• This is a radio controlled flying model and as such must always be flown with caution and care.
This is not a toy.
• The KingTwin is designed for intermediate to advanced pilots.
• Always exercise great caution when using the recommended battery to power this product. For full safety notes
and operating procedures, please see information provided by your battery supplier.
• Take great care when connecting/disconnecting the battery. See battery supplier for full safety procedures.
• Never power up the model in confined spaces and always keep the prop clear of obstructions.
• This product is not a toy. Children must be accompanied by an adult at all times if operating this product.
• Only fly this model in an open area away from crowds, people, buildings, trees, power lines and obstructions.
• Always put safety first when operating this model and consider the warnings stated above.
• The supplier/manufacturer accepts no responsibility for damage or injury caused through the use of the
product. Not suitable for children under the age of 14. THIS IS NOT A TOY.
SAFETY PRECAUTIONS
111
12
PRODUCT LIST
1
2 5
3
4
6
9
78
1. Fuselage
2. Mid-wing panel
3. Horizontal stabilizer
7. Spinner with back plate,
8. Plastic nose cone
9. Vertical stabilizer
4. Left and Right outer wing panels
5. Left-Hand & Right-Hand propeller
6. Plastic scale detail parts

13
1. Apply foam safe glue to the nose of the fuselage, and install the vacuum formed plastic nose
cone as shown.
ASSEMBLE INSTRUCTION.
FUSELAGE
2. Connect both the rudder servo lead and the LED light lead to the extension cord as shown.

3. Install the vertical fin onto the fuselage. Ensure it is fully seated, and the front part of the vertical fin
is fully inserted into the slot as shown. Use the supplied set of 3 x 8mm self-tapping screws to lock
the vertical fin in place. Note: Please do this on both sides.
4. Trial fit the stabilizer onto the fuselage and ensure it is fully seated inside the slot. If you are
satisfied with the fit apply foam safe glue to the slot and the wooden spar on the stabilizer,then
install it onto the fuselage as shown. In this meantime, repeat this step to install the stabilizer on
the other side. Ensure the stabilizer on both sides stay level whilst the glue dries.
14

15
5. Install the ball link socket to the ball head fitting on the stabilizer control horn as shown. Repeat
this step on the other side. Check from the rear to ensure both elevator halves are level on each
side. If necessary, adjust the clevis by turning half a turn either clockwise or anti-clockwise to
achieve a neutral elevator.
6. Connect the flap control linkages as shown. The length of the flap control linkages are factory
set. Ensure the outer and inner flaps are set perfectly level with each other.If necessary,adjust
the clevis by turning half a turn either clockwise or anti-clockwise to achieve this.
Note: Check Left and Right flap control surfaces after the setup. Both inner and outer flaps
have to be level when in operation. i.e., From retract position to fully deployed position.

16
WING INSTALLATION
7. Place the mid-wing panel on a work bench or an airplane stand. Thread the bunch of servo leads
and the power cablesthrough the fuselage as shown.
8. Install the wing onto the fuselage. First align the wing dowelsto the holes on the wing mount, and
then place the rear part of the mid-wing panel into the wing cradle. Use the supplied wing
mounting screws M4 x 55mm to secure the mid-wing panel in place.

17
9. This twin motor powered KingTwin uses a set of counter-rotating propellers, and they spin
inwards when view from the front.
PROPELLER AND SPINNER INSTALLATION
10. Find a propeller with a marking “L” on the prop hub which will be installed on the left-hand side. It
spins clockwise when viewed from the front. See pic shown below.
Place the prop on the spinner back plate. Install the assembly, and at the same time, install the
spinner onto the motor shaft, and hand tightened it until the whole assembly is fully seated on the
drive hub. Repeat the above steps on the right hand side.
Note: Don’t over tighten itas this will deform, andoverly stress the plastic spinner andit
may cause parts breakage inflight, andeven loss ofcontrol.
1 2
3 4

18
We have designed a no fuss & an easy way to attach the wing panel by using a multi-link
connector and a unique plastic mount which securely connectseverything together at the same
time.
11. Align the wing joiners to the set of tubes which are pre-installed in the mid-wing. Slide the outer wing
panel all the way in until you hear a “click” sound from the plastic clip underneath the wing. This
“click” means that the outer wing panel has been attached securely to the mid wing. Note: It’s
always good to do a safety check. To ensure the installation is secure before flight, try to pull the
mid-wing panel and one of the outer panels apart with both hands. If the lock is solid then you are
safe to fly. Otherwise repeat the above steps until it is securely locked in place.
OUTER WING PANEL INSTALLATION

19
1. Glue the tail skid onto the fuselage as shown.
SCALE DETAILED PART A
2. Glue all scale detail parts onto the plane as shown.

110
NOSE WHEEL RETRACT AND STEERING SERVO LEAD CONNECTIONS
The basic assembly of your Avios KingTwin is now complete. Please perform
a final check on all screws, bolts and components, ensuring all are secure and
firmly and correctly in place before the final set-up stage below.

111
CONTROL THROWS LOW - HIGH:
CG LOCATION
C of G is 65-75mm from
leading edge measured at wing root.
CG 65-75mm
8-12mm
7-14mm
Elevator low 8mm, high 12mm
8-15mm
8-15mm
Rudder low 8mm, high 15mm
Aileron low 7mm, high 14mm
7-14mm
8-12mm
65-75mm Flaps
45 degrees
20 degrees

112
CONTROL DIRECTIONS TESTS:
Assemble the aircraft and bind your transmitter to the receiver before performing this test.
After binding your transmitter to the aircraft receiver, set the trims and sub-trims to 0, then
adjust the clevises to center all the control surfaces.
Move the controls on the transmitter to make sure the aircraft control surfaces move in the
proper direction.

1113
Flying the KingTwin simply put is a pure joy. Its twin counter rotating prop design, its long wing and ample
power system combine to give a very locked in, stable and fun flying experience. When flying the King Twin
you’ll want to have a good short grass runway or hard surface to fly from and take off runs are a breeze with
mid flap setting. The model will take-off after a short run out at just above 1/2 throttle and settle into a nice
smooth climb out. Retract the gear as you climb out and this cleans the airframe up nicely by the time you
have made your first turn and increase power and retract flaps as you do. At this point you’ll be ready for your
first fly by (after any trimming that is needed). Right away you’ll see how locked in the KT-1700 flies, low
throttle, mid and full throttle passes low to the ground are especially satisfying. The KingTwin has good
aerobatic potential along with the more typical scale flight, rolls and loops being performed with ease as well
as other aerobatics. Slow flight is very enjoyable with the KingTwin,which is surprising for a model of its size.
Full flap fly-by’s with less than half throttle are easily achieved with the KT1700, and when combined with slow
turns coordinate the ailerons with the rudder to reduce the risk of stall.
When you are ready to land,line up with the runway and bring the gear down and initially set mid flaps. Once
the KingTwin settles into the approach, use power all the way through your approach to control descent and
keep airflow over the control surfaces. Full flaps can be deployed as you enter your final approach to further
slow the model down if needed. A nose down approach not only looks cool but also helps maintain airspeed so
is recommended. You will want to aim to land the KingTwin on the rear main wheels first then touch down with
the nose wheel. Feed in elevator once very close to the ground to bring the nose up and flare onto the main
gear. Once down the KingTwin will come quickly to a stop if flying from grass, but on hard surfaces will run on
a little. Avoid using excess rudder/steering inputs if it does. Flight times on the recommended battery with
mixed throttle use are on average around 7 minutes.
Thank you for purchasing the KingTwin 1700, we wish you many pleasant flights and if the worst should
happen, don’t forget we do have spare parts available too.
Double check you have the props installed correctly, they should rotate inwards towards the nose.
A 4cell LiPo weighing between 360-370g is recommended for the best combination of AUW and flight
times with mixed throttle use.
The KingTwin slows down really well with flaps and is a lot of fun flying at these slower speeds low to
the ground, so don’t use them just for take-offs and landings.
Use a little rudder in the turns, especially when flying slow. A coordinated turn not only looks better but
will give you more control too.
After a few flights,check the nose landing gear to ensure it hasn’t bent back a little if you’ve had some
nose wheel first landings. It should always be raked a little forwards to maintain the nose up attitude of
the model when on the ground.
FLYING THE KINGTWIN 1700:
KingTwin 1700 Flying Tips:

114
• Select your flying area carefully. Always choose an open space that is clear and not obstructed by
trees, poles, pylons, and buildings etc. Also ensure you are away from people and crowded areas.
Avoid flying in areas with roads, near water, or within close proximity to full size air traffic.
• Do not fly this model in poor weather, for example: high winds, low visibility, inclement temperatures,
and rain and storms are also to be avoided.
• Never attempt to catch the model whilst it is in flight, even a slow moving model can cause harm to
yourself and risks damage to the model.
• This model is not recommended for children under the age of 14 years old.All children no matter
what age, should be supervised by a capable and responsible adult when operating this model.
• Always unplug your model battery when not in use, never leave the battery installed in the model.
• Please remember to keep clear of the propellers at all times when your flight battery is connected.
• Before flying, always turn ON your transmitter first, then plug your flight battery into the model.
• After flying, always unplug your battery first in the model and then turn OFF your transmitter.
• Exercise caution when charging your batteries, and follow in full your battery manufacturers safety
guideline when doing so.
MODEL FLYING PRECAUTIONS:
1. Always range check your model before any flying. Follow your radio manufacturers guidelines for
performing this check.
2. Check all screw and mounting points are firmly secured including control horns and clevises.
3. Only fly with fully charged batteries. Failure to do so could result in loss of control, damage to the
model and possibly property around you. Make sure your batteries are fully charged.
4. With the model powered up check that all control surfaces are free from damage, moving in the
correct directions and with no binding.
5. Inspect the model and props for any damage that may have occurred during transit to your flying site.
Listen for any unusual sounds from the electronics when powered up, if in doubt, do not fly.
6. With the model held securely and the propellers free of obstructions, increase the throttle just slightly
to confirm the rotation of the propellers is correct . The model should want to pull straight forward
when the throttle is applied.
7. If this is your first flight with the model double check that the C of G is at the correct position. If not,
adjust the battery position inside model as necessary.
8. If you are an inexperienced model pilot, seek the help and assistance of an experienced pilot to
perform these final checks, and to test fly the model for you.
PRE-FLIGHT CHECKS:

115
Motors do not run:
1. Battery is not fully charged (Charge the battery).
2. Transmitter battery is low (Charge or install a fully charged battery).
3. Motors are not connected properly (Check the motor to ESC connections and the ESC to battery
connections).
4. Receiver is not bound to the transmitter (Consult your radio manual and go through the binding
procedure).
5. ESC is in set-up mode (Hold model and move throttle up to full then back to idle, or reverse the
throttle channel on your transmitter. Switch everything off before doing this).
Model moves backwards:
1. Propellers installed on the wrong motors (Swap the propellers around).
Control surfaces not moving with stick input:
1. The servo leads are not connected properly (Check the servo connections).
2. The servo is damaged (Replace the servo).
The model does not fly straight:
1. Control surfaces are not at neutral (Adjust the trims/sub trim on your transmitter).
2. C of G is not correct (Re-position the battery to achieve correct balance).
Model does not climb well:
1. The battery is not fully charged (Charge the battery).
2. The elevator servo is reversed (Change the direction via your transmitter settings).
3. C of G to far forwards making it nose heavy (move battery backwards or add weight to tail).
TROUBLE SHOOTING:

SPARE PARTS
16
Fuselage
SKU: 9310000431-0 Wing center section
SKU: 9310000432-0 Left wing panel
SKU: 9310000433-0
Right wing panel
SKU: 9310000434-0 Vertical Tail
SKU: 9310000435-0 Horizontail Tail
SKU: 9310000436-0
Cowl Set
SKU: 9310000437-0 Canopy hatch
SKU: 9310000438-0 Spinner set
SKU: 9310000440-0
Push rod set
SKU: 9310000442-0 40amp ESC set
SKU: 9310000443-0 Retract set
SKU: 9310000444-0
Motor set inc mounts
SKU: 9310000445-0 Scale plastic parts
SKU: 9310000470-0

RECOMMENDED ACCESSORIES
117
OrangeRx Tx10i Mode 2
EU Version
SKU: 9171001399-0
Turnigy 9X 9Ch Transmitter
w/ Module & iA8 Receiver
SKU: 9114000070-0
OrangeRx R720X V3 7Ch
2.4GHz DSMX
SKU: 9171001395-0
OrangeRx RSF08SB Futaba
S-FHSS/FHSS-2
SKU: 9295000020-0
Turnigy 3300mAh 4S 30C
Lipo Pack XT-60
SKU: 9067000259-0
Turnigy Nano-Tech Plus 3300mAh
4S 70C Lipo Pack w/XT90
SKU: 9210000267-0
Turnigy nano-tech 3300mAh
4S 35~70C Lipo Pack w/XT-60
SKU: 9210000200-0
ZIPPY Compact 3300mAh
4s 60c Lipo Pack
SKU: 9067000039-0
Turnigy Graphene Panther
4000mAh 4S 75C Battery
Pack w/XT90
SKU: 9067000412-0

HXT900 Micro Servo 1.6kg /
0.12sec / 9g
SKU: HXT900
Turnigy TG9e Eco Micro Servo
1.5kg / 0.10sec / 10.1g
SKU: TG9e
Foam-Cure EPP and EPO Foam
Glue 4 oz.
SKU: 9117000006-0
UHU POR Glue
SKU: 9934000001-0 HobbyKing Super Glue CA
(50g / 1.7oz) Medium
SKU: HC-50-175C
HobbyKing Super Glue CA
(50g / 1.7oz) Thick
SKU: HC-50-1100C
118
XT90 Male to XT60 Female 2pcs
SKU: 258000140-0
HXT 4mm Male/Female to XT60
Female Battery Adapter (2pcs)
SKU: 9992000187-0
HOTA H6 Pro AC/DC 200W
AC/700W DC 1~6S Smart
Charger
SKU: 9466000020-3

UK REP
EC REP
APEX CE SPECIALISTS LIMITED
89 Princess Street, Manchester,
M1 4HT, UK
APEX CE SPECIALISTS LIMITED
Unit 3D North Point House,
North Point Business Park,
New Mallow Road, Cork, T23AT2P, Ireland
Table of contents
Other Avios Toy manuals

Avios
Avios SPITFIRE Mkvb User manual

Avios
Avios C-130V2 User manual

Avios
Avios Grand Tundra User manual

Avios
Avios Albatross HU-16 User manual

Avios
Avios Albatross User manual

Avios
Avios Bush Mule User manual

Avios
Avios MIG-17 FRESCO User manual

Avios
Avios EXTRA 330 LX User manual

Avios
Avios Zazzy User manual

Avios
Avios BushMule V2 User manual