Avision AV8350 User manual
Document Imaging Scanner
User’s Manual
Regulatory model: 300400008
manual-en- 250-0599-E-8350v3
Avision Inc.

User’s Manual
ii
Trademarks
Microsoft is a U.S. registered trademark of Microsoft
Corporation.
Windows, Windows Vista, Windows 7 and Windows 8 are either
registered trademarks or trademarks of Microsoft Corporation in
the United States and/or other countries.
IBM, IBM PC are registered trademarks of International Business
Machines Corp.
Other brands and product names herein are trademarks or
registered trademarks of their respective holders.
Copyright
All rights reserved. No part of this publication may be
reproduced, transmitted, transcribed, stored in a retrieval
system, or translated into any language or computer language,
in any form or by any means, electronic, mechanical,
magnetic, optical, chemical, manual, or otherwise, without the
prior written permission of Avision Inc.
Material scanned by this product may be protected by
governmental laws and other regulations, such as copyright
laws, the customer is solely responsible for complying with all
such laws and regulations.
Warranty
The information contained in this document is subject to
change without notice.
Avision makes no warranty of any kind with regard to this
material, including, but not limited to, the implied
warranties of fitness for a particular purpose.
Avision shall not be liable for errors contained herein or for
incidental or consequential damages in connection with the
furnishing, performance, or use of this material.

User’s Manual
iii
Federal Communications Commission (FCC) compliance
information statement
Part 15
The product has been tested and found to comply with the
limits for a Class A digital device pursuant to Part 15 of the
FCC Rules. Operation is subject to the following two
conditions: (1) this device may not cause harmful interference
and (2) this device must accept any interference received
including interference that may cause undesired operation.
The FCC Class A limits are designed to provide reasonable
protection against harmful interference when the equipment is
operated in a commercial environment. This equipment
generates, uses, and can radiate radio frequency energy and,
if not installed and used in accordance with the instruction
manual may cause harmful interference in which case the user
will be required to correct the interference at his own
expense.

User’s Manual
iv
European Union Regulatory Notice
Products bearing the CE marking comply with the following EU
Directives:
Low Voltage Directive 2006/95/EC
EMC Directive 2004/108/EC
Restriction of the use of certain hazardous substances
(RoHS) Directive 2011/65/EU
CE compliance of this product is valid if powered with the
correct CE-marked AC adapter provide by Avision.
This product satisfies the Class A limits of EN55022, EN55024,
safety requirements of EN 60950 and ROHS requirements of
EN50581.
CE Warning
This is a class A product. In a domestic environment this
product may cause radio interference in which case the user
may be required to take adequate measures.

User’s Manual
v
Disposal of Waste Equipment by Users in Private Union
This symbol on the product or on its packaging indicates that
the product can not be disposed of with your other household
waste. Instead it should be sent to appropriate facilities for
recovery and recycling in an effort to protect human health
and the environment. Fore more information about where you
can drop off your waste equipment for recycling, please
contact your local city office, your household waste disposal
service or the shop where you purchased the product.
System Requirements
IBM compatible PC 586, Pentium or higher
Microsoft Windows XP(SP3), Windows Vista/Windows
7/Windows 8
USB port 2.0 (compatible with USB 1.1)
At least 100 MB of free hard disk space (500 MB is
recommended)
At least 128 MB of system memory (512 MB of RAM is
recommended)
At least 1 GB of RAM for Windows Vista or later
A CD-ROM drive

User’s Manual
vi
Table of Contents
1. Introduction..............................................1-1
2. Scanner Installation..................................2-1
2.1 Unlocking Your Scanner ...............................2-2
2.2 ADF Paper Chute.........................................2-3
2.3 Installing the Scanner Driver and Connecting
the Cables..................................................2-4
2.3.1 Connecting to Power.........................2-4
2.3.2 Turning on the Power .......................2-4
2.3.3 Installing the Scanner Driver .............2-5
2.3.4 Connecting to Computer ...................2-7
3. Completing Your First Scan .......................3-1
3.1 Loading Your Paper .....................................3-1
3.1.1 Placing Your Document on the
Flatbed...........................................3-1
3.1.2 Notice on Using the ADF....................3-2
3.1.3 Loading Your Document in the ADF
Paper Tray ......................................3-3
3.2 Verifying Your Scanner Installation ................3-4
3.3 A Glance of the Scanner Properties Dialog Box 3-8
4. Using the Scanner Properties Dialog Box ..4-1
4.1 Buttons on the Scanner Properties Dialog Box.4-2
4.2 The Image Tab ...........................................4-4
4.2.1 The Image Selection Box...................4-5
4.2.2 Other Image Options........................4-8
4.2.3 Scanning color images.................... 4-20
4.2.4 Scanning grayscale images.............. 4-20
4.2.5 Scanning B&W images .................... 4-20
4.2.6 Editing Profiles............................... 4-21
4.3 The Compression Tab ................................ 4-24

User’s Manual
vii
4.4 The Color Dropout Tab............................... 4-26
4.4.1 Color Dropout Selection .................. 4-26
4.4.2 Other Color Dropout Options............ 4-34
4.5 The Paper Tab .......................................... 4-36
4.5.1 Cropping....................................... 4-37
4.5.2 Other Paper Selection..................... 4-42
4.6 The Multi-Feed Detection Tab...................... 4-45
4.7 The Preview Tab ....................................... 4-49
4.8 The Options Tab........................................ 4-50
4.9 The Setting Tab ........................................ 4-59
4.10 The Imprinter Tab ................................. 4-62
4.11 The Information Tab .............................. 4-66
5. ISIS Interface Operation...........................5-1
6. Maintenance..............................................6-1
6.1 Cleaning the ADF ........................................6-1
6.2 Cleaning the Glass.......................................6-3
6.3 Replacing the ADF detachable pad module......6-4
7. Troubleshooting........................................7-1
7.1 Questions and Answers................................7-1
7.2 Technical Service ........................................7-3
8. Specifications............................................8-1
Index .................................................................. a

User’s Manual
1-1
1. Introduction
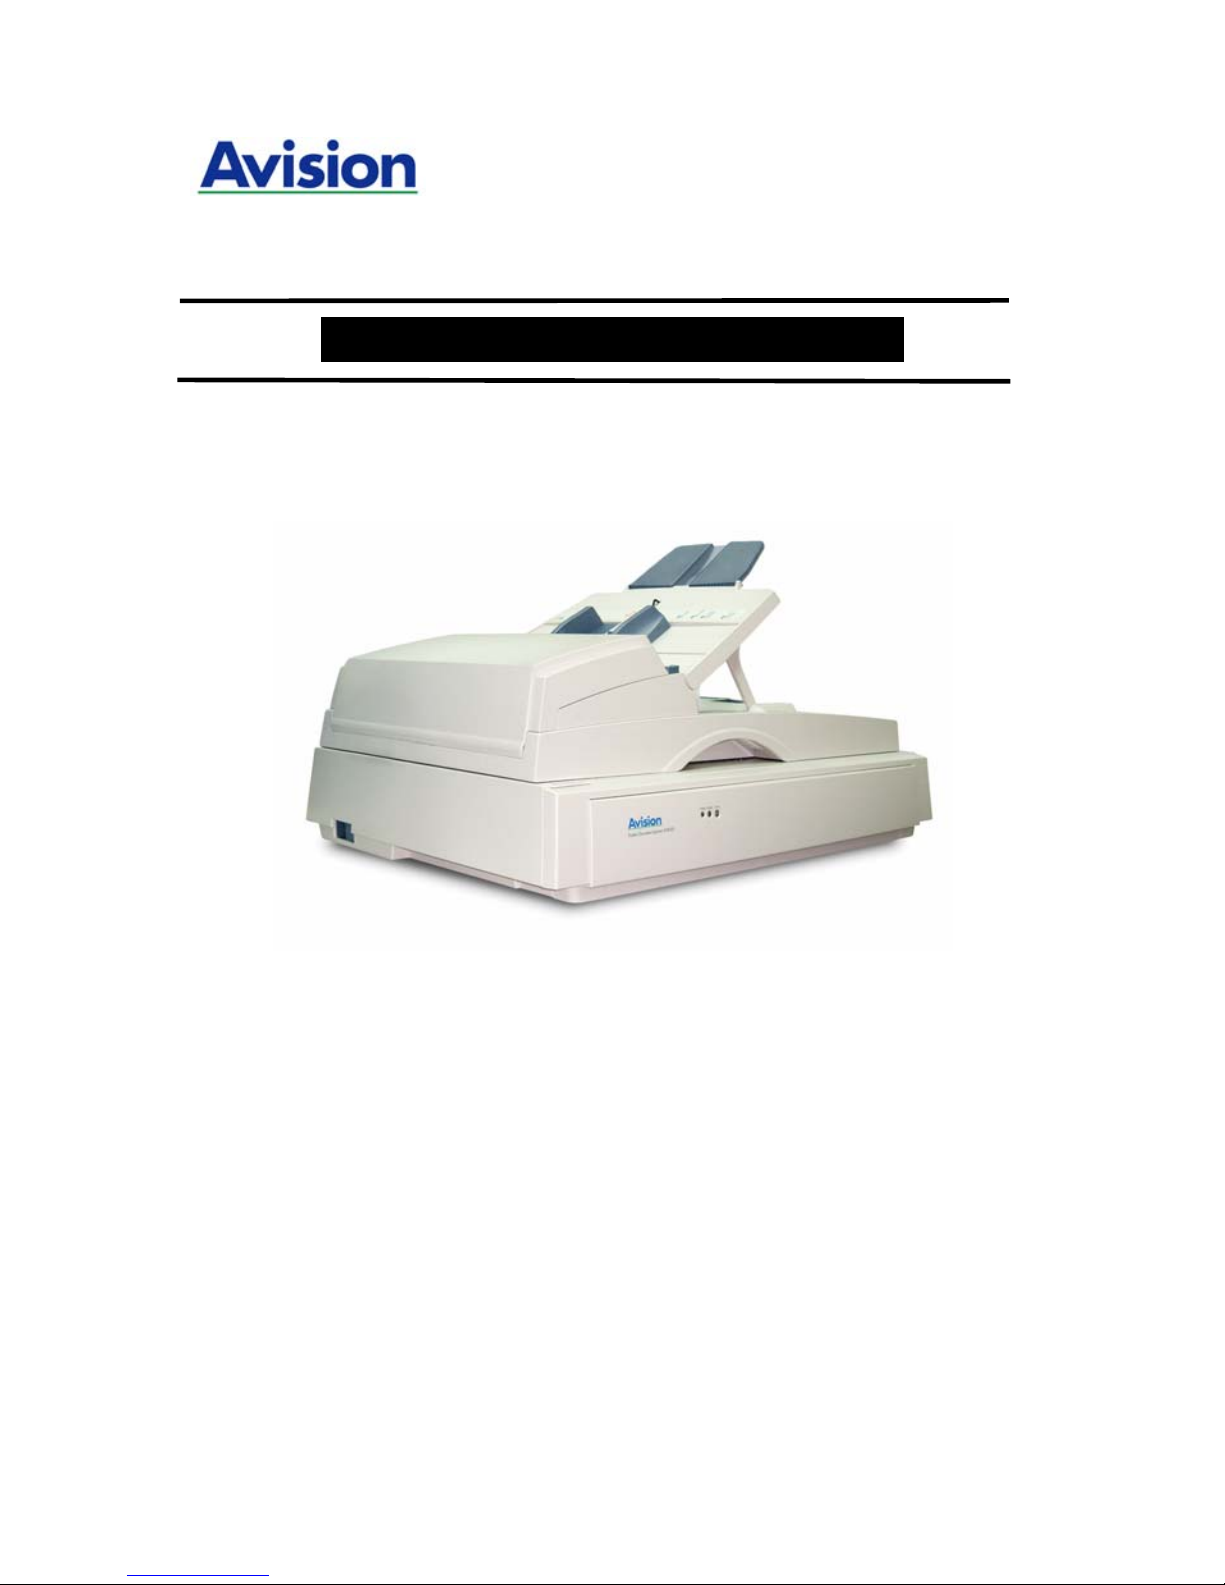
Congratulations on your purchase of the Avision’s A3-sized
document scanner. Avision is one of the leading companies to
make high quality color image scanner.
Before you install and operate the new scanner, please
take a few minutes to read through this manual. It
provides proper instructions for you to unpack, install,
operate and maintain the scanner.
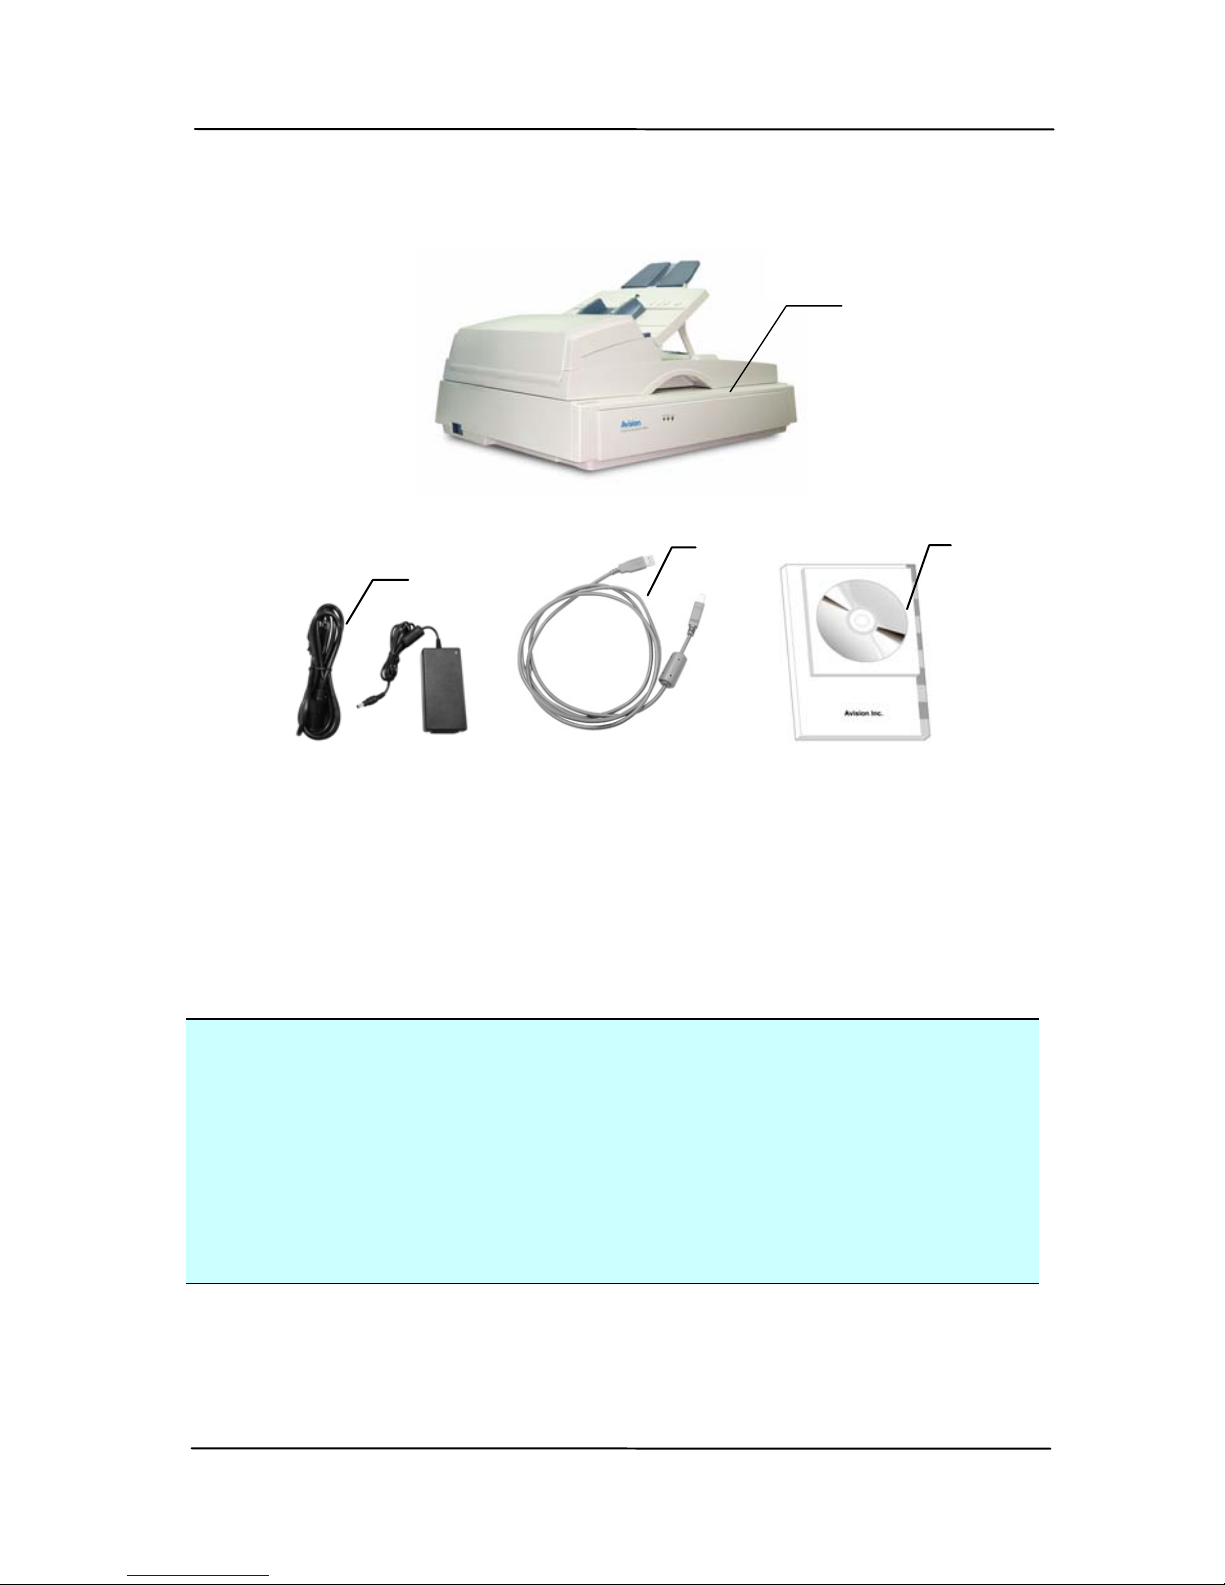
The following figure indicates the package contents. Please
check all the items against your checklist. If you do not
receive all the items, please contact your authorized local
dealer immediately.
User’s Manual
1-2
1. Scanner main unit
2. Power adapter/Power cord
3. USB cable
4. User’s manual/CD
Figure 1-1 Scanner Packaging
Note:
1. Only use the AC adapter DA-48M24 (APD)/ HEG42-
240200-7L (Hitron) included in the machine. Using other
AC adapters may damage the machine and void the
warranty.
2. Please unpack the packing carefully, and check the
contents against the checklist. If any items are missing or
damaged, please contact your dealer immediately.
4
1
2 3

User’s Manual
2-1
2. Scanner Installation
Precautions
Keep the scanner out of direct sunlight. Direct
exposure to the sun or excessive heat may cause
damage to the unit.
Do not install the scanner in a humid or dusty place.
Be sure to use the proper AC power source.
Place the scanner securely on an even, flat surface.
Tilted or uneven surfaces may cause mechanical or
paper-feeding problems.
Retain the scanner box and packing materials for
shipping purposes.
Other manuals for AV8350
1
Table of contents
Other Avision Barcode Reader manuals


