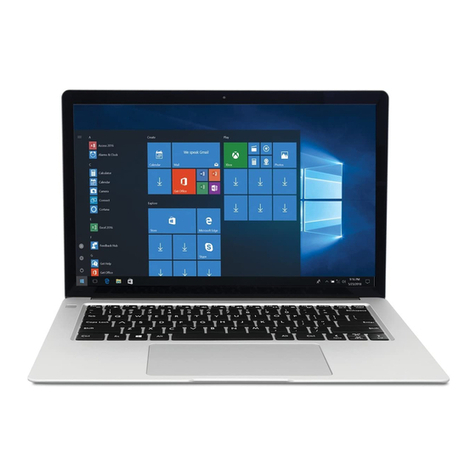
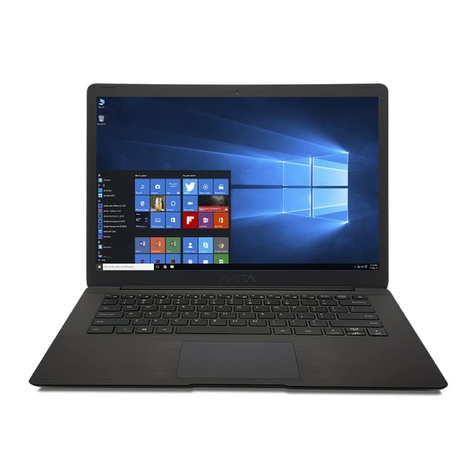
Avita CN6F14 Series Guide

e-manual
avita-americas.com
CN6F14
Laptop

2
CN6F14_e-manual - V.00
IMPORTANT SAFETY
INSTRUCTIONS
Some of the following information may not apply to your particular
product; however, as with any electronic product, precautions should
be observed during handling and use.
• Read these instructions.
• Keep these instructions.
• Heed all warnings.
• Follow all instructions.
• Do not use this apparatus near water.
• Clean only with dry cloth.
• Do not block any ventilation openings. Install in accordance with
the manufacturer’s instructions.
• Do not install near any heat sources such as radiators, heat registers,
stoves, or other apparatus (including amplifiers) that produce heat.
• Protect the power cord from being walked on or pinched particularly
at plugs, convenience receptacles, and the point where they exit
from the apparatus.
• Only use attachments / accessories specified by the manufacturer.
• Unplug this apparatus during lightning storms or when unused
for long periods of time.
• Refer all servicing to qualified service personnel. Servicing is
required when the apparatus has been damaged in any way, such
as power-supply cord or plug is damaged, liquid has been spilled
or objects have fallen into the apparatus, the apparatus has been
exposed to rain or moisture, does not operate normally, or has
been dropped.

3
CN6F14_e-manual - V.00
CAUTION: RISK OF EXPLOSION IF BATTERY IS REPLACED BY AN
INCORRECT TYPE. DISPOSE OF USED BATTERIES ACCORDING TO
THE INSTRUCTIONS.
Battery safety
This device contains a built-in battery, improper use of which may
result in explosion. Do not heat, open, puncture, mutilate, or dispose
of the product in fire. Do not leave the device in direct sunlight for
an extended period of time, which could cause melting or battery
damage. The battery in this device is not user replaceable and
should only be replaced by AVITA or a AVITA Authorized Service
Provider.
ADDITIONAL SAFETY INFORMATION
• The AC adapter and apparatus shall not be exposed to dripping
or splashing and no objects filled with liquids, such as vases, shall
be placed on the apparatus.
• Always leave sufficient space around the product for ventilation.
Do not place product in or on a bed, rug, in a bookcase or cabinet
that may prevent air flow through vent openings.
• Do not place lighted candles, cigarettes, cigars, etc. on the product.
• Care should be taken so that objects do not fall into the product.
• Do not attempt to disassemble the cabinet. This product does not
contain customer serviceable components.
• To prevent the risk of fire or electric shock, do not expose this
apparatus to rain or moisture.
• Do not play your headset at high volume. Hearing experts warn
against extended high-volume play.

4
CN6F14_e-manual - V.00
FCC information
This device complies with Part 15 of the FCC Rules. Operation is subject
to the following two conditions: (1) This device may not cause harmful
interference, and (2) this device must accept any interference received,
including interference that may cause undesired operation.
This equipment has been tested and found to comply with the
limits for a Class B digital device, pursuant to Part 15 of FCC Rules.
These limits are designed to provide reasonable protection against
harmful interference in a residential installation. This equipment
generates, uses, and can radiate radio frequency energy and, if not
installed and used in accordance with the instructions, may cause
harmful interference to radio communications.
However, there is no guarantee that interference will not occur in a
particular installation. If this equipment does cause harmful interference
to radio or television reception, which can be determined by turning
the equipment off and on, the user is encouraged to try to correct
the interference by one or more of the following measures:
•Reorient or relocate the receiving antenna.
•Increase the separation between the equipment and receiver.
•Connect the equipment into an outlet on a circuit different from that
to which the receiver is connected.
•Consult the dealer or an experienced radio/TV technician for help.
Warning: Changes or modifications not expressly approved by the
party responsible for compliance could void the user’s authority to
operate the equipment.
Warning: the AC adapter is used as disconnect device and it should
remain readily operable during intended use. In order to disconnect
the mains plug from mains completely, the AC adapter should be
disconnected from the mains socket outlet completely. The socket-
outlet shall be installed near the equipment and shall be easily
accessible.
5
CN6F14_e-manual - V.00
SAR
The radiated output power of this device is below the FCC radio
frequency exposure limits. Nevertheless, the device should be used
in such a manner that the potential for human contact is minimized
during normal operation.The exposure standard for wireless devices
employs a unit of measurement known as the Specific Absorption
Rate, or SAR. The SAR limit set by the FCC is 1.6 W/Kg. Tests for SAR
are conducted using standard operating positions accepted by the
FCC with the device transmitting at its highest certified power level
in all tested frequency bands. Although the SAR is determined at the
highest certified power level, the actual SAR level of the device while
operating can be well below the maximum value. This is because the
device is designed to operate at multiple power levels so as to use only
the power required to reach the network. In general, the closer you
are to a wireless base station antenna, the lower the power output. To
avoid the possibility of exceeding the FCC radio frequency exposure
limits, human proximity to the antenna should be minimized.
For body worn operation, this device has been tested and meets the
FCC RF exposure.

6
CN6F14_e-manual - V.00
Important Safety Instructions ................................................ 2
Getting Started ....................................................................... 7
Getting to know your Laptop .......................................................... 7
Using Type-C Dongle ....................................................................... 10
Charging your Laptop ........................................................................ 11
Turning your Laptop on .....................................................................13
Turning your Laptop off ..................................................................14
Power Management .............................................................................16
Basics ....................................................................................... 17
Start menu .............................................................................................. 17
Action center ......................................................................................... 20
Task view .................................................................................................. 23
Using the touchpad ............................................................................ 24
Using the keyboard ............................................................................. 27
Fingerprint recognition ...................................................................... 32
Connections and Setup .......................................................... 34
External display ..................................................................................... 34
Connecting to a Wi-Fi network ....................................................... 36
Airplane mode ...................................................................................... 38
Bluetooth ...................................................................................... 39
Brightness ...................................................................................... 39
Volume ..................................................................................................... 41
Troubleshooting ...................................................................... 42
Specifications ........................................................................... 44
Legal and Safety Notices ......................................................... 45
Contents

7
CN6F14_e-manual - V.00
Getting Started
Getting to know your Laptop
Top view

8
CN6F14_e-manual - V.00
Camera
The built-in camera allows you to take still photos and record
videos.
Speakers
Microphone
For voice input.
Power indicator
The power indicator lights up when the Laptop is powered
on and blinks slowly when the Laptop is in Standby mode.
Charging indicator
Shows the battery's charge status.
- Orange: Charging
- Green: Fully charged
- Orange (blinking): Low battery
USB Type-C port
Connects with 20V DC charger.
Connects to a USB storage device or a mouse, keyboard, or
camera.
Supports DisplayPort™ audio/video output.

9
CN6F14_e-manual - V.00
Headphones (Ø3.5mm) jack
Headphones connection for personal listening.
Power button
Press and hold it to turn the Laptop on or off.
Fingerprint sensor
Scans a fingerprint to unlock the screen.
Refers to the Fingerprint recognition section on page 31 for
more information.
Touchpad
Moves the cursor and selects options.
Functions as a mouse.
USB Type-C to 3.5mm Converter cable

10
CN6F14_e-manual - V.00
HDMI OUT port
Connect to a TV or a display device.
Headphones (Ø3.5mm) jack
Headphones connection for personal listening.
USB port
Connect to a USB storage device or a mouse, keyboard, or
camera.
USB Type-C Dongle
USB Type-C port
For charging only.
There are two USB Type-C ports (5V DC, 1.5A) on the left and right
side of your Laptop. You can connect the supplied USB Type-C
Dongle to the USB Type-C ports.

11
CN6F14_e-manual - V.00
Charging Laptop
IMPORTANT! Please Read.
We recommend fully charging your Laptop before using
it for the first time. For optimum performance, please
connect the provided AC Adapter to your Laptop when
it falls below 20% charge.
To wall socket
Charging indicator Status
Orange: Charging
Green: Fully charged
Orange (blinking): Low battery
Charging
indicator

12
CN6F14_e-manual - V.00
NOTE
•Use ONLY the included AC Adapter to charge the battery.
• The AC Adapter may vary in appearance, depending on models
and your region.
•Charging time will vary depending on remaining battery level.
Charging from 0% to 70% will take approximately 1.5 hours. You
may not be able to turn on your Laptop within a few minutes
if the battery was fully drained.
In order to keep the battery working in best condition,
please pay attention to the following:
•The included AC Adapter is for use with this unit only. Do
not use it with other equipment.
•Please do not charge the battery in high temperatures.
•Do not wait for the battery to be fully depleted before
charging again. Keep the battery charged as needed.
•If your Laptop has not been used for a long period of time,
the battery might be in over discharge protection mode and
may take longer to charge.

13
CN6F14_e-manual - V.00
2. Select the language, then click .
3. Follow the onscreen instructions to configure your Laptop.
About Windows Activation
Windows will be active automatically once you connect your
Laptop to a WiFi network.
Turning your Laptop on
Starting for the rst time
When using the Laptop for the first time, you will be required to
setup the following:
1. Press the Power button to turn on the unit.
Power on Standby
(White)
(White - breathing)

14
CN6F14_e-manual - V.00
Turning your Laptop o
1. Click the icon in the lower-left corner of the screen or
press the Start key on the keyboard to get to the Start
menu.
2. Click the Power icon in the lower-left corner of the
screen
, it will display 3 options (Sleep, Shut down and
Restart).
3.
Select Shut down to power the Laptop off.
Sleep
Shut down
Restart
NOTE
• Save all data before turning your Laptop off.
• If your Laptop is unresponsive, press and hold the Power
button for several seconds and follow the on-screen instructions
to force SHUT DOWN the unit.

15
CN6F14_e-manual - V.00
Putting your Laptop to Sleep
You can put your Laptop to Sleep mode by doing either of the
following:
• Go to the Start menu and click the Power icon in the
lower-left corner of the screen
,
select and click
Sleep
.
• Briefly press the Power button to put the Laptop in sleep
mode. If you don’t operate for some time, the Laptop will
enter sleep mode automatically.

16
CN6F14_e-manual - V.00
Power Management
When the apparatus is not connected power Adapter and not
providing the main function or when other energy-using products
are not dependent on its function, the default system settings and
its characteristics enable the apparatus to activate display sleep
mode within 5 minutes of user inactivity, and to activate a distinct
sleep mode within 10 minutes of user inactivity. In the same
scenario, when the apparatus is connected to power Adapter, will
activate display sleep mode within 15 minutes of user inactivity,
and activate a distinct sleep mode within 25 minutes of user
inactivity. When in sleep mode, the system becomes fully usable
within 5 seconds via network connections or user interface devices.
The power management function is automatically switched on by
the default system settings.
Go to Settings -> System -> Power & sleep to manage how your
Notebool PC use power.

17
CN6F14_e-manual - V.00
Start menu
Microsoft Windows 10 is a new operating system that is used to
control a computer.
Click the icon in the lower-left corner of
the screen to get to the Start menu. You can also open the Start
menu by pressing the Start key on the keyboard.
Live titles
Taskbar
Basics
Live Tiles on the screen change and update in real time so you
can get real-time updates about news or sports, check what
your friends are up to, and get the latest weather forecast.

18
CN6F14_e-manual - V.00
Account options
Click on your account name to change account settings, lock
your device or sign out of your account.
Settings
Allows you to access the settings of your Laptop. Click it to enter
the Settings screen.
Power
Click
icon to Sleep, Shut down or Restart your Laptop.
Expand
Click this icon in the upper-left corner of the screen to
expand the START menu.
Start
Click the Start icon to open/close the Windows Start menu.

19
CN6F14_e-manual - V.00
Taskbar
The below table lists some of the frequently used icons in the
Taskbar:
Shows the battery status.
Displays when Wi-Fi is turned on but there is NO a
Wi-Fi network connection.
Displays when a Wi-Fi network connected.
Displays when Wi-Fi is turned off.
Airplane mode is on.
Adjusts the speaker volume.
Shows the recent task.
Launches Search.
Shows all opened tasks in a single view.
Launches the File Explorer.
Launches Action Center
Icon Description

20
CN6F14_e-manual - V.00
Action Center
It allows you to receive system notifications, such as updates. It
also has a really useful Quick Actions on the bottom.
Checking notications
1. Click the icon in the lower-right corner of the screen to
launch the ACTION CENTER screen.
2. All messages appears in the Action Center and you can
select and click them to read.
Tip: You can go to Settings -> System -> Notifications &
actions to set the Notifications and Actions.
NOTE
• Select Expand or Collapse to expand or minimize the Quick
Actions menu.
Table of contents
Other Avita Laptop manuals

Avita
Avita ADMIROR User manual

Avita
Avita CN6Q15 User manual

Avita
Avita CN6Q15 User manual

Avita
Avita LIBER V NS14A8 User manual

Avita
Avita CN6613 Guide

Avita
Avita PURA Guide

Avita
Avita Essential NE14A2 User manual

Avita
Avita CN6314F551 User manual

Avita
Avita CN6314F551 User manual

Avita
Avita LIBER NS13A Guide