'H¿QLWLRQRI6\PEROV
IMPORTANT SAFETY
INSTRUCTIONS
1. Read and understand all
safety warnings and in-
structions. Failure to follow the warnings
and instructions may result in serious injury
or death. Save all warnings and instructions
for future reference.
2. Personal and Work Area Safety
A. Always wear ANSI approved
safety goggles.
B. Always wear hearing protec-
tection when working in
noisy environments. Prolonged exposure
to high intensity noise can cause hearing
loss.
C. Use safety equipment. Safe-
ty shoes, hard hat and work
gloves must be used for applicable condi-
tions.
IMPORTANT SAFETY
INFORMATION
7KLVLVDSAFETY ALERT symbol.
It is used to alert you to
potential personal
injury hazards. Obey all
safety messages that follow
this symbol to avoid possible injury or death.
DANGER indicates a
hazardous situation which, if not avoided,
will result in death or injury.
WARNING indicates a
hazardous situation which, if not avoided,
could result in death or serious injury.
CAUTION indicates a
hazardous situation which, if not avoided,
could result in minor or moderate injury.
NOTICE indicates
important information which, if not followed,
may cause damage to equipment.
SAVE THIS MANUAL
Keep this manual for the safety warnings
DQGSUHFDXWLRQV7KHPDQXDORႇHUVLPSRU-
tant information on how to assemble, use
and maintain this product.
Write the product’s model number and
purchase date on the cover page of this
manual.
Keep this manual (and your purchase re-
ceipt) in a safe place.
UNPACKING
7KH shipment should be thoroughly inspected as
VRRQDVLWLVUHFHLYHG7KHVLJQHG³ELOORIODG-
ing” is acknowledgement by the carrier of receipt
in good condition or shipment covered by our
invoice. For your own protection, if any of the
goods called for on the bill of lading are shorted
or damaged, do not accept them until the carrier
makes a notation on the freight bill of the shorted
or damaged goods.
Notify AVITEC immediately if any hidden loss
or damage is discovered after receipt.
F. While assembling and using the Cargo
Carrier keep work area clean and well
lighted. Keep spectators and children
out of the work area.
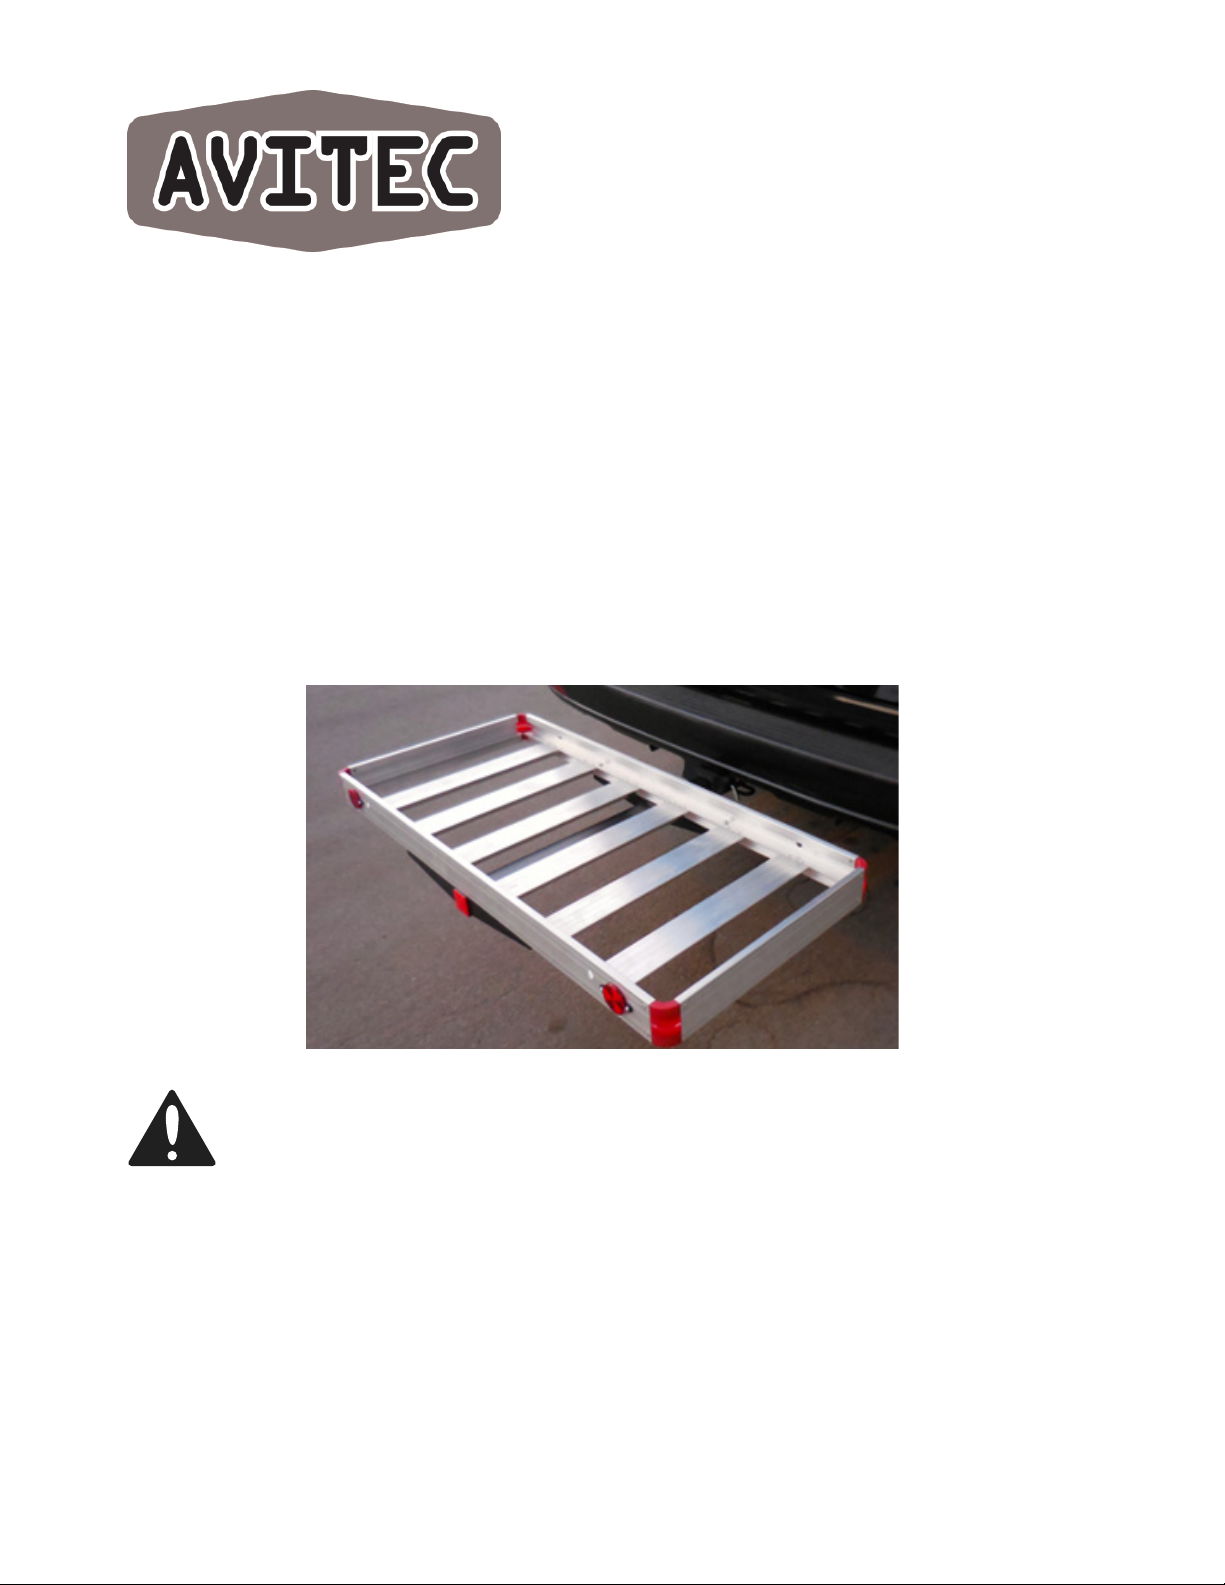
3. Use of the Cargo Carrier
A.The Cargo Carrier must be attached to
a 2” x 2” Class III or Class IV hitch receiv-
er. 7KHKLWFKPXVWEHSURSHUO\LQVWDOOHGE\D
TXDOL¿HGVHUYLFHWHFKQLFLDQDQGEHFHUWL¿HG
to support the weight of this Cargo Carrier
and its contents (500 Lbs. capacity).
%7KLV&DUJR&DUULHULVGHVLJQHGWRKDXO
¿UHZRRGFRROHUVDQGRWKHUVLPLODUORDGV
Do not modify the Cargo Carrier and do
not use this product for purposes that it
was not designed for.
C. Never exceed the maximum weight
capacity of 500 Lbs.
D. Be aware of the danger of “dynamic
loading”7KLVVLWXDWLRQDULVHVZKHQDORDG
is dropped onto the Cargo Carrier, resulting
in a short term excessive load. Dynamic
loading can result in damage and failure of
the Cargo Carrier and/or hitch receiver, and
personal injury to the person loading the
Cargo Carrier.
E. Never load people or animals into the
Cargo Carrier. Keep children and specta-
tors well clear when loading and using this
product.
F. Adhere to all Department of Transpor-
tation (D.O.T.) requirements when using
this product. Use ropes and tie downs to
securely hold all cargo in place.
G. For the vehicle that will support the Car-
go Carrier, read all pertinent vehicle instruc-
tions and warnings provided in the owner’s
manual. Make sure the vehicle’s engine is
OFF, with parking brake set, before load-
ing or unloading the Cargo Carrier
H. Weight inside the Cargo Carrier
should be evenly distributed, with heavier
items positioned towards the center of
the Carrier.
I. Note the position of the vehicle’s ex-
haust pipes before setting up the Cargo
Carrier. Make sure exhaust pipes are not in
FORVHSUR[LPLW\RIWKH&DUJR&DUULHUÀDPPD-
ble goods in the Cargo Carrier could catch
RQ¿UHGXHWRKHDWIURPH[KDXVW,IWKLVULVN
exists on your vehicle, do not use the Cargo
Carrier
Keep in mind that the warnings previous-
ly discussed cannot cover all possible
conditions or situations that could occur.
It is important that the person loading/
unloading and using this product under-
stand that common sense and caution
are factors which cannot be built into this
product, and must be supplied by the
person(s) using this product.
Limited Warranty
AVITEC warrants to the original retail
purchaser that the product is free of defects
in material and workmanship at the time of
VKLSPHQW7KLV&DUJR&DUULHULVZDUUDQWHHG
IRUGD\VIURPWKHGDWHRISXUFKDVH7KLV
warranty is expressly in lieu of all other war-
ranties, express or implied.
Proof of purchase is required for warranty
transactions; a copy of the original invoice
or sales receipt is required.
WARNING concerning Risk of Eye
Injury. Wear ANSI approved eye
protection.
WARNING concerning Risk of
Hearing Loss. Wear hearing pro-
tection.
Model 110111 Page 2 Model 110111 Page 3
D. Dress appropriately. Never wear loose
¿WWLQJFORWKLQJRUMHZHOU\ZKHQZRUNLQJ
Contain long hair, and keep hair, clothing
and gloves away from moving parts.
E. Use common sense when working.
Stay alert and concentrate when setting up
and using the Cargo Carrier. Never work
ZKLOHXQGHUWKHLQÀXHQFHRIDOFRKROGUXJVRU
medications.
Personal and Work Area Safety (continued)
WARNING
DANGER
CAUTION
NOTICE
INSTRUCTION
MANUAL