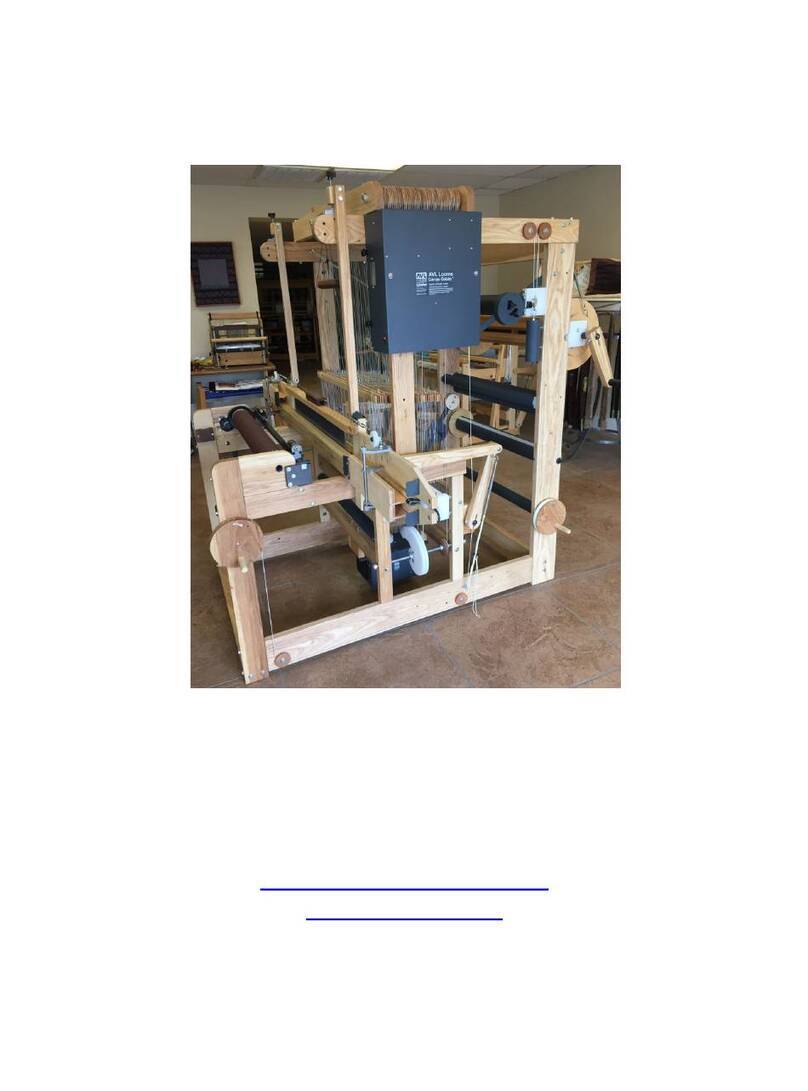
AVL Looms K Series User manual

K-Series Loom User Manual
AVL Looms
2360 Park Avenue
Chico, CA 95928-6785
U.S.A.
530 893-4915
530 893-1372 fax
www.avlusa.com
Version 2.2
January 29, 2020


K-Series Loom User Manual Introductory Information
Table of Contents Page | i
Table of Contents ........................................................................................................................ ii
Introductory Information ................................................................................................................ 1
Introductory Information ............................................................................................................ 1
Safety .......................................................................................................................................... 2
Introduction ................................................................................................................................. 4
Loom Features ............................................................................................................................ 4
Compu-Dobby V on the K-Series Loom .................................................................................... 9
Set Up........................................................................................................................................ 10
Loom Assembly ............................................................................................................................ 13
Loom Assembly ........................................................................................................................ 13
Before You Begin ..................................................................................................................... 14
K-Series Crossmember Hardware ............................................................................................. 14
Identifying Pieces...................................................................................................................... 15
Inserting Nuts And Bolts .......................................................................................................... 17
Unpacking the Loom ................................................................................................................. 18
Unpack the Side Frames ........................................................................................................... 18
Install the Rear Cross Member ................................................................................................. 19
Install Lower Harness Pulley Support ...................................................................................... 22
Install the Front Treadle pulley support with axle .................................................................... 23
Installation of Lower front assembly ........................................................................................ 25
Install The Upper Harness Pulley Support................................................................................ 27
Attach the Lower treadle cable pulley guide ............................................................................ 29
Squaring The Completed Frame ............................................................................................... 30
Install Harness Assemblies ....................................................................................................... 31
Add Heddles to the harnesses ................................................................................................... 36
Attach the Treadle Cables ......................................................................................................... 37
Place the Power Box on the Loom ............................................................................................ 41
Install The Cloth Storage Beam ................................................................................................ 42
Install The Swinging Beater Assembly ..................................................................................... 44
To Remove or to Change the Reed ........................................................................................... 47
Install the Cloth Guide Rollers ................................................................................................. 52
Install the Cloth Beam .............................................................................................................. 54
Install The Upper (Primary) Warp Beam .................................................................................. 57
Install The Lower (Secondary) Warp Beam ............................................................................. 61
Introductory Information K-Series Loom User Manual
Page | ii Table of Contents
Install The Shelf ........................................................................................................................ 65
Connecting The Compu-Dobby ................................................................................................ 65
Additional Loom Options ............................................................................................................. 69
Additional Loom Options ......................................................................................................... 69
Rotary Ring Temples ................................................................................................................ 70
Track & Mount ......................................................................................................................... 72
Raddle ....................................................................................................................................... 75
Casters ....................................................................................................................................... 76
Weaving Instructions .................................................................................................................... 79
Weaving Instructions ................................................................................................................ 79
Loom Orientation ...................................................................................................................... 80
Warping the Loom .................................................................................................................... 80
Warping Direction .................................................................................................................... 81
Warping The Plain Beam .......................................................................................................... 83
Warping The Sectional Beam ................................................................................................... 89
Combining Sectional And Plain Warping............................................................................... 102
Threading, Sleying, & Tying On ............................................................................................ 104
Setting The Tension ................................................................................................................ 108
To Remove or to Change the Reed ......................................................................................... 109
Using the Beater ...................................................................................................................... 114
Using the Automatic Cloth Advance ...................................................................................... 115
Using the Cloth Storage Roller ............................................................................................... 115
Using the Ring Temples.......................................................................................................... 115
Removing the Cloth from the Loom ....................................................................................... 117
Additional Loom Information ..................................................................................................... 119
Additional Loom Information ................................................................................................. 119
Loom Maintenance ................................................................................................................. 120
Troubleshooting ...................................................................................................................... 129
Reference Guide ...................................................................................................................... 133
The Fine Print ............................................................................................................................. 135
The Fine Print ......................................................................................................................... 135
AVL Customer Service ........................................................................................................... 136
TABLE OF CONTENTS

K-Series Loom User Manual Introductory Information
Introductory Information Page | 1
INTRODUCTORY
INFORMATION
INTRODUCTORY INFORMATION

Introductory Information K-Series Loom User Manual
Page | 2 Safety
SAFETY
Before Getting Started:
Please read the entire manual before using the loom.
Warnings:
WARNING:
EQUIPMENT SHOULD ONLY BE USED FOR TEXTILE MANUFACTURING. IF
THE EQUIPMENT IS USED IN A MANNER NOT SPECIFIED BY THE
MANUFACTURER, THE PROTECTION PROVIDED BY THE EQUIPMENT MAY
BE IMPAIRED.
WARNING:
ELECTRICAL SHOCK HAZARD. DO NOT TAMPER WITH ELECTRICAL WIRES
OR OPERATE THE LOOM WITH SAFETY PANELS OPENED OR REMOVED.
WARNING:
PINCH, CRUSH, AND FINGER CUT-OFF HAZARDS. DO NOT OPERATE THE
LOOM WITH SAFETY PANELS OPENED OR REMOVED. DO NOT PLACE
HANDS IN MOVING MECHANISMS.

K-Series Loom User Manual Introductory Information
Safety Page | 3
WARNING:
EQUIPMENT IS HEAVY. TO AVOID MUSCLE STRAIN OR INJURY, USE
PROPER LIFTING TECHNIQUES AND A HELPER.
WARNING:
DO NOT POSITION EQUIPMENT IN A WAY TO BLOCK OR IMPEDE ACCESS
TO DISCONNECTING DEVICES
WARNING:
USE OF CONDUCTIVE FIBER OR YARN ON OR AROUND THIS EQUIPMENT
WILL VOID WARRANTY AND MAY DAMAGE EQUIPMENT.
Safety Features:
Covers and shielding separate weaver from moving components where pinch
hazards exist and high voltage circuitry. Do not remove covers and shielding
while the loom is operating.

Introductory Information K-Series Loom User Manual
Page | 4 Introduction
INTRODUCTION
About AVL
AVL Looms has been in the business of designing and building some of the
world’s finest handweaving looms since 1977.
Jim Ahrens had been building and designing looms for a number of years
before Jon Violette, the “V” in AVL, approached Ahrens about a partnership
in 1977.Violette, an industrial management professional, had discovered
Ahrens’ work through his sister who ran the Pacific Basin School of Textiles
in Berkeley, where Ahrens was a volunteer advisor.
The two men worked together in the Bay Area for three years until Violette
moved Ahrens and Violette Looms to Chico, where it officially became known
as AVL Looms Inc., and has operated ever since.
In 1982, Violette was instrumental in the development of the first
computerized dobby, then called the “Apple Dobby”. He retired from active
life in the company in 1987.
Once known for our production looms, AVL has broadened its line
considerably and we now offer customers a full spectrum of fine weaving
equipment, ranging from our small Home Looms, to our Industrial Dobby
Looms, Rug Looms, and Jacquards.
The K-Series Loom Design Concept
The guiding concept behind the K-Series Loom is ease of use. The loom is
designed to be easy to thread, easy to setup and easy to weave on.
LOOM FEATURES
Countermarche Loom with Compu-Dobby®
The K-Series dobby offers the best of all worlds with these features:
The countermarche design has a large shed and works well with all
types of weave structures. The center shed eliminates the need to
adjust for harness float, which is seen with rising shed and jack
style dobby looms.

K-Series Loom User Manual Introductory Information
Loom Features Page | 5
Counterbalanced harnesses use dobby weights in a closed loop
setup to ensure light and balanced treadling no matter which
pattern is being used or how many harnesses are being lifted.
Lifting either one or forty harnesses requires minimal effort and
feels nearly the same.
Available with 8, 16, 24, 32 or 40 harnesses, this best in class
capability provides flexibility and freedom for the ultimate weaving
loom.
Fitted to the countermarche loom is the Compu-Dobby 5. A first for
handweaving looms, the Compu-Dobby 5 enables computer control of
pattern and key loom functions, including warp tension and pick spacing.
Pattern control is a state of the art system that eliminates the multi-treadle
dance of traditional looms and the tedious pegging of mechanical dobby
looms. Much like the legacy cartridge systems from the Compu-Dobby I and
II, the Compu-Dobby 5 stores entire weaving files (WIFs) onboard with three
significant advantages over all other systems:
Ultra-fast pick writing. The system can achieve weaving speeds in
excess of 100 picks per minute.
Hundreds of weaving files may be stored for later use.
Eliminates latency timing issues inherent in computer
communications systems. Latencies can cause slower weaving and
even missed picks.
As a web enabled device, this loom connects to your computer or tablet via
WiFi or USB and controls the loom from your favorite browser. AVLDrive
version 5 is an easy to use, intuitive interface run from within the Compu-
Dobby 5. As a result, there is no software to install for the loom, nor is there
any limitation on the controlling device, except for a minimum screen
resolution (1024 x 768 pixels). AVLDrive is compatible with all major
browsers, including Safari, Chrome, Edge, Firefox and Opera.
Warp Beams and Automatic Warp Tension System
The K-Series comes equipped with a ½-yard sectional beam. The sectional
warp beam includes a handle and enough hoops to make 2” (5.1 cm)
sections. The hoops are moveable allowing sections of any width, provided
they are calculated in 1” (2.6 cm) increments. Removing all the hoops turns
the sectional beam into a plain beam.
Additional hoops can be ordered to make 1” (2.6 cm) sections.

Introductory Information K-Series Loom User Manual
Page | 6 Loom Features
A regular plain warp beam with apron and 2 rods may be substituted for the
sectional beam at no extra charge.
A second or supplemental warp beam can added to the loom. It can also be
either a ½-yard sectional or plain beam.
The K-Series takes our unique, live weight-style automatic tensioning
systems up a notch by providing digital controls. Traditional looms use a
locking brake which slows weaving considerably and adversely affects the
quality of the fabric. An automatic tension system has three significant
benefits:
Maintains warp tension at all times.
Allows advancing of the warp without taking off tension, thus
removing inconsistency in fabric density.
Provides a small amount of tension release during the beat to
reduce the sharp impact on the fabric and reduce the chance of end
breakage.
Another first in our industry, the K-Series’ digital control of warp tension
uses a small electrical motor and drive system connected via spring and
brake cable to the warp beam. The motor is controlled by the Compu-Dobby
& AVLDrive. Easily change the warp tension at any time during weaving with
a click of the mouse or a touch of the finger on the touchscreen. This system
allows very fine, repeatable control with a range from locked beam to free
turning for winding on the warp.
Cloth Beam with Automatic Cloth Advance
The K-Series comes standard with AVL’s signature sandpaper covered cloth
beam and automatic cloth advance. A cloth beam cover protects delicate
skin and clothes from the abrasive surface. The cloth beam and cover are
easily removable for getting in close during loom threading.
Automatic cloth advance is an AVL-only feature on hand weaving looms.
Earlier mechanical versions of these systems are well known for providing
fine control over pick advance spacing. This feature utilizes digital controls
via an electric motor driven worm and gear attached directly to the cloth
beam. Similar to the digital warp tension controls, set the picks per inch in
AVLDrive and start weaving. Easily change the advance setting or manually
advance the cloth at any time during weaving with a click of the mouse or a
touch of the finger on the touchscreen. This system allows very fine,

K-Series Loom User Manual Introductory Information
Loom Features Page | 7
repeatable control. It allows for hundreds of picks per inch or the large
movements needed when starting a new warp.
Note:
The default for the system is picks per inch, however, it can be changed to
picks per centimeter.
Cloth Storage System with Automatic Cloth Take Up
The Cloth Storage System consists of the cloth storage beam, apron, apron
rod and advance system. The beam quickly lifts out for getting in close
during loom threading.
Another AVL-only feature, automatic cloth take up is a time saver and cloth
preserving feature. The cloth take up system uses a linkage attached to the
beater to drive a one-way clutch bearing. The system will automatically take
up any slack in your weaving without over tensioning the woven cloth. The
system is easily adjustable with the turn of a knob hidden inside the cloth
storage beam hub.
Bottom Swing Beater
A bottom swing beater is standard and comes with a stainless steel reed of
your choice ranging in spacing of 8-15 dents per inch. Changing the reed can
be done quickly by loosening the bolts holding the premium hardwood
beater top.
The automatic cloth take up linkage is easily detached via tri-knob
thumbscrew and the beater lifts right out of the frame for getting in close
during loom threading.
Weights can be added to the beater to make it easier to beat in weft at high
densities.
Harnesses
The loom uses a standard rigid harness structure featuring an enclosed, four
sided wood harness with stainless steel heddle bars. The heddle bar support
system uses a novel flip up bracket to allow for easy unloading and loading
of heddles or complete removal of the heddle bar.
The loom comes standard with polyester heddles, or metal heddles are
available as an upgrade. Some weavers like metal heddles because they feel
these are easier to thread; others prefer quieter polyester heddles.

Introductory Information K-Series Loom User Manual
Page | 8 Loom Features
Loom Frame
The K-Series comes available in 24, 32 or 40” (61, 81, or 102 cm) weaving
widths.
Advanced frame construction uses high quality joinery to improve rigidity
and strength.
Oiled hardwood construction is good both for longevity, beauty and the
environment.
Options
The K-Series has a limited number of options available based on your
warping and weaving preferences. These include:
Second or Supplementary Warp Beam Systems
As discussed above, you can use a second warp beam.
Rotary Ring Temples
Rotary Ring Temples are an upgrade available for this loom. Temples are
used to maintain good selvages and prevent draw-in. Add in the rotary ring-
type system to make the temples automatic with no need to stop and reset
as with standard temples. The K-Series rotary ring temples come with a
cover to prevent contact with delicate skin or clothing. The K-Series comes
with hidden, built-brackets making ring temple installation quick and simple.
Track & Mount
The track and mount system mounts directly to the rear vertical side frame
members to provide a stable platform for a tension box.
Raddle
Raddles are commonly used for loading plain warp beams when warping
back to front, as it provides the same functions of warp end spacing,
smoothing and tensioning as the reed provides in front to back warping. The
raddle is AVL’s standard 2 piece with a lift off top to make loading of the
warp easy. The raddle mounts directly to the rear vertical side frame
members.
Casters
Casters can be attached to the K-series loom to make moving it easy. The
casters are sturdy and designed to support the weight of the loom. When not
in use, the casters lock into place.

K-
Series Loom User Manual
Compu-
Dobby V on the K
Bench
An AVL sh
provides adjustable height, pivoting seat for ideal angle and a firm, wide
base to ensure stability.
Shuttles
Choose from either the standard or short hand shuttle with end feed
tensioners. Thes
selvage with minimal effort.
C
OMPU
For the Compu
without going through the shut
an Uninterrupted Power Supply, or UPS, with the Compu
What is a UPS?
A UPS has an internal battery that charges from your electrical outlet and
can provide power to the item plugged into it during power outages. They
also provide surge prote
power forever. The amount of time the battery will keep your item running
depends on how much power the item uses and the size of the battery. The
number of items plugged into the battery backup will al
Power requirements for the Compu
The Compu
UPS with a minimum Volt Amps (VA) of 640. Check both the Wattage and
the Volt Amps that the manufacturer states for the mod
both be equal or greater to the amount required by the Compu
Series Loom User Manual
Dobby V on the K
An AVL sh
ort bench is the suitable seat for this loom.
provides adjustable height, pivoting seat for ideal angle and a firm, wide
base to ensure stability.
Shuttles
Choose from either the standard or short hand shuttle with end feed
tensioners. Thes
e shuttles provide optimal tensioning to achieve excellent
selvage with minimal effort.
OMPU
-D
OBBY
For the Compu
-
Dobby V, power should not be removed from the loom
without going through the shut
an Uninterrupted Power Supply, or UPS, with the Compu
What is a UPS?
A UPS has an internal battery that charges from your electrical outlet and
can provide power to the item plugged into it during power outages. They
also provide surge prote
power forever. The amount of time the battery will keep your item running
depends on how much power the item uses and the size of the battery. The
number of items plugged into the battery backup will al
Power requirements for the Compu
The Compu
-
Dobby V has a power supply of 400 Watts (W). You will need a
UPS with a minimum Volt Amps (VA) of 640. Check both the Wattage and
the Volt Amps that the manufacturer states for the mod
both be equal or greater to the amount required by the Compu
Series Loom User Manual
Dobby V on the K
-
Series Loom
ort bench is the suitable seat for this loom.
provides adjustable height, pivoting seat for ideal angle and a firm, wide
base to ensure stability.
Choose from either the standard or short hand shuttle with end feed
e shuttles provide optimal tensioning to achieve excellent
selvage with minimal effort.
OBBY
V
ON THE
Dobby V, power should not be removed from the loom
without going through the shut
an Uninterrupted Power Supply, or UPS, with the Compu
A UPS has an internal battery that charges from your electrical outlet and
can provide power to the item plugged into it during power outages. They
also provide surge prote
ction. Keep in mind that the battery will not provide
power forever. The amount of time the battery will keep your item running
depends on how much power the item uses and the size of the battery. The
number of items plugged into the battery backup will al
Power requirements for the Compu
Dobby V has a power supply of 400 Watts (W). You will need a
UPS with a minimum Volt Amps (VA) of 640. Check both the Wattage and
the Volt Amps that the manufacturer states for the mod
both be equal or greater to the amount required by the Compu
Series Loom
ort bench is the suitable seat for this loom.
provides adjustable height, pivoting seat for ideal angle and a firm, wide
Choose from either the standard or short hand shuttle with end feed
e shuttles provide optimal tensioning to achieve excellent
selvage with minimal effort.
ON THE
Dobby V, power should not be removed from the loom
without going through the shut
-
off procedure. AVL recommends that yo
an Uninterrupted Power Supply, or UPS, with the Compu
A UPS has an internal battery that charges from your electrical outlet and
can provide power to the item plugged into it during power outages. They
ction. Keep in mind that the battery will not provide
power forever. The amount of time the battery will keep your item running
depends on how much power the item uses and the size of the battery. The
number of items plugged into the battery backup will al
Power requirements for the Compu
Dobby V has a power supply of 400 Watts (W). You will need a
UPS with a minimum Volt Amps (VA) of 640. Check both the Wattage and
the Volt Amps that the manufacturer states for the mod
both be equal or greater to the amount required by the Compu
ort bench is the suitable seat for this loom.
provides adjustable height, pivoting seat for ideal angle and a firm, wide
Choose from either the standard or short hand shuttle with end feed
e shuttles provide optimal tensioning to achieve excellent
ON THE
K-S
ERIES
Dobby V, power should not be removed from the loom
off procedure. AVL recommends that yo
an Uninterrupted Power Supply, or UPS, with the Compu
A UPS has an internal battery that charges from your electrical outlet and
can provide power to the item plugged into it during power outages. They
ction. Keep in mind that the battery will not provide
power forever. The amount of time the battery will keep your item running
depends on how much power the item uses and the size of the battery. The
number of items plugged into the battery backup will al
Power requirements for the Compu
-
Dobby V
Dobby V has a power supply of 400 Watts (W). You will need a
UPS with a minimum Volt Amps (VA) of 640. Check both the Wattage and
the Volt Amps that the manufacturer states for the mod
both be equal or greater to the amount required by the Compu
ort bench is the suitable seat for this loom.
The short bench
provides adjustable height, pivoting seat for ideal angle and a firm, wide
Choose from either the standard or short hand shuttle with end feed
e shuttles provide optimal tensioning to achieve excellent
ERIES
L
OOM
Dobby V, power should not be removed from the loom
off procedure. AVL recommends that yo
an Uninterrupted Power Supply, or UPS, with the Compu
A UPS has an internal battery that charges from your electrical outlet and
can provide power to the item plugged into it during power outages. They
ction. Keep in mind that the battery will not provide
power forever. The amount of time the battery will keep your item running
depends on how much power the item uses and the size of the battery. The
number of items plugged into the battery backup will al
Dobby V
Dobby V has a power supply of 400 Watts (W). You will need a
UPS with a minimum Volt Amps (VA) of 640. Check both the Wattage and
the Volt Amps that the manufacturer states for the mod
both be equal or greater to the amount required by the Compu
Introductory Information
The short bench
provides adjustable height, pivoting seat for ideal angle and a firm, wide
Choose from either the standard or short hand shuttle with end feed
e shuttles provide optimal tensioning to achieve excellent
OOM
Dobby V, power should not be removed from the loom
off procedure. AVL recommends that yo
an Uninterrupted Power Supply, or UPS, with the Compu
-
Dobby V.
A UPS has an internal battery that charges from your electrical outlet and
can provide power to the item plugged into it during power outages. They
ction. Keep in mind that the battery will not provide
power forever. The amount of time the battery will keep your item running
depends on how much power the item uses and the size of the battery. The
number of items plugged into the battery backup will al
so affect runtime.
Dobby V has a power supply of 400 Watts (W). You will need a
UPS with a minimum Volt Amps (VA) of 640. Check both the Wattage and
the Volt Amps that the manufacturer states for the mod
el. These should
both be equal or greater to the amount required by the Compu
-
Introductory Information
Page |
The short bench
provides adjustable height, pivoting seat for ideal angle and a firm, wide
Choose from either the standard or short hand shuttle with end feed
e shuttles provide optimal tensioning to achieve excellent
Dobby V, power should not be removed from the loom
off procedure. AVL recommends that yo
u use
Dobby V.
A UPS has an internal battery that charges from your electrical outlet and
can provide power to the item plugged into it during power outages. They
ction. Keep in mind that the battery will not provide
power forever. The amount of time the battery will keep your item running
depends on how much power the item uses and the size of the battery. The
so affect runtime.
Dobby V has a power supply of 400 Watts (W). You will need a
UPS with a minimum Volt Amps (VA) of 640. Check both the Wattage and
el. These should
-
Dobby V.
Introductory Information
Page |
9
provides adjustable height, pivoting seat for ideal angle and a firm, wide
e shuttles provide optimal tensioning to achieve excellent
u use
A UPS has an internal battery that charges from your electrical outlet and
can provide power to the item plugged into it during power outages. They
ction. Keep in mind that the battery will not provide
power forever. The amount of time the battery will keep your item running
depends on how much power the item uses and the size of the battery. The
so affect runtime.
Dobby V has a power supply of 400 Watts (W). You will need a
UPS with a minimum Volt Amps (VA) of 640. Check both the Wattage and

Introductory Information K-Series Loom User Manual
Page | 10 Set Up
Choosing a UPS
Depending on the model you buy, some of the outlets on the UPS may not
provide battery backup. The options available on different brands and
models vary widely, so look at various models. You will want to make sure
that the UPS will provide enough power for you to successfully shut-down
the loom during a power outage. It may be a good idea to test how the UPS
works so that you understand what will happen when the power goes out.
Links to more information
Here are some links we found helpful about the UPS:
https://www.cyberpowersystems.com/blog/how-does-a-ups-work/
https://www.howtogeek.com/161479/how-to-select-a-battery-backup-for-your-computer/
https://thewirecutter.com/reviews/best-uninterruptible-power-supply-ups/
https://www.lifewire.com/best-uninterrupted-power-supplies-4142625
SET UP
Looms may be shipped fully assembled or knocked-down. Fully assembled
looms will arrive crated. Please verify that all entries, halls and doorways are
large enough to pass thru with the crate. If knocked down, your loom will
arrive in several boxes of various sizes.
Shipping Damage or Missing Boxes
Looms are rarely damaged in shipping. AVL takes special effort in providing
suitable packaging, however, on occasion a box will get damaged or go
missing. To protect against this, AVL ships every loom insured. We will assist
you in the event that there is a problem. We just require you follow these
simple steps:
1) At receipt of the shipment while the driver is unloading, please
confirm receipt of the correct number of boxes as indicated on your
copy of the Bill of Lading, and that there is no external damage to
the boxes/crate. If any boxes are missing or damaged, please
require the driver to make notes on his paperwork. Failure to have
the driver note the problem significantly shortens the timeframe for
a claim to as little as 5 working days.

K-Series Loom User Manual Introductory Information
Set Up Page | 11
2) Upon departure of the truck, take pictures of the damaged box and
email the pictures to AVL. We will use the pictures to initiate a
claim.
3) As soon as possible and preferably within a few days, open each
damaged box/crate to search for damaged or missing items. We
can provide you with a list of what was in the box. Please take
pictures of what you see, especially of damage to parts. This
information will help us identify what to replace and how much to
claim against the insurance.
4) Lastly, save your packaging materials and parts in case the
freight/insurance company wishes to inspect the damage.
Assuming you have followed above procedure, AVL will replace the damaged
parts as quickly as possible. An invoice will be issued with expectation for
payment via the claim reimbursement. Should the reimbursement be paid
directly to you, the invoice will become immediately due and payable by you.


K-Series Loom User Manual Loom Assembly
Loom Assembly Page | 13
LOOM ASSEMBLY
LOOM ASSEMBLY

Loom Assembly K-Series Loom User Manual
Page | 14 Before You Begin
BEFORE YOU BEGIN
Putting together your new loom may look intimidating at first, but this
manual is designed to guide you through the process with clear steps,
pictures, and diagrams. If the manual is unclear or confusing at any point,
call us at 530-893-4915. We’re here to help.
There is a definite advantage in assembling your own loom. You’ll come to
know it very well, sooner than you otherwise would, and the better you
know your loom, the better you’ll be able to use and maintain it.
Tools
First, you’ll need tools:
1. Hammer
2. Socket Wrench with 1/2”, and 7/16” sockets
3. 1/2”, and 7/16” Box Wrenches
4. Large standard screwdriver
5. Small (jewelry sized) standard screwdriver
6. Phillips screwdriver
7. Scissors
8. Crescent Wrench
9. Level (a small one will do)
10. Tape Measure
11. Mallet
You will also need a helper at some points.
K-SERIES CROSSMEMBER HARDWARE
This list of hardware is included in your hardware packet and is applicable to
the 24”, 32”, and 40” K-series loom.
Order of
operations
Count
Name Parts
1 x4 Rear Crossmember 1/4x2-3/4 Hex Bolt
w/washer and square nut
2 x4 Lower Harness Pulley
Support
1/4x4 Hex Bolt w/washer
3 x4 Front Treadle pulley
support w/axle
1/4x2-1/2 FHMS
w/square nut

K-Series Loom User Manual Loom Assembly
Identifying Pieces Page | 15
Order of
operations
Count
Name Parts
4 x4 Lower front assembly 1/4x2-3/4 Hex Bolt
w/washer & square nut
5 x4 Upper Harness Pulley
Support
1/4x2-3/4 Hex Bolt
w/washer
6 x2 Lower treadle cable pulley
guide
1/4x4 FHMS
IDENTIFYING PIECES
There are a number of different types of hardware that will hold your loom
together. The following chart will help you familiarize yourself with the types
of hardware you will encounter.
Figure 1 - Hex Bolt
These always get a washer between
the head of the bolt and the wood.
Figure 2 - Flat Head Machine
Screw (FHMS)
Figure 3 - Flat
Washer
Figure 4 - Square Nut
These always go in a nut access hole. They attach with
no washer between the nut and the wood, to hex bolts.

Loom Assembly K-Series Loom User Manual
Page | 16 Identifying Pieces
Figure 5 - Black Knob
Figure 6 - Measuring Bolts
Table of contents
Other AVL Looms Other manuals

AVL Looms
AVL Looms Rug Loom User manual

AVL Looms
AVL Looms A Series User manual

AVL Looms
AVL Looms Dobby User manual

AVL Looms
AVL Looms Jacq3G User manual

AVL Looms
AVL Looms Compu-Dobby V User manual

AVL Looms
AVL Looms TECHNICAL EDUCATION LOOM User manual

AVL Looms
AVL Looms HOME LOOM with Compu-Dobby III Quick reference guide