AVL Looms Rug Loom User manual

Rug Loom
Chico, CA 95928
Rug Loom
User’s
Manual
AVL Looms
2360 Park Avenue
Chico, CA 95928
-6785
U.S.A.
530 893-4915
530 893-1372 fax
sales@avlusa.com
www.avlusa.com
Version 1
November 22, 2019
Manual


Rug Loom User’s Manual Introductory Information
Page | i
Introductory Information ................................................................................................................ 1
Safety .......................................................................................................................................... 2
Introduction ................................................................................................................................. 4
Loom Features ............................................................................................................................ 5
Air Component Information ....................................................................................................... 6
Set Up.......................................................................................................................................... 8
Loom Assembly ............................................................................................................................ 11
Before You Begin ..................................................................................................................... 12
Side Frame Assembly ............................................................................................................... 14
Add Cross Members ................................................................................................................. 18
Square the Frame ...................................................................................................................... 20
Add remaining cross members .................................................................................................. 21
Level the Frame ........................................................................................................................ 23
Dobby Assembly ....................................................................................................................... 23
Beater Assembly ....................................................................................................................... 24
Air System ................................................................................................................................ 27
Add Harnesses to the Loom ...................................................................................................... 30
Cloth Storage Beam Assembly ................................................................................................. 36
Cloth Beam Assembly .............................................................................................................. 38
Worm Drive .............................................................................................................................. 41
Separation Rollers ..................................................................................................................... 44
Warp Beams .............................................................................................................................. 45
Brake Cable Assembly .............................................................................................................. 46
Brake Drag Strap....................................................................................................................... 48
Apron ........................................................................................................................................ 50
Install the Air Lift ..................................................................................................................... 51
Install the Air Compu-Dobby ................................................................................................... 54
Connect The Air System ........................................................................................................... 56
Maintaining Your System ......................................................................................................... 58
Other Loom Maintenance ......................................................................................................... 59
Appendix – Optional Features ...................................................................................................... 61
Air Shuttle Installation And Adjustments ................................................................................. 62
Air Beater .................................................................................................................................. 65
Automatic Advance .................................................................................................................. 65

Introductory Information Rug Loom User’s Manual
Page | ii
Weaving Instructions .................................................................................................................... 81
Warping The Plain Beam .......................................................................................................... 82
Warping The Sectional Beam ................................................................................................... 89
Combining Sectional And Plain Warping ............................................................................... 103
Threading, Sleying, & Tying On ............................................................................................ 104
Advancing the Warp ............................................................................................................... 107
Removing Cloth from the Loom ............................................................................................. 109
The Fine Print ............................................................................................................................. 111
AVL Customer Service ........................................................................................................... 112
AVL Warranties ...................................................................................................................... 112
Notice to Users in the European Union .................................................................................. 114

Rug Loom User’s Manual Introductory Information
Page | 1
INTRODUCTORY
INFORMATION

Introductory Information Rug Loom User’s Manual
Page | 2 Safety
SAFETY
Before Getting Started: Please read the entire manual before using the loom.
Warnings:
WARNING: EQUIPMENT SHOULD ONLY BE USED FOR TEXTILE
MANUFACTURING. IF THE EQUIPMENT IS USED IN A MANNER NOT
SPECIFIED BY THE MANUFACTURER, THE PROTECTION PROVIDED BY THE
EQUIPMENT MAY BE IMPAIRED.
WARNING: ELECTRICAL SHOCK HAZARD. DO NOT TAMPER WITH
ELECTRICAL WIRES OR OPERATE THE LOOM WITH SAFETY PANELS
OPENED OR REMOVED.
WARNING: PINCH, CRUSH, AND FINGER CUT-OFF HAZARDS. DO NOT
OPERATE THE LOOM WITH SAFETY PANELS OPENED OR REMOVED. DO
NOT PLACE HANDS IN MOVING MECHANISMS OR SCISSORS.

Rug Loom User’s Manual Introductory Information
Safety Page | 3
WARNING: EQUIPMENT PANELS ARE AWKWARD AND HEAVY. TO AVOID
MUSCLE STRAIN OR INJURY, USE PROPER LIFTING TECHNIQUES AND A
HELPER.
WARNING: DO NOT POSITION EQUIPMENT IN A WAY TO BLOCK OR IMPEDE
ACCESS TO DISCONNECTING DEVICES, EMERGENCY STOPS, OR ON/OFF
BREAKER SWITCHES
WARNING: USE OF CONDUCTIVE FIBER OR YARN ON OR AROUND THIS
EQUIPMENT WILL VOID WARRANTY AND MAY DAMAGE EQUIPMENT.
WARNING: THIS EQUIPMENT IS CLASSIFIED FOR LIGHT INDUSTRIAL
ENVIRONMENT ONLY. OPERATION OF HIGH-CURRENT DRAW EQUIPMENT
(EX. MIG WELDER) ON THE SAME ELECTRICAL CIRCUITS MAY CAUSE
EQUIPMENT FAILURE.
Safety Features:
Covers and shielding separate weaver from moving components where pinch
hazards exist. Do not reach under a covers and shielding while the loom is
operating.

Introductory Information Rug Loom User’s Manual
Page | 4 Introduction
INTRODUCTION
About AVL
AVL Looms has been in the business of designing and building some of the
world’s finest handweaving looms since 1977.
Jim Ahrens had been building and designing looms for a number of years
before Jon Violette, the “V” in AVL, approached Ahrens about a partnership
in 1977. Violette, an industrial management professional, had discovered
Ahrens’ work through his sister who ran the Pacific Basin School of Textiles
in Berkeley, where Ahrens was a volunteer advisor.
The two men worked together in the Bay Area for three years until Violette
moved Ahrens and Violette Looms to Chico, where it officially became known
as AVL Looms Inc., and has operated ever since.
The Rug Loom Design Concept
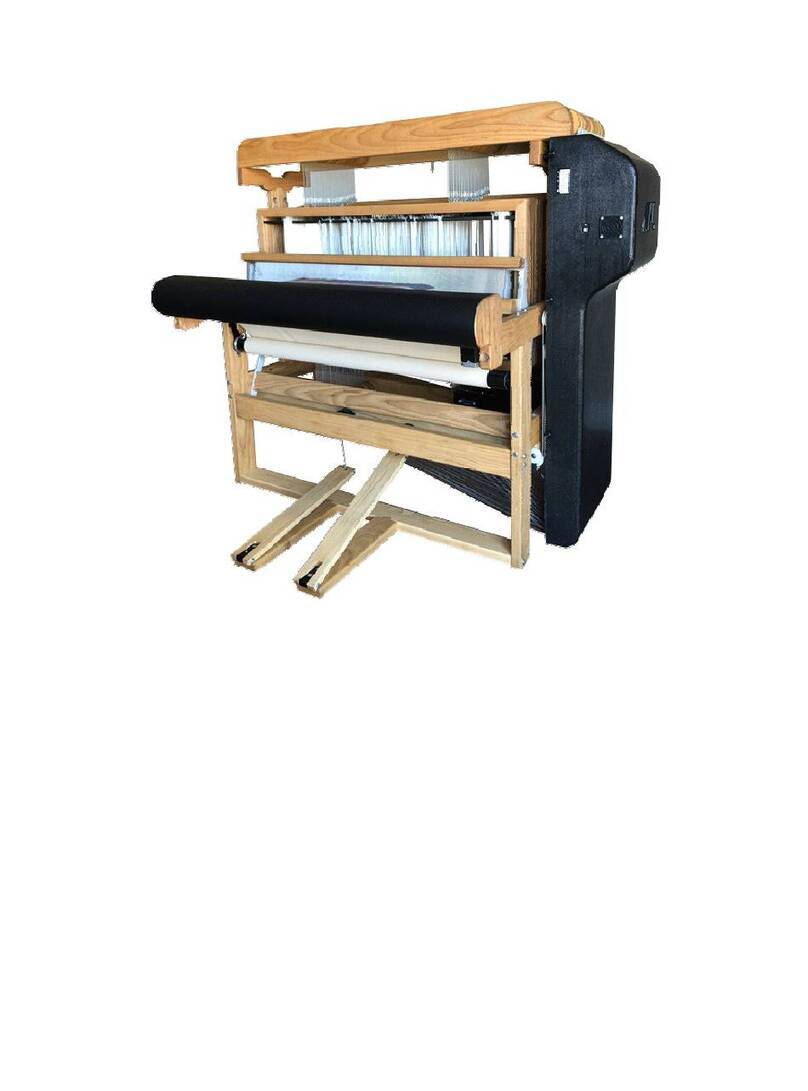
The Rug Loom is designed for professional rug weavers. Starting at four feet
and available up to 20 feet, this loom offers enough width for any of your
needs.
The four foot and six foot rug loom are made of wood. The eight foot rug
loom has wood side frames with steel cross members for strength. Looms
wider than eight feet are made mostly of steel.
The AVL rug loom has several components which are air driven and require
an air compressor to be hooked up to the loom. As with all AVL looms, the
rug loom can be customized to fit your needs.

Rug Loom User’s Manual Introductory Information
Loom Features Page | 5
LOOM FEATURES
Brake and Tension System
The warp tension is maintained with an air-controlled locking brake. The
tension and the brake are controlled with levers at the front of the loom.
Cloth Storage System
The Cloth Storage System stores the finished cloth conveniently out of the
way on a beam under and behind the cloth beam.
Sliding Beater
The Sliding Beater is a standard feature of the Rug Loom. This beater allows
you to beat in weft tightly and easily. The normal sliding beater can be
replaced with an air beater.
Sectional Beam
If you have purchased a Sectional Beam, you will find it to be extremely
adaptable to your needs. Because each of its hoops is removable, you may
create sections of any width you like, provided they are calculated in one-
inch increments.
An AVL Sectional Beam with metal hoops has holes for the hoops at 1”
sections. The wheel comes with enough metal hoops to setup 2” sections.
More hoops can be ordered from AVL if narrower sections are desired. For
wider sections, remove as many metal hoops as needed.
Plain Beam
The Plain Beam is provided with an apron, which will allow you to maximize
the length of your warp.
Dobby
The Rug Loom can come with either a mechanical dobby with an air lift or an
air Compu-Dobby.
Air Lift
The Air lift or Air Compu-Dobby replaces treadles on your loom and allows
the shafts to be lifted easily and smoothly by pressing a pedal.

Introductory Information Rug Loom User’s Manual
Page | 6 Air Component Information
Spring levers
There is a spring lever for each harness which stabilize the harnesses and
encourage their vertical fall when the shed is released.
Harnesses
You will have metal heddles on your loom. Metal heddles, whether twisted
wire or flat steel, are suspended from steel heddle bars mounted in rigid
frames. In all cases, the harnesses are stabilized at the bottom by a set of
spring levers. These hold the harnesses down and prevent your heddles from
floating.
Automatic Cloth Advance (Optional)
The rug loom can be customized with an automatic cloth advance. The
locking brake on the warp beam will be replaced with an automatic warp let
off system. The cloth storage beam will also be automatic. These three
systems will work together.
AIR COMPONENT INFORMATION
Compressor
A machine which compresses, stores, and delivers air to an air system.
Air Cylinder
A sealed tube that contains a movable shaft. This shaft is caused to move in
or out by the action of compressed air.
Exhaust Valve
Some of the systems on your rug loom are powered by compressed air. This
air comes into the system via the compressor, is forced through the cylinder,
and is then vented from the system. An exhaust valve is the door through
which the air leaves.
FRL
This is a filter and regulator together in a single device. The air that comes
from your compressor feeds directly into the FRL where it's conditioned and
its pressure regulated.

Rug Loom User’s Manual Introductory Information
Air Component Information Page | 7
Piloted Valve
This valve directs the flow of air to and from different parts of the system.
Rod End
The working end of an air cylinder which connects to the mechanism that
needs to be moved.
Air Compressor Requirements
Compressors are rated according to the volume of compressed air they can
delivery in one minute. This rating is known as C.F.M., cubic feet per
minute.
DEVICE USAGE
UNITS PER COMPRESSOR
RATING *
UNITS NOTES
RL 48 in.,
72 in., 96
in., 120 in.
0.73 CFM @
100 PSI
Loom 2 CFM Rated @
30 PPM
RL 144 in.,
180 in.
1.45 CFM @
100 PSI
Loom 4 CFM Rated @
30 PPM
Air-
Assisted
Shuttle
Boxes
0.47 CFM @
100 PSI
Loom 2 CFM Rated @
60 PPM
PPM = Picks Per Minute
CFM = Cubic Feet Per Minute
PSI = Pounds Per Square Inch
We suggest sizing a compressor for worst case scenarios like 50% duty
cycle. When using a 50% duty cycle, doubling the usage rate is the first
step, then adding another 50% will insure the compressor is not working at
maximum capacity, making it last longer and delivering reliable compressed
air to AVL products.
Note:
If you will be using multiple air components, make sure your air compressor
is sized to handle all of them.
Exceptions to the above sizing methods are products that may use
compressors other than the reciprocating type. Screw type compressors are

Introductory Information Rug Loom User’s Manual
Page | 8 Set Up
often used in higher volume applications such as IDL's, or a Jacquard with
several heads.
The choice of a compressor is yours. In general, we advise you to buy a
compressor that can deliver more air than you actually need -- it will run
more efficiently, last longer, and allow the addition of future air
components.
Nearly all compressors have storage tanks. Here, too, size is important. We
recommend that you consider a compressor with at least a twenty gallon
tank.
SET UP
Even the narrower rug looms will require the efforts of two people for many
of the assembly operations. Several of the components can be quite heavy,
especially in longer lengths. PLEASE TAKE PRECAUTIONS TO PROTECT
YOUR BACK, YOUR FINGERS, AND FEET WHEN HANDLING THESE
PARTS!
If your loom was assembled by AVL, it will have arrived on a pallet, possibly
within a protective framework. Accessories too large to include with the loom
will be located in supplementary boxes.
Looms delivered knocked-down will arrive in several boxes of various sizes.
Please confirm that you received the number of boxes indicated on your
copy of the Bill of Lading. If any are missing, please call the delivery
company.
Shipping Damage or Missing Boxes
Looms are rarely damaged in shipping. AVL takes special effort in providing
suitable packaging, however, on occasion a box will get damaged or go
missing. To protect against this, AVL ships every loom insured. We will assist
you in the event that there is a problem. We just require you follow these
simple steps:
1) At receipt of the shipment while the driver is unloading, please
confirm receipt of the correct number of boxes as indicated on
your copy of the Bill of Lading, and that there is no external
damage to the boxes/crate. If any boxes are missing or damaged,
please require the driver to make notes on his paperwork. Failure
to have the driver note the problem significantly shortens the
timeframe for a claim to as little as 5 working days.

Rug Loom User’s Manual Introductory Information
Set Up Page | 9
2) Upon departure of the truck, take pictures of the damaged box
and email the pictures to AVL. We will use the pictures to initiate
a claim.
3) As soon as possible and preferably within a few days, open each
damaged box/crate to search for damaged or missing items. We
can provide you with a list of what was in the box. Please take
pictures of what you see, especially of damage to parts. This
information will help us identify what to replace and how much to
claim against the insurance.
4) Lastly, save your packaging materials and parts in case the
freight/insurance company wishes to inspect the damage.
Assuming you have followed above procedure, AVL will replace the damaged
parts as quickly as possible. An invoice will be issued with expectation for
payment via the claim reimbursement. Should the reimbursement be paid
directly to you, the invoice will become immediately due and payable by you.


Rug Loom User’s Manual Loom Assembly
Set Up Page | 11
LOOM ASSEMBLY

Loom Assembly Rug Loom User’s Manual
Page | 12 Before You Begin
BEFORE YOU BEGIN
Putting together your new loom may look intimidating at first, but this
manual is designed to guide you through the process with clear steps,
pictures, and diagrams. If the manual is unclear or confusing at any point,
call us at 530-893-4915. We’re here to help.
There is a definite advantage in assembling your own loom. You’ll come to
know it very well, sooner than you otherwise would, and the better you
know your loom, the better you’ll be able to use and maintain it.
Tools
You'll need a few basic hand tools to assembly your loom. We recommend a
couple of others that we think will make your job easier.
Ratchet and sockets: 7/16", 1/2", and 9/16"
Standard screwdriver
Medium Phillips screwdriver
Hammer or mallet
8" or 10" adjustable end wrench
Carpenter's level
Framing square
Pliers
Three wooden blocks or books (approximately 2" thick)
Step stool
Power screwdriver with assorted bits (optional)
Extra ratchet and sockets (optional)
You'll need an area roughly 10' x 10' in which to assemble the side frames.
If the floor is concrete, you may want to lay a tarp down to protect the
lacquer finish on the parts.
Once you’ve gathered your tools, place the boxes near the location where
you will be assembling the loom. Please DO NOT REMOVE the tape from
any of the components until we tell you. Also leave the hardware bags
unopened until they are required.
Keep as many of your packing materials as you can in case you need to ship
or store your loom in the future. Clear away your packing materials from
your working space. It’s best if you keep your work area as organized and
free of clutter as possible.

Rug Loom User’s Manual Loom Assembly
Before You Begin Page | 13
Inserting Nuts And Bolts
NOTE:
Given the limited space provided by the nut access holes, it can be
challenging at first getting the nuts onto the bolt ends. You’ll find it helpful to
push each bolt in just until it just appears in the access hole. Move the nut
into position over the end of the bolt and hold it with your finger. Slowly turn
the bolt clockwise and when the nut engages, tighten it most of the way
down.
If your fingers are too big to comfortably manipulate the nut, try holding it
with a flat blade screwdriver or needle-nose pliers. Always have the large
"nut access hole" facing toward the inside of the loom unless otherwise
specified. Square nuts always go in "nut access holes" and do not take a
washer.
Looms 8 feet or wider have steel beams as part of the structure. For these
looms, the bolts are screwed into a pre-threaded hole on steel beams. There
may also be wooden parts with nut access holes depending on the loom.
Figure 1 - Inserting Nuts
Note:
As you are building the loom, do not tighten the nuts all the way down. You
will tighten everything down once you have squared and leveled the loom as
described on page 20.

Loom Assembly Rug Loom User’s Manual
Page | 14 Side Frame Assembly
Hardware
If a bolt is a little tight going into a hole, give it a light, friendly tap with a
hammer.
Always put a washer under the head of a hex bolt. Any nut that is NOT in an
access hole also requires a washer. This will prevent damage to the wood.
If you have trouble turning a screw into the wood on your loom, try dressing
the threads with a little bar soap.
The rug loom consists of large, heavy parts and assemblies that may require
more than one person to hold in place during assembly. It can be helpful to
place bolts into partway place on the frame before placing cross members
into place. It will then be possible to insert the bolts the rest of the way
quickly into each hole. This will reduce the amount of time that the cross
member needs to be held in place.
SIDE FRAME ASSEMBLY
Your first task will be to construct the left and right side frames, to which
you will add the various other loom parts. As you work through the assembly
sequence, you will add components in the order given in the assembly
instructions.
You will need a 9/16” ratchet to assemble the side frames.
1) Locate boxes containing the side frames and remove the contents.
Note that each component is identified by number. These
numbers correspond to the Side Frame Assembly diagram.
2) Check the contents of the hardware bag against its packing list
and group similar bolts together. Each bolt should have been
fitted at AVL with a lock washer, a flat washer, and square nut, in
that order.
3) Separate the parts into the right and left frames. Assemble one
frame at a time.
4) Arrange the parts in your work area according to the diagrams.
Orient the pieces so that the large access holes face up.
Note:
It is usually easiest to begin with the longest part (1) and arrange the rest of
the side frame around it.

Rug Loom User’s Manual Loom Assembly
Side Frame Assembly Page | 15
5) Use the appropriate bolts, according to the diagram, to loosely
connect each part to its neighbors.
6) Once the frames are loosely connected, tighten all of the bolts.
Note:
If you have a wooden frame, make sure you do not tighten the bolts too much
and crack the wood.

Loom Assembly
Page | 16
Figure 2 - Left side frame
completed
completed
Rug Loom User’s Manual
Side Frame Assembly
Table of contents
Other AVL Looms Other manuals

AVL Looms
AVL Looms Compu-Dobby V User manual

AVL Looms
AVL Looms Dobby User manual

AVL Looms
AVL Looms TECHNICAL EDUCATION LOOM User manual

AVL Looms
AVL Looms K Series User manual

AVL Looms
AVL Looms HOME LOOM with Compu-Dobby III Quick reference guide

AVL Looms
AVL Looms Jacq3G User manual

AVL Looms
AVL Looms A Series User manual