AWS DeepRacer User manual

AWS DeepRacer
Getting started guide

Getting started guide
Contents
In the box
Vehicle at a glance
Preparation
Setup your vehicle
Connect to Wi-Fi
Drive
Drive and experiment
Tips
- Battery level and charging
- LED behavior guide
- Wi-Fi Connection troubleshooting
1
2
3-4
5-8
9-11
12
13-15
16-17
18-19
20

In the box
3
2
1
4
5
9
10a
7a
6a
10b
7b
6b
8
1. Vehicle chassis
2. Vehicle body shell
3. Micro-USB to USB-A cable
4. Compute battery
5. Compute battery connector cable
6a. Compute battery charge adapter
6b. Computer battery charge cable
7a. Vehicle power cable
7b. Vehicle power adapter
8. Pins (spare parts)
9. Vehicle battery
10a. Vehicle battery charge adapter
10b. Vehicle battery charge cable
11. Silicon cable holder (not shown)
12. White marking tape (not shown)
1

Vehicle at a glance
Front
Front
Back
Back
Camera
4 MP camera
with MJPEG
SD card slot
Power button
HDMI
Micro USB
USB C
USB
Reset button
Power on/off
Vehicle chassis
Status LEDs
Compute
module
Customizable LED
Compute battery on/off
2

1. Charge compute battery
Connect the compute charge adapter, the compute
battery charge cable and the compute battery. Plug
into an power outlet to charge.
Note: Press button to power on. Battery indicator
LEDs glow when battery is charged or at capacity.
2. Charge vehicle battery
Connect the vehicle battery charge adapter, the
vehicle battery charge cable and the vehicle
battery. Plug into an power outlet.
Note: Green LED - full charge and ready
Preparation
Charge batteries
Approx. time: 2hrs.
Red and green LED indicates
vehicle battery is charging
3
4
6a
6b
910a
10b

Vehicle battery
DeepRacer vehicle
Compute
battery
Compute
battery
connector
cable
Preparation
Gather these items
4

Setup your vehicle
1. Unpin and remove vehicle shell 2. Unpin chassis by removing four pins
4. Connect vehicle battery
Use the red connector cable, the white
connector is for charging
Note: wires attached
3. Lift compute module
Approx. time: 5-10min.
5

5. Insert vehicle battery in the cradle 6. Secure vehicle battery with velcro strap
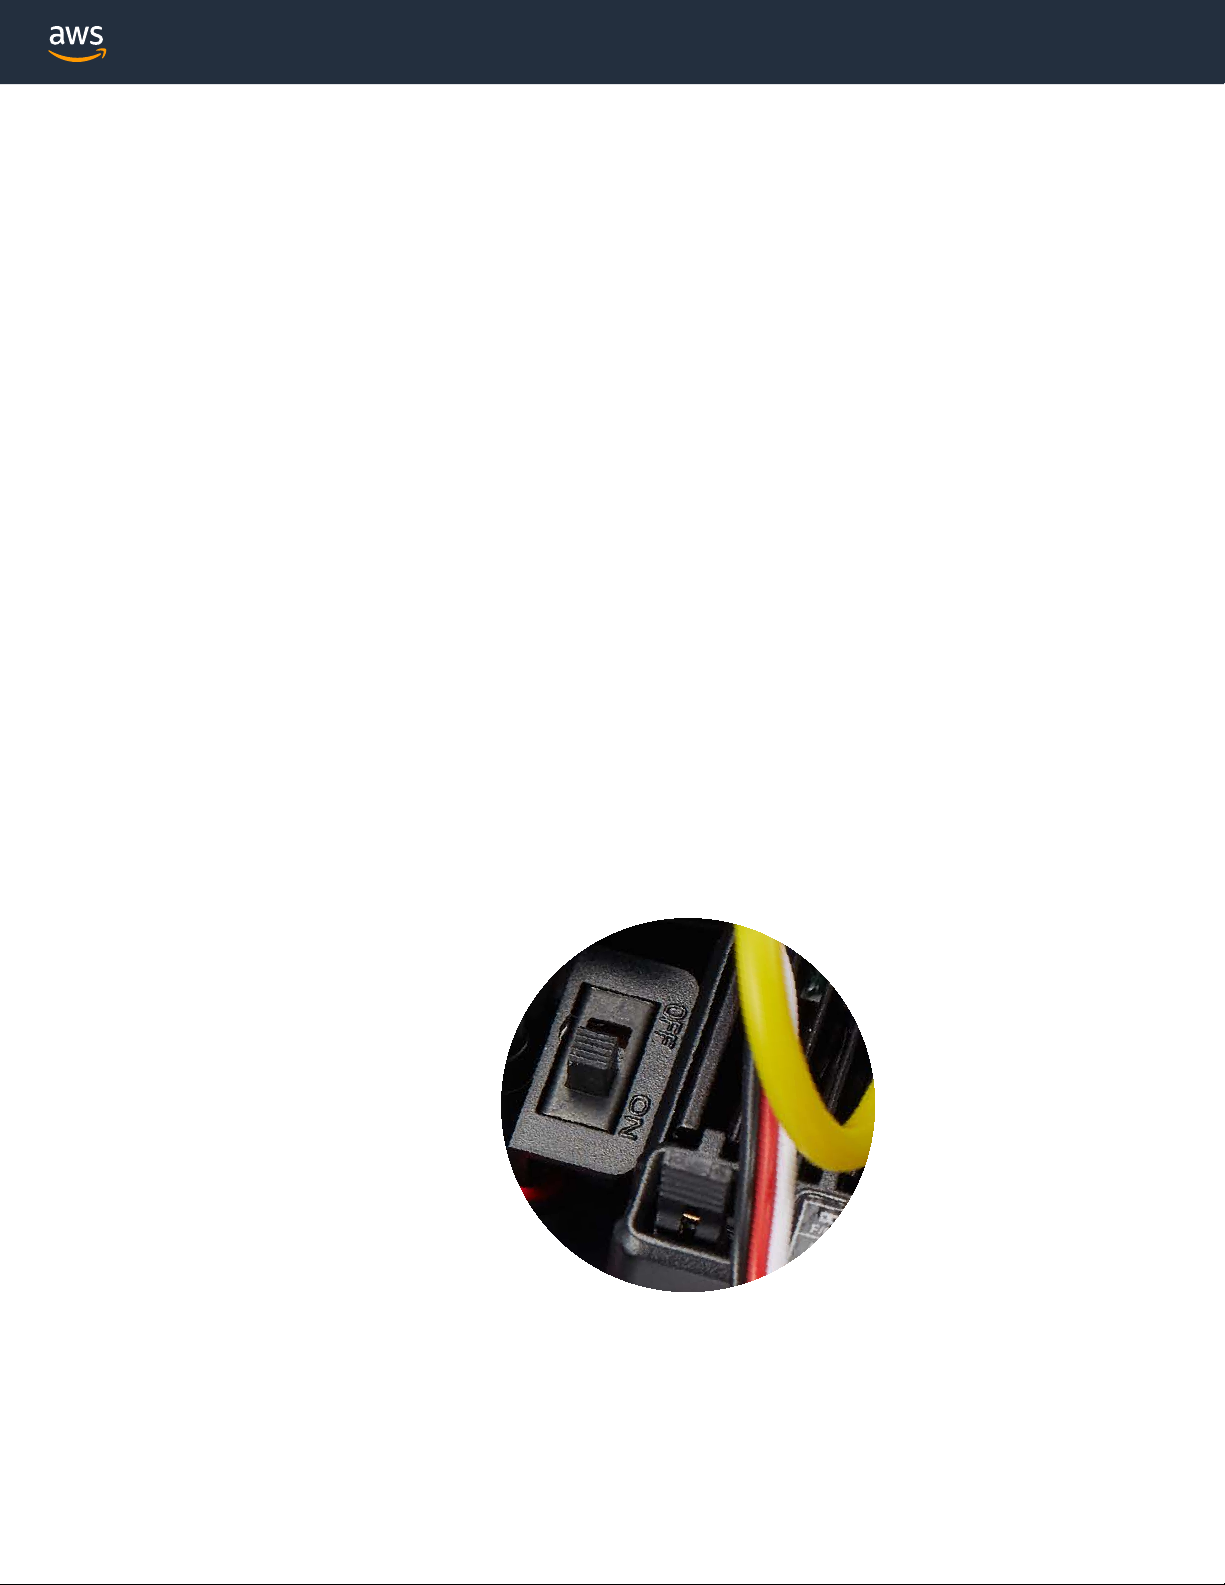
7. Turn switch on, then off
Setup your vehicle
Listen for an indicator sound, then switch off
Note: Sound indicates the vehicle battery has charge and everything is working
6

Setup your vehicle
8. Secure vehicle with four pins
10. Insert compute battery in cradle
and coil cable
11. Secure compute battery and cable
velcro strap
9. Connect compute battery to vehicle
7
Connect one side of the cable to the battery
and the other side to the USB-C port of the
vehicle
Use the same orientation of the battery as
shown

Connect to Wi-Fi
Let’s get your vehicle
connected to a Wi-Fi
network and use the
vehicle’s IP address to
drive your vehicle manually
and autonomously.
1. Connect vehicle to computer with
micro-USB/USB-A cable
Approx. time: 10-15min.
9

Connect to Wi-Fi
Note: Write down the password, you will need to use it later.
Some letters in the password might be hard to recognize.
Try ‘l/I, o/O/0 and i/l’ if your password doesnt work
4. Password printed on the bottom of the vehicle
xxxx-xxxx
xxxxxxxx
xxxx-xxxx
xxxxxxxx
Select advanced and ‘Proceed to deepracer.aws’
to get to unlock your AWS DeepRacer
Note: Firefox requires a trust certificate
3. Proceed with a non-private connection2. Open browser, enter deepracer.aws
https://deepracer.aws
Note: Disable Wi-Fi on your computer and
disconnect ethernet cable
Trouble connecting, see Wi-Fi Tips
10

Connect to Wi-Fi
5. Update Wi-Fi network to establish vehicle IP address
6. Write down vehicle IP address to access your
vehicle on any browser
Note: This is an example, not a your vehicle IP address
https://192.12.68.04
11
Next: Drive
6. Unplug micro-USB/USB-A cable connecting
vehicle to computer

Drive
Listen for an indicator sound, two short
beeps and one long beep
12
1. Switch on vehicle
2. Enter vehicle IP address to access
your vehicle on any browser
3. Enter password to drive
4. Update software
Note: This is an example, not a your
vehicle IP address
Note: Found printed on the bottom of
your vehicle
Refresh browser if the software update takes more than 10min.
https://192.12.68.04
Use any device with a
browser to drive your
DeepRacer
Connect your device to the
same Wi-Fi network as
your AWS DeepRacer
Next: Drive and experiment

Drive and experiment
1. Manually drive
2. Build a straight track
Manually drive your vehicle with the touch joystick.
13
Approx. time: 5min.
Build a straight track segment to
experiment with pre-loaded
reinforcement learning (RL)
sample_model. The model has been
optimized to stay within boundaries.
A. Turn on the vehicle, see Drive for details
B. Gradually increase throttle limit
Note: If the vehicle moves backwards, see Calibration in navigation menu
A. Lay down tape on one border of the straight line.
Length varies on available space.

14
Drive and experiment
C. Lay down a parrallel line and
match the length.
D. Place the vehicle at one edge
of the track.
3. Autonomous driving mode
A. Select the Autonomous driving mode, load the Sample_Model using the drop down.
B. Press Start vehicle button
C. Gradually increase the Maximum speed % until model begins to move
Note: Check if the vehicle switch is on.
In general, optimizing a trained model for transfer to a physical AWS DeepRacer vehicle is a
challenging learning process. It often requires iterations through trials and errors.
For more tips, see Optimize Training AWS DeepRacer Models for Real Environments
B. Measure a width of approx.
24”, excluding tape borders.

Drive and experiment
15
Go to https://www.aws.amazon.com/deepracer
4. Train your own reinforcement learning (RL) models
5. Join the DeepRacer League
Summit Circuit: Find a Race
Welcome to the world’s first global autonomous
racing league, open to anyone.
Train your own RL models and watch training in simulation. Evaluate models
and download models to your AWS DeepRacer to test on tracks.
DEEPRACER
6. Join the community
DeepRacer forum
DeepRacer Slack channel
DeepRacer Github issues
DeepRacer documentation

Compute battery charge
Charge compute battery
Tips
Battery level and recharging
Press and hold the power button to
turn on/off.
Note: LED represents battery level
Connect charger and charger cable
to an outlet.
16

Vehicle battery
Use the white cable and insert in
vehicle battery charger.
Green: fully charged battery
Red: battery needs recharging
Tips
Battery level and recharging
Green/Red LEDs - charge required
17

Understanding LED behavior
Battery LED Guide
Solid blue: Batery charged, application running
Blinking blue: updating software
Yellow: Device booted to OS
Blinking Yellow: Loading BIOS and OS
Red: Error in system when rebooting or starting application
Tips
18
Other manuals for DeepRacer
2
Table of contents
Other AWS Motorized Toy Car manuals
Popular Motorized Toy Car manuals by other brands

THUNDER TIGER
THUNDER TIGER G3 ER-4WD Instruction manual & parts catalogue

Horizon Hobby
Horizon Hobby Axial WRAITH 1.9 instruction manual

WLtoys
WLtoys 124019 manual

Carrera RC
Carrera RC Red Bull RC2 Assembly and operating instructions

Tamiya
Tamiya Super Fighter G manual

HPI Racing
HPI Racing micro RS4 instruction manual