axess vision Screeni 30030001 User manual

1
30030511-C
www.axessvision-tsc.com
1639
EN
Screeni®
User manual
Screeni® 30030001

2
30030511-C
Table of Contents
1. Important information – read before use .............................................................................................. 3
1.1. Foreword ............................................................................................................................................................ 3
1.2. Intended use ....................................................................................................................................................... 3
1.3. Indications for use .............................................................................................................................................. 3
1.4. Contraindications ................................................................................................................................................ 3
1.5. User qualification ................................................................................................................................................ 3
1.6. Warnings and cautions for use ........................................................................................................... 4
1.7. Instrument compatibility ...................................................................................................................................... 4
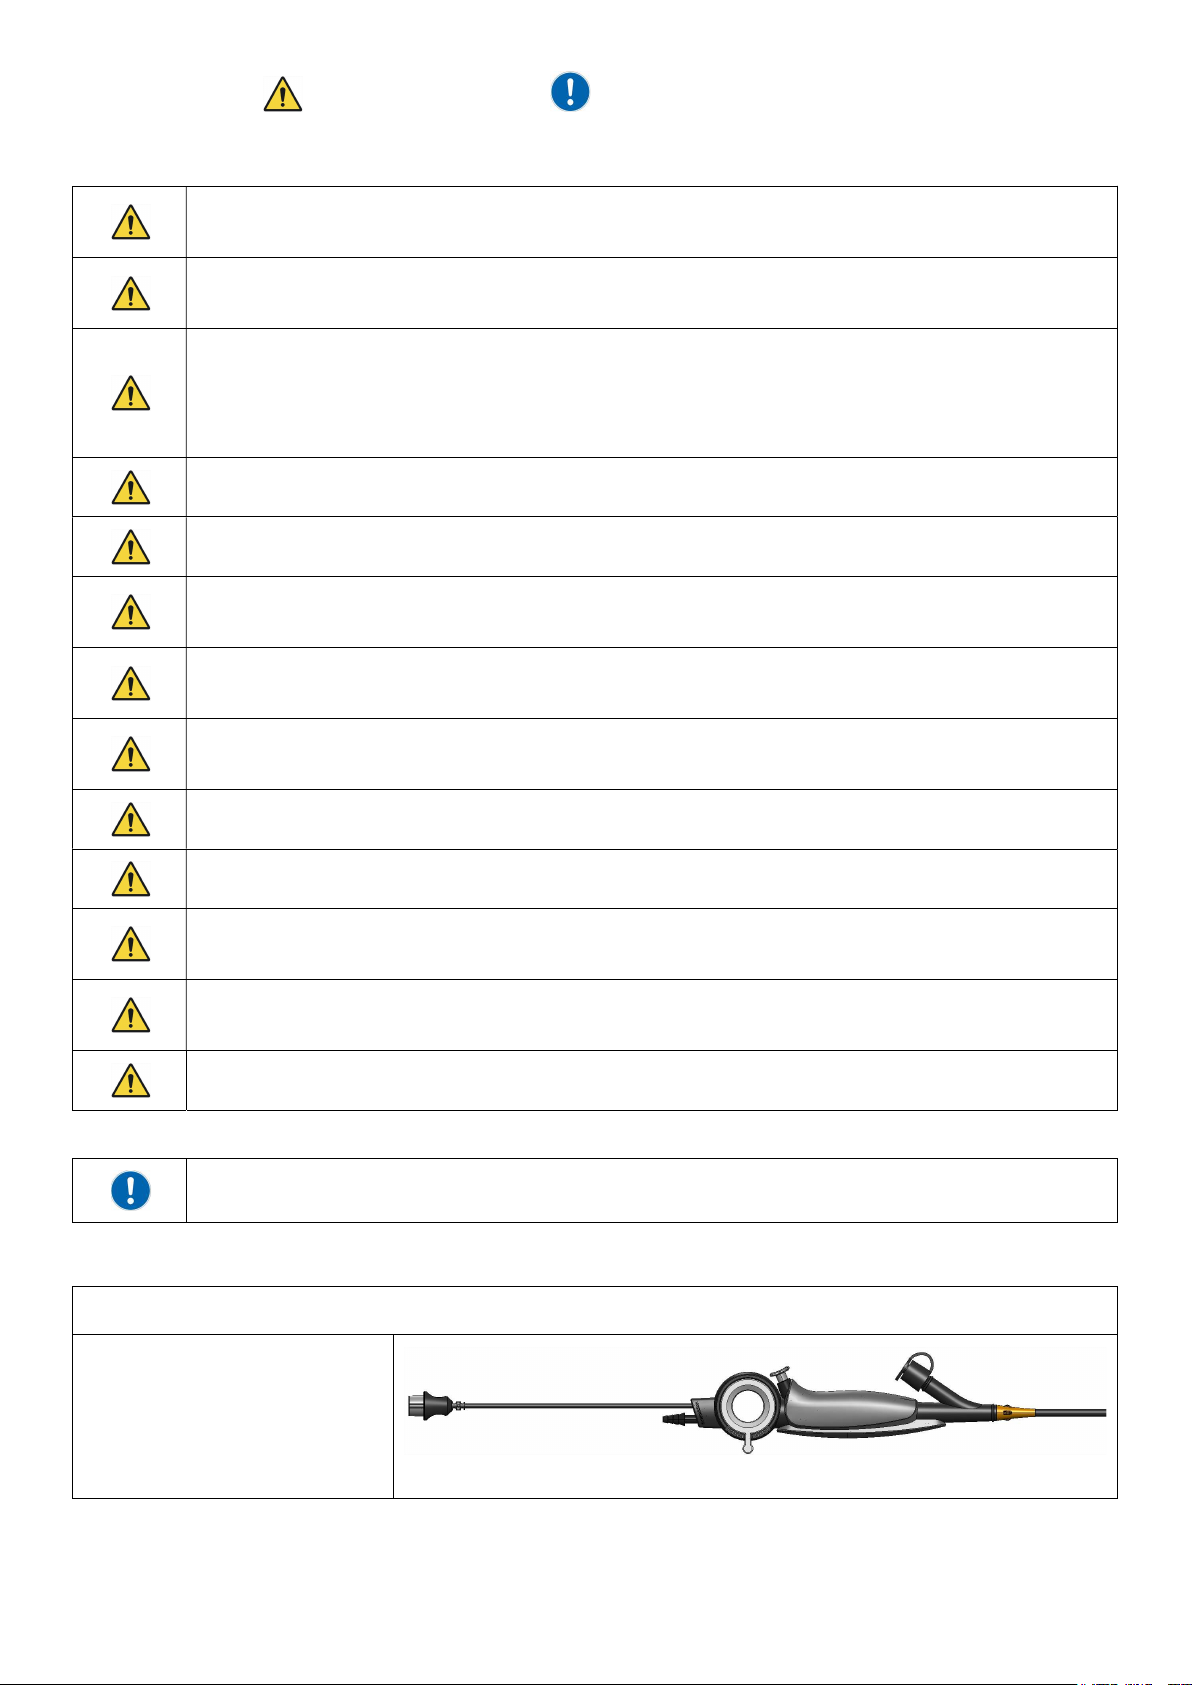
2. Description of the Screeni and accessories ......................................................................................... 5
2.1. Product description ............................................................................................................................................. 5
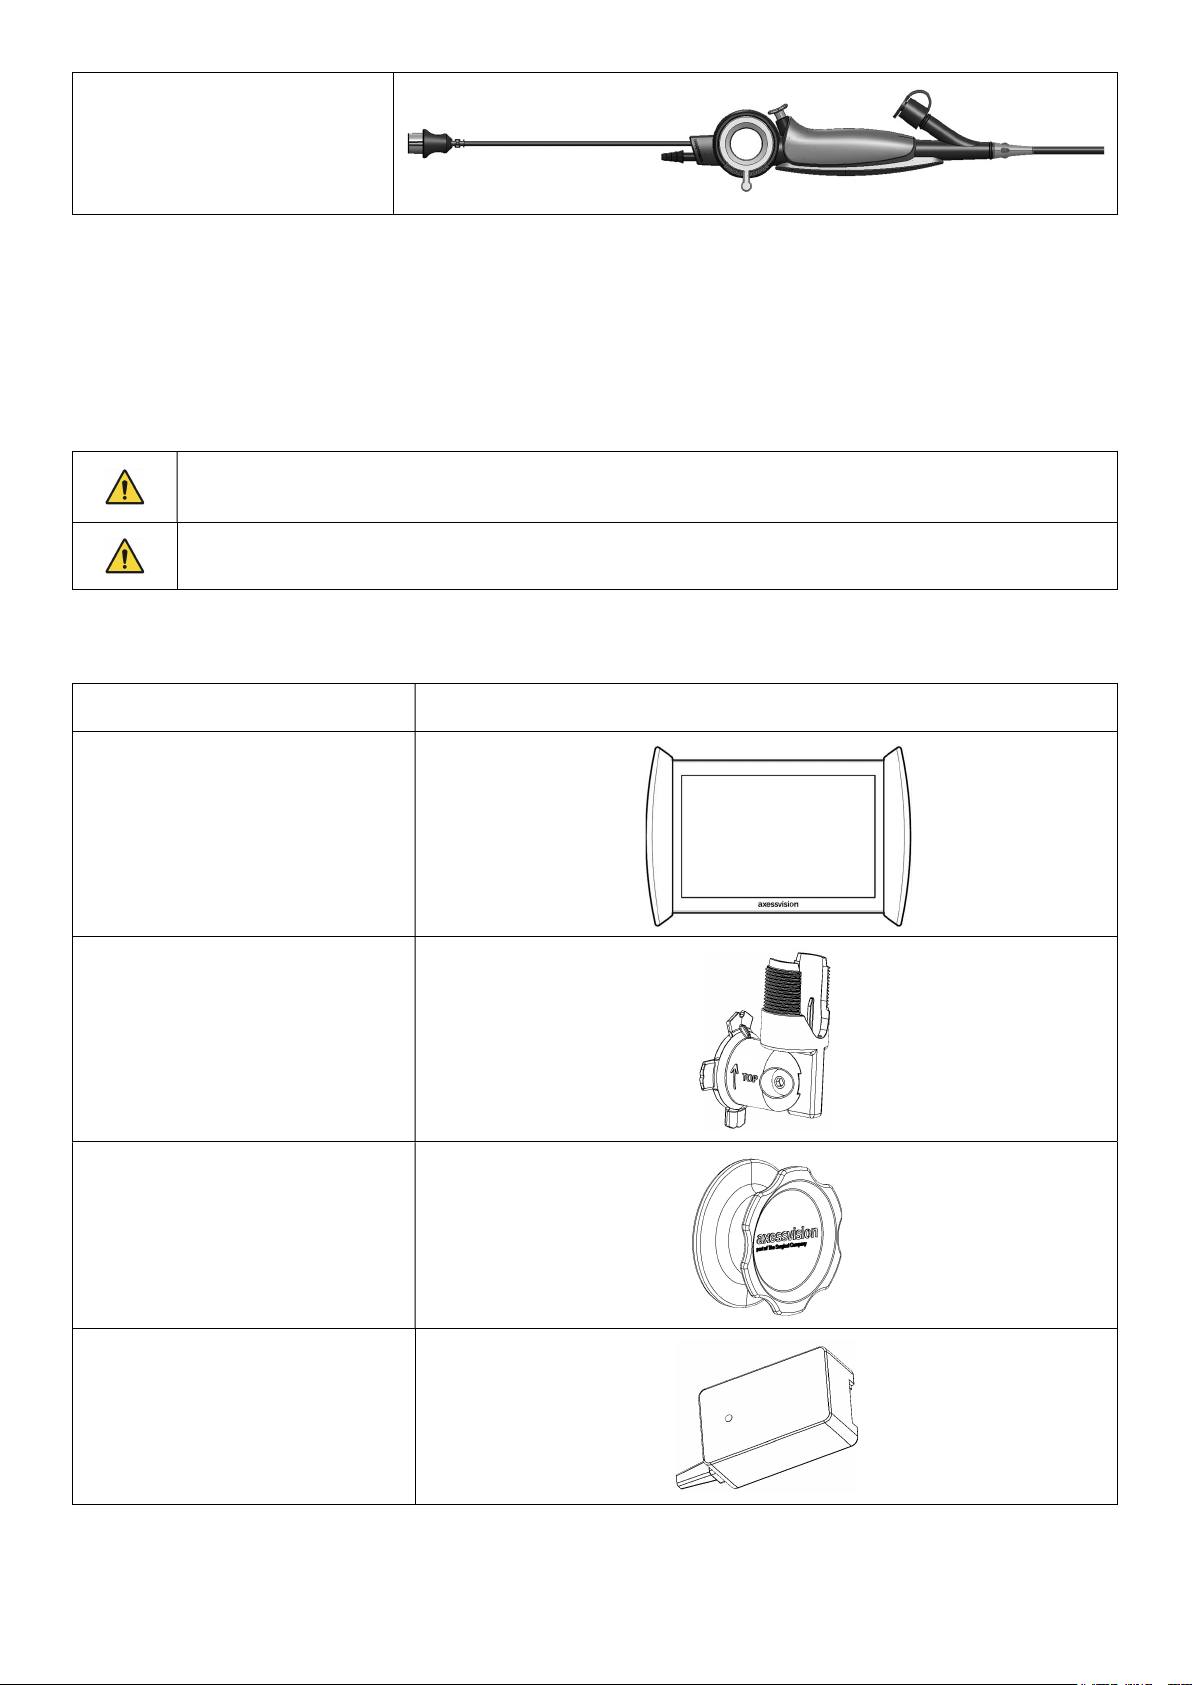
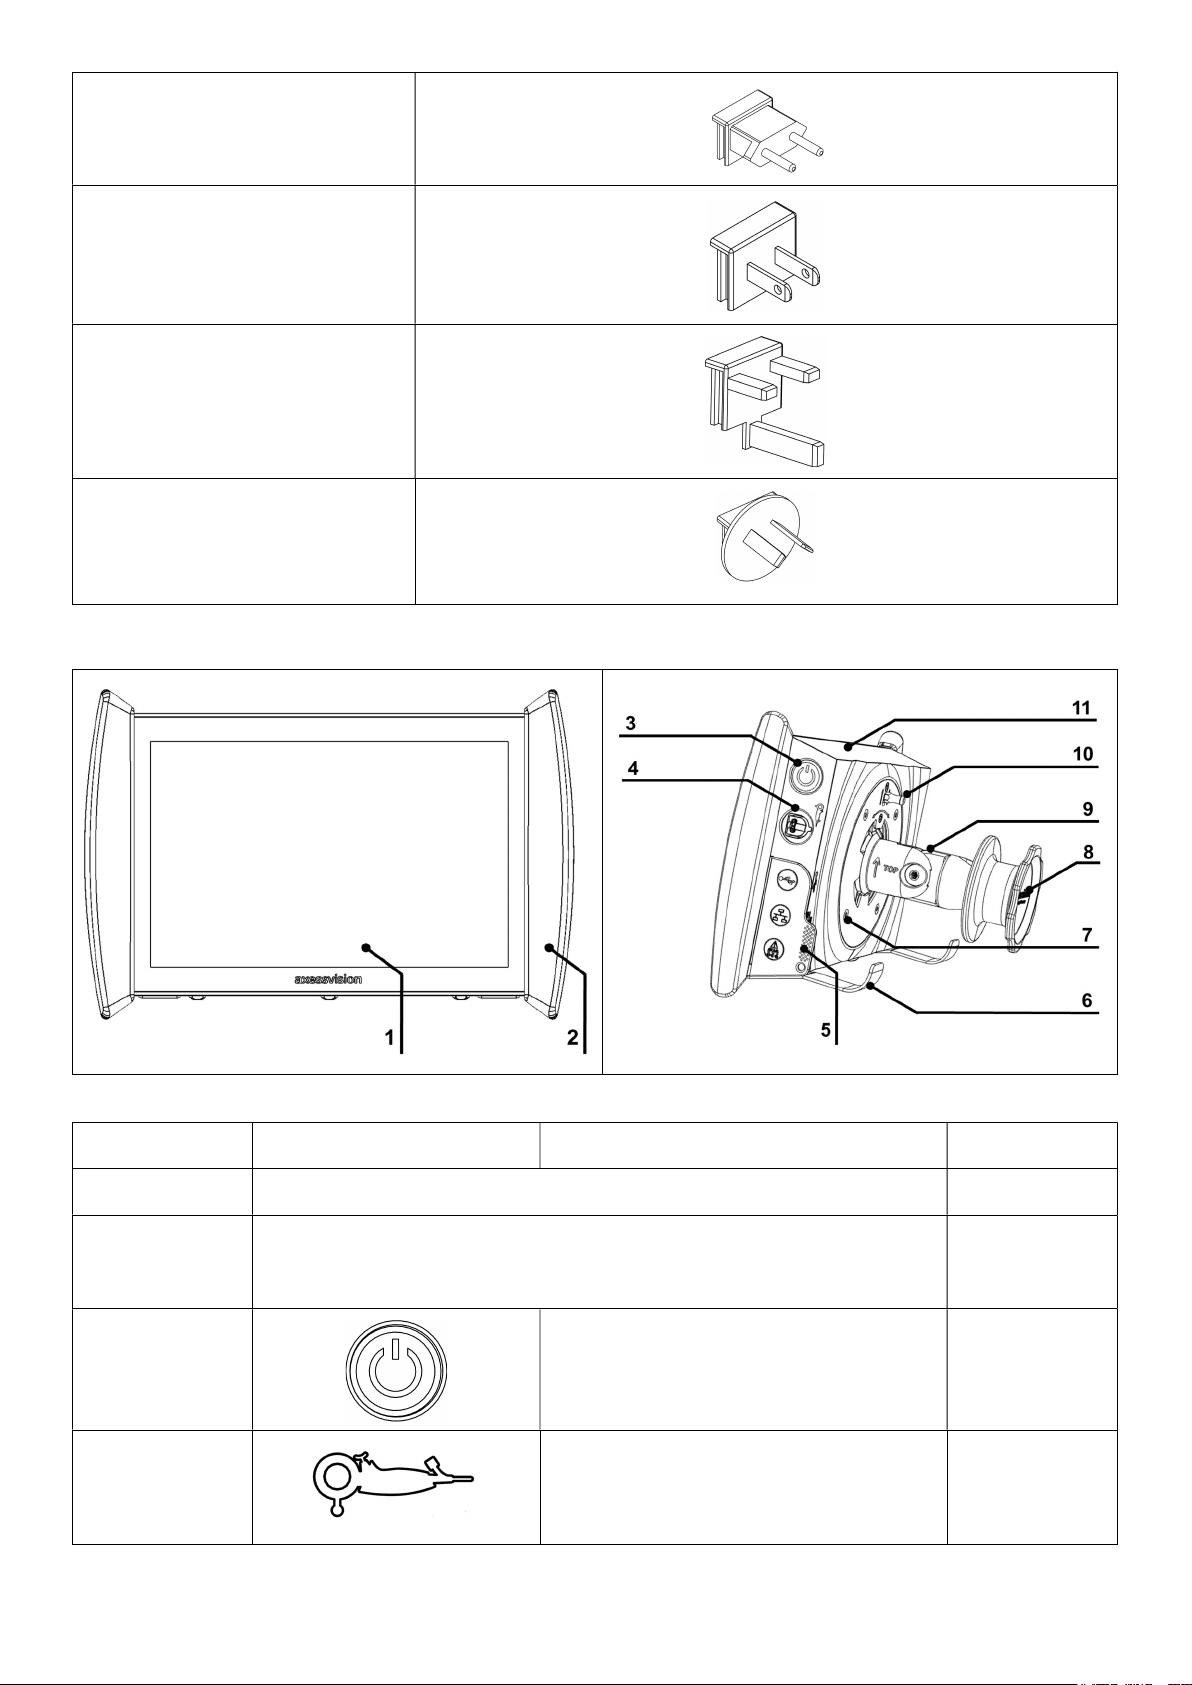
2.2. Inspecting package contents .............................................................................................................................. 5
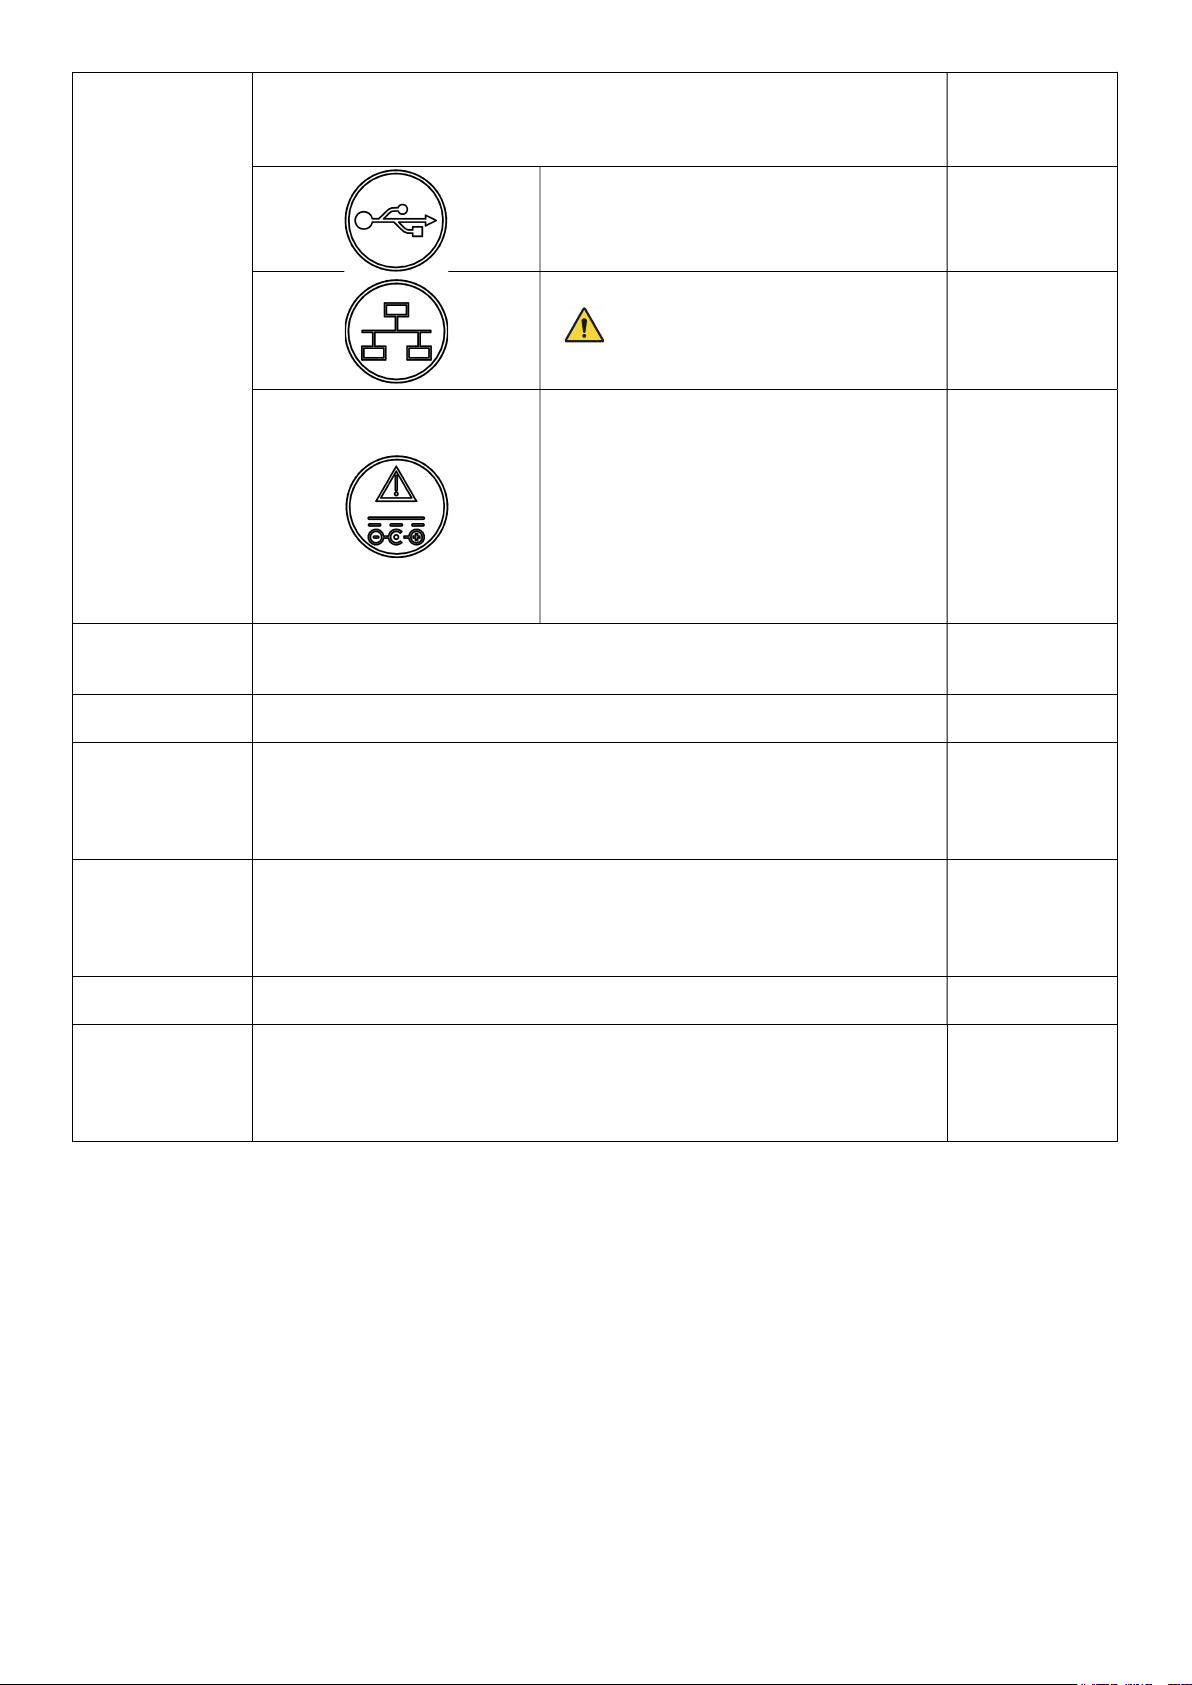
2.3. Screeni details .................................................................................................................................................... 6
3. Installation and connection ................................................................................................................... 7
3.1. Precautions prior to use ..................................................................................................................................... 7
3.2. Installation .......................................................................................................................................................... 8
3.3. Power connection ............................................................................................................................................. 11
4. Instructions for using the Screeni ....................................................................................................... 11
4.1. Using the Screeni for an examination .............................................................................................................. 11
4.2. System shutdown ............................................................................................................................................. 14
4.3. Examination management ................................................................................................................................ 14
4.4. Settings management ...................................................................................................................................... 16
5. Cleaning precautions ........................................................................................................................... 17
6. Warranty ................................................................................................................................................ 17
7. Troubleshooting ................................................................................................................................... 17
8. Maintenance .......................................................................................................................................... 18
8.1. Nature and frequency of maintenance and calibration..................................................................................... 18
8.2. Certificate of compliance with the specifications .............................................................................................. 18
9. Transport, storage, use and disposal ................................................................................................. 18
9.1. Conditions of transport, storage and use ......................................................................................................... 18
9.2. Waste disposal ................................................................................................................................................. 18
10. Labels and meaning of symbols ........................................................................................................ 19
11. Technical information ........................................................................................................................ 20
11.1. Essential performance .................................................................................................................................... 21
11.2. Information concerning the electrical protection class ................................................................................... 21
11.3. Electromagnetic compatibility information ...................................................................................................... 21
11.4. Applicable standards ...................................................................................................................................... 24
12. Manufacturer’s contact details .......................................................................................................... 24
EN

3
30030511-C
1. IMPORTANT INFORMATION – READ BEFORE USE
“WARNING” indicates a particularly hazardous situation. Failure to observe the instruction may damage
the instrument, cause injury, or even death.
“CAUTION” indicates that use or improper use of the instrument may cause a problem, such as product
malfunction, failure or damage.
1.1. Foreword
This user manual contains essential information for the safe and optimal use of the Screeni. The information in this user
manual is subject to change at any time, without notice. Make sure that you are using the latest version by logging onto
the Axess Vision website www.axessvision-tsc.com or contacting the distributor.
This user manual does not contain any explanations of information concerning endoscopic techniques per se.
Carefully read this manual, along with the manuals for all the instruments used, and use them as instructed. Keep all
user manuals in a safe and readily accessible place. Should you have any questions or comments concerning this
manual, do not hesitate to contact the distributor.
This manual describes the recommended inspection and preparation procedures prior to use of the equipment, the
procedures for its use and the precautions to be followed for cleaning and maintenance after use.
Carefully follow all the instructions given in this user manual. Poor understanding of these instructions could lead to:
severe injuries to the patient,
severe injuries to the user,
severe injuries to a third party,
equipment damage.
1.2. Intended use
This product was developed by the company Axess Vision and is exclusively reserved for the endoscopic examinations
claimed in the manual of the endoscope used (see list of compatible devices).
The Screeni is used for viewing the lungs and airways by means of a single-use endoscope. The Screeni should not be
used for any purpose other than that described herein.
1.3. Indications for use
This device is designed for use exclusively in a hospital environment, in combination with an Axess Vision Broncoflex®
video-bronchoscope. For more information on the endoscope used, see the user manual of the endoscope (found in its
transport box and available on the Axess Vision website www.axessvision-tsc.com).
1.4. Contraindications
The images generated by this device should not be used for diagnostic purposes. Physicians must interpret and support
any findings in other ways, based on the patient's clinical data.
1.5. User qualification
The Screeni can be used by an anaesthesia nurse, scrub nurse, or any other person authorised to interact with and
prepare the equipment before a medical procedure under the responsibility of the physician in charge of examining the
patient.
Where there are official standards and/or regulations relating to user qualification for performing endoscopy, and
endoscopic treatment defined by the medical administration or by other official institutions, such as the academic
endoscopy society, these must be respected.
Otherwise, this instrument should only be used by a doctor approved by the head of department responsible for accident
prevention in the hospital or by the person in charge of the corresponding department (pulmonology department, etc.).
The physician must be able to perform the video endoscopy and the planned endoscopic procedure, safely, in
accordance with the guidelines set by the academic endoscopy society and considering the risks of complications
related to endoscopy and the endoscopic procedure.

4
30030511-C
1.6. Warnings and cautions for use
Observe all the warnings and precautions described in this manual. Otherwise, Axess Vision cannot be held liable in
case of injury to the patient or user or damage to the device.
The Screeni should only be used with endoscopes marketed by Axess Vision (see § 1.7 "Instrument
compatibility").
The use of incompatible instruments may result in injury to the patient and impede the correct operation
of the video-endoscopic system.
Any modification of the Screeni by the user is strictly forbidden. Failure to comply with this instruction
may result in injury to the patient or the user and/or impede the correct operation of the video-endoscopic
system.
If the Screeni malfunctions, see § 7 "Troubleshooting" or contact the distributor.
Do not expose the Screeni to water or moisture or allow prolonged exposure to the sun.
The Screeni power cable should be placed in an area where there is no risk of it being crushed.
If the power cord is damaged or bare, replace it immediately with another of the same type and rating
provided by the manufacturer.
If the Screeni is exposed to liquids (in a manner contrary to the cleaning instructions), in the event of a
fall, or if the case is damaged, switch off the Screeni and return it to the manufacturer.
Use only the cables and accessories supplied by the manufacturer for the Screeni (list available in § 2
"Description of the Screeni and its accessories").
Avoid touching the electrical contacts of the Screeni.
Do not simultaneously touch the patient and any metal part of the Screeni.
For battery-powered use, the charge must be checked before starting the examination. If the battery is
low, connect the Screeni to the mains to perform the exam.
Do not connect the Screeni to the hospital computer network. The Ethernet port is for maintenance
purposes only.
US federal law restricts this device for sale only by, or on the order of, a physician.
Do not use sharp or hard objects to press the On/Off button.
1.7. Instrument compatibility
Compatible devices from the Axess Vision range
Broncoflex® Vortex
Reference: 10030001
Applied part

5
30030511-C
Broncoflex® Agile
Reference: 20030001
Applied part
2. DESCRIPTION OF THE SCREENI AND ACCESSORIES
2.1. Product description
The Screeni is a non-sterile reusable medical device. It is a video processor with integrated touch interface designed to
display live imaging data captured by sterile disposable endoscopes marketed by Axess Vision.
2.2. Inspecting package contents
When unpacking, any defective instrument should be returned in its original box to the local Axess Vision-
approved distributor.
When unpacking and handling the fastening system, take care not to pinch your fingers.
Compare the contents of the package with the items shown below. Ensure that all accessories and components shown
below are present and in good condition.
Description Illustration
Screeni
Reference: 30030001
Quick mounting bracket
(already attached to the Screeni)
Reference: 30030301 + 30030302
Knurled screw
Reference: 30030303
Medical-grade power supply
(FRIWO FOX30-XM)
Reference: 00030001

6
30030511-C
EU adaptor
Reference: 00030002
US adaptor
Reference: 00030006
UK Adaptor
Reference: 00030007
AU adaptor
Reference: 00030008
2.3. Screeni details
# Symbol Description Material
1 Touch screen display. Glass
2 Bumper for handling the Screeni.
TPE
(thermoplastic
elastomer)
3
Screeni On/Off button.
The button lights up to indicate that the
Screeni is switched on.
Silicone
4
Port for connecting the Axess Vision
endoscope to the Screeni. -

7
30030511-C
5
Flexible connector protection tab:
TPE
(thermoplastic
elastomer)
USB port for USB key connection only
(self-powered hard discs must not be
connected).
Ethernet port.
For use by qualified personnel
for maintenance purposes only.
Power connector 15V DC - 2A.
Under this connector an LED indicates the
charge status of the Screeni:
Orange: charging
White: switched on, not charging
Flashing orange: charging error (see
§ 7 “Troubleshooting”).
6 Support feet / packaged endoscope support system when the system is
attached to an IV pole (maximum load: 4 endoscopes). Stainless steel
7 VESA 75 compatible mounting bracket. Stainless steel
8 Screw knob for fixing to an IV pole and serving as a take-up reel for the power
cable.
ABS
(acrylonitrile
butadiene
styrene)
9 Quick-connect system for vertical tube, diameter between 15 and 25.4 mm
(such as an IV pole, for example).
ABS
(acrylonitrile
butadiene
styrene)
10 Lever to release the quick-connect system. Stainless steel
11 Housing.
ABS
(acrylonitrile
butadiene
styrene)
3. INSTALLATION AND CONNECTION
3.1. Precautions prior to use
Perform a general inspection of the product:
No damage (e.g. deformations or cracks) should be visible.
It should be clean and free from cleaning agent or disinfectant residues.
Ensure that no parts are missing and that all parts are properly attached.
Ensure that the cables are neither broken nor damaged.
Check that the accessories present with the system are those supplied by Axess Vision.
Make sure the battery charge is sufficient before the examination starts. If not, mains operation is required.
If you notice any anomalies, do not use the Screeni and refer to the instructions in § 7 “Troubleshooting”. If this section
fails to eliminate the anomaly, please contact the distributor. Any physical damage or other defects may endanger the
patient or user and seriously damage the endoscopic system.

8
30030511-C
3.2. Installation
The Screeni offers two installation possibilities: on feet, in which case it must be placed on a flat and stable horizontal
surface, or fixed to a stable vertical tubular support *.
3.2.1. Assembly and disassembly on vertical tubular support
a) Mounting
1) Unfold the quick-connect bracket. 2) Position the bracket on the vertical tube
and tighten the knob until the assembly is
immobilised.
Make sure the Screeni is secure, without
risk of falling or tipping.
b) Removal
Unscrew the knob while holding the Screeni and place it on a stable horizontal surface.

9
30030511-C
3.2.2. Quick removal and mounting of the Screeni leaving the fixing system on the vertical support
a) Mounting
1) Ensure that the quick-connect bracket
is properly installed ("Top" arrow on
the side of the bracket facing
upwards) and correctly tightened on
the IV pole.
2) Present the Screeni at a 45° angle and slot it into the quick-
connect bracket, then rotate it to the right or left until it
locks.
Check the stability of the assembly and that the lever is
locked.

10
30030511-C
b) Removal
1) Raise the lever located on the back of the
Screeni.
2) Holding the lever in the up position, rotate the
Screeni to the right or left and remove it from its
quick-connect bracket.
3.2.3. Tilting the Screeni
When the Screeni is in position on its quick-connect bracket, it is possible to adjust its vertical tilt, holding the bumpers:

11
30030511-C
3.2.4. VESA mounting
The Screeni can be mounted on a VESA 75x75 mount. To do this, remove the quick-connect bracket as described in §
3.2.2 "Quick removal and mounting of the Screeni leaving the fixing system on the vertical support".
Next, attach the Screeni to the VESA mounting bracket (not supplied) using four M4 x 10 mm screws (not supplied).
Comply with the size of the screws for VESA mounting to avoid any system damage.
3.3. Power connection
See the list of connectors contained in the package, connect the appropriate power adaptor to the power supply
according to the geographical area of use of the system. To change the mains adaptor, see the power supply manual
supplied in its packaging.
If used for the first time, connect the power cord to the Screeni and connect the power supply to a power socket.
Use only the power cable provided by Axess Vision to power and charge the Screeni (see list of
components presented in § 2 "Description of the Screeni and its accessories").
When using a power strip to power the Screeni:
verify that it complies with the IEC 60884-1 standard,
make sure that it is not placed on the floor, to prevent possible ingress of liquids and to avoid
mechanical or electrical damage.
The use of accessories, transducers or cables other than those described and supplied by Axess Vision
may result in an increase in electromagnetic emissions or reduce the electromagnetic immunity of the
Screeni and cause a malfunction.
The power connector LED lights up white when the Screeni is fully charged and connected to mains power, and orange
if the Screeni is charging on mains power.
4. INSTRUCTIONS FOR USING THE SCREENI
The Screeni comes with built-in software. The version number of the installed software can be accessed by simply
clicking the "axess vision" button/logo (12) from the home page. For information concerning the latest software features,
go to
www.axessvision-tsc.com or contact the distributor.
4.1. Using the Screeni for an examination
If the following battery symbol is displayed , connect the Screeni to the mains immediately before
continuing the examination.
A full battery charge takes about 3 hours.
1) Switch on the Screeni by pressing the "On/Off" button.
VESA mounting brackets (75x75)

12
30030511-C
When the home interface below is displayed, the system is operational:
# Meaning
11 Battery charge level.
12 Indication of software version.
13 Access the examination manager.
14 Access Screeni settings.
15 Indication of the location of endoscope connection.
2) Check the battery charge level indicator (11)
Logo displayed Battery power indicator
Battery charging
100% - 80%
70% - 50%
40% - 20%
15% - 5%
Battery fault
(See § 7
“Troubleshooting”
)
3) Connect the endoscope to the Screeni
The system automatically switches to "live":
Connect the endoscope to the Screeni before using it on the patient.
Before each use, ensure that the orientation of the images observed using the endoscope is correct
and check whether the image displayed is live or not.

13
30030511-C
# Meaning
16 Start/Stop a video recording of the current examination.
17 Take a photo of the current examination.
18 Examination name.
19 Batch number of the endoscope in use.
20 Symbol indicating whether the endoscope has already been used (absent by default).
21 Last photo taken (pressing the last photo taken provides access to current examination
management: see § 4.3 “Examination management”).
22 Adjust "live" image brightness.
23 Edit the examination name.
24 “Live” indicator.
4) Check that a live video image appears on the screen. Point the distal tip of the Broncoflex display device to an
object or the palm of your hand and make sure that the "LIVE" indicator appears.
If the symbol is displayed, this indicates that the endoscope has already been connected to a
Screeni. The user is responsible for continuing the examination.
5) To finish the examination, disconnect the endoscope from the Screeni after removing it and moving it away
from the patient. The home screen is displayed once more. See the instructions for use of the endoscope used
for details concerning its disposal.
Should the endoscope become disconnected during an examination, reconnect it, making sure to hold
the connector by its plastic part.

14
30030511-C
4.2. System shutdown
Disconnect the Broncoflex display device from the Screeni if you have not already done so.
If the charge level of the Screeni battery is low, charge it (see § 3.3 "Power connection ").
Switch off the Screeni by pressing the On/Off button once. You will be asked to confirm the shutdown request. If no
response is given to the system, shutdown is automatically cancelled.
See § 5 "Cleaning and disinfection precautions" for cleaning the Screeni.
4.3. Examination management
To access exam management:
Press the dedicated button on the home page,
Press the last photo taken from the "live" page.
# Meaning
25 Export an examination (the button is enabled when a USB key is connected to the system).
26 Delete an examination.
27 Back to the previous screen (back to "live" if an examination is in progress).
The USB port is for connecting a USB flash drive only.
Do not remove the USB drive while it is copying examination data as this may corrupt the contents of
the USB key.
At any moment during the examination, you can return to the "live" view by pressing the "home" or "back"
buttons.

15
30030511-C
28 List of examinations contained in the system.
29 Scroll through saved records.
30 Back to the home screen (back to "live" if an examination is in progress).
When a record is selected from the examination list, the following interface is displayed:
# Meaning
31 Rename the examination being viewed.
32 Delete a file.
33 Details of the selected examination.
34 Thumbnail display area.
35 Scroll through files.
36 Selected file viewing area.
From the examination review page, the following actions are possible:
Review photos and videos made during an examination,
Rename the examination,
Delete the file being viewed,
Transfer the examination to a USB key connected to the system.

16
30030511-C
When replaying a video, a controller appears, allowing you to navigate easily within the video:
# Meaning
37 Video navigation bar.
38 Rewind the video by 1 second (if video paused) or 5 seconds (if video in playback mode).
39 Resume video playback.
40 Pause video playback.
41 Fast forward the video by 1 second (if video paused) or 5 seconds (if video in playback mode).
42 Information on the current position of the video and its total duration.
4.4. Settings management
The settings are only accessible when no examination is in progress, from the home page using dedicated button 14
# Meaning
43 Set time.
44 Password locking of examination manager access.
45 Set date.
46 Language selection.
47 System language.
48 Access administrator settings. This feature can only be used by the manufacturer/distributor and is
password-protected.

17
30030511-C
5. CLEANING PRECAUTIONS
It is recommended to clear the Screeni regularly, in accordance with the hospital’s standards and protocols or applicable
local regulations. The following solutions should be applied by wetting a non-abrasive sterile gauze compress and must
be compatible with those recommended below:
Mild detergent (pH 7 - 9) and water
Isopropyl alcohol and water, 70% by volume
After cleaning, the Screeni should be stored in a clean, dry place, in accordance with the atmospheric conditions detailed
in § 9.1 "Conditions of transport, storage and use".
6. WARRANTY
The Screeni has a two-year warranty from the date of purchase. Opening the Screeni will void the legal warranty.
7. TROUBLESHOOTING
Inspection indications and actions are proposed below to resolve most problems encountered.
In the event that the following instructions do not correct the problem, return the Screeni to the local authorised Axess
Vision distributor for analysis and repair or replacement of the product. To avoid any risk of contamination, it is strictly
prohibited to return a contaminated medical device.
Problem Cause(s) Actions
The Screeni will not
switch on
The battery is discharged Connect the Screeni to the mains with the specific
transformer, and check that the system is working again.
The battery is discharged
and no power supply
Check the connection to the hospital electrical network.
If the Screeni is connected to a power strip, check that
the power strip is working properly.
The power connector
light flashes orange
Battery fault Return the Screeni to the distributor.
The following battery
symbol is displayed:
No image despite a
connected endoscope
Faulty endoscope/Screeni
connection
First check that the endoscope has been detected,
making sure that the “live” page is displayed. Disconnect
and reconnect the consumable.
Faulty endoscope Connect another endoscope.
The Screeni must be switched off and the power plug must be removed from the socket before starting
the cleaning procedure.
Never immerse the Screeni in liquid, never clean the Screeni by autoclave or steam and never pour
alcohol directly onto the Screeni.
Do not spray or pour liquid solution directly onto the Screeni.
Disinfect if necessary, in accordance with the hospital’s standards and protocols or applicable local
regulations.
Check that no liquid comes into direct contact with any electrical components of the Screeni.
Never use a solution containing a ketone or an abrasive solution.

18
30030511-C
8. MAINTENANCE
8.1. Nature and frequency of maintenance and calibration
No calibration or maintenance is necessary.
Any modification of the Screeni by the user is strictly forbidden. Failure to comply with this instruction
may result in injury to the patient or the user and/or impede the correct operation of the video-endoscopic
system.
If the Screeni malfunctions, see § 7 "Troubleshooting" or contact the distributor.
8.2. Certificate of compliance with the specifications
The manufacturer, Axess Vision, certifies the compliance of its equipment, both in terms of design and manufacturing,
with the applicable directives and regulatory standards.
It uses the appropriate components taking into account:
their technical characteristics and their limitations,
their intended use and the electromagnetic environment.
9. TRANSPORT, STORAGE, USE AND DISPOSAL
9.1. Conditions of transport, storage and use
Parameters Minimum Maximum
Transport and storage
conditions
Temperature -10°C (14°F) +60°C (140°F)
Relative air humidity (no condensation) 10% 90%
Atmospheric pressure 80kPa 109kPa
Conditions of use
Temperature + 10°C (50°F) + 40°C (104°F)
Relative air humidity (no condensation) 30% 85%
Altitude and atmospheric pressure ≤ 2000m – 80kPa ~ 109kPa
Protection type
The Screeni has an IP30 protection rating.
It must be stored away from projections of foreign bodies less than 2.5 mm in diameter.
It must be stored away from liquid splashes as there is no protection against water drops.
9.2. Waste disposal
In accordance with Directive 2002/96/EC on Waste Electrical and Electronic Equipment (WEEE), Screeni belongs to
category 8 of WEEE (medical devices with the exception of all implanted and infected products).
In order to preserve the environment, the Screeni electronic interface unit must not be discarded with household waste,
but rather with waste electrical and electronic equipment for a cycle of reuse, recycling or any form of recovery of this
electrical and electronic equipment.
If necessary, return the Screeni unit to the distributor for disposal.
If you do not use the Screeni for several months, perform a full charge and battery strength test before
use.

19
30030511-C
10. LABELS AND MEANING OF SYMBOLS
The meanings of the various symbols and labels are described in the table below:
Symbol Meaning
Manufacturer
Date manufactured
Serial number
Catalogue reference
Class 2 electrical protection device
Read the instructions for use before use
Do not dispose of with normal household waste
Conformity marking as per the European medical devices directive (MDD) 93/42/EEC,
accompanied by the identification number of the notified body SGS
15V – 2A Input voltage: 15V DC; sink current: 2A
IP30
Symbol certifying protection against the effects of temporary immersion in water in
accordance with IEC 60529. IPN1N2 with
N1 = 3 Protection against 2.5 mm diameter solid foreign objects,
N2 = 0 No protection from liquids
Indicates that the instructions for use contain important cautionary information, such as
warnings and precautions, that cannot, for various reasons, be displayed on the medical
device itself
Do not use if package is damaged
Do not expose the box to rain

20
30030511-C
Fragile contents
Store in an environment with a relative humidity of between 10 and 90%
Store in an environment with a temperature of between -10 and +60°C
Store in an environment with an atmospheric pressure of between 80 and 109 kPa
Device to be used on prescription only
11. TECHNICAL INFORMATION
ELECTRICAL CHARACTERISTICS
Power supply
Power requirement 100-240V AC / 50-60Hz / 0.6A
Power output 15 VDC / 2A
Type of protection against
electrocution Class 2
Battery type Lithium-Ion battery (11,25V - 2950mAh)
Autonomy At least 3 hours (for a new and fully charged battery)
MECHANICAL CHARACTERISTICS
Dimensions L: 300 mm x H: 200 mm x D: 110 mm (mounting bracket folded)
Weight 1.8 kg (with mounting bracket)
Mounting interface VESA 75 mm
TOUCH SCREEN
Maximum resolution 1280x800
Display Type 10.1 inch TFT LCD
Viewing angle Horizontal: 170°
Vertical: 170°
MISCELLANEOUS CHARACTERISTICS
Protection Rating IP30
Table of contents
Popular Medical Equipment manuals by other brands

Dentsply Sirona
Dentsply Sirona TENEO Installation requirements

stemoscope
stemoscope STEMO300 instruction manual

Dräger Medical
Dräger Medical Inhalog 1 plus Instructions for use

FUTURA MOBILITY
FUTURA MOBILITY ST7 Quick Resource Guide

Shuttle
Shuttle 2000-1 manual

Sissel
Sissel Cold Therapy Compression operating manual