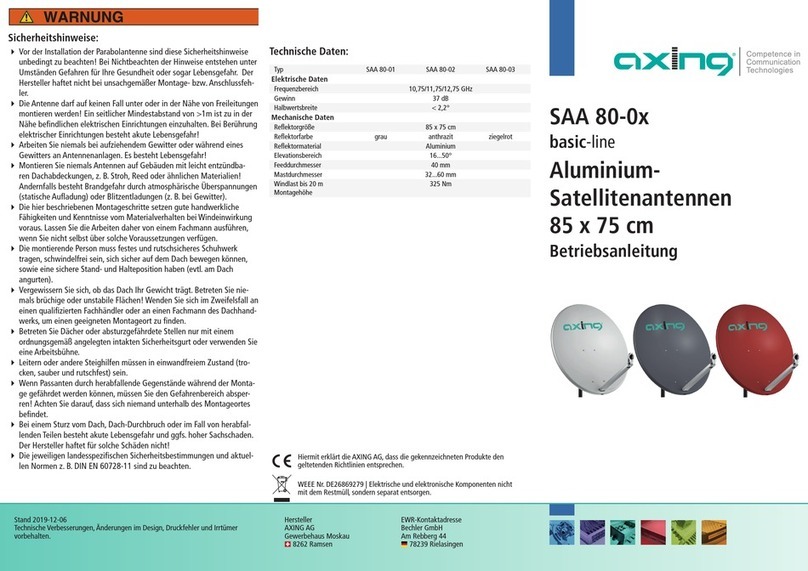
axing premium-line SAA 85-0 Series User manual

Hersteller
AXING AG
Gewerbehaus Moskau
8262 Ramsen
EWR-Kontaktadresse
Bechler GmbH
Am Rebberg 44
78239 Rielasingen
Stand 2019-12-06
Technische Verbesserungen, Änderungen im Design, Druckfehler und Irrtümer
vorbehalten.
Sicherheitshinweise:
Vor der Installation der Parabolantenne sind diese Sicherheitshinweise
unbedingt zu beachten! Bei Nichtbeachten der Hinweise entstehen unter
Umständen Gefahren für Ihre Gesundheit oder sogar Lebensgefahr. Der
Hersteller haftet nicht bei unsachgemäßer Montage- bzw. Anschlussfeh-
ler.
Die Antenne darf auf keinen Fall unter oder in der Nähe von Freileitungen
montieren werden! Ein seitlicher Mindestabstand von >1m ist zu in der
Nähe befindlichen elektrischen Einrichtungen einzuhalten. Bei Berührung
elektrischer Einrichtungen besteht akute Lebensgefahr!
Arbeiten Sie niemals bei aufziehendem Gewitter oder während eines
Gewitters an Antennenanlagen. Es besteht Lebensgefahr!
Montieren Sie niemals Antennen auf Gebäuden mit leicht entzündba-
ren Dachabdeckungen, z. B. Stroh, Reed oder ähnlichen Materialien!
Andernfalls besteht Brandgefahr durch atmosphärische Überspannungen
(statische Aufladung) oder Blitzentladungen (z. B. bei Gewitter).
Die hier beschriebenen Montageschritte setzen gute handwerkliche
Fähigkeiten und Kenntnisse vom Materialverhalten bei Windeinwirkung
voraus. Lassen Sie die Arbeiten daher von einem Fachmann ausführen,
wenn Sie nicht selbst über solche Voraussetzungen verfügen.
Die montierende Person muss festes und rutschsicheres Schuhwerk
tragen, schwindelfrei sein, sich sicher auf dem Dach bewegen können,
sowie eine sichere Stand- und Halteposition haben (evtl. am Dach
angurten).
Vergewissern Sie sich, ob das Dach Ihr Gewicht trägt. Betreten Sie nie-
mals brüchige oder unstabile Flächen! Wenden Sie sich im Zweifelsfall an
einen qualifizierten Fachhändler oder an einen Fachmann des Dachhand-
werks, um einen geeigneten Montageort zu finden.
Betreten Sie Dächer oder absturzgefährdete Stellen nur mit einem
ordnungsgemäß angelegten intakten Sicherheitsgurt oder verwenden Sie
eine Arbeitsbühne.
Leitern oder andere Steighilfen müssen in einwandfreiem Zustand (tro-
cken, sauber und rutschfest) sein.
Wenn Passanten durch herabfallende Gegenstände während der Monta-
ge gefährdet werden können, müssen Sie den Gefahrenbereich absper-
ren! Achten Sie darauf, dass sich niemand unterhalb des Montageortes
befindet.
Bei einem Sturz vom Dach, Dach-Durchbruch oder im Fall von herabfal-
lenden Teilen besteht akute Lebensgefahr und ggfs. hoher Sachschaden.
Der Hersteller haftet für solche Schäden nicht!
Die jeweiligen landesspezifischen Sicherheitsbestimmungen und aktuel-
len Normen z. B. DIN EN 60728-11 sind zu beachten.
Technische Daten:
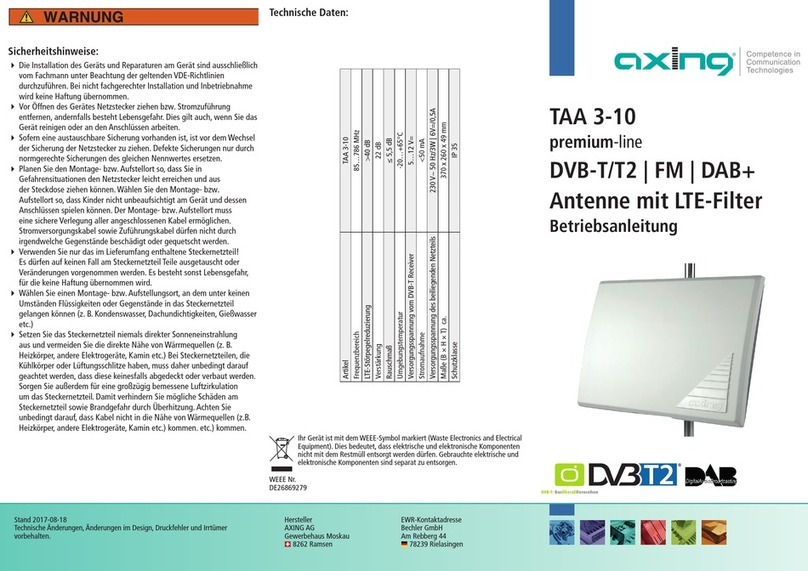
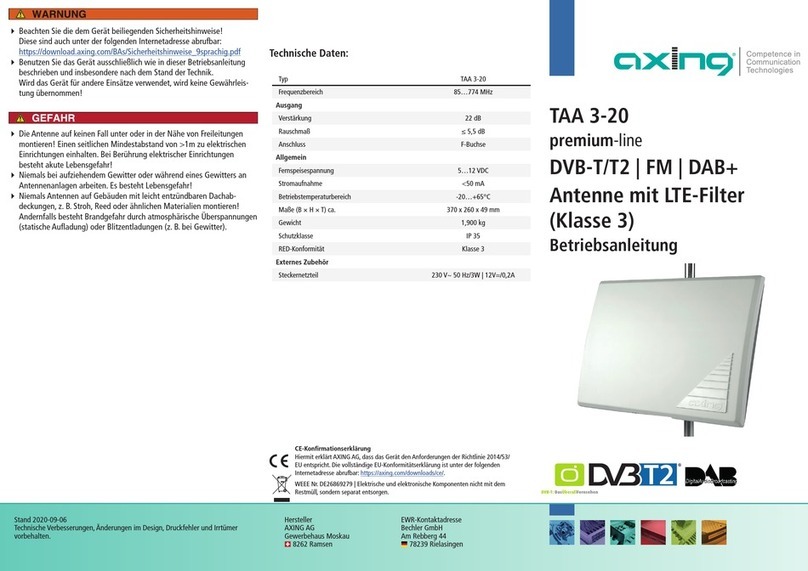
Typ SAA 85-01 SAA 85-02 SAA 85-03
Elektrische Daten
Frequenzbereich 10,75/11,75/12,75 GHz
Gewinn 38,12...39,53 dB
Halbwertsbreite < 2,2°
Mechanische Daten
Reflektorgröße 85 x 85 cm
Reflektorfarbe grau anthrazit ziegelrot
Reflektormaterial Aluminium
Elevationsbereich 15...50°
Feeddurchmesser 40 mm
Mastdurchmesser 32...76 mm
Windlast bei max.
Windgeschwindigkeit
[20/40/60m/s]
21,3 kg/85,4 kg/192,1 kg
Rückenteilmaterial Verzinkter Stahl mit Kunststoffverbindungen
Schraubensatzmaterial Dacromet
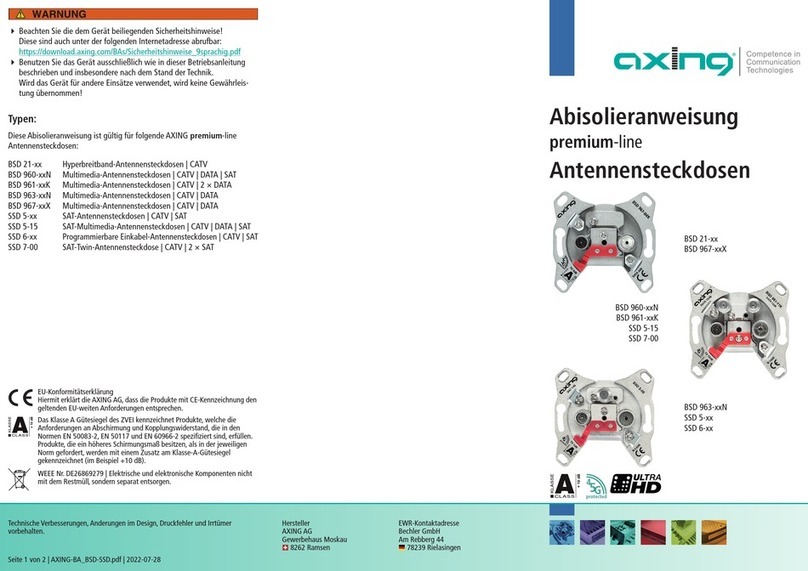
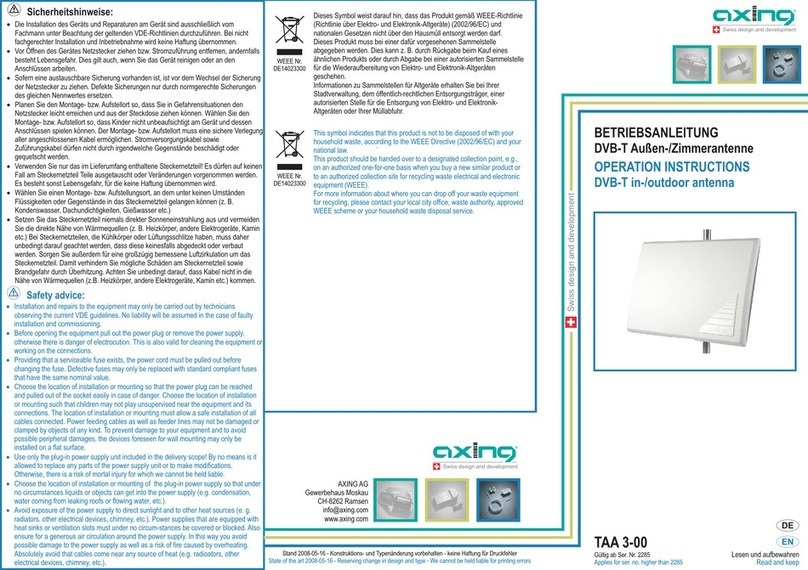
Typ SAA 110-01 SAA 110-02 SAA 110-03
Elektrische Daten
Frequenzbereich 10,75/11,75/12,75 GHz
Gewinn 39,8...40,9 dB
Halbwertsbreite < 1,8°
Mechanische Daten
Reflektorgröße 110 x 99 cm
Reflektorfarbe grau anthrazit ziegelrot
Reflektormaterial Aluminium
Elevationsbereich 5...70°
Feeddurchmesser 40 mm
Mastdurchmesser 32...76 mm
Windlast bei max.
Windgeschwindigkeit
[20/40/60m/s]
30 kg/119 kg/268 kg
Rückenteilmaterial Verzinkter Stahl mit Kunststoffverbindungen
Schraubensatzmaterial Edelstahl
Hiermit erklärt die AXING AG, dass die gekennzeichneten Produkte den
geltetenden Richtlinien entsprechen.
WEEE Nr. DE26869279 | Elektrische und elektronische Komponenten nicht
mit dem Restmüll, sondern separat entsorgen.
SAA 85-0x | SAA 110-0x
premium-line
Aluminium-
Satellitenantennen
85 cm | 110 cm
Betriebsanleitung

Verwendungsbereich und Produktbeschreibung:
Die SAA 85-0x/110-0x ist ausschließlich für den Empfang von
Satellitensignalen und nur für den Einsatz als Haushaltsantenne vorgesehen.
Sie ist nicht geeignet für die Montage an schwingungsanfälligen Bauwerken.
Beachten Sie unbedingt die Angaben über die Windlast in den technischen
Daten. Bei Überschreitung dieser Last können Teile losbrechen!
Die SAA 85-0x/110-0x ist für die Verwendung mit einem LNB zum Empfang
der Signale von einer Satellitenposition geeignet. Durch die Verwendung einer
Multifeedschiene (SZU 85-0x) ist der Empfang mehrere Satellitenpositionen
möglich. LNB oder Multifeedschiene gehören nicht zum Lieferumfang.
Verwenden Sie die SAA 85-0x/110-0x nicht zu anderen Zwecken als in
dieser Anleitung angegeben! Jegliche anderweitige Nutzung hat den
Verlust der Gewährleistung bzw. Garantie zur Folge. Insbesondere dürfen
Sie niemals irgendwelche Bauteile verändern oder andere Bauteile
verwenden, als vom Hersteller ausdrücklich für die Verwendung mit der
Antenne vorgesehen. Andernfalls kann es sein, dass die Antenne nicht mehr
ausreichend stabil und sicher ist!
Erdung, Blitzschutz und Potenzialausgleich:
Erdungs- und Blitzschutzarbeiten dürfen nur von hierfür speziell
geschulten Fachkräften des Elektrohandwerks ausgeführt werden!
Führen Sie niemals Erdungs- und Blitzschutzarbeiten durch, wenn Sie
nicht selbst Fachkraft mit entsprechenden Kenntnissen sind! Die hier
abgedruckten Hinweise sind keine Aufforderung an Nichtfachleute,
Erdungs- und Blitzschutzarbeiten in eigener Verantwortung durchzuführen,
sondern dienen der von Ihnen beauftragten Fachkraft als zusätzliche
Information!
Die Antenne muss gemäß DIN EN 60728-11 montiert und entsprechend
geerdet werden.
Zur Erdung muss der Mast auf kürzestem Weg über einen geeigneten
Erdungsleiter mit der Blitzschutzanlage des Gebäudes verbunden sein,
und sofern keine Blitzschutzanlage vorhanden ist, mit der Gebäudeerdung.
Anschlüsse an die Blitzschutzanlage dürfen nur von einem qualifizierten
Blitzschutzanlagen-Installateur durchgeführt werden.
Antennenkabel und Erdungsleiter dürfen nicht durch Räume geführt
werden, die zur Lagerung von leicht entzündlichen Stoffen dienen (z. B.
Heu, Stroh) oder in denen sich eine explosive Atmosphäre bilden kann (z. B.
Gase, Dämpfe).
Bei Verwendung der Parabolantenne in kompletten Antennenanlagen (z.B.
Verteilanlagen) müssen zudem die Erdungsmaßnahmen so ausgeführt
sein, dass der Erdungsschutz auch dann bestehen bleibt, wenn einzelne
Einheiten entfernt oder ausgetauscht werden.
Gefahren können nicht nur durch Gewitter entstehen (Blitzschlag), sondern
auch durch statische Aufladung oder Kurzschluss in den angeschlossenen
Geräten. Deshalb muss generell für alle Antennenanlagen aus Sicherheits-
gründen ein Potenzialausgleich aus 4 mm² Kupfer vorgenommen werden.
Die Kabelschirme aller Koaxialantennen-Niederführungskabel müssen über
einen Potenzialausgleichsleiter mit dem Mast verbunden werden.
Von der Erdungspflicht ausgenommen sind nur solche Antennen, die mehr als
2 m unterhalb der Dachkante und zugleich weniger als 1,5 m von Gebäuden
angebracht sind.
Montage:
Verwenden Sie die beiliegenden Montageschrauben und die Montagelöcher
an den Geräten.
Befestigen Sie die Antenne an einen ordnungsgemäß montierten
senkrechten Mast. Der Durchmesser des Mastes kann 32 bis 60 mm
betragen (empfohlener Durchmesser mindestens 48 mm). Geeignete
Dachsparrenmasthalter und Wandhalter finden Sie unter www.axing.com
(SZU 85-0x).
Wasser- und Gasrohre sind als Mastersatz unzulässig und stellen eine
potentielle Gefahr dar!
min.48
Das Rückenteil gemäß Abbildung am Mast befestigen und die Flügelmuttern
leicht anziehen. Die Antenne kann nun ausgerichtet werden.
Den LNB gemäß Abbildung montieren. Das Kabel ggf. durch die Gummitülle
ziehen und dann F-Stecker, Gummitülle und Kabel befestigen.
SAA 85-0x:
Die beiligenden Kabel-Clips seitlich einstecken, bis sie
einrasten. Die Kabel mit Hilfe der Kabel-Clips verlegen.
SAA 110-0x:
Die Kabel im LNB-Arm verlegen,
der Arm ist innen hohl.
Die vier Reflektor-Befestigungsschrauben mit einem maximalen
Drehmoment von 10 Nm anziehen.
Die Antenne auf den gewünschten Satelliten ausrichten, danach die
seitlichen Muttern und die hinteren Flügelmuttern anziehen (maximales
Drehmoment 5 Nm).
Elevationsanzeiger
Noch nicht fest anziehen
Anziehen
Den Elevationsanzeiger in das Rückenteil einstecken. Den Reflektor
mittig auf die im Rückenteil vormontierte Schraube von oben nach unten
einhängen, sodass die vier Befestigungslöcher übereinstimmen.

Manufacturer
AXING AG
Gewerbehaus Moskau
8262 Ramsen
EEA contact address
Bechler GmbH
Am Rebberg 44
78239 Rielasingen
State of the art 2019-12-06
Technical improvements, changes in design, printing- and other errors expected.
Safety advices:
Prior to the installation of this parabolic aerial, it is essential that
these safety instructions are observed! Failure to comply with these
instructions may result in injury or even death. The manufacturer is not
liable in case of improper installation and connection errors.
Under no circumstances may the antenna be installed under or in close
proximity to overhead power lines! A minimum lateral distance of >1
m from any electrical equipment must be observed. Touching electrical
installations may cause death!
Never work on antennas during thunderstorms or when a thunderstorm
is approaching. There is a risk of death!
Never install antennas on buildings with inflammable roof coverings
such as in thatched roofs! In such cases there is a fire hazard due to
atmospheric surge voltages (static electricity) or lightning (e.g. during
thunderstorms).
The installation procedure described herein requires good technical
skills and knowledge on properties of materials when exposed to wind.
Therefore, have the work executed by a trained technician in case you do
not have these skills yourself.
The person executing the installation must wear sturdy antislip-footwear,
should have no fear of heights, be able to move safely on the roof
and have a secured standing and holding position (e.g. by using belts
connected to the roof).
Check whether the roof can support your weight. Never step on cracked
or non-load-bearing areas! If in doubt, consult a qualified dealer or
roofing craftsman to determine a suitable installation position.
Enter roofs or areas with a risk of falling only with a safety harness that
is properly worn and free of defects or use a work platform.
Ladders or other climbing aids must be in good order and condition (dry,
clean and slip-resistant).
If there is a possibility that there may be a hazard to pedestrians due to
falling objects during installation, you must block the hazard zone! Make
sure that there are no persons present below the location of installation.
Falling from or through the roof and falling parts can cause death and
significant material damage. The manufacturer cannot be held liable for
such damage.
The applicable national safety regulations and current standards such as
DIN EN 60728-11 must be observed.
SAA 85-0x | SAA 110-0x
premium-line
Aluminium
satellite antennas
85 cm | 110 cm
Operation instructions
Technical data:
Type SAA 85-01 SAA 85-02 SAA 85-03
Electrical data
Frequency range 10,75/11,75/12,75 GHz
Antenna gain 38,12...39,53 dB
Full width at half
maximum
< 2,2°
Mechanical data
Reflector dimensions 85 x 85 cm
Reflector colour grey anthracite brick-red
Reflector material Aluminium
Elevation range 15...50°
Diameter of feed 40 mm
Mast diameter 32...76 mm
Wind load at max. wind
speed [20/40/60m/s]
21,3 kg/85,4 kg/192,1 kg
Back part material Zinc coated steel, including plastic coupler
Screw sets material Dacromet
Type SAA 110-01 SAA 110-02 SAA 110-03
Electrical data
Frequency range 10,75/11,75/12,75 GHz
Antenna gain 39,8...40,9 dB
Full width at half
maximum
< 1,8°
Mechanical data
Reflector dimensions 110 x 99 cm
Reflector colour grey anthracite brick-red
Reflector material Aluminium
Elevation range 5...70°
Diameter of feed 40 mm
Mast diameter 32...76 mm
Wind load at max. wind
speed [20/40/60m/s]
30 kg/119 kg/268 kg
Back part material Zinc coated steel, including plastic coupler
Screw sets material Stainless steel
Herewith AXING AG declares that the marked products comply with the valid
guidelines.
WEEE Nr. DE26869279 | Electrical and electronic components must not be
disposed of as residual waste, it must be disposed of separately.

Field of application and product discription:
The SAA 85-0x/110-0x is intended for the reception of satellite signals and
only for use in domestic environments. It is not suitable for installation on
structures prone to vibration.
It is essential that you observe the information on the maximum wind load
in the technical data. If this load is exceeded, parts may break loose!
The SAA 85-0x/110-0x is suitable for use with a LNB for receiving signals from
one satellite position. By using a multifeed bar (SZU 85-0x) it is possible to
receive several satellite positions. The LNB as well as the multifeed bar are not
part of the delivery scope.
Do not use the SAA 85-0x/110-0x for any other purpose than the
one mentioned in this manual! Any other use voids the statutory and
manufacturer‘s warranty. In particular, you must never alter any parts or
use parts other than those specifically intended for use with the antenna by
the manufacturer. Failure to comply with this may cause the antenna to be
no longer sufficiently stable and safe!
Grounding, lightning protection and
equipotentialbonding:
Grounding and lightning protection must only be undertaken by
trained electricians!
Never execute any grounding and lightning protection work if you are not
a trained professional with the relevant skills! These printed instructions
are not to be construed as an encouragement for laypersons to execute
grounding and lightning protection work on their own initiative. Their
purpose is to provide additional information to trained technicians!
The antenna must be installed and grounded according to the DIN EN
60728-11 standard.
For grounding purposes, the mast must be connected to the lightning
protection system of the building, using the shortest possible way and a
suitable grounding conductor. If the building has no lightning protection
system, it must be connected to the grounding point of the building.
Connections to the lightning protection system may only be made by a
qualified lightning protection technician.
Antenna cables and grounding conductors must not be routed through
rooms that are used to store easily inflammable materials (such as hay or
straw) or that are prone to the formation of explosive atmospheres (such as
gases and vapors).
If the parabolic aerial is used in antenna systems (e.g. installation with
distribution), the grounding measures must be implemented in such a way
that the ground protection remains effective in case individual units are
removed or exchanged.
Hazards may not only arise from thunderstorms (lightning strike) but also
from static electricity or short-circuits in connected devices. For this reason,
an equipotential bonding conductor from copper with a section of 4 mm² is
a general safety requirement for all antenna systems.
The cable shields of all coaxial antenna downlink cables must be connected
to the mast with an equipotential bonding conductor.
Grounding is not mandatory for only such antennas that are installed more
than 2 m below the edge of the roof and, at the same time, less than 1.5 m
from the building.
Mounting:
Use the mounting screws included in the delivery and the mounting holes of
the devices.
Mount the antenna on a properly installed vertical mast. The mast diameter
should be between 30 and 60 mm (recommended minimum diameter
48mm). Masts and wall brackets can be found in the AXING product range
(SZU 85-0x).
Water or gas pipes are not suitable materials for aerial masts and
may result in injury!
min.48
Attach the back part according to the image and lightly tighten the wing
nuts. Now the antenna can be aligned.
Mount the LNB according to the image. Pull the cable through the rubber
grommet (if applicable) and attach F-plug, rubber grommet and cable..
SAA 85-0x:
Insert the included cable clips until they engage. Route
the cable using the cable clips.
SAA 110-0x:
Route the cable through the hollow
LNB arm.
Tighten the four reflector mounting screws with a maximum torque of
10 Nm.
Adjust the antenna towards the desired satellite. After that, tighten the
wing nuts at the side and at the rear side. (maximum torque 5 Nm).
elevation indicator
Do not tighten screw
Tighten screw
Insert the elevation indicator into the back part. Engage the reflector
with the pre-assembled screws in the back part from top to bottom so
that the four installation bores flush and the reflector is centered.
This manual suits for next models
10
Table of contents
Languages:
Other axing Antenna manuals
Popular Antenna manuals by other brands

RF Mogul
RF Mogul Eagle instructions

EPAK
EPAK Premium Line TV61TV90 manual

Signal Kicker Antennas
Signal Kicker Antennas Base Kicker installation guide

l-com
l-com HG2415Y installation instructions

Laird
Laird AP-ANT-40 Assembly and installation instructions

DX Engineering
DX Engineering DXE-NOISELOOP-INS Series quick start guide