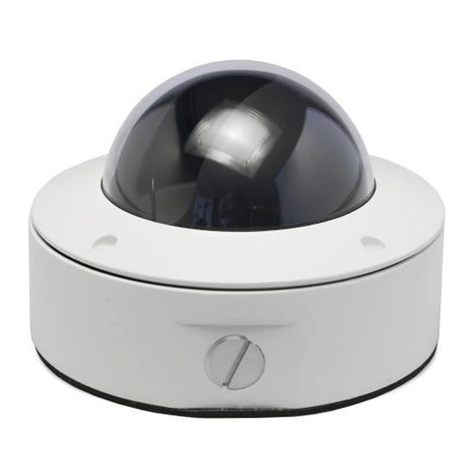
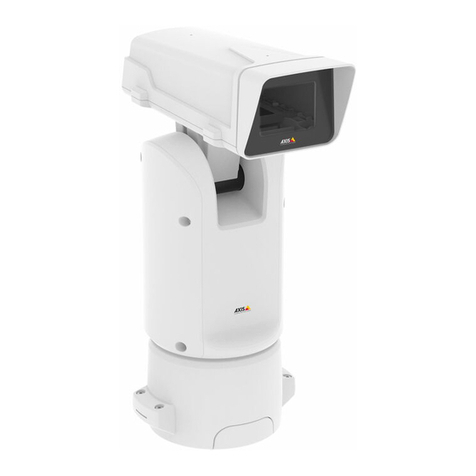
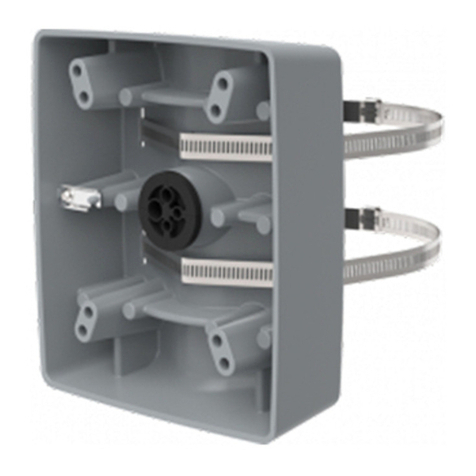
Axis T93C10 User manual

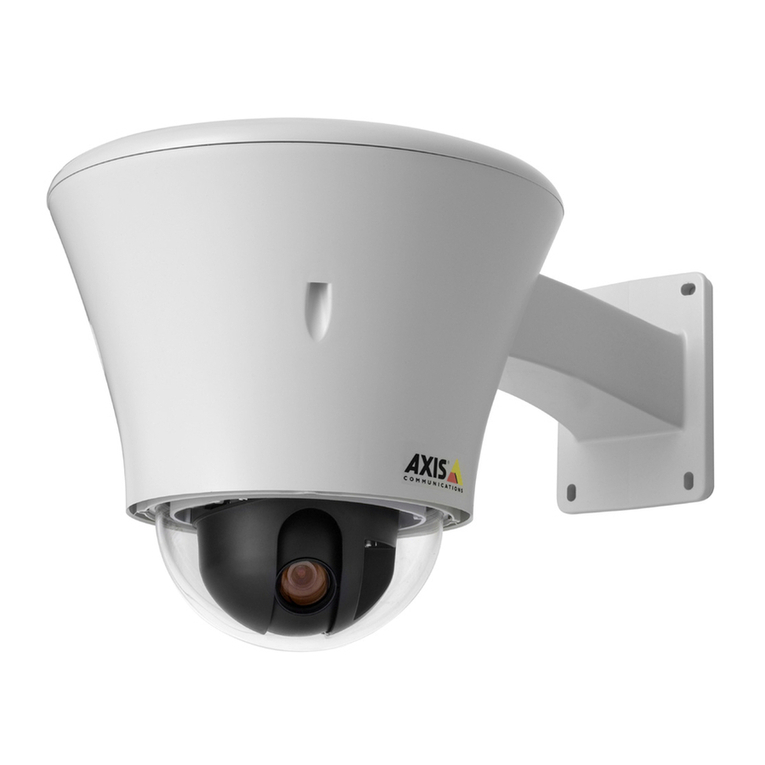
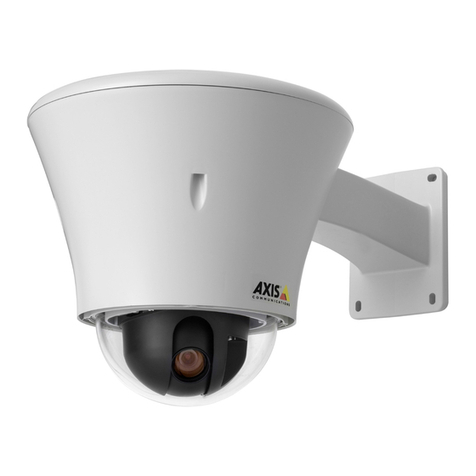
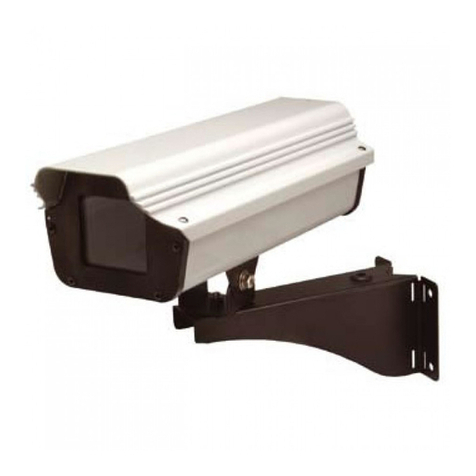
AXIS T93C10 Outdoor Housing
Installation Guide
Available from A1 Security Cameras

Available from A1 Security Cameras

English EN
France: Français FR
Deutschland: Deutsch DE
Italia: Italiano IT
España: Español ES
日本:日本語 JA
中文:简体中文 ZH
Available from A1 Security Cameras

Read this rst
Read through this Installation Guide carefully before
installing the product. Keep the Installation Guide for
future reference.
Legal considerations
Video and audio surveillance can be regulated by la s that
vary from country to country. Check the la s in your local
region before using this product for surveillance purposes.
Liability
Every care has been taken in the preparation of this
document. Please inform your local Axis ofce of any
inaccuracies or omissions. Axis Communications AB cannot
be held responsible for any technical or typographical errors
and reserves the right to make changes to the product and
manuals ithout prior notice. Axis Communications AB
makes no arranty of any kind ith regard to the material
contained ithin this document, including, but not limited
to, the implied arranties of merchantability and tness for
aparticular purpose. Axis Communications AB shall not
be liable nor responsible for incidental or consequential
damages in connection ith the furnishing, performance
or use of this material. This product is only to be used for
its intended purpose.
Intellectual ro erty rights
Axis AB has intellectual property rights relating to
technology embodied in the product described in this
document. In particular, and ithout limitation, these
intellectual property rights may include one or more of
the patents listed at axis.com/patent.htm and one or more
additional patents or pending patent applications in the
US and other countries.
Equi ment modications
This equipment must be installed and used in
strict accordance ith the instructions given in the
user documentation. This equipment contains no
user-serviceable components. Unauthorized equipment
changes or modications ill invalidate all applicable
regulatory certications and approvals.
Trademark acknowledgements
AXIS COMMUNICATIONS, AXIS and VAPIX are registered
trademarks or trademark applications of Axis AB in various
jurisdictions. All other company names and products are
trademarks or registered trademarks of their respective
companies.
Regulatory information
Europe
This product complies ith the applicable CE marking
directives and harmonized standards:
• Electromagnetic Compatibility (EMC) Directive
2014/30/EU. See Electromagnetic compatibility (EMC)
on page 4.
• Lo Voltage (LVD) Directive 2014/35/EU. See Safety
on page 4.
• Restrictions of Hazardous Substances (RoHS) Directive
2011/65/EU. See Disposal and recycling on page 5.
Acopy of the original declaration of conformity may be
obtained from Axis Communications AB. See Contact
information on page 5.
Electromagnetic com atibility (EMC)
This equipment has been designed and tested to fulll
applicable standards for:
• Radio frequency emission hen installed according to
the instructions and used in its intended environment.
• Immunity to electrical and electromagnetic phenomena
hen installed according to the instructions and used
in its intended environment.
USA
This equipment has been tested using ashielded net ork
cable (STP) and found to comply ith the limits for a
Class Bdigital device, pursuant to part 15 of the FCC
Rules. These limits are designed to provide reasonable
protection against harmful interference in aresidential
installation. This equipment generates, uses and can
radiate radio frequency energy and, if not installed and
used in accordance ith the instructions, may cause
harmful interference to radio communications. Ho ever,
there is no guarantee that interference ill not occur in
aparticular installation. If this equipment does cause
harmful interference to radio or television reception, hich
can be determined by turning the equipment off and on,
the user is encouraged to try to correct the interference by
one or more of the follo ing measures:
• Reorient or relocate the receiving antenna.
• Increase the separation bet een the equipment and
receiver.
• Connect the equipment into an outlet on acircuit
different from that to hich the receiver is connected.
• Consult the dealer or an experienced radio/TV
technician for help.
The product shall be connected using ashielded net ork
cable (STP) that is properly grounded.
Canada
This digital apparatus complies ith CAN ICES-3 (Class B).
The product shall be connected using ashielded net ork
cable (STP) that is properly grounded. Cet appareil
numérique est conforme àla norme CAN NMB-3 (classe B).
Le produit doit être connecté àl'aide d'un câble réseau
blindé (STP) qui est correctement mis àla terre.
Europe
This digital equipment fullls the requirements for RF
emission according to the Class Blimit of EN 55022. The
product shall be connected using ashielded net ork cable
(STP) that is properly grounded.
Australia/New Zealand
This digital equipment fullls the requirements for RF
emission according to the Class Blimit of AS/NZS CISPR 22.
The product shall be connected using ashielded net ork
cable (STP) that is properly grounded.
Japan
この装置は、クラスB 情報技術装置です。この装置
は、家庭環境で使⽤することを⽬ 的としています
が、この装置がラジオやテレビジョン受信機に近
接して使⽤されると、 受信障害を引き起こすこと
があります。 取扱説明書に従って正しい取り扱い
をして下さい。 本製品は、シールドネットワーク
ケーブル(STP)を使⽤して接続してください。また
適切に接地してください。
Korea
이기기는 가정용(B급) 전자파적합기기로서 주로
가정에서 사용하는 것을 목적으로 하며, 모든 지
역에서 사용할 수있습니다. 적절히 접지된 STP
(shielded twisted pair) 케이블을 사용하여 제품을
연결 하십시오.
Safety
This product complies ith IEC/EN/UL 60950-1 and
IEC/EN/UL 60950-22, Safety of Information Technology
Available from A1 Security Cameras
Equipment. The product shall be grounded either through a
shielded net ork cable (STP) or other appropriate method.
Dis osal and recycling
When this product has reached the end of its useful life,
dispose of it according to local la s and regulations. For
information about your nearest designated collection point,
contact your local authority responsible for aste disposal.
In accordance ith local legislation, penalties may be
applicable for incorrect disposal of this aste.
Europe
This symbol means that the product shall not be
disposed of together ith household or commercial aste.
Directive 2012/19/EU on aste electrical and electronic
equipment (WEEE) is applicable in the European Union
member states. To prevent potential harm to human health
and the environment, the product must be disposed of in
an approved and environmentally safe recycling process.
For information about your nearest designated collection
point, contact your local authority responsible for aste
disposal. Businesses should contact the product supplier for
information about ho to dispose of this product correctly.
This product complies ith the requirements of
Directive 2011/65/EU on the restriction of the use of
certain hazardous substances in electrical and electronic
equipment (RoHS).
China
This product complies ith the requirements of
SJ/T 11364-2014, Marking for the restriction of hazardous
substances in electrical and electronic products.
Warranty information
For information about Axis’ product arranty and thereto
related information, go to axis.com/warranty
Su ort
Should you require any technical assistance, please contact
your Axis reseller. If your questions cannot be ans ered
immediately, your reseller ill for ard your queries through
the appropriate channels to ensure arapid response. If you
are connected to the Internet, you can:
• do nload user documentation and soft are updates
• nd ans ers to resolved problems in the FAQ database,
search by product, category, or phrase
• report problems to Axis support staff by logging in to
your private support area
• chat ith Axis support staff
• visit Axis Support at axis.com/s pport
Learn more!
Visit Axis learning center axis.com/academy for useful
trainings, ebinars, tutorials and guides.
有毒有害物质或元素
部
件
名
称
铅
(Pb)
汞
(Hg) 镉
(Cd) 六价
铬
(Cr-
(VI))
多溴
联苯
(PB-
B)
多溴
二苯
醚
(PB-
DE)
电
气
实
装
部
分
X00000
0: 表示该有毒有害物质在该部件所有均质材料中
的含量均在GB/T 26572标准规定的限量要求以下。
X: 表示该有毒有害物质至少在该部件的某一均质
材料中的含量超出GB/T 26572标准规定的限量要
求。
Contact information
Axis Communications AB
Emdalavägen 14
223 69 Lund
S eden
Tel: +46 46 272 18 00
Fax: +46 46 13 61 30
axis.com
Available from A1 Security Cameras

Installation Guide
Table of Contents
Pa kage ontents ............................................ 11
Produ t overview ............................................ 12
How to install the produ t ..................................... 13
Ho to install the camera in the housing ............................... 13
Ho to install the pan-tilt knuckle to the housing ........................ 13
Ho to install the all mount ....................................... 14
Ho to attach the housing to the all mount ........................... 14
About cables and cable glands ...................................... 14
Ho to connect po er ............................................ 16
Ho to connect the net ork ........................................ 16
Ho to prevent moisture in the housing ............................... 16
Ho to pan and tilt the housing ..................................... 16
Ho to adjust zoom .............................................. 16
Ho to secure the lid ............................................. 17
Safety information .......................................... 19
Hazard levels ................................................... 19
Other message levels ............................................. 19
Safety instru tions .......................................... 20
Transportation .................................................. 20
Contenu de l’emballage ....................................... 21
Vue d'ensemble du produit .................................... 22
Comment installer le produit ................................... 23
Comment installer la caméra dans le boîtier ............................. 23
Comment installer le pivot panoramique/inclinaison sur le boîtier .............23
Comment installer la xation murale .................................. 24
Comment xer le boîtier à la xation murale ............................ 24
À propos des câbles et des presse-étoupes .............................. 24
Comment brancher l'alimentation .................................... 26
Comment se connecter au réseau .................................... 26
Comment empêcher l'accumulation de l'humidité dans le boîtier ..............26
Comment réaliser un panoramique et une inclinaison au niveau du boîtier .......26
Comment régler le zoom ........................................... 26
Comment xer solidement le couvercle ................................ 27
Informations sur la sé urité .................................... 29
Niveaux de risques ............................................... 29
Autres niveaux de message ......................................... 29
Consignes de sé urité ........................................ 30
Transport ...................................................... 30
Lieferumfang .............................................. 31
Produktübersi ht ............................................ 32
Installieren des Produkts ...................................... 33
Die Kamera in das Gehäuse einbauen .................................. 33
So bringen Sie das Gelenk zum Sch enken und Neigen am Gehäuse an .........33
6
Available from A1 Security Cameras
AXIS T93C10 Outdoor Housing
Table of Contents
Die Wandhalterung anbringen ....................................... 34
Das Gehäuse an der Wandhalterung befestigen .......................... 35
Informationen zu Kabeln und Kabelverschraubungen ...................... 35
Die Stromversorgung herstellen ...................................... 36
Die Netz erkverbindung herstellen ................................... 36
Feuchtigkeit im Gehäuse verhindern .................................. 36
Das Gehäuse horizontal und vertikal ausrichten. .......................... 37
Den Zoom einstellen .............................................. 37
Den Deckel sichern ............................................... 37
Si herheitsinformationen ...................................... 39
Gefährdungsstufen ............................................... 39
Andere Meldeebenen ............................................. 39
Si herheitsanweisungen ....................................... 40
Transport ...................................................... 40
Contenuto della onfezione .................................... 41
Panorami a del dispositivo ..................................... 42
Come installare il dispositivo ................................... 43
Modalità di installazione della telecamera nell'alloggiamento ................43
Modalità di installazione dell'asse di rotazione-inclinazione nell'alloggiamento ...43
Modalità di installazione del supporto a parete .......................... 44
Modalità di collegamento dell'alloggiamento al supporto aparete .............45
Informazioni sui cavi e sui pressacavi ................................. 45
Modalità di collegamento dell'alimentazione ............................ 46
Modalità di collegamento alla rete ................................... 46
Modalità di prevenzione dei problemi nell'alloggiamento ...................46
Modalità di rotazione einclinazione dell'alloggiamento ....................47
Modalità di regolazione dello zoom ................................... 47
Modalità di ssaggio del coperchio ................................... 47
Informazioni di si urezza ...................................... 49
Livelli di pericolo ................................................ 49
Altri livelli di messaggio ........................................... 49
Informazioni di si urezza ...................................... 50
Trasporto ...................................................... 50
Contenido del paquete ........................................ 51
Informa ión general del produ to ............................... 52
Cómo instalar el produ to ..................................... 53
Cómo instalar la cámara en la carcasa ................................. 53
Cómo instalar la pieza articulada de movimiento horizontal/vertical en la carcasa .53
Cómo instalar el soporte de pared .................................... 54
Cómo jar la carcasa al soporte de pared ............................... 55
Acerca de los cables y los prensaestopas ............................... 55
Cómo conectar la alimentación ...................................... 56
Cómo conectar la red ............................................. 56
7
Available from A1 Security Cameras
Installation Guide
Table of Contents
Cómo prevenir la humedad en la carcasa ............................... 56
Cómo realizar el movimiento vertical yhorizontal de la carcasa. ..............57
Cómo ajustar el zoom ............................................. 57
Cómo jar la tapa ............................................... 57
Informa ión de seguridad ..................................... 59
Niveles de peligro ............................................... 59
Otros niveles de mensaje .......................................... 59
Instru iones de seguridad ..................................... 60
Transporte ..................................................... 60
パパ
パッッ
ッケケ
ケーー
ージジ
ジのの
の内内
内容容
容....................................... 61
製製
製品品
品のの
の概概
概要要
要............................................. 62
製製
製品品
品のの
の取取
取りり
り付付
付けけ
け方方
方法法
法..................................... 63
カメラをハウジングにインストールする方法 .................... 63
パン/チルトナックルをハウジングにインストールする方法 ......... 63
壁面取付ブラケットの取り付け方法 ............................ 64
ハウジングの壁面取付ブラケットへの取り付け方法 ............... 65
ケーブルとケーブルグランドについて .......................... 65
電源の接続方法 ............................................ 66
ネットワークの接続方法 ..................................... 66
ハウジング内の湿気を防ぐ方法 ............................... 66
ハウジングをパンおよびチルトする方法 ........................ 67
ズームの調整方法 .......................................... 67
蓋の固定方法 .............................................. 67
安安
安全全
全情情
情報報
報.............................................. 69
危険レベル ................................................ 69
その他のメッセージレベル ................................... 69
安安
安全全
全手手
手順順
順.............................................. 70
輸送 ..................................................... 70
包包
包装装
装内内
内容容
容.............................................. 71
产产
产品品
品概概
概述述
述.............................................. 72
如如
如何何
何安安
安装装
装产产
产品品
品........................................... 73
如何将摄像机安装在防护罩中 ................................. 73
如何将云台转向节安装至防护罩 ............................... 73
如何安装墙挂支架 .......................................... 74
如何将防护罩连接至墙挂支架 ................................. 74
关于电缆和电缆套管 ........................................ 74
如何连接电源 .............................................. 75
如何连接网络 .............................................. 76
如何避免防护罩内受潮 ....................................... 76
如何水平转动和垂直转动防护罩 ............................... 76
如何调节变焦 .............................................. 76
如何紧固盖子 .............................................. 76
安安
安全全
全信信
信息息
息.............................................. 77
8
Available from A1 Security Cameras
AXIS T93C10 Outdoor Housing
Table of Contents
危险等级 ................................................. 77
其他消息等级 .............................................. 77
安安
安全全
全说说
说明明
明.............................................. 78
运输 ..................................................... 78
9
Available from A1 Security Cameras
AXIS T93C10 Outdoor Housing
Package contents
•AXIS T93C10 Outdoor Housing
•Wall mount bracket
•Pan-tilt knuckle and mounting hard are
• Camera mounting hard are
- 1 camera sled
- 20 bolts 3/8 inch (9.5 mm)
- 1 split asher
- 1 at asher
•Camera mounting spacer
•Humidity control pack
• Printed material
- Installation Guide (this document)
EN
11
Available from A1 Security Cameras
AXIS T93C10 Outdoor Housing
Product overvie
1Ho sing
2Cable gland
3Kn ckle
4Wall mo nt
5Camera spacer
6Camera sled
7H midity control pack
12
Available from A1 Security Cameras

AXIS T93C10 Outdoor Housing
Ho to install the product
How to install the camera in the housing EN
1. Open the housing.
2. Remove the hard are pouch.
3. Loosen and remove the t o rear scre s that are securing the camera sled.
4. Remove the camera sled from the housing.
5. Attach the camera sled to the camera.
NONO
NOTICETICE
TICE
For cameras ith large lenses, use the camera spacer bet een the camera and the camera
sled.
6. Connect the camera connector to the 24 VDC camera po er ire in the housing. See
instructions in the camera’s Installation Guide.
7. Slide the front of the camera sled, ith the attached camera, into the t o front xed
scre s to reinstall the camera sled into the housing.
8. Secure the camera sled ith the t o rear scre s.
How to install the an-tilt knuckle to the housing
1. Attach the scre s to the knuckle.
2. Attach the knuckle to the housing.
3. Attach the scre s.
Important
•For ado n ard position of the camera, make sure TILTING marked on the knuckle is
on the captive scre side of the housing.
•For an up ard position of the camera, make sure TILTING marked on the knuckle is on the
hinge side of the housing.
13
Available from A1 Security Cameras

AXIS T93C10 Outdoor Housing
How to install the wall mount
CAUTION
Make sure that the scre s and plugs are appropriate for the material (e.g. ood, metal,
dry all, stone) and that the material is strong enough to support the combined eight
of the camera, housing, and all mount.
For dimension dra ings, see .axis.com.
1. Mark the holes for the all mount on the all and drill the holes.
2. Attach the all mount to the all.
3. Drill ahole in the all for cables, under the all mount.
1Cable hole
How to attach the housing to the wall mount
1. Loosen the t o scre s on the all mount.
2. Attach the housing ith the attached knuckle to the all mount.
3. Attach the t o scre s.
About cables and cable glands
All po er and net ork cables must be routed through the cable glands.
NONO
NOTICETICE
TICE
To avoid moisture ithin the housing, the cable ports, ire feeds, and conduit must be fully
sealed. Make sure the follo ing criteria is fullled:
14
Available from A1 Security Cameras

AXIS T93C10 Outdoor Housing
•Use only one cable per cable gland port.
•Use only round cables.
How to re are the cable glands EN
1. Remove the external nut to expose the cable glands.
2. Push out the asher through the cable gland, from the inside of the housing. Use a
blunt tool.
How to attach the cable glands
1. Thread the nut on the cable.
2. Thread the asher on the cable.
3. Pull the cable through the cable gland, into the housing.
4. Pull the asher into the cable gland.
5. Attach the nut. Make sure it is properly sealed.
1Cable gland
2Washer
3N t
15
Available from A1 Security Cameras

AXIS T93C10 Outdoor Housing
How to connect ower
1. Connect 24 VDC to the red terminal of the terminal block.
2. Connect (-) DC ground ire to the black terminal of the terminal block.
3. Tighten rmly ith asmall at scre driver.
How to connect the network
1. Connect the net ork cable to the camera’s net ork connector (PoE). See instructions in
the camera’s Installation Guide.
How to revent moisture in the housing
To prevent moisture inside the housing, add the humidity control pack.
1. Remove the plastic package from the humidity control pack.
2. Place the humidity control pack behind the camera in the housing.
How to an and tilt the housing
To access the live vie stream, nd the camera on the net ork and log in to the camera's ebpage.
For tilt adjustment:
1. Loosen the scre in the pan-tilt knuckle.
2. Adjust the housing into position.
3. Attach the scre .
For pan adjustment:
1. Loosen the t o scre s on both sides of the all mount.
2. Adjust the housing into position.
3. Attach the scre s.
How to adjust zoom
1. Log in to the camera’s ebpage.
2. Zoom the lens by turning the zoom ring on the lens ith your ngers.
3. Lock the zoom position ith the supplied elastic.
16
Available from A1 Security Cameras

AXIS T93C10 Outdoor Housing
How to secure the lid
1. Close the housing.
2. Make sure to alternately tighten the seven captive scre s. EN
17
Available from A1 Security Cameras

AXIS T93C10 Outdoor Housing
Safety information
Hazard levels
DANGER EN
Indicates ahazardous situation hich, if not avoided, ill result in death or serious injury.
WARNING
Indicates ahazardous situation hich, if not avoided, could result in death or serious injury.
CAUTION
Indicates ahazardous situation hich, if not avoided, could result in minor or moderate
injury.
NONO
NOTICETICE
TICE
Indicates asituation hich, if not avoided, could result in damage to property.
Other message levels
Important
Indicates signicant information hich is essential for the product to function correctly.
Note
Indicates useful information hich helps in getting the most out of the product.
19
Available from A1 Security Cameras
AXIS T93C10 Outdoor Housing
Safety instructions
NONO
NOTICETICE
TICE
•The Axis product shall be used in compliance ith local la s and regulations.
•Store the Axis product in adry and ventilated environment.
•Avoid exposing the Axis product to shocks or heavy pressure.
•Do not install the product on unstable poles, brackets, surfaces or alls.
•Use only applicable tools hen installing the Axis product. Using excessive force ith
po er tools could cause damage to the product.
•Do not use chemicals, caustic agents, or aerosol cleaners.
•Use aclean cloth dampened ith pure ater for cleaning.
•Use only accessories that comply ith the technical specication of your product. These
can be provided by Axis or athird party. Axis recommends using Axis po er source
equipment compatible ith your product.
•Use only spare parts provided by or recommended by Axis.
•Do not attempt to repair the product yourself. Contact Axis support or your Axis reseller
for service matters.
Trans ortation
NONO
NOTICETICE
TICE
•When transporting the Axis product, use the original packaging or equivalent to prevent
damage to the product.
20
Available from A1 Security Cameras
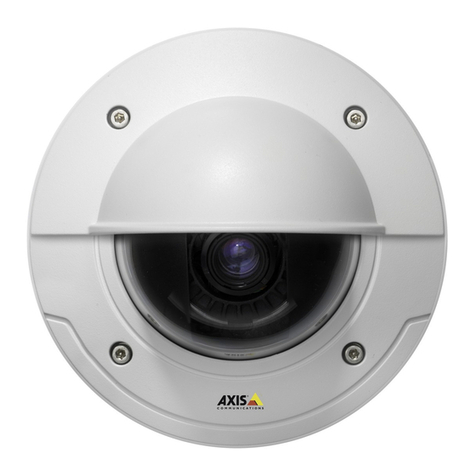
Table of contents
Languages:
Other Axis Camera Accessories manuals