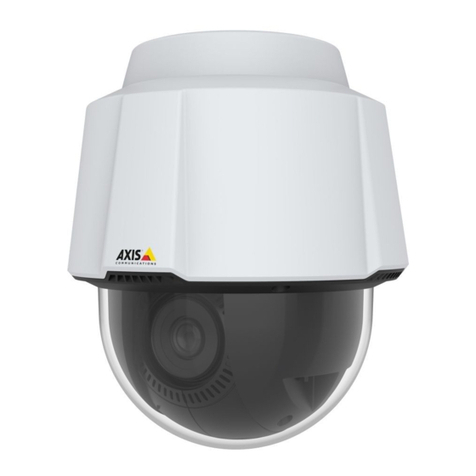
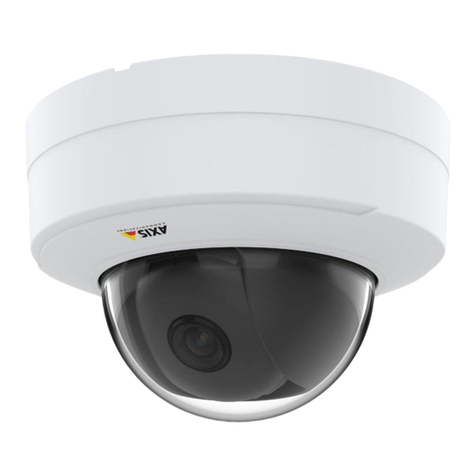
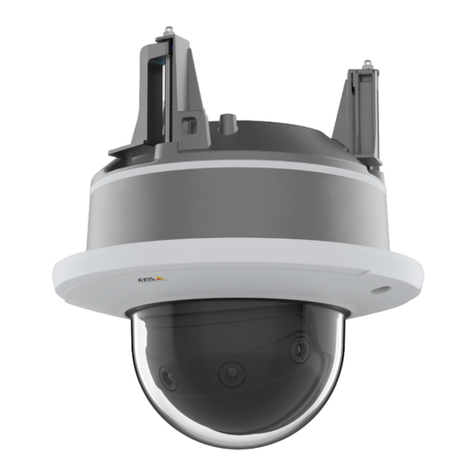
Axis Q60-E Series User manual

AXISQ60-ESeries
AXISQ6052-EPTZNetworkCamera
AXISQ6054-EMkIIPTZNetworkCamera
InstallationGuide

Legalonsiderations
Videosurveillancecanberegulatedbylawsthatvaryfrom
countrytocountry.Checkthelawsinyourlocalregion
beforeusingthisproductforsurveillancepurposes.
Thisproductincludesthefollowinglicences:
•one(1).264decoderlicense
Topurchasefurtherlicenses,contactyourreseller.
Liability
Everycarehasbeentakeninthepreparationofthis
document.PleaseinformyourlocalAxisofceofany
inaccuraciesoromissions.AxisCommunicationsABcannot
beheldresponsibleforanytechnicalortypographicalerrors
andreservestherighttomakechangestotheproductand
manualswithoutpriornotice.AxisCommunicationsAB
makesnowarrantyofanykindwithregardtothematerial
containedwithinthisdocument,including,butnotlimited
to,theimpliedwarrantiesofmerchantabilityandtnessfor
aparticularpurpose.AxisCommunicationsABshallnot
beliablenorresponsibleforincidentalorconsequential
damagesinconnectionwiththefurnishing,performance
oruseofthismaterial.Thisproductisonlytobeusedfor
itsintendedpurpose.
Intelletualpropertyrights
AxisABhasintellectualpropertyrightsrelatingto
technologyembodiedintheproductdescribedinthis
document.Inparticular,andwithoutlimitation,these
intellectualpropertyrightsmayincludeoneormoreof
thepatentslistedataxis.com/patentandoneormore
additionalpatentsorpendingpatentapplicationsinthe
USandothercountries.
Thisproductcontainslicensedthird-partysoftware.See
themenuitem“About”intheproduct’suserinterfacefor
moreinformation.
ThisproductcontainssourcecodecopyrightApple
Computer,Inc.,underthetermsofApplePublicSource
License2.0(seeopensource.apple.com/apsl).Thesource
codeisavailablefromdeveloper.apple.com/bonjour/.
Equipmentmodiations
Thisequipmentmustbeinstalledandusedin
strictaccordancewiththeinstructionsgiveninthe
userdocumentation.Thisequipmentcontainsno
user-serviceablecomponents.Unauthorizedequipment
changesormodicationswillinvalidateallapplicable
regulatorycerticationsandapprovals.
Trademarkaknowledgements
AXISCOMMUNICATIONS,AXISandVAPIXareregistered
trademarksortrademarkapplicationsofAxisABinvarious
jurisdictions.Allothercompanynamesandproductsare
trademarksorregisteredtrademarksoftheirrespective
companies.
Apple,Apache,Bonjour,Ethernet,InternetExplorer,
Linux,Microsoft,Mozilla,Real,SMPTE,QuickTime,UNIX,
Windows,andWWWareregisteredtrademarksofthe
respectiveholders.JavaandallJava-basedtrademarksand
logosaretrademarksorregisteredtrademarksofOracle
and/oritsafliates.TheUPnPWordMarkandUPnPLogo
aretrademarksofOpenConnectivityFoundation,Inc.in
theUnitedStatesorothercountries.
SD,SDC,andSDXCLogosare
trademarksofSD-3CLLC.SD,SDCandSDXCare
trademarksorregisteredtrademarksofSD-3C,LLCinthe
UnitedStates,othercountriesorboth.
Regulatoryinformation
Europe
ThisproductcomplieswiththeapplicableCEmarking
directivesandharmonizedstandards:
•ElectromagneticCompatibility(EMC)Directive
2014/30/EU.SeeElectromagneticcompatibility(EMC)
onpage2.
•LowVoltageDirective(LVD)2014/35/EU.SeeSafety
onpage3.
•RestrictionofazardousSubstances(RoS)Directive
2011/65/EUand2015/863,includinganyamendments,
updatesorreplacements.Seeisposalandrecycling
onpage3.
Acopyoftheoriginaldeclarationofconformitymaybe
obtainedfromAxisCommunicationsAB.SeeContact
informationonpage3.
Eletromagnetiompatibility(EMC)
Thisequipmenthasbeendesignedandtestedtofulll
applicablestandardsfor:
•Radiofrequencyemissionwheninstalledaccordingto
theinstructionsandusedinitsintendedenvironment.
•Immunitytoelectricalandelectromagneticphenomena
wheninstalledaccordingtotheinstructionsandused
initsintendedenvironment.
USA
Thisdevicecomplieswithpart15oftheFCCRules.
Operationissubjecttothefollowingtwoconditions:
1.Thisdevicemaynotcauseharmfulinterference,and
2.thisdevicemustacceptanyinterferencereceived,
includinginterferencethatmaycauseundesired
operation.
Thisequipmenthasbeentestedusingashieldednetwork
cable(STP)andfoundtocomplywiththelimitsfora
ClassAdigitaldevice,pursuanttopart15oftheFCCRules.
Theselimitsaredesignedtoprovidereasonableprotection
againstharmfulinterferencewhentheequipmentis
operatedinacommercialenvironment.Thisequipment
generates,uses,andcanradiateradiofrequencyenergy
and,ifnotinstalledandusedinaccordancewiththe
instructionmanual,maycauseharmfulinterferenceto
radiocommunications.Operationofthisequipmentin
aresidentialareaislikelytocauseharmfulinterference
inwhichcasetheuserwillberequiredtocorrectthe
interferenceathisownexpense.Theproductshallbe
connectedusingashieldednetworkcable(STP)thatis
properlygrounded.
Contactinformation
AxisCommunicationsInc.
300ApolloDrive
Chelmsford,MA01824
UnitedStatesofAmerica
Tel:+19786142000
Canada
ThisdigitalapparatuscomplieswithCANICES-3(ClassA).
Theproductshallbeconnectedusingashieldednetwork
cable(STP)thatisproperlygrounded.Cetappareil
numériqueestconformeàlanormeCANNMB-3(classeA).
Leproduitdoitêtreconnectéàl'aided'uncâbleréseau
blindé(STP)quiestcorrectementmisàlaterre.
Europe
ThisdigitalequipmentfulllstherequirementsforRF
emissionaccordingtotheClassAlimitofEN55032.The
productshallbeconnectedusingashieldednetworkcable
(STP)thatisproperlygrounded.Notice!ThisisaClassA

product.Inadomesticenvironmentthisproductmaycause
RFinterference,inwhichcasetheusermayberequired
totakeadequatemeasures.
Australia/NewZealand
ThisdigitalequipmentfulllstherequirementsforRF
emissionaccordingtotheClassAlimitofAS/NZSCISPR32.
Theproductshallbeconnectedusingashieldednetwork
cable(STP)thatisproperlygrounded.Notice!Thisisa
ClassAproduct.Inadomesticenvironmentthisproduct
maycauseRFinterference,inwhichcasetheusermaybe
requiredtotakeadequatemeasures.
Japan
この装置は、クラスA機器です。この装置を住宅環
境で使⽤すると電波妨害を引き起こすことがあり
ます。この場合には使⽤者が適切な対策を講ずる
よう要求されることがあります。VCCI‒A
本製品は、シールドネットワークケーブル(STP)を
使⽤して接続してください。また適切に接地し
てください。
本製品は電気通信事業者(移動通信会社、固定通
信会社、インターネットプロバイダ等)の通信回線
(公衆無線LANを含む)に直接接続することがで
きません。本製品をインターネットに接続する場
合は、必ずルータ等を経由し接続してください。
Korea
이기기는업무용환경에서사용할목적으로적합
성평가를받은기기로서가정용환경에서사용하
는경우전파간섭의우려가있습니다.적절히접지
된STP(shieldedtwistedpair)케이블을사용하여
제품을연결하십시오.
Safety
ThisproductcomplieswithIEC/EN/UL60950-1and
IEC/EN/UL60950-22,SafetyofInformationTechnology
Equipment.Theproductshallbegroundedeitherthrougha
shieldednetworkcable(STP)orotherappropriatemethod.
Disposalandreyling
Whenthisproducthasreachedtheendofitsusefullife,
disposeofitaccordingtolocallawsandregulations.For
informationaboutyournearestdesignatedcollectionpoint,
contactyourlocalauthorityresponsibleforwastedisposal.
Inaccordancewithlocallegislation,penaltiesmaybe
applicableforincorrectdisposalofthiswaste.
Europe
Thissymbolmeansthattheproductshallnotbe
disposedoftogetherwithhouseholdorcommercialwaste.
Directive2012/19/EUonwasteelectricalandelectronic
equipment(WEEE)isapplicableintheEuropeanUnion
memberstates.Topreventpotentialharmtohumanhealth
andtheenvironment,theproductmustbedisposedofin
anapprovedandenvironmentallysaferecyclingprocess.
Forinformationaboutyournearestdesignatedcollection
point,contactyourlocalauthorityresponsibleforwaste
disposal.Businessesshouldcontacttheproductsupplierfor
informationabouthowtodisposeofthisproductcorrectly.
Thisproductcomplieswiththerequirementsof
Directive2011/65/EUand2015/863ontherestrictionof
theuseofcertainhazardoussubstancesinelectricaland
electronicequipment(RoS).
China
Thisproductcomplieswiththerequirementsof
SJ/T11364-2014,Markingfortherestrictionofhazardous
substancesinelectricalandelectronicproducts.
有毒有害物质或元素
部
件
名
称
铅
(Pb)汞
(g)镉
(Cd)六价
铬
(Cr-
(VI))
多溴
联苯
(PB-
B)
多溴
二苯
醚
(PB-
DE)
电
气
实
装
部
分
X00000
0:表示该有毒有害物质在该部件所有均质材料中
的含量均在GB/T26572标准规定的限量要求以下。
X:表示该有毒有害物质至少在该部件的某一均质
材料中的含量超出GB/T26572标准规定的限量要
求。
Contatinformation
AxisCommunicationsAB
Emdalavägen14
22369Lund
Sweden
Tel:+46462721800
Fax:+4646136130
axis.com
Support
Shouldyourequireanytechnicalassistance,pleasecontact
yourAxisreseller.Ifyourquestionscannotbeanswered
immediately,yourresellerwillforwardyourqueriesthrough
theappropriatechannelstoensurearapidresponse.Ifyou
areconnectedtotheInternet,youcan:
•downloaduserdocumentationandsoftwareupdates
•ndanswerstoresolvedproblemsintheFAQdatabase,
searchbyproduct,category,orphrase
•reportproblemstoAxissupportstaffbylogginginto
yourprivatesupportarea
•chatwithAxissupportstaff
•visitAxisSupportataxis.com/support
Learnmore!
VisitAxislearningcenteraxis.com/academyforuseful
trainings,webinars,tutorialsandguides.


AXISQ60-ESeries
Safetyinformation
Hazardlevels
DANGER
Indicatesahazardoussituationwhich,ifnotavoided,willresultindeathorseriousinjury.
WARNNG
Indicatesahazardoussituationwhich,ifnotavoided,couldresultindeathorseriousinjury.
CAUTON
Indicatesahazardoussituationwhich,ifnotavoided,couldresultinminorormoderate
injury.
NO NO
NOTICE TICE
TICE
Indicatesasituationwhich,ifnotavoided,couldresultindamagetoproperty.
Othermessagelevels
Important
Indicatessignicantinformationwhichisessentialfortheproducttofunctioncorrectly.
Note
Indicatesusefulinformationwhichhelpsingettingthemostoutoftheproduct.
Safetyinstrutions
WARNNG
TheAxisproductshallbeinstalledbyatrainedprofessional,andincompliancewithlocal
lawsandregulations.
NO NO
NOTICE TICE
TICE
•TheAxisproductshallbeusedincompliancewithlocallawsandregulations.
•StoretheAxisproductinadryandventilatedenvironment.
•AvoidexposingtheAxisproducttoshocksorheavypressure.
•Donotinstalltheproductonunstablepoles,brackets,surfacesorwalls.
•UseonlyapplicabletoolswheninstallingtheAxisproduct.Usingexcessiveforcewith
powertoolscouldcausedamagetotheproduct.
•Donotusechemicals,causticagents,oraerosolcleaners.
•Useacleanclothdampenedwithpurewaterforcleaning.
•Useonlyaccessoriesthatcomplywiththetechnicalspecicationofyourproduct.These
canbeprovidedbyAxisorathirdparty.AxisrecommendsusingAxispowersource
equipmentcompatiblewithyourproduct.
•UseonlysparepartsprovidedbyorrecommendedbyAxis.
5

AXISQ60-ESeries
•Donotattempttorepairtheproductyourself.ContactAxissupportoryourAxisreseller
forservicematters.
•Donotpointthecameralenstowardthesunorotherhigh-intensityradiationsources
becausethiscouldcausedamagetothecamera.
•Thepowersupplyshallbepluggedintoasocketoutletinstalledneartheproductand
shallbeeasilyaccessible.
•Usealimitedpowersource(LPS)witharatedoutputpowerlimitedto≤100Wandarated
outputcurrentlimitedto≤5A.
Transportation
NO NO
NOTICE TICE
TICE
•WhentransportingtheAxisproduct,usetheoriginalpackagingorequivalenttoprevent
damagetotheproduct.
Battery
TheAxisproductusesa3.0VCR2032lithiumbatteryasthepowersupplyforitsinternalreal-time
clock(RTC).Undernormalconditionsthisbatterywilllastforaminimumofveyears.
Lithiumcoincell3.0Vbatteriescontain1,2-dimethoxyethane;ethyleneglycoldimethylether
(EGDME),CASno.110-71-4.
Domeover
NO NO
NOTICE TICE
TICE
•Becarefulnottoscratch,damageorleavengerprintsonthedomecoverbecausethis
coulddecreaseimagequality.Ifpossible,keeptheprotectiveplasticonthedomecover
untiltheinstallationiscomplete.
•Donotcleanadomecoverthatlookscleantotheeyeandneverpolishthesurface.
Excessivecleaningcoulddamagethesurface.
•Forgeneralcleaningofthedomecoveritisrecommendedtouseanon-abrasive,
solvent-freeneutralsoapordetergentmixedwithpurewaterandasoft,cleancloth.Rinse
wellwithpurelukewarmwater.Drywithasoft,cleanclothtopreventwaterspotting.
•Neveruseharshdetergents,gasoline,benzene,acetone,orsimilarchemicals.
•Avoidcleaningthedomecoverindirectsunlightoratelevatedtemperatures.
•Makesurethedomeisattachedinoperationmode,otherwisefocusmaybeaffected.
6

AXISQ60-ESeries
Packagecontents
•AXISQ6052-E/Q6054-EMkII/Q6055-EPTZDomeNetworkCamera
•Cleardomecover(premounted)
•Sunshield,includingscrewsT20(3x)
•RJ45Push-pullConnector(IP66)
•AxisighPoEmidspan1-port(LPS)
•Printedmaterials
-InstallationGuide(thisdocument)
-Extraserialnumberlabel(2x)
-AVSAuthenticationkey
Hardwareoverview
NO NO
NOTICE TICE
TICE
Makesurethedomeisattachedinoperationmode,otherwisefocusmaybeaffected.
1Hookforsafetywire
2Networkconnector(HighPoE)
7

AXISQ60-ESeries
3Groundscrew
4Unitholder(3x)
5Partnumber(P/N)&Serialnumber(S/N)
6Powerbutton
7Heater
8Controlbutton
9StatusLEindicator
10Scardslot
11ome
DomeCover
1omebracketscrewPH2(4x)
2omebracket
3Rubbergasket
4omering
5omeringscrewT30(4x)
6omecover
8

AXISQ60-ESeries
Sunshield
1Screwholes
2Holesforunitholders
9

AXISQ60-ESeries
Howtoinstalltheproduct
Readalltheinstructionsbeforeinstallingtheproduct.Someinstallationstepswouldbenetfrom
beingcompletedtogetherbecausetheyrequireremovalofthedomecover.
NO NO
NOTICE TICE
TICE
•Theproductshallbeconnectedusingashieldednetworkcable(STP).Allcablesconnecting
theproducttothenetworkshallbeintendedfortheirspecicuse.Makesurethatthe
networkdevicesareinstalledinaccordancewiththemanufacturer’sinstructions.For
informationaboutregulatoryrequirements,seeElectromagneticcompatibility(EMC)
onpage2.
•Mounttheproductwiththedomecoverfacingdownward.
•Becarefulnottoscratch,damageorleavengerprintsonthedomecoverbecausethis
coulddecreaseimagequality.Ifpossible,keeptheprotectiveplasticonthedomecover
untiltheinstallationiscomplete.
Reommendedtools
•Torx®screwdriverT20
•Torx®screwdriverT30
•ScrewdriverP2(tochangethedomecover)
•Cableshoepliers
•Diagonalpliers
Attahthesunshield(optional)
ThesunshieldprotectsthecameraagainstUVlightandhelpskeepthetemperatureinsidethe
cameradown.
1.Slidethesunshieldovertheunitholdersonthecameraunit.
2.Securethesunshieldusingthesuppliedscrews(T20).
Changethedomeover(optional)
Thepremountedcleardomecovercanbereplacedifyouwanttouseasmokeddomecoverorifthe
domecoverisscratchedordamaged.Smokeddomecoversandsparecleardomecoverscanbe
purchasedfromyourAxisreseller.
Forlocationofthecomponents,seeHardwareoverviewonpage7.
1.Loosenthedomeringscrewsandremovethedomecover.
10

AXISQ60-ESeries
2.Removethedomebracketscrews,thedomebracket,andthedomecoverfromthedome
ring.
3.Makesuretherubbergasketisttedcorrectlyonthedomecover.
4.Alignthebulgeonthedomecoverwithoneofthelogotypesonthedomering.
5.Attachthedomebracketandthedomecovertothedomeringandtightenthescrews
(torque1.2Nm).
6.ToinstallanSDcard,seeHowtoinstallanScard(optional)onpage11.
7.Toattachthedomecovertothetopcover,alignthebulgeonthedomecoverwiththe
heateronthecameraunitandtightenthescrews(torque1.5Nm).
HowtoinstallanSDard(optional)
InstallinganSDcardisoptional.AstandardorhighcapacitySDcard(notincluded)canbeusedto
storerecordingslocallyintheproduct.
1.Loosenthedomeringscrewsandremovethedomecover.
2.InsertanSDcardintotheSDcardslot.
3.Toattachthedomecovertothetopcover,alignthebulgeonthedomecoverwiththe
heateronthecameraunitandtightenthescrews(torque1.5Nm).
Installtheameraonabraketmount
WARNNG
Riskofelectricshock.Theproductshallbegroundedusingagroundingwire.Makesure
bothendsofthegroundingwireareincontactwiththeirrespectivegroundingsurfaces.
NO NO
NOTICE TICE
TICE
TocomplywiththeIP66-rateddesignofthecameraandmaintaintheIP66protection,
thesuppliedRJ45Push-pullConnector(IP66)shallbeused.Alternatively,usetheRJ45
IP66-ratedcablewithpremountedconnectorwhichisavailablefromyourAxisreseller.Do
notremovetheplasticnetworkconnectorshieldfromthecamera.
Thisproductcanbemountedwiththecablesroutedthroughoralongthewallorroof.
1.Installtheselectedbracketaccordingtotheinstructionssuppliedwiththebracket.If
drillingisrequired,makesuretousedrillbits,screwsandplugsthatareappropriatefor
thematerial.
2.Securethecamerausingthesuppliedsafetywire.
3.Routethenetworkcableandagroundingwirethroughtheholesinthemounting
bracket.Makesurethegroundingwireisasshortaspossibletomakethecurrentpath
asshortaspossible.
4.Loosenthegroundingscrewandremovethewasherandcableshoe.
11

AXISQ60-ESeries
1Networkconnector–RJ45Push-pullConnector(IP66)
2Networkconnectorandnetworkconnectorshield
3GroundscrewT20
4Washer
5Cableshoe
5.Attachthegroundingwire(torque1.5to2Nm)tothecableshoeusingcableshoepliers.
6.Putthecableshoeandwasherbackintheiroriginalpositionsandtightenthescrew
(torque0.5Nm).Makesurethecableshoeisincontactwiththegroundingsurface.
NO NO
NOTICE TICE
TICE
Becarefulnottodamagethenetworkcablewhenconnectingit.
7.IftheRJ45Push-pullConnector(IP66)hasnotbeenconnectedtothenetworkcable,
seetheinstructionssuppliedwiththeconnector.Forinformationhowtoassemblean
IP66-ratedRJ45connector,seepage15.
8.Connectthenetworkcable.
9.Slidetheunitholdersonthenetworkcameraintotheslotsinthemountingbracketand
rotatethecameraunit.
10.Securethenetworkcameratothemountingbracketbytighteningthescrews.
12

AXISQ60-ESeries
1ScrewT30(3x)
2Slotforunitholder(3x)
3Safetywire
11.Installthesuppliedmidspan,seetheInstallationGuidedeliveredwiththemidspanor
nditonwww.axis.com
Howtoaesstheprodut
TondAxisdevicesonthenetworkandassignthemIPaddressesinWindows®,useAXISIPUtility
orAXISDeviceManager.Bothapplicationsarefreeandcanbedownloadedfromaxis.com/support
Formoreinformationaboutusingtheproduct,seetheUserManualavailableataxis.com
13

AXISQ60-ESeries
Resettofatorydefaultsettings
Important
Resettofactorydefaultshouldbeusedwithcaution.Aresettofactorydefaultresetsall
settings,includingtheIPaddress,tothefactorydefaultvalues.
Toresettheproducttothefactorydefaultsettings:
1.Pressandholdthecontrolbuttonandthepowerbuttonfor15–30secondsuntilthe
statusLEDindicatorashesamber.See.
2.Releasethecontrolbuttonbutcontinuetoholddownthepowerbuttonuntilthestatus
LEDindicatorturnsgreen.
3.Releasethepowerbuttonandassembletheproduct.
4.Theprocessisnowcomplete.Theproducthasbeenresettothefactorydefaultsettings.
IfnoDCPserverisavailableonthenetwork,thedefaultIPaddressis192.168.0.90.
5.UsingtheinstallationandmanagementsoftwaretoolstoassignanIPaddress,setthe
passwordandaccessthevideostream.
Itisalsopossibletoresetparameterstofactorydefaultthroughthewebinterface.GotoSettings
>System>MaintenanceandclickDefault.
14

AXISQ60-ESeries
Furtherinforation
•Forthelatestversionofthisdocument,seeaxis.com
•Theusermanualisavailableataxis.com
•Tocheckifthereisupdatedrmwareavailableforyourdevice,seeaxis.com/support
•Forusefulonlinetrainingsandwebinars,seeaxis.com/academy
ScantheQRcodetoviewavideoonhowtoassemblethesuppliedRJ45Push-pullConnector(IP66).
Optionalaessories
Foracompletelistofavailableaccessoriesforthisproduct,gototheproduct’spageonaxis.com
andselectSoftware&Accessories.
Warrantyinformation
ForinformationaboutAxis’productwarrantyandtheretorelatedinformation,goto
axis.com/warranty.
15

AXISQ60-ESeries
Specifications
LEDIndiators
StatusLEDndication
UnlitConnectionandnormaloperation.
GreenSteadygreenfor10secondsfornormaloperationafterstartup
completed.
AmberSteadyduringstartup.Flashesduringrmwareupgradeorreset
tofactorydefault.
Amber/RedFlashesamber/redifnetworkconnectionisunavailableorlost.
RedFirmwareupgradefailure.
Buttons
Controlbutton
Forlocationofthecontrolbutton,see.
Thecontrolbuttonisusedfor:
•Resettingtheproducttofactorydefaultsettings.Seepage14.
•ConnectingtoanAXISVideoostingSystemservice.Tondoutmoreaboutthis
service,seeaxis.com
Powerbutton
Pressandholdthepowerbuttontotemporarilypowertheproductwhenthedomecoveris
removed.Thepowerbuttonisalsousedwiththecontrolbuttontoresetthecameratofactory
defaultsettings.Seepage14.
Connetors
Networkonnetor
RJ45Push-pullConnector(IP66)withighPoweroverEthernet(ighPoE).
NO NO
NOTICE TICE
TICE
Usethesuppliedmidspan.
16

AXISQ60-ESeries
NO NO
NOTICE TICE
TICE
Theproductshallbeconnectedusingashieldednetworkcable(STP).Allcablesconnecting
theproducttothenetworkshallbeintendedfortheirspecicuse.Makesurethatthe
networkdevicesareinstalledinaccordancewiththemanufacturer’sinstructions.For
informationaboutregulatoryrequirements,seeElectromagneticcompatibility(EMC)on
page2.
NO NO
NOTICE TICE
TICE
TocomplywiththeIP66-rateddesignofthecameraandmaintaintheIP66protection,
thesuppliedRJ45Push-pullConnector(IP66)shallbeused.Alternatively,usetheRJ45
IP66-ratedcablewithpremountedconnectorwhichisavailablefromyourAxisreseller.Do
notremovetheplasticnetworkconnectorshieldfromthecamera.
SDardslot
NO NO
NOTICE TICE
TICE
•RiskofdamagetoSDcard.Donotusesharptools,metalobjects,orexcessiveforcewhen
insertingorremovingtheSDcard.Useyourngerstoinsertandremovethecard.
•Riskofdatalossandcorruptedrecordings.DonotremovetheSDcardwhiletheproduct
isrunning.UnmounttheSDcardfromtheproduct’swebpagebeforeremoval.
ThisproductsupportsSD/SDC/SDXCcards.
ForSDcardrecommendations,seeaxis.com.
Operatingonditions
TheAxisproductisintendedforoutdooruse.
ProductTemperatureHumidity
AXISQ6052-E
AXISQ6054-EMkII
AXISQ6055-E
-50°Cto50°C
(-58°Fto122°F)*
Maximum
temperature
(intermittent):
60°C(140°F)
10–100%R(condensing)
*ArcticTemperatureControlenablescamerastart-upattemperaturesaslowas-40°C(-40°F)
17

AXISQ60-ESeries
StorageConditions
Temperature
-50ºCto60ºC(-58ºFto140ºF)
Poweronsumption
NO NO
NOTICE TICE
TICE
UseaSafetyExtraLowVoltage(SELV)compliantlimitedpowersource(LPS)witheither
aratedoutputpowerlimitedto≤100Woraratedoutputcurrentlimitedto≤5A.Axis
recommendsusingthesuppliedmidspan.
ProductAxisHighPoEmidspan
1–port(included)AxisPoE+midspan1–port
AXISQ6052-E
AXISQ6054-EMkII
AXISQ6055-E
100–240VAC,max74WIEEE802.3at,Type2Class4
100–240VAC,max37W
18

AXISQ60-ESeries
Informationssurlaséurité
Niveauxderisques
DANGER
Indiqueunesituationdangereusequi,siellen'estpasévitée,entraîneraledécèsoudes
blessuresgraves.
AVERTSSEMENT
Indiqueunesituationdangereusequi,siellen'estpasévitée,pourraitentraînerledécès
oudesblessuresgraves.
ATTENTON
Indiqueunesituationdangereusequi,siellen'estpasévitée,pourraitentraînerdes
blessureslégèresoumodérées.
A A
AVIS VIS
VIS
Indiqueunesituationqui,siellen'estpasévitée,pourraitendommagerl'appareil.
Autresniveauxdemessage
Important
Indiquelesinformationsimportantes,nécessairespourassurerlebonfonctionnementde
l’appareil.
Note
Indiquelesinformationsutilesquipermettrontd’obtenirlefonctionnementoptimalde
l’appareil.
Consignesdeséurité
AVERTSSEMENT
LeproduitAxisdoitêtreinstalléparunprofessionnelqualiéetconformémentauxloiset
règlementationslocalesenvigueur.
A A
AVIS VIS
VIS
•LeproduitAxisdoitêtreutiliséconformémentauxloisetrèglementslocaux.
•ConserverceproduitAxisdansunenvironnementsecetventilé.
•NepasexposerceproduitAxisauxchocsouauxfortespressions.
•Nepasinstallerceproduitsurdespoteaux,supports,surfacesoumursinstables.
•Utiliseruniquementdesoutilsrecommandéspourl'installationdel'appareilAxis.
L'applicationd'uneforceexcessivesurl'appareilavecdesoutilspuissantspourrait
l'endommager.
•Nepasutiliserdeproduitschimiques,desubstancescaustiquesoudenettoyants
pressurisés.
•Utiliserunchiffonpropreimbibéd'eaupurepourlenettoyage.
19

AXISQ60-ESeries
•Utiliseruniquementdesaccessoiresconformesauxcaractéristiquestechniquesdevotre
produit.IlspeuventêtrefournisparAxisouuntiers.Axisrecommanded'utiliserun
équipementd'alimentationAxiscompatibleavecvotreproduit.
•UtiliseruniquementlespiècesderechangefourniesourecommandéesparAxis.
•Nepasessayerderéparervous-mêmeceproduit.Contacterl'assistancetechniqued'Axis
ouvotrerevendeurAxispourdesproblèmesliésàl'entretien.
•Évitezdepointerl’objectifdelacaméraverslesoleiloutouteautresourcederadiation
dehauteintensité.Celarisqued’endommagerlacaméra.
•L'alimentationélectriquedoitêtrebranchéeàuneprisedecourantinstalléeprèsde
l'équipementetêtrefacilementaccessible.
•Utilisezunesourced'alimentationlimitée(LPS)dontlapuissancedesortienominaleest
limitéeà≤100Wetdontlecourantdesortienominalestlimitéà≤5A.
Transport
A A
AVIS VIS
VIS
•LorsdutransportduproduitAxis,utilisezl'emballaged'origineouunéquivalentpour
éviterd'endommagerleproduit.
Batterie
LeproduitAxisutiliseunebatterieaulithiumCR20323,0Vcommealimentationdesonhorloge
entempsréelinterne(RTC).Dansdesconditionsnormales,cettebatterieauneduréedevie
minimaledecinqans.
Lespilesboutons3,0Vaulithiumcontiennentdu1,2-diméthoxyéthane,éthylèneglycoldiméthyl
éther(EGDME),CASn°110-71-4.
Couverlededôme
A A
AVIS VIS
VIS
•Veillezànepasrayer,endommageroulaisserd'empreintessurlecouvercledudômecar
celapourraitaltérerlaqualitéd'image.Laissez,sipossible,laprotectionenplastiquesur
lecouvercledudômejusqu’àlandel’installation.
•Nenettoyezpaslecouvercledudômes'ilsemblepropreàl'œilnuetnefrottezjamaissa
surface.Unnettoyageexcessifpourraitendommagerlasurface.
•Pourlenettoyagegénéralducouvercledudôme,ilestrecommandéd'utiliserunproduit
nonabrasif,unsavonneutresanssolvantouundétergentmélangéavecdel'eaupureet
unchiffondouxpropre.Rincezbienàl'eautièdepure.Séchezavecunchiffondouxet
proprepouréviterlestâchesd'eau.
•N'utilisezjamaisdedétergentsagressifs,d'essence,debenzène,d'acétoneouautres
produitschimiquessimilaires.
20
Other manuals for Q60-E Series
3
This manual suits for next models
2
Table of contents
Languages:
Other Axis Security Camera manuals

Axis
Axis P13-LE Series User manual

Axis
Axis P3367-VE User manual

Axis
Axis 25735 Instruction sheet

Axis
Axis P5655-E User manual

Axis
Axis Q1931-E User manual

Axis
Axis AXIS P3354 User manual

Axis
Axis NETEYE 200 User manual

Axis
Axis Network Camera AXIS 221 User manual

Axis
Axis P1265 User manual

Axis
Axis AXIS 212 PTZ User manual

Axis
Axis 01991-001 User manual

Axis
Axis P5544 PTZ User manual

Axis
Axis M3027-PVE User manual

Axis
Axis P5544 PTZ User manual

Axis
Axis 231D User manual

Axis
Axis Q3505-V User manual

Axis
Axis M32-LVE Series User manual

Axis
Axis Panorama PTZ User manual

Axis
Axis Q6055-S User manual

Axis
Axis Q16 Series User manual