2
!DANGER
Installation and services should only be a qualied person.
Do not use the heater in an explosive atmosphere.
Before use, check the hose.
Disconnect LPG cylinder before moving the heater.
Do not attempt to alter any parts of the heater.
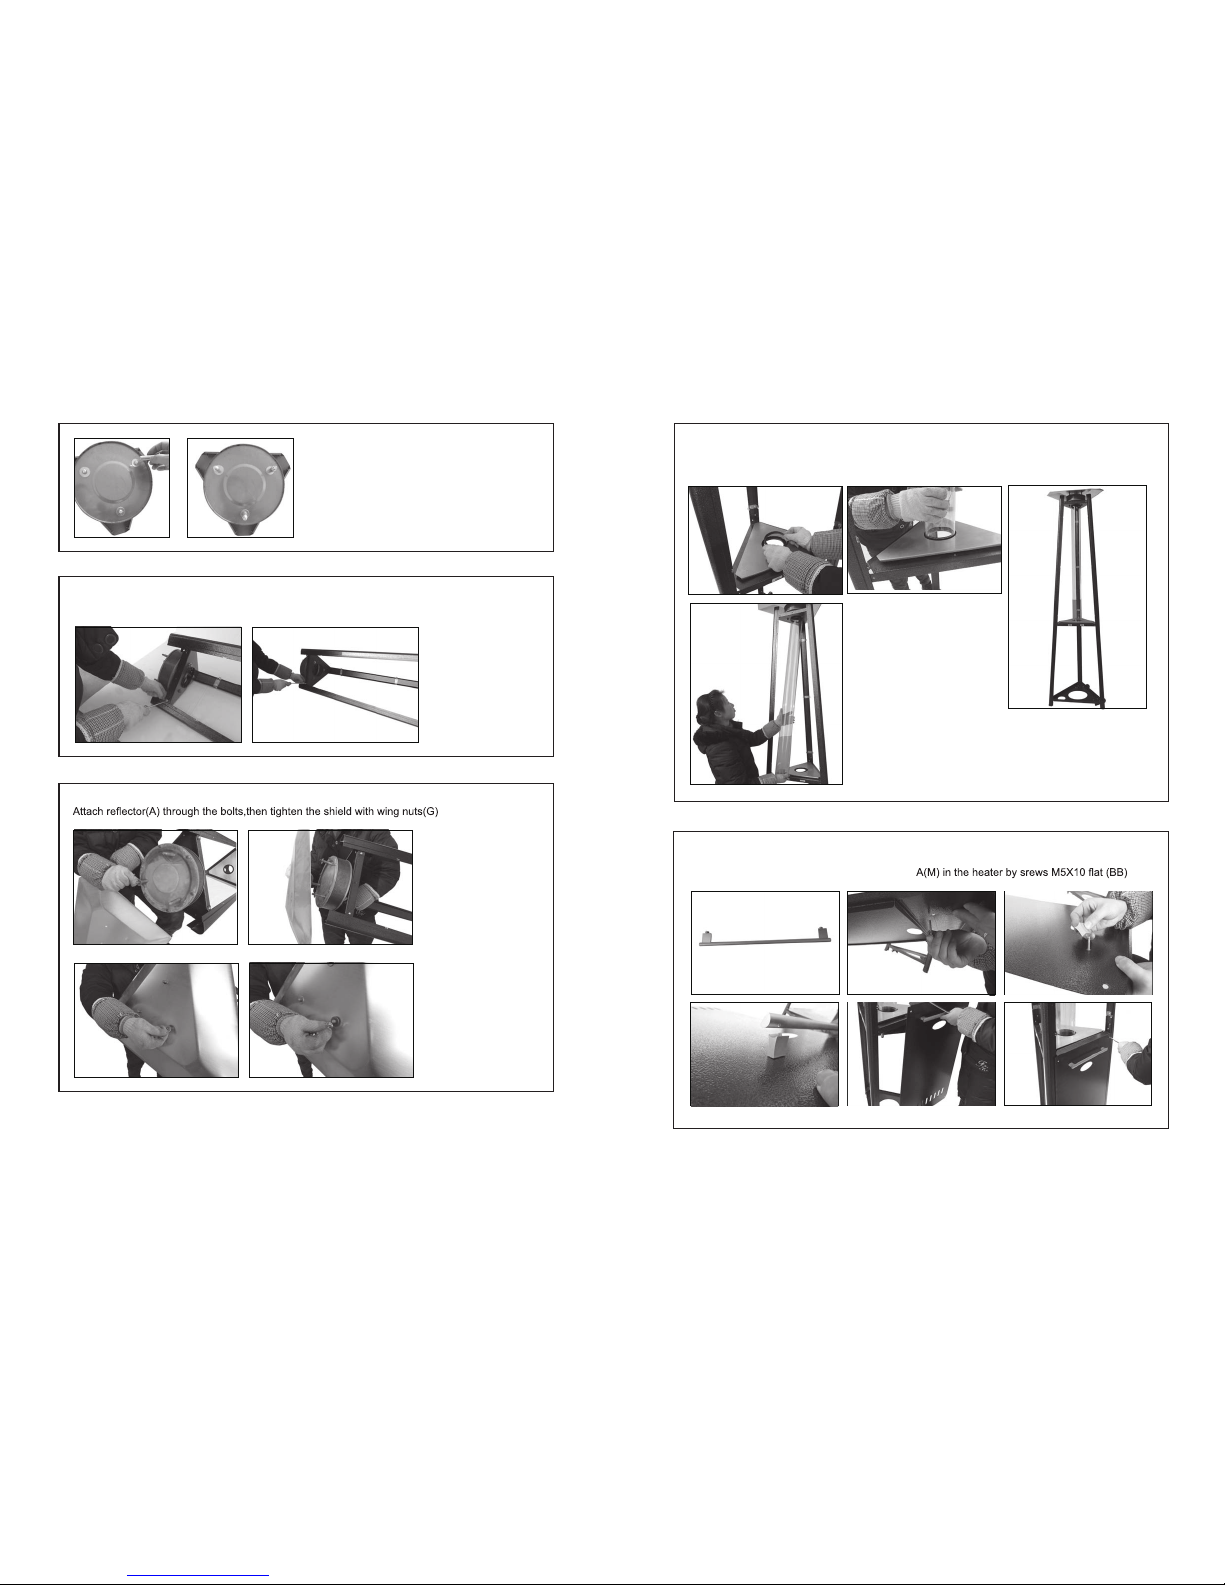
Example: Using the heater without reector or protection guard.
The appliance shall not be used in basements or below ground level.
It must always be placed on a solid and level surface.
Never replace or substitute the regulator use only that one is suitable both appliance category and
normal pressure of gas.
Do not clean the heater with cleaners that are combustible or corrosive.
Do not paint protection guard, control box or reector.
The LPG gas cylinder valve should be turned off and disconnect the cylinder with the heater when
the heater is not in use.
Don't not use the heater when it is raining, and do not let any liquid splash to the glass tube when
the heater is working.
Keep the children away from the heater, always be carefully not to knock down the heater,
which will break the glass tube and might cause injury.
Do not move the appliance when in operation.
After a long break of operation, the gas parts in the control box of the heater and the hose should
be inspected for spiders, spider webs or other insects.
Check the heater immediately if any of the following exists:
1. There is smell of gas.
2. The heater is not effective.
3. The burner makes popping noise during use (a slight popping noise is normal when the burner
is extinguished after use).
If you smell gas, turn off the valve immediately. If smell persists, contact the dealer or gas
supplier immediately.
The hose with regulator assembly shall be stored in a safe place to avoid it’s accidental damage.
Children and adults should be aware of the high surface temperature hazard, and should keep a safe
distance away to avoid clothes burning or igniting.
Young children should be carefully supervised when they are in the working area of the heater.
Clothing or other flammable material should not be hung from the heater, or placed on or near
the heater.
Do not obstruct the flow of combustion products.
Keep the ventilation opening of the cylinder enclosure free and clear of debris.
Do not obstruct the ventilation holes of the cylinder housing.
Shut off the valve of gas cylinder or the regulator before moving the appliance.
The tubing or the flexible hose must be changed within the prescribed intervals.
Use only the type of gas and the type of cylinder specified by the manufacturer.
In case of violent wind particular attention must be taken against tilting of the appliance.
Storage of the heater indoor is permitted only if the cylinder is disconnected and removed from the
appliance.
Do not store a spare LP-gas cylinder under or near this heater.
Never fill the cylinder beyond 80 percent full.
PRECAUTIONS
CARBON MONOXIDE HAZARD
This appliance can produce carbon
monoxide which has no odor.
Using it in an enclosed space can kill you.
Never use this appliance in a enclosed space
such as a camper, tent, car or home.
Keep electrical supply cord away from the
heated surfaces.
WARNING: Improper installation,
adjustment, alteration, services or
maintenance can cause injury, death or
property damage. Read the installation,
operating and maintenance instructions
thoroughly before installing or servicing this
equipment.
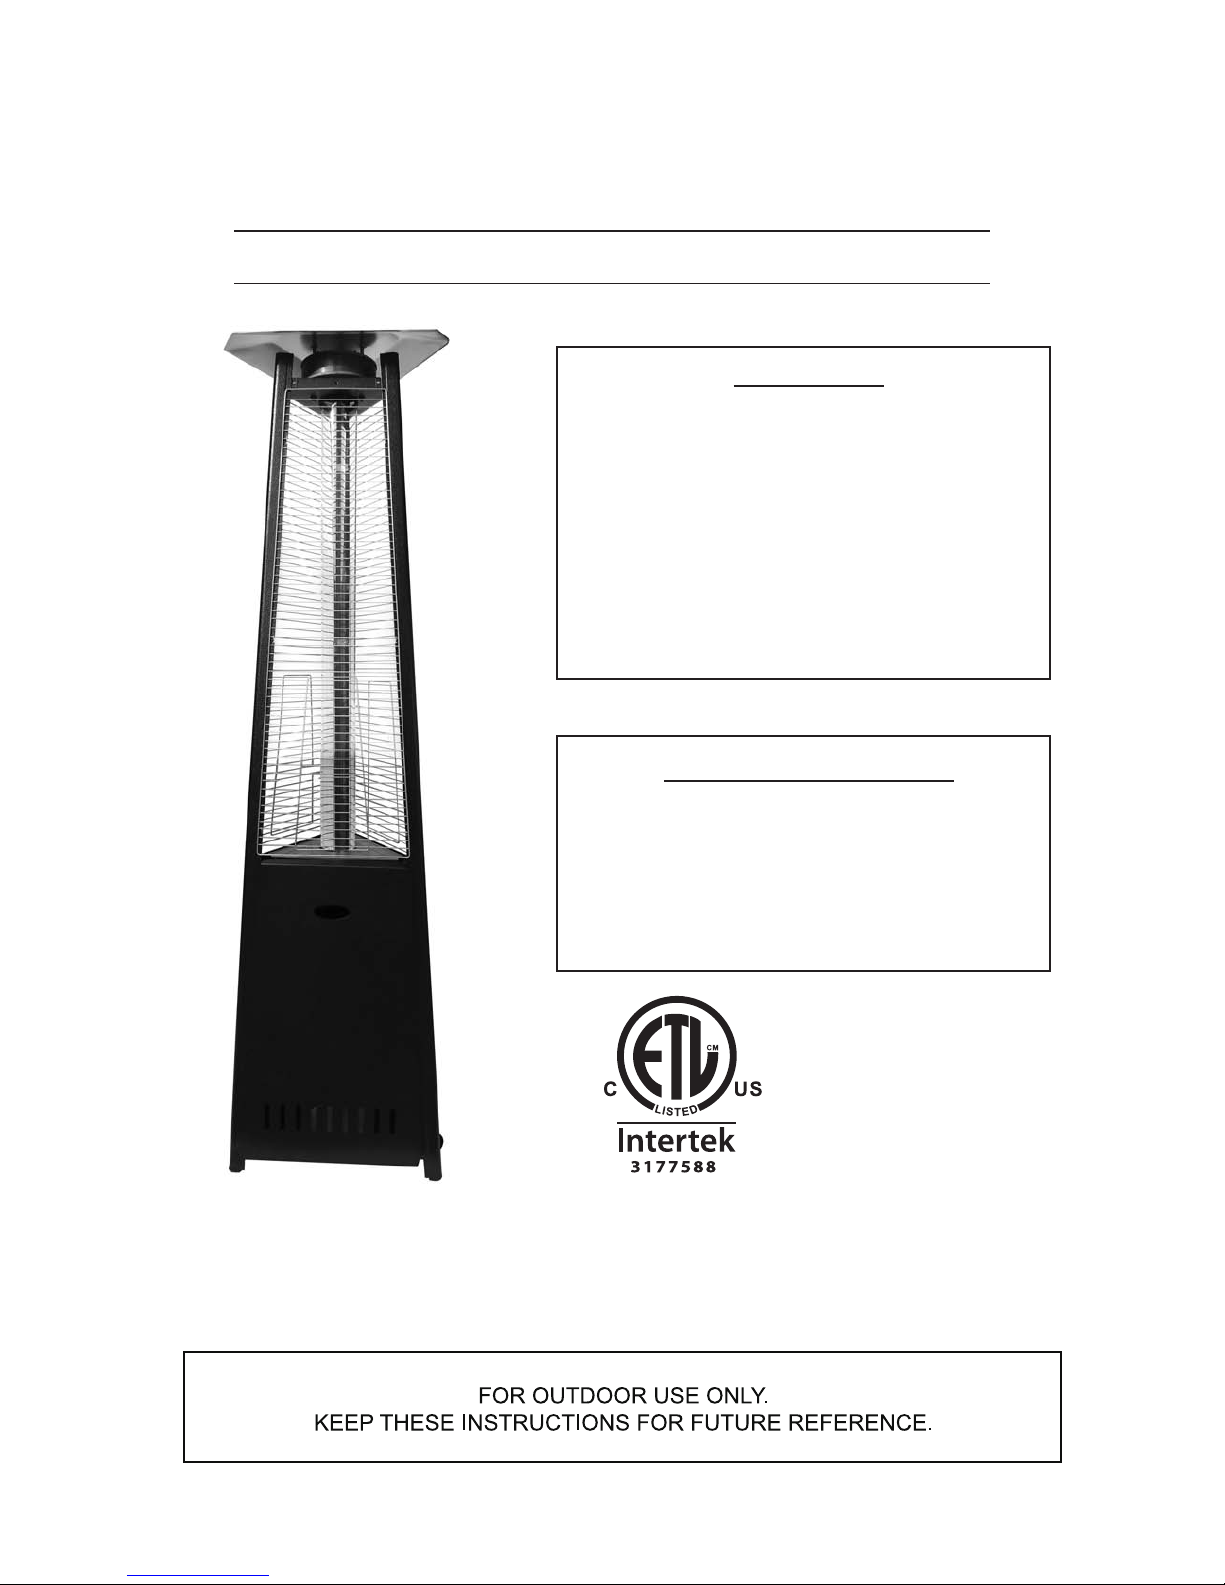
WARNING:
FOR OUTDOOR USE ONLY.
Cylinders to be used must be constructed
and Marked in accordance with US DOT
specications.
Storage indoors is permissible only if the
cylinder is removed.
The unit should be secured or moved indoors
if winds exceed 19.5mph.
Note:
Use for 20lb.LPG tank, but it is not supplied.
Use for CSA regulator with 0.6m gas hose.
This regulator is set for an outlet pressure of
11 inches water column.
Tools needed
Philips head screwdriver
Leak detection solution
For questions, replacement parts, service
Help or other assistance, pls call local service
•
•
•
•
•
•
•
•
•
•
•
•
•
•
•
•
•
•
•
•
•
•
•
•
•
•
•
•
•
•
•
3